
I am going to talk about the best VPN for Netflix in 2025.
Why do I need a Netflix VPN when the service is already available in my country? The answer is simple. The Netflix content library varies by country due to licensing agreements with the copyright holders. Therefore, even if you have Netflix, you may want to watch movies or shows available in other countries but not yours.
The term used for limiting content to specific regions is called geo-restriction. You need a VPN to bypass geo-restrictions and unblock the entire Netflix catalog.
VPN services virtually route your internet connection through a different country using one of their many servers worldwide. As a result, it appears to Netflix that you are requesting access from the same country whose content you wish to unblock.
But there is a catch. Since 2016, Netflix has been campaigning against VPN servers. It has spent millions to detect and block VPN servers, and has had significant success.
Therefore, finding VPNs that stay one step ahead of Netflix and avoid detection is essential.
We tested dozens of VPNs over several weeks and found the best one for unblocking Netflix: ExpressVPN.
How Does Netflix Detect a VPN: Quick Look
When connected to a VPN server, your connection is assigned a new IP address. However, you are not the only one using the server. Hundreds or even thousands of users may use the same server simultaneously. Most VPN providers assign the same IP address to you and all other users on that server.
There are two primary reasons the same IP is given to every user: Firstly, it is more cost-effective for VPN providers. By doing this, they save resources per connection and lower the subscription prices per user.
Secondly, one of the biggest reasons people use a VPN is to maintain anonymity, and online anonymity is easily preserved when multiple users are on a server with the same IP address.
However, multiple users from the same IP address put the server on Netflix’s radar. The company probably uses algorithms to identify VPN servers’ IP addresses.
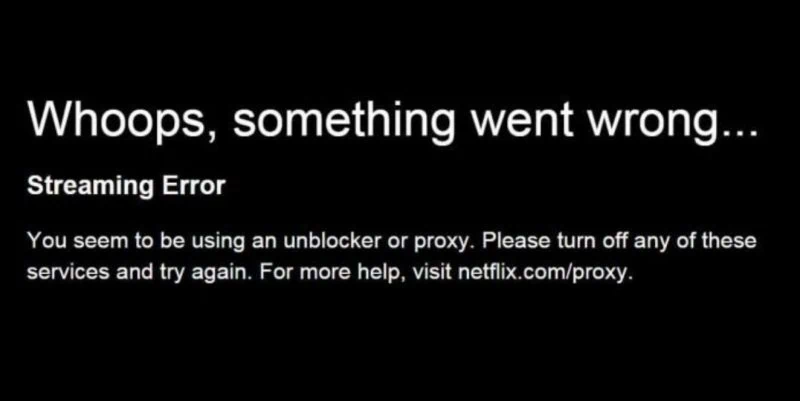
As a result, those IP addresses are blocked, preventing you from streaming region-restricted content. That’s when you see the proxy error on Netflix.
ExpressVPN continuously keeps adding new IP addresses. As a result, it becomes difficult for Netflix to block your connection.
How We Review VPNs?
We buy VPN subscriptions and carry out extensive research over several weeks, assessing essential factors such as speed, performance, security leaks, geo-unblocking capabilities, and additional features like ad-blocking. Our testing process involves examining multiple VPN servers across various cities and countries at different times of the day. Moreover, we also assess the performance on times and days when the network traffic is expected to be higher, such as weekends. Furthermore, every VPN is tested on all compatible devices, including routers.
Best VPN for Netflix (2026): ExpressVPN
We will now take a closer look at the best Netflix VPN- ExpressVPN.
ExpressVPN has been evading Netflix’s VPN detection algorithm for quite some time. Even though Netflix banned many of its IP addresses and servers, the developers of this VPN service are always on their toes and keep adding new virtual locations.
Most of the time, you can connect to a server quickly and start streaming restricted content almost immediately. However, you may run into Netflix proxy issues, which are common among other VPN providers. Such instances, however, are fewer than those of different services.
Servers
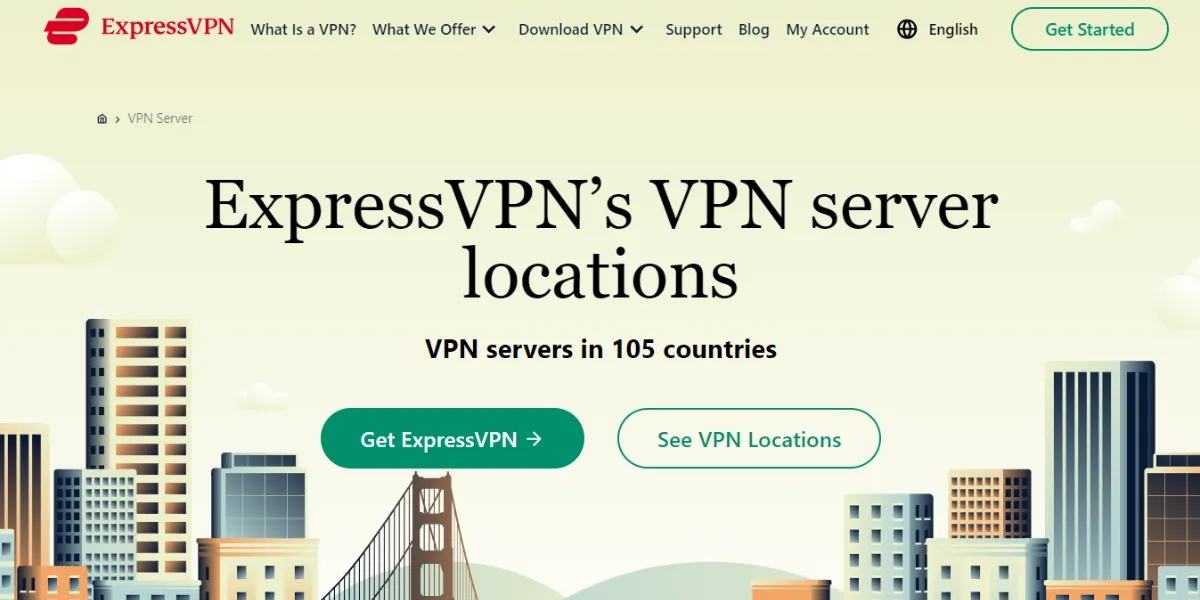
A few things set the ExpressVPN Netflix service apart from the rest. Its biggest draw is the number of servers. ExpressVPN has over 3000 servers across nearly 105 countries and 160 server locations. Of course, many of its servers are in the United States, which is the most popular location for Netflix’s VPN service.
Speed
One of the biggest challenges with most VPN services is that they reduce the internet connection speed. Some VPNs even slow the speed by more than 50%. Fortunately, that’s not the case with ExpressVPN.
You will achieve 80–90% of the original speed, which is truly impressive. A decent internet connection lets you stream even in 4K resolution.
ExpressVPN also has a built-in ‘Speed Test’ tool that indexes its servers by download speed and lets you choose the fastest servers. This ensures you experience the least latency and Netflix problems while streaming your favorite content.
Features
We also consider ExpressVPN the best VPN for Netflix because of its security features. For instance, Kill Switch keeps your online activities safe if your VPN connection drops. It blocks off all internet traffic until your device’s protection is restored. This feature is standard on ExpressVPN apps for Windows, Mac, Linux, and routers.
You can use the split-tunneling feature to route ExpressVPN traffic only to Netflix and have all other online activity routed through your ISP. This is particularly useful for applications that may not work well with a VPN, like banking apps. It ensures they remain connected through your normal internet connection while protecting your Netflix session.
ExpressVPN uses the TrustedServer security feature on all its servers. As they run on RAM only, all data is wiped from ExpressVPN servers after every reboot. After every startup, the entire software stack is reinstalled on servers to ensure your Netflix streaming isn’t compromised.
Platforms
Netflix is available on almost all popular platforms nowadays. This entertainment service offers native apps for Android, iOS, Windows Mobile, Windows PC, Mac OS, and Linux. Thankfully, ExpressVPN is also supported on all these platforms. So, it doesn’t matter which device you use to watch Netflix. If you want to switch to a new server location for your device, ExpressVPN can help. ExpressVPN even has extensions for popular browsers like Chrome and Firefox.
If you own an Apple TV, Amazon FireStick, PlayStation 3 or 4, or Xbox 360, ExpressVPN offers a MediaStreamer service that lets you access geo-restricted Netflix content on these device platforms.
You can use ExpressVPN on up to 8 devices simultaneously.
Pricing
ExpressVPN is not one of the cheapest VPN services. It is costlier (even if slightly) than most other such services. But given its large number of servers, excellent speed, and connectivity, it is worth it.
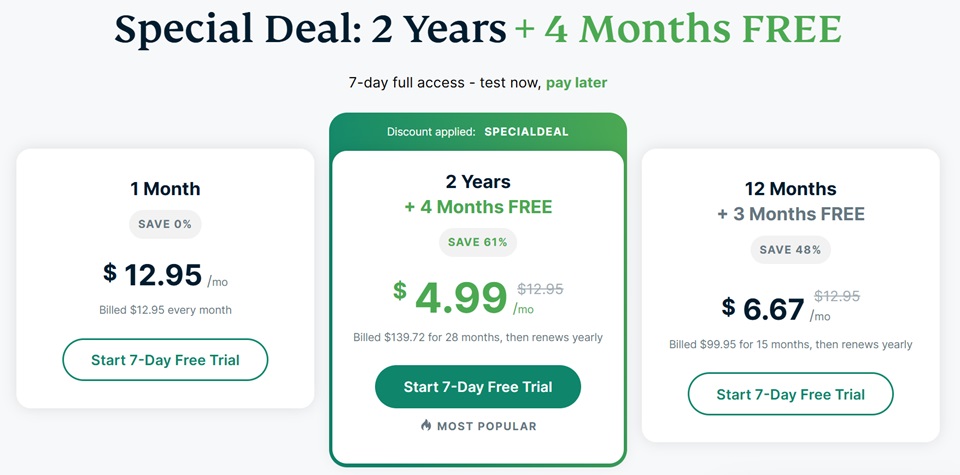
ExpressVPN is available in three pricing tiers as follows:
- 1 month: $12.95
- 12 months: $6.67 per month (billed at $99.95 every 15 months)
- Best Value for Money: $4.99 per month (billed at $139.72 for 28 months)
All the plans above come with a 100% money-back guarantee within 30 days. If you are unsatisfied with the service, you can get a refund without hassle.
How to get ExpressVPN for Netflix
Here is how you can subscribe to ExpressVPN.
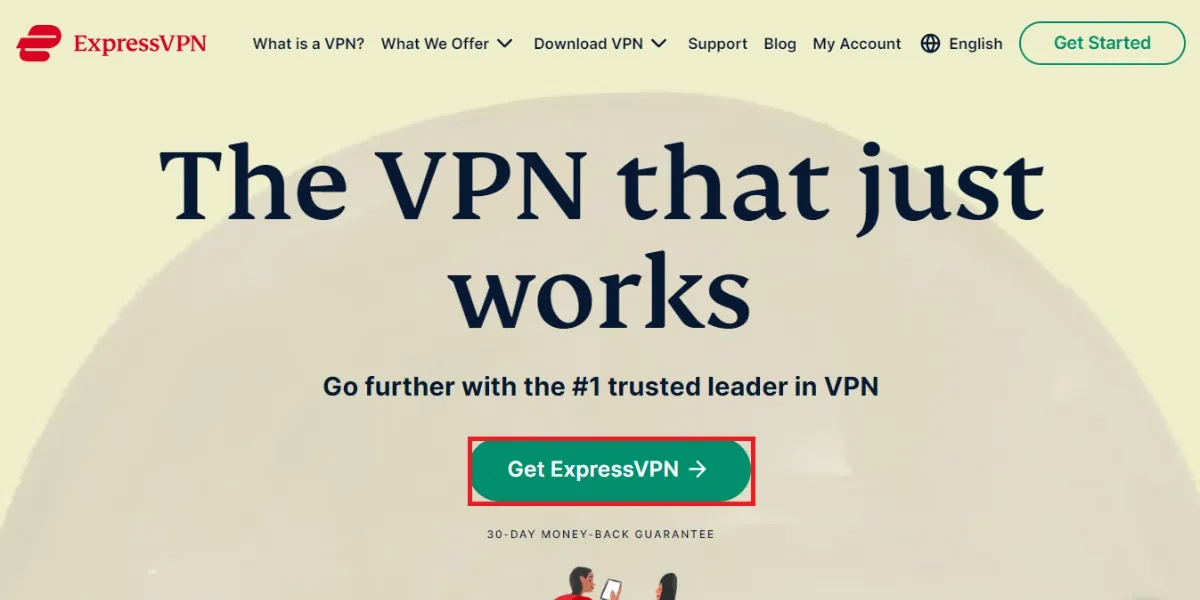
1. Visit the official website using any computer or mobile browser. Click Get ExpressVPN on the page.
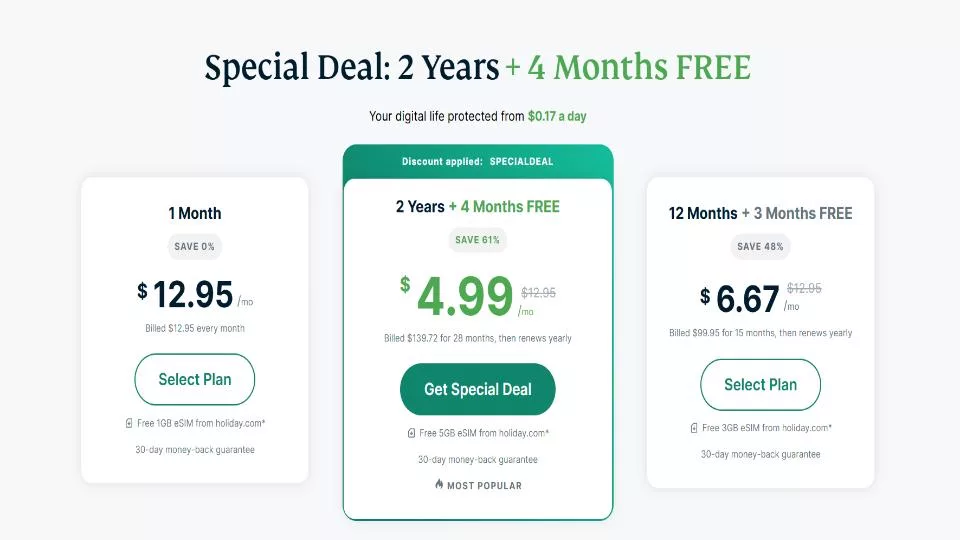
2. Choose one of the three available plans, as shown below. The 24-month plan (+4 extra months) is the most popular and offers the most significant savings.
3. Once you have chosen the plan, scroll down a bit. Enter your email address and choose your payment mode.
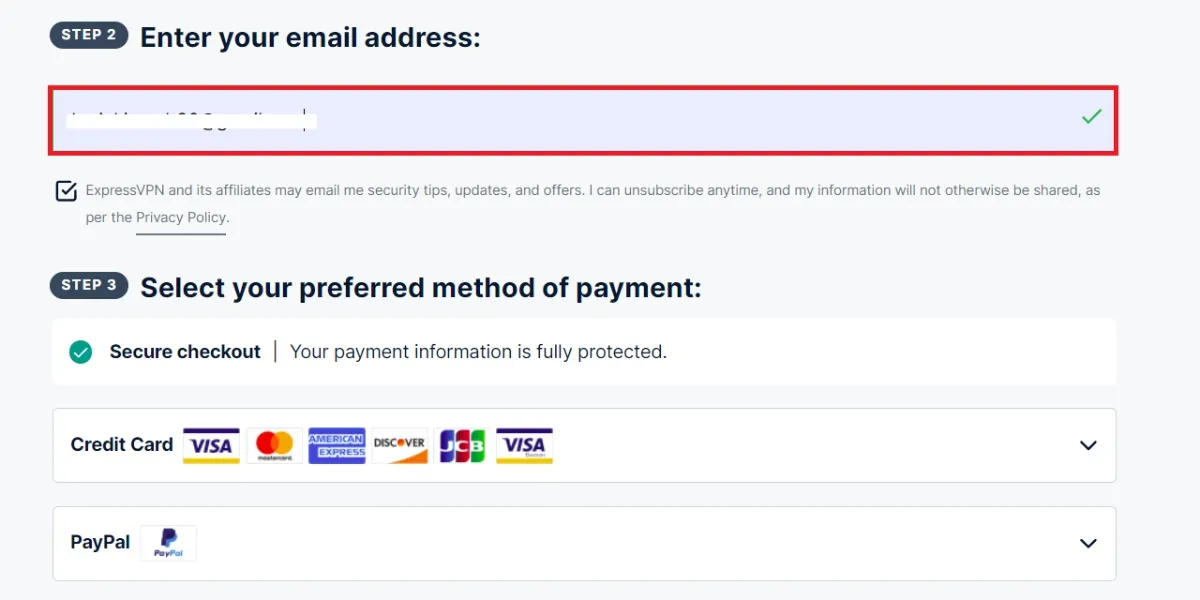
4. You can pay using one of the major credit card providers, PayPal, or even Bitcoin. Yes! Even Bitcoin. I chose PayPal.
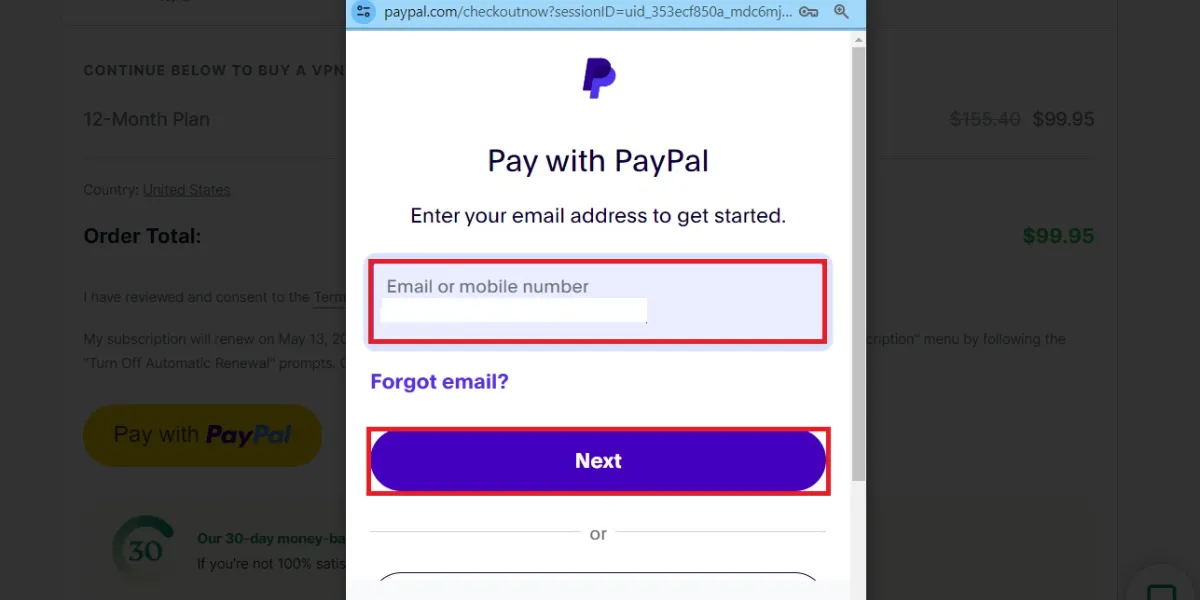
The Other section offers additional payment options. Select your preferred payment mode, enter your payment details, and make the payment. Once you have made the payment, you will receive the activation code to log in to the ExpressVPN app on desktop or mobile devices.
Setting Up and Installing ExpressVPN
ExpressVPN is an excellent VPN that works with Netflix and many other services. But you must set it up before using it on your computer.
If you use the ExpressVPN app on a mobile device, you can download it from the app store and sign in with the login credentials you created when buying your subscription. I’ll still show you how in the next section.
Install ExpressVPN on Your Windows / Mac / Linux Computer
Here are the simple steps that work on Windows, Mac, and Linux computers:
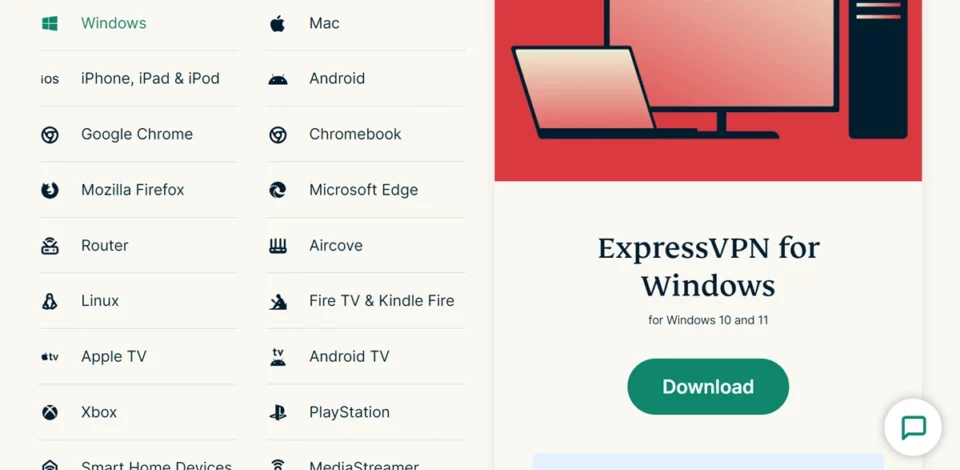
1. Go to expressvpn.com/vpn-download. Click the Download button. On the next page, click your device. I am picking Windows.
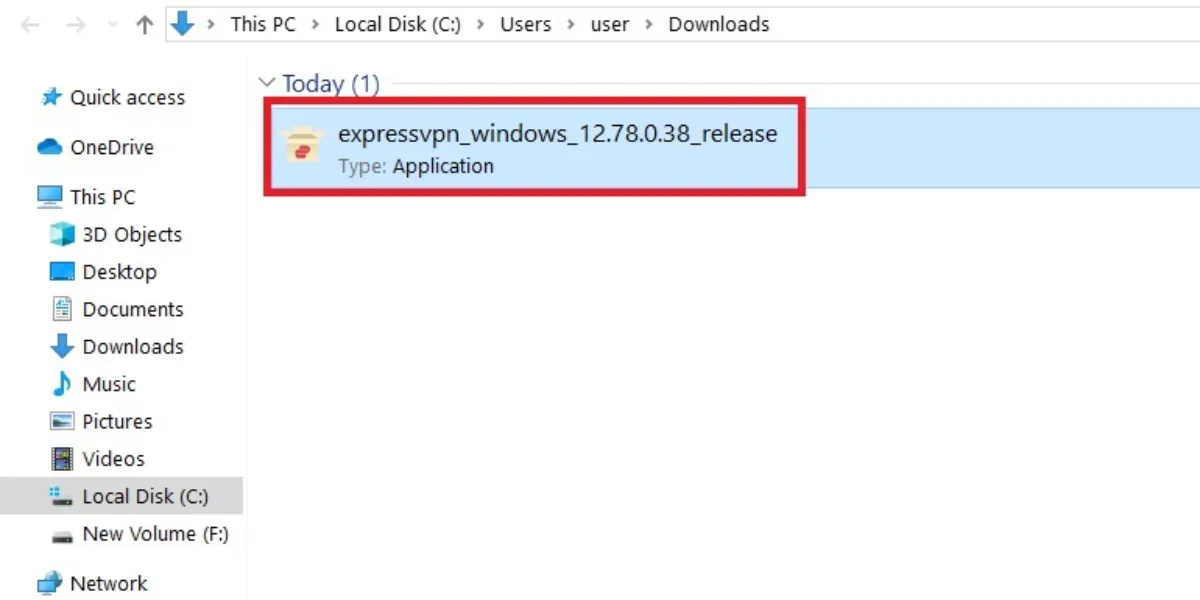
2. The app installer starts downloading, and you can see the progress in your browser’s Downloads section. Once the download is complete, open your Downloads folder on your PC to locate the file.
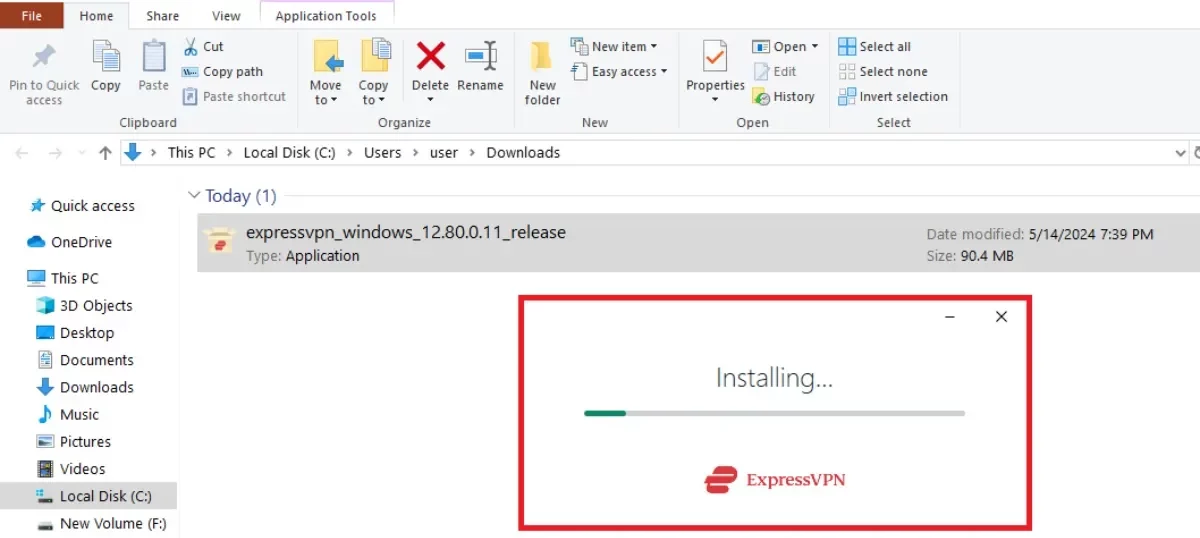
3. Run the file. Click Yes when you see the warning message asking if you want ExpressVPN to make changes to your computer. The installation process will start as shown below.
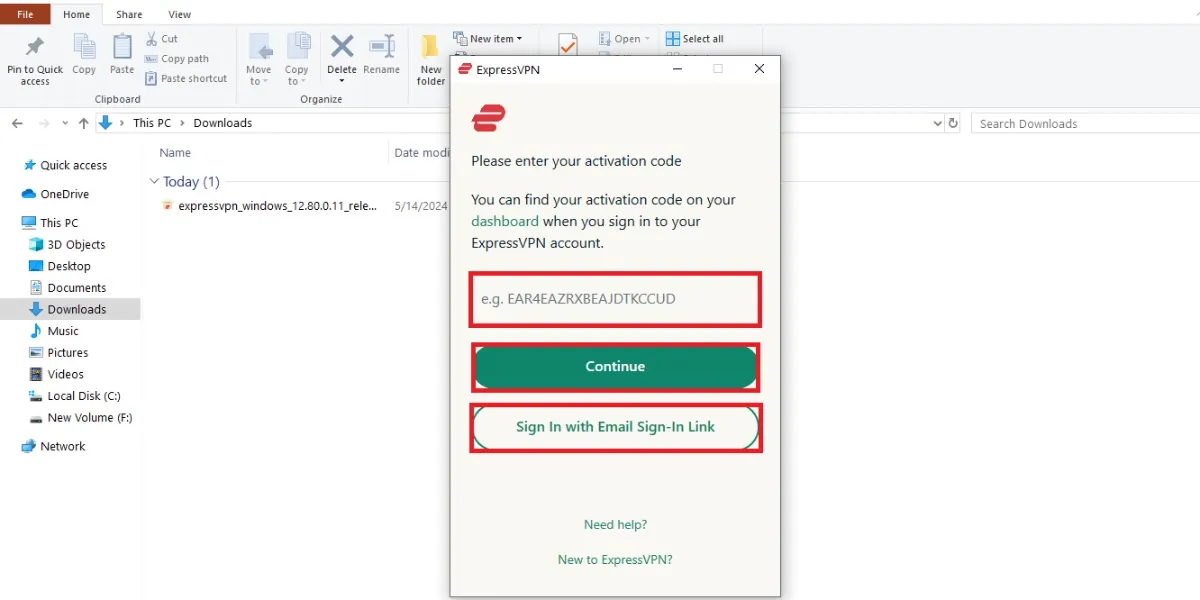
4. The app will prompt you to sign in once the installation is complete. You can do so using an activation code or an email link sent to your email. If you don’t have an ExpressVPN account yet, click New to ExpressVPN and follow the steps to sign up for one.
That’s all. You have downloaded and set up ExpressVPN on your device.
Install ExpressVPN for Netflix On Your Mobile Device
Getting started with ExpressVPN on a mobile device is as easy as setting it up on a computer. Make sure you have downloaded the app from the official app store. The app has the same interface across all mobile platforms. The steps below are for Android devices, but they are also applicable to other mobile platforms. Here is what you need to do:
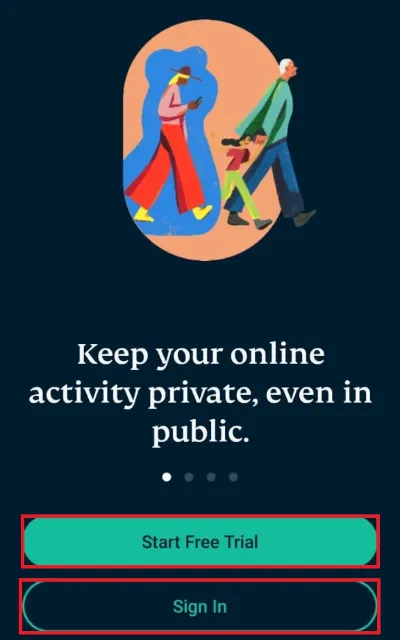
1. Open the ExpressVPN app on your mobile device and tap the Sign in button. When creating an account, sign in with your email address and password. ExpressVPN also offers a free trial of its Android services. If this is what you prefer, select Start Free Trial.
That’s it! You are all set to go with ExpressVPN on your mobile device.
How to Use Netflix with ExpressVPN
We will now learn how to select a desired server on ExpressVPN to stream region-specific Netflix content. The following steps and images are from ExpressVPN on Windows. However, this VPN tool has a similar interface across all platforms, so you will have no difficulty using it on any device.
The only significant difference between the mobile and desktop apps is that on the mobile app, you first need to sign in with your ExpressVPN account credentials (email address and password) and then enter an activation code. On the other hand, you can start using the app on your computer immediately by providing the activation code.
To obtain the activation code, check the welcome email you received from ExpressVPN. Click Setup ExpressVPN Now to take you to the activation page in your email. Here are the steps to use ExpressVPN with Netflix.
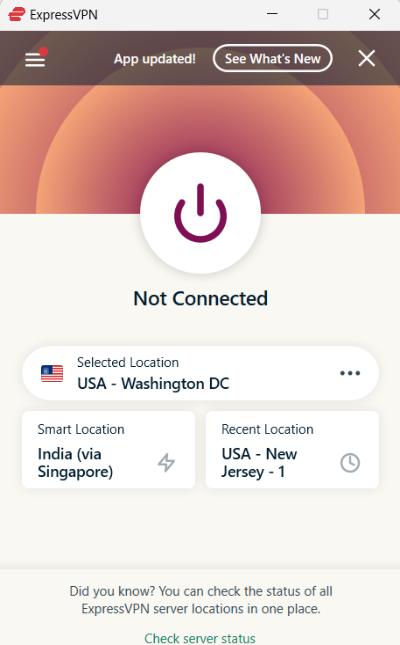
1. Run ExpressVPN on your device and enter your activation code, which you can get from your ExpressVPN welcome email. When ExpressVPN launches, select the Start Using the App button.
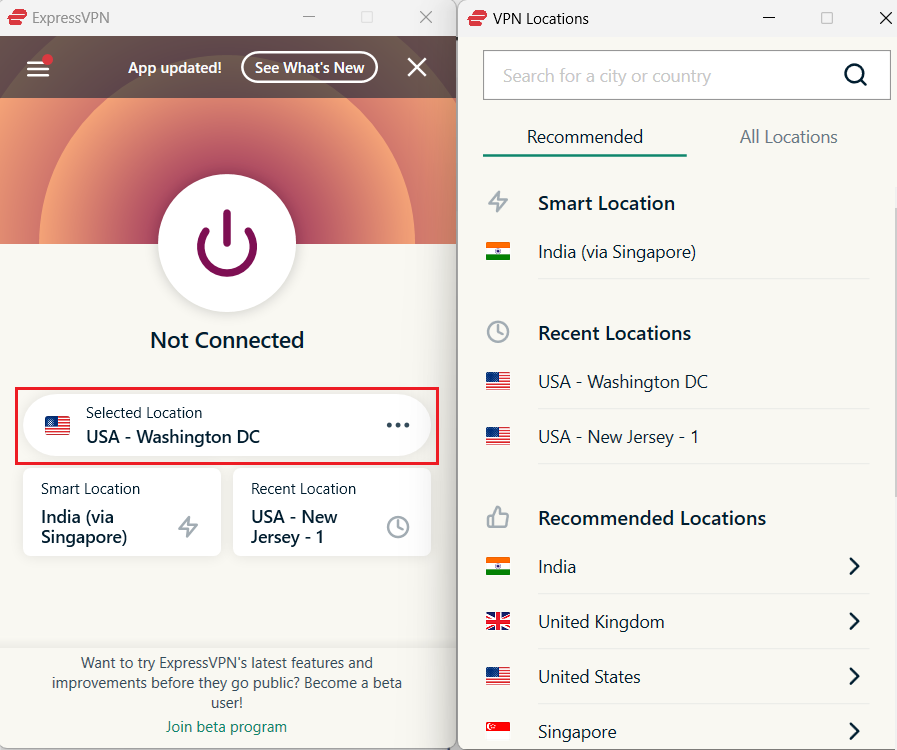
Click the Choose Location button on the ExpressVPN app’s home screen. You’ll see a new page with the list of the servers. There are three tabs here: Recommended, All, and Recents. Please select the Recommended tab (we will discuss the other tabs later).
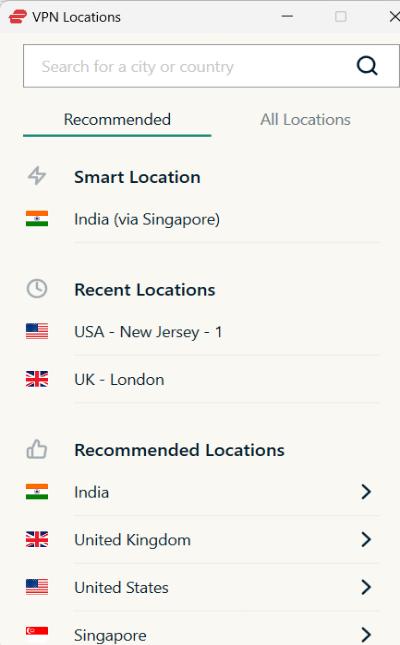
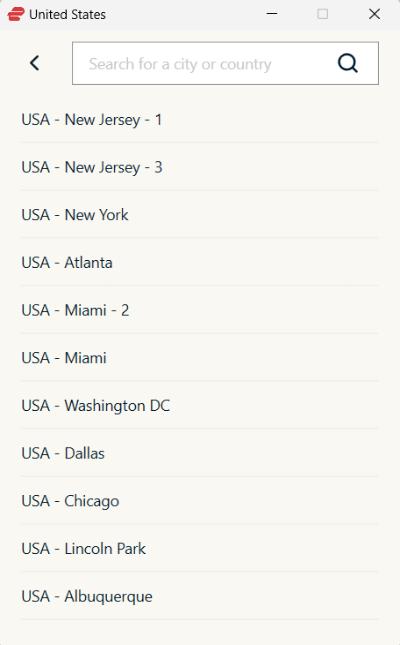
2. Since we want to stream Netflix USA content, click on the small arrow on the right next to the United States to see the list of recommended servers for this location.
3. Now click the large power button in the center of the app.
4. ExpressVPN will now start connecting. Once you are connected to the server, the ExpressVPN power button will become green.
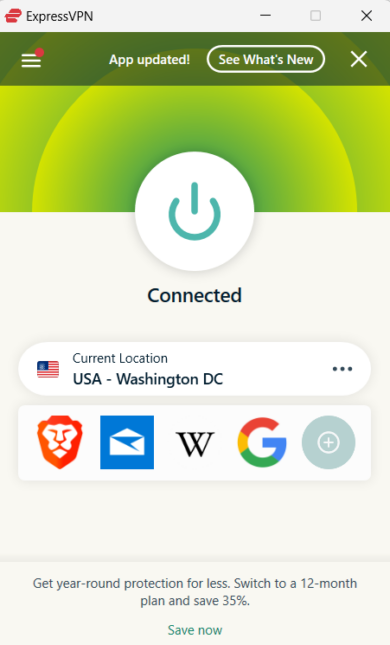
You are all set now. Now, go ahead and open Netflix to start streaming.
What If ExpressVPN Netflix Is Not Working?
If the chosen ExpressVPN server is not working with Netflix, Netflix may have detected it or may be experiencing a temporary issue. You can easily select another server.
1. Click the power button again to disconnect from the currently connected server. Then click Choose Location to select a different server in your desired country.
2. The Recommended tab only shows the most popular servers. To view the list of all servers, click the “All Locations” tab. Here is how the server list is categorized:
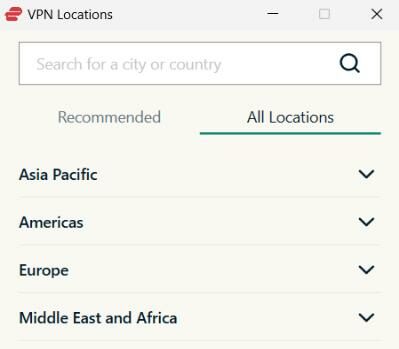
You will find all the USA servers in the Americas category. In the Recents tab, you can see the list of the servers you have recently connected to and the servers you have favored.
Conclusion
That’s it! This concludes our article, the best VPN for Netflix. ExpressVPN is the best option for unblocking Netflix content from anywhere in the world.

Suberboost Your FireStick with My Free Guide
Stay Ahead: Weekly Insights on the Latest in Free Streaming!
No spam, ever. Unsubscribe anytime.

Two part question.
Part 1: Isn’t it safer to avoid using VPN on paid services such as Netflix, Amazon prime, Disney+? Wouldn’t using VPN on those services as well in conjunction with using VPN on streaming services like Exodus Redux just cause me to be identified since the IP addresses are the same? Also, the firestick is linked to my legit Amazon account.
Part 2: If I am not interested in using a VPN for my paid streaming services, do you recommend that I use a second Firestick in order to avoid having to toggle the VPN on/off and prevent accidentally watching my legit services on the VPN because I forgot to toggle off the VPN? I estimate that about 80% of my viewing will be on paid for streaming services.
Thank you
Hi, you can safely use a VPN with the paid as well as third-party party services. There is no need to toggle the VPN on or off while switching services. Even though the IP address is the same, it belongs to the VPN server and it cannot be traced back to you (provided you are using a trustworthy and reliable VPN service like ExpressVPN)
I hope I answered both your questions.
I have signed up for both nordvpn and expressvpn in the last 24 hours. I live in Canada. Nord vpn only provides security not usa Netflix anymore as according to them a software update to the firestick blocks this access. They say they are working on a fix. Although I was a client expressvpn up until December 2018 …for my firestick Netflix Usa, I can no longer move the cursor to select a specific server so I am thinking this is their way of Geoblocking. Time to dump the firestick? If so Vpn providers should clearly state on their websites that their service re firestick s is only for security not geoblocking
Hi Chris, there were some navigation issues with ExpressVPN that did not let you select the servers. These issues have been fixed. Install the latest version of the app from Amazon Store and you will be able to select any server you like
Loved your article. Very informative. thank you! .
Glad you liked it 🙂