This guide will teach you how to install the BewbsandBeer addon on Kodi. You may use this same method on any compatible device, including Fire TV Cube, FireStick 4K, FireStick Lite, and Fire TV.
What is BewsandBeer Addon?
Warning! This is an adult addon. You must be 18+ to access this guide.BewbsandBeer is an adult content-focused add-on that is available from the Grindhouse Repository. The BewbsandBeer Kodi addon contains a diverse range of adult content, including porn, anthology series, and even Hollywood movies.
Exploring this addon may uncover some hidden gems, or you may find some masterpieces. The BewbsandBeer Kodi addon is ideal for those seeking more than just standard adult entertainment.
Well, let’s install it without further delay. Here is a step-by-step guide for installing BewbsandBeer on Kodi.
Attention Kodi Users!
Governments and ISPs worldwide monitor your online activities. If you use third-party Kodi addons, you should always use a reliable Kodi VPN to hide your identity and prevent issues with your streaming experience. Currently, your IP is visible to everyone.
I use ExpressVPN, the fastest and most secure VPN in the industry. It is very easy to install on any device, including Amazon Fire TV Stick, PC, Mac, and Smartphones. It also includes a 30-day money-back guarantee. If you're not satisfied with their service, you can request a refund. ExpressVPN is offering a special NEW YEAR deal: get 4 months free and save 78% on the 2-year plan.
Install and Use Best Kodi VPN | Why you must use a VPN at all times
How to Install BewbsandBeer Addon in Kodi
Follow the steps below to install this addon:
Legal Disclaimer: This guide is for informational purposes only. FireStickTricks.com does not own, host, operate, resell, or distribute any apps, services, or content mentioned.
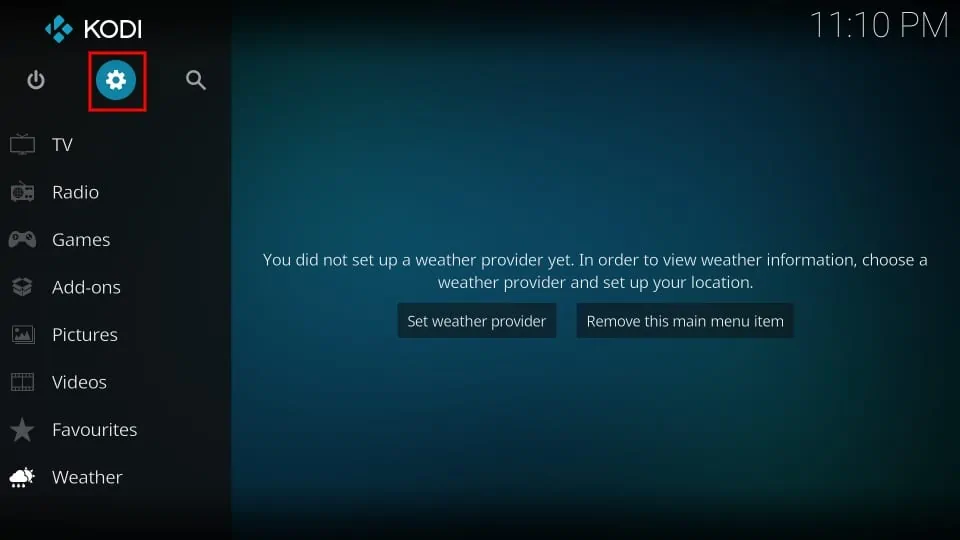
1. Launch the Kodi app. On the home screen, head to the settings gear.
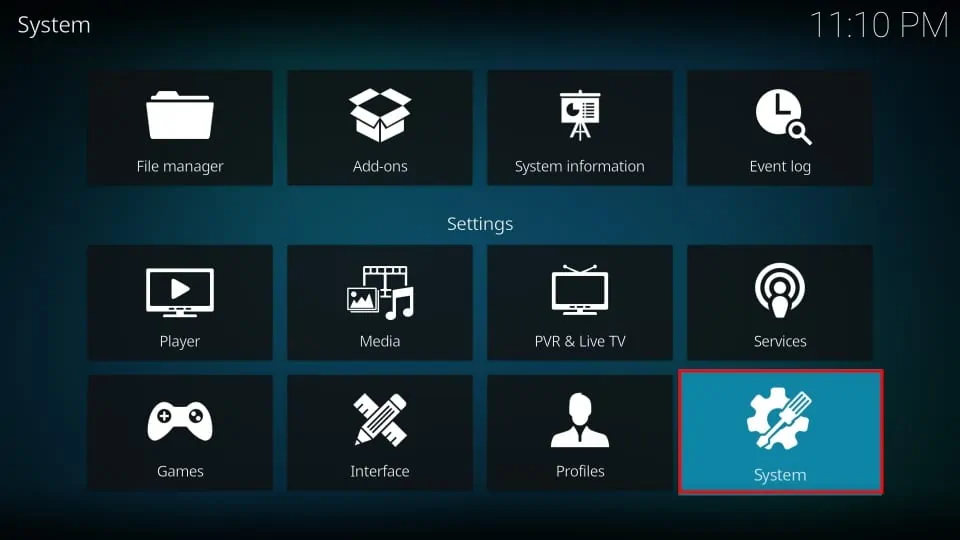
2. Select System.
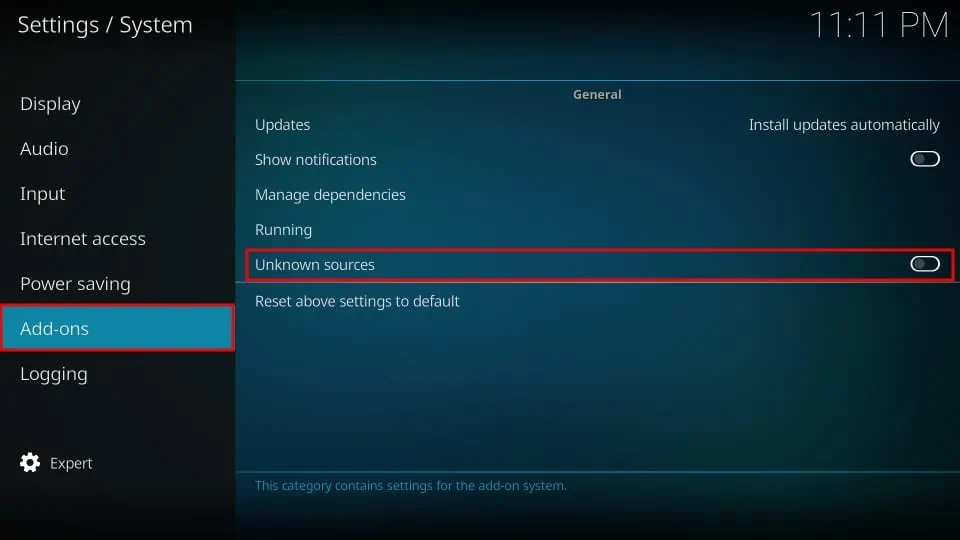
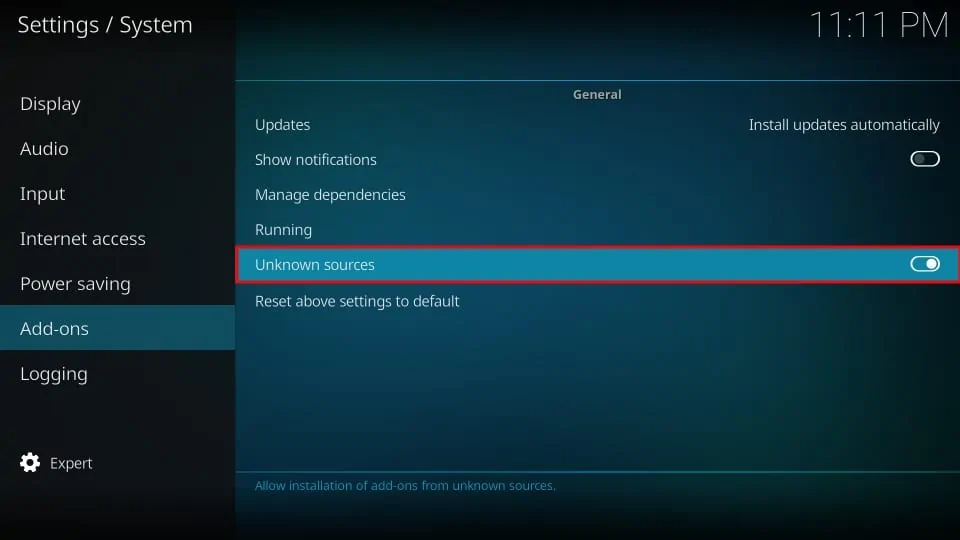
3. Navigate to the Add-ons tab in the left menu. On the right side of the screen, select Unknown sources.
Note: By default, the toggle is disabled for your privacy and security. I recommend disabling this option to install this third-party add-on for Kodi.
4. Click Yes when a warning window appears.

5. The toggle for Unknown sources should be to the right, meaning it’s on.
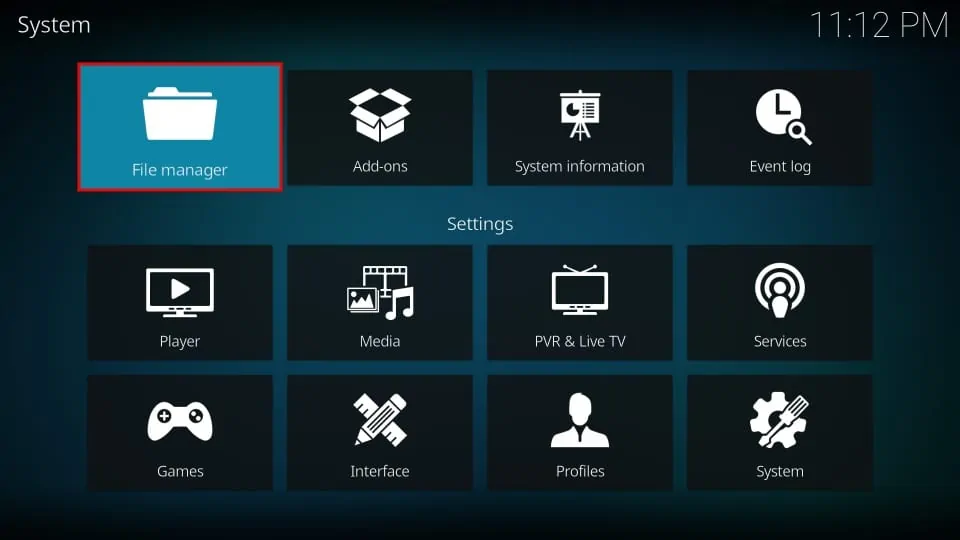
6. On your FireStick remote, press the back button to return to the settings page. Then click File manager.
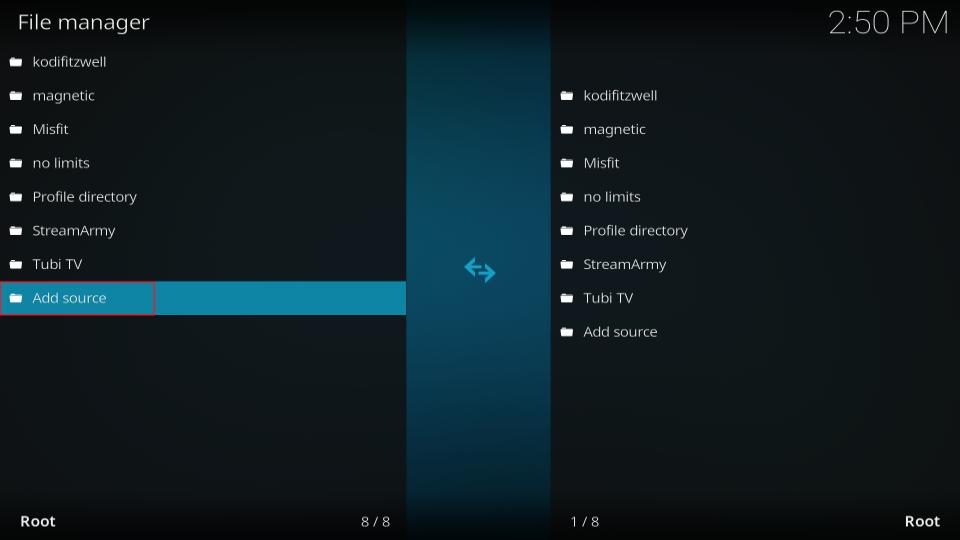
7. Choose Add source.
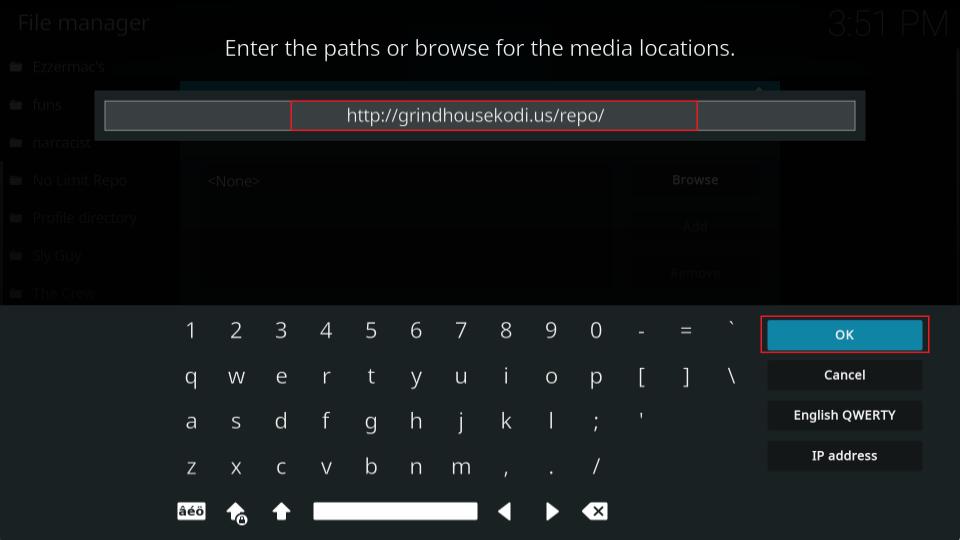
8. Click on <None>.
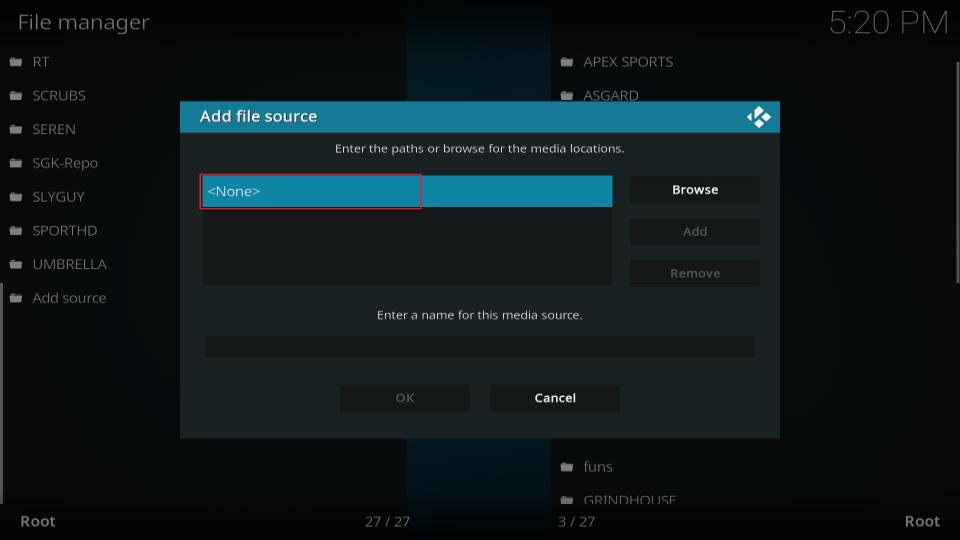
9. Type http://grindhousekodi.us/repo into the URL section. Make sure it’s correct, and then click OK.
Note: FireStickTricks.com does not host this URL or the addon therein. This URL takes you to the original repository source.
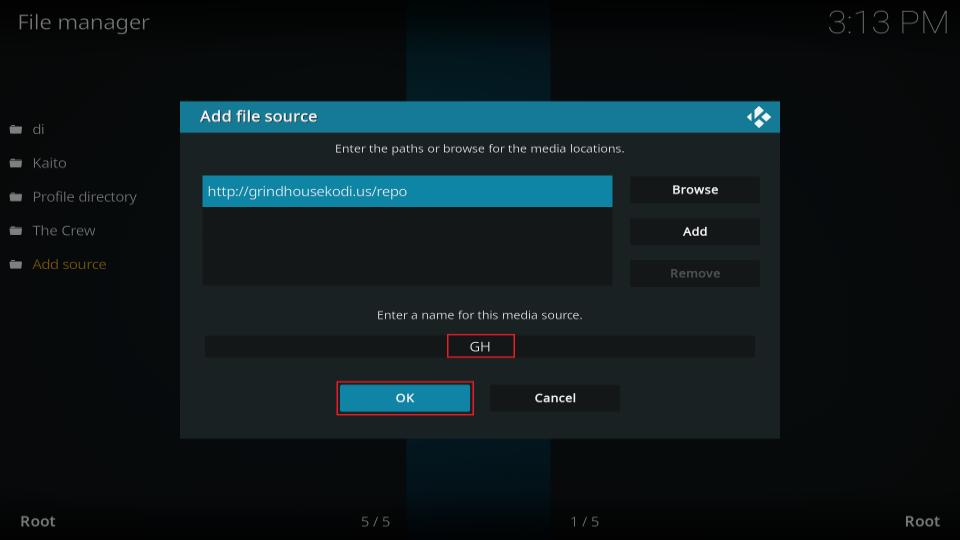
10. Type GH in the field labeled Enter a name for this media source. Click OK.
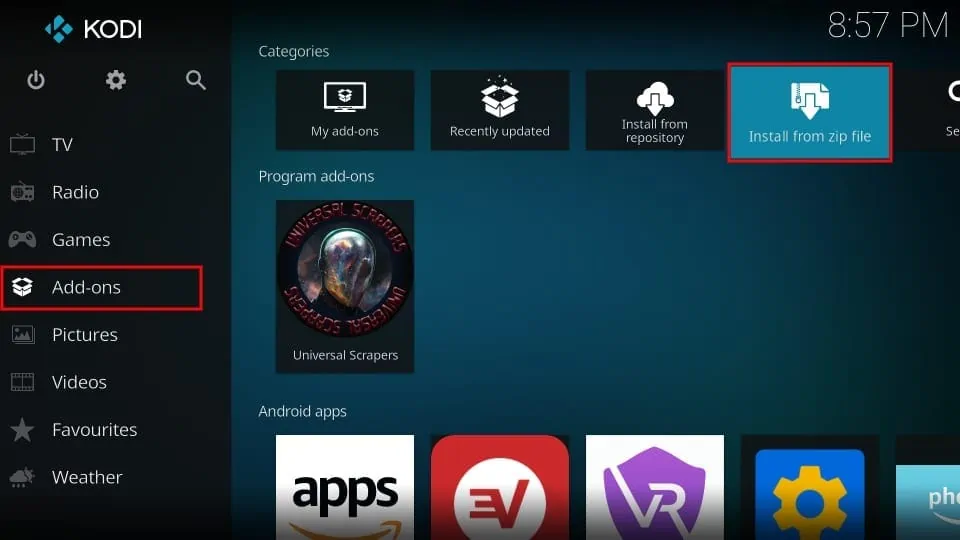
11. Go back to the Kodi home page and scroll to Add-ons. Under the Categories section at the top, choose Install from zip file.
A small window will tell you that you must manually update any addons installed this way, except in the official repositories. Click Yes.
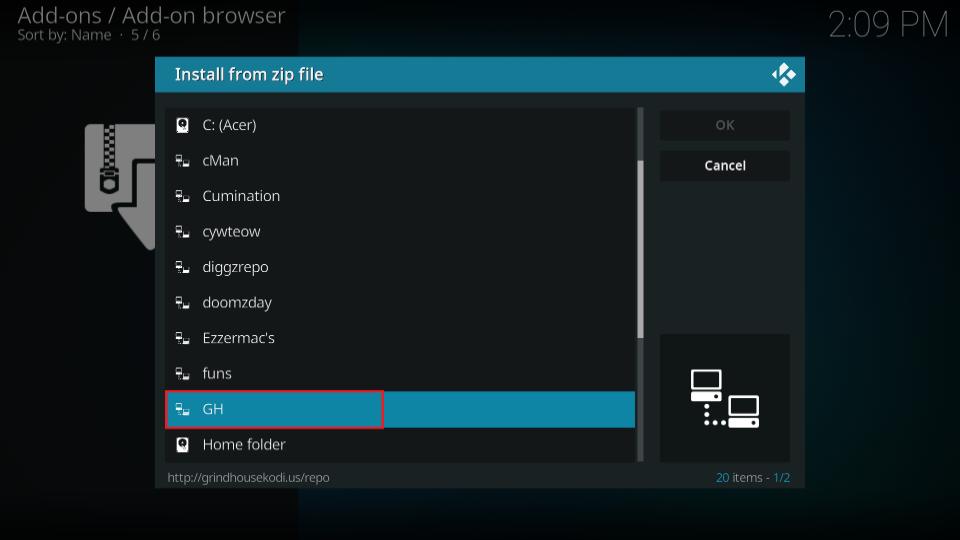
12. Select GH.
13. Click on repository.grindhousekodi-x.x.zip, then click OK.
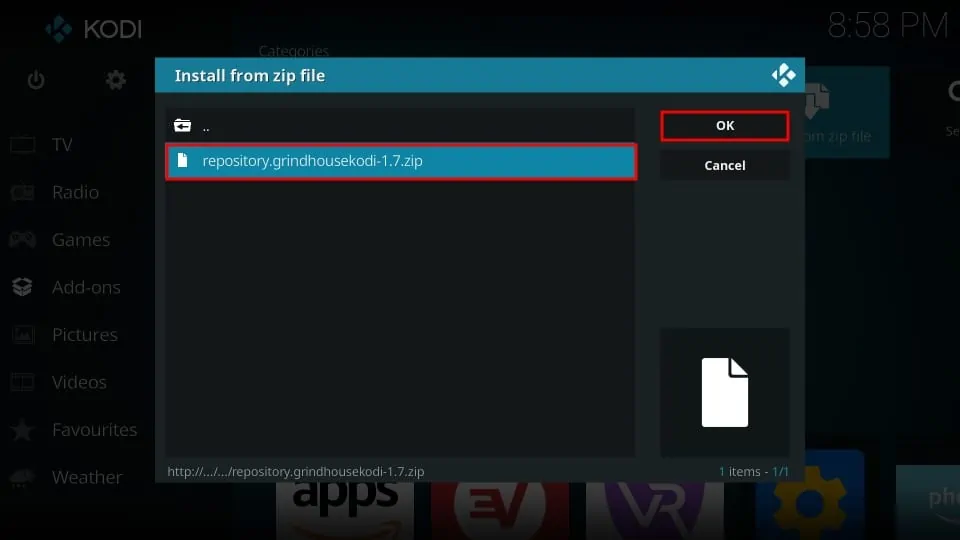
14. Wait for a few seconds until you get a notification that the repository is installed.
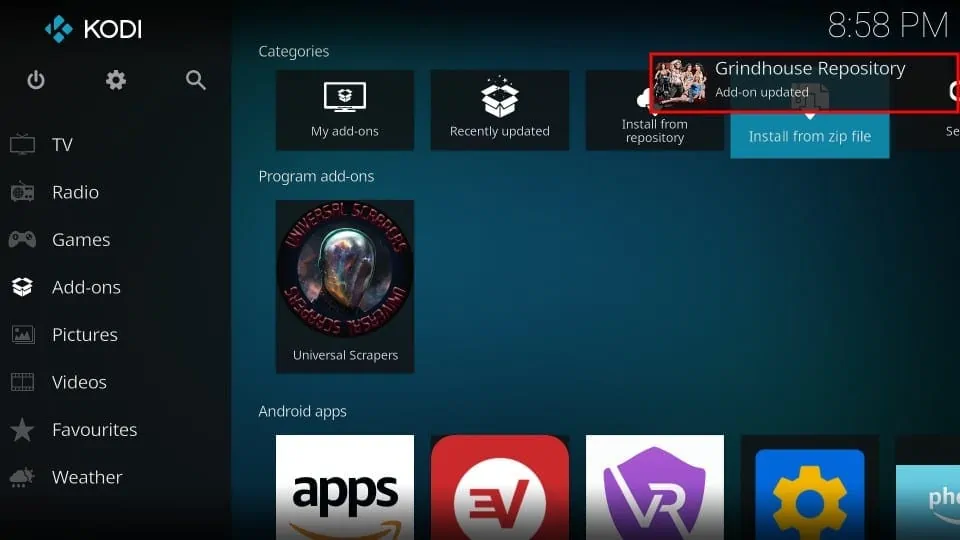
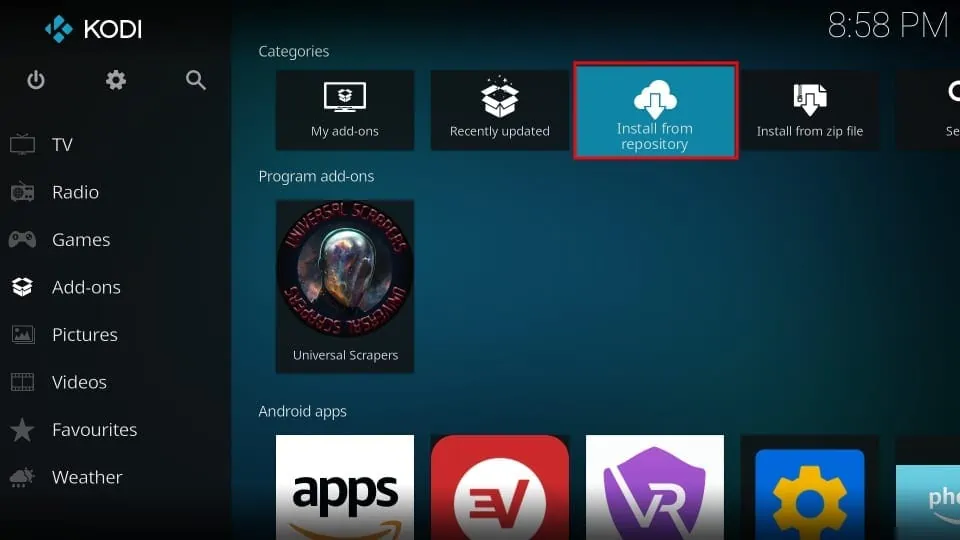
15. Navigate back to the home screen and click Install from repository.
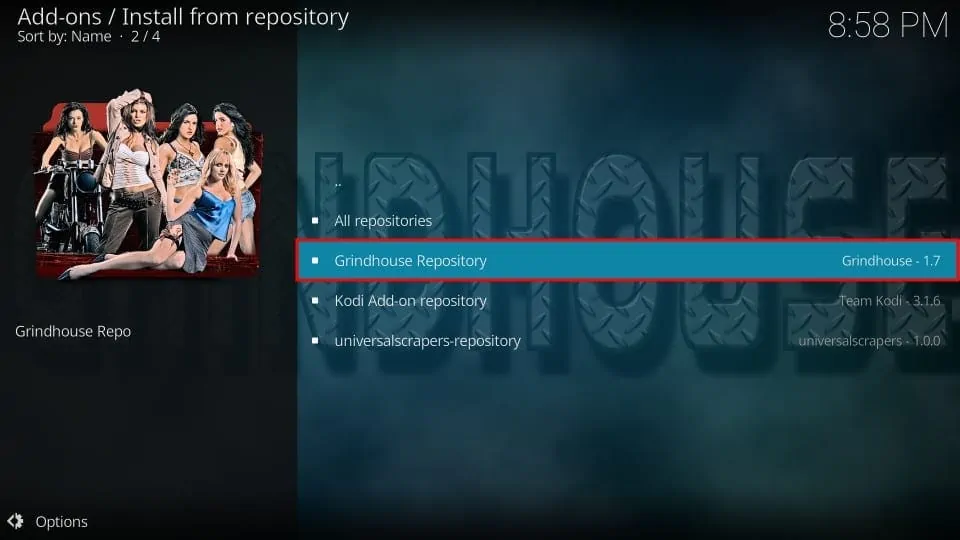
16. Select Grindhouse Repository.
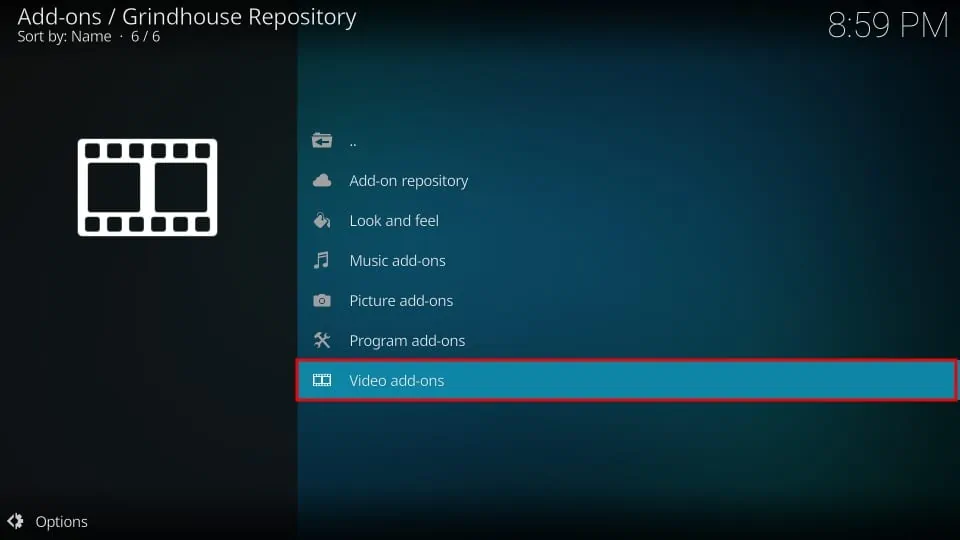
17. Choose Video add-ons.
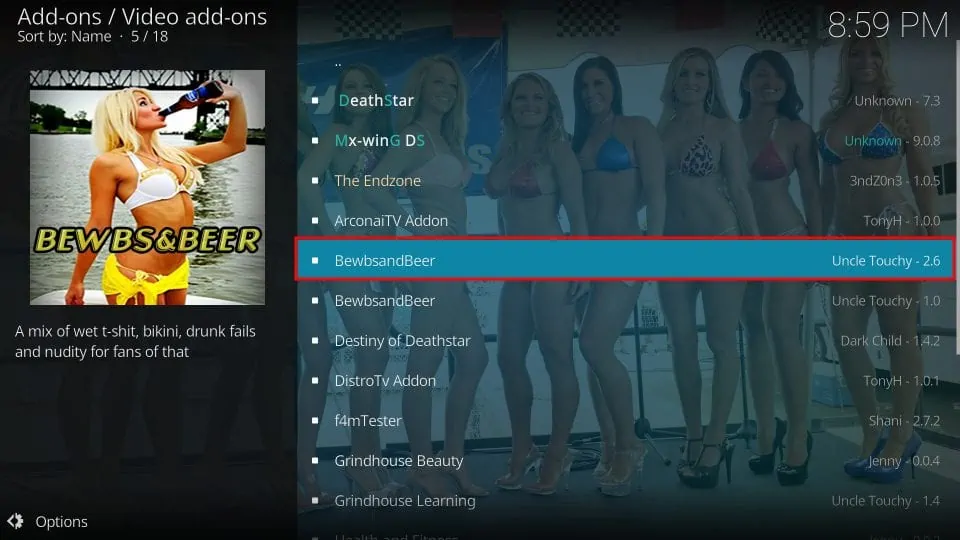
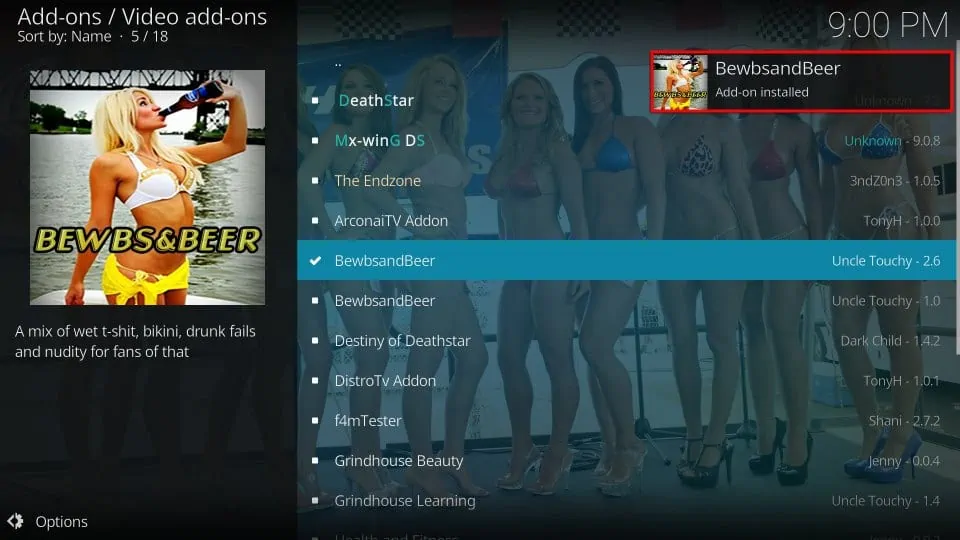
18. Scroll down and select BewbsandBeer (Uncle Touchy – 2.6).
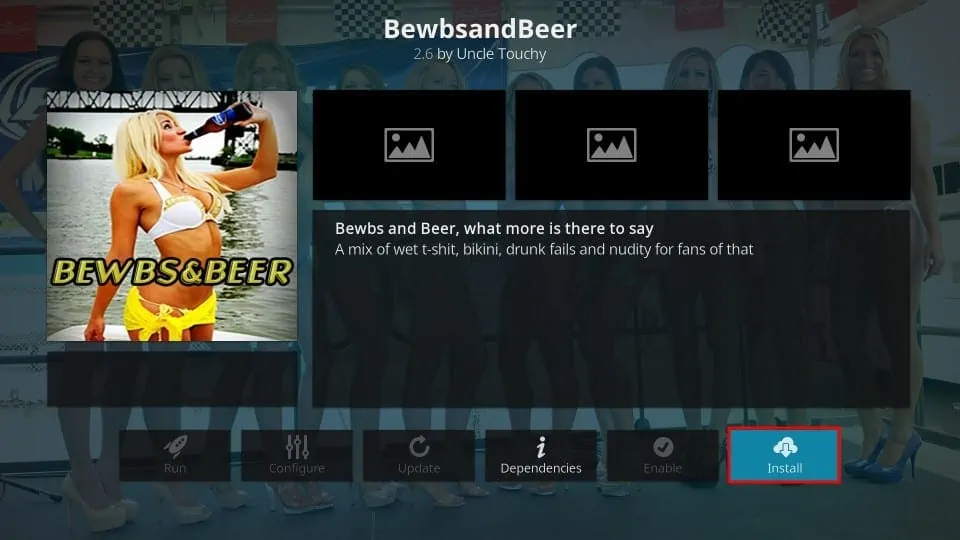
19. Click Install.
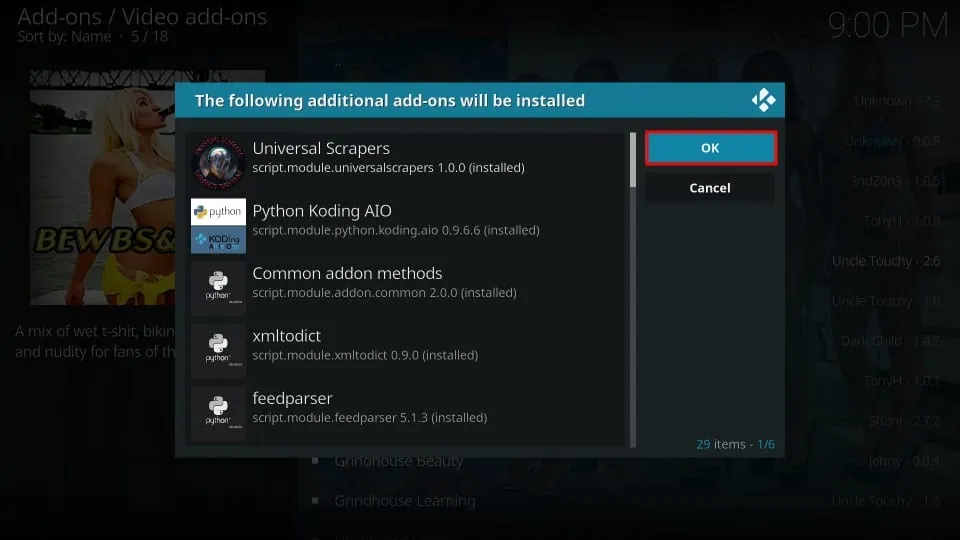
20. Click OK on the pop-up that asks you to allow the installation of additional addons.
21. Wait for the download process to complete. Once the installation is complete, you will get a BewbsandBeer Add-on installed message.
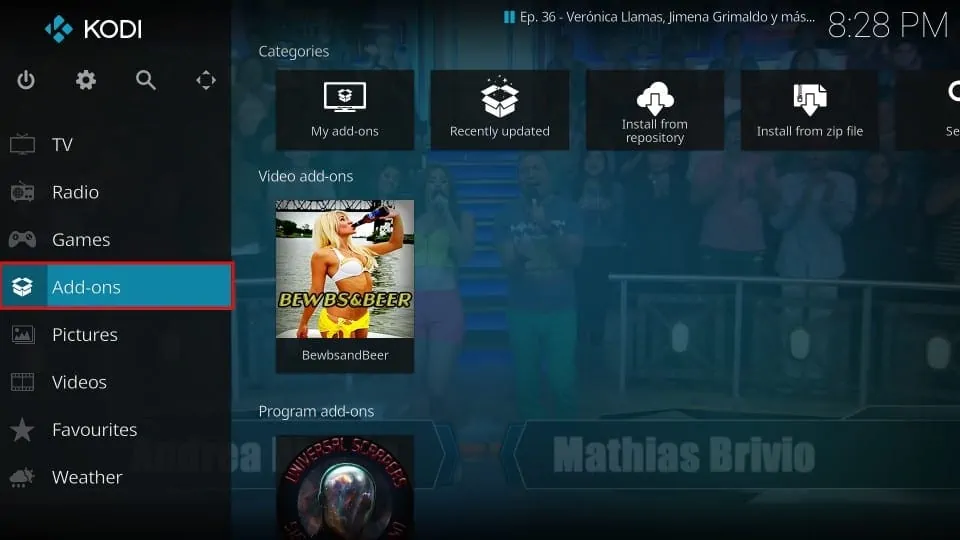
22. Go to the Kodi home screen again and scroll to Add-ons. BewbsandBeer should appear on the right panel under Video add-ons.
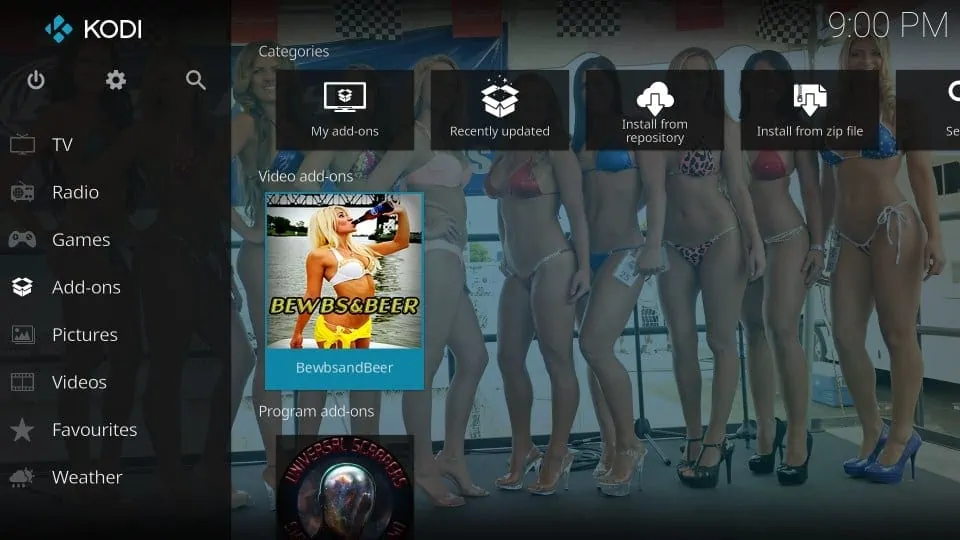
This is how you install the BewbsandBeer Addon.
Before you start streaming with Kodi Addons or Builds, I would like to warn you that everything you stream on Kodi is visible to your ISP and Government. This means, streaming copyrighted content (free movies, TV shows, live TV, and Sports) might get you into legal trouble.
Thankfully, there is a foolproof way to keep all your streaming activities hidden from your ISP and the Government. All you need is a good VPN for Kodi. A VPN will mask your original IP which is and will help you bypass Online Surveillance, ISP throttling, and content geo-restrictions.
I personally use and recommend ExpressVPN, which is the fastest and most secure VPN. It is compatible with all kinds of streaming apps and devices.
NOTE: We do not encourage the violation of copyright laws. But, what if you end up streaming content from an illegitimate source unintentionally? It is not always easy to tell the difference between a legit and illegal source.
So, before you start streaming on Kodi, here's how to get VPN protection in 3 simple steps.
Step 1: Get the ExpressVPN subscription HERE. It comes with a 30-day money-back guarantee. Meaning, you can use it free for the first 30-days and if you are not satisfied with the performance (which is highly unlikely), you can ask for a full refund.
Step 2: Click HERE to download and install the ExpressVPN app on your streaming device. If you are using a FireStick, I have given the exact steps starting with Step 4 below.
Step 3: Click the Power icon to connect to a VPN server. That's all. Your connection is now secure with the fastest and best VPN for Kodi.

The following are the steps to install Kodi VPN on your Fire TV devices. If you have other streaming devices, follow Step 1-3 above.
Step 4: Subscribe to ExpressVPN HERE (if not subscribed already).
Step 5: Go to Fire TV Stick home screen. Click Find followed by Search option (see image below).

Step 6: Type Expressvpn in the search bar and select when it shows up.

Step 7: Click Download.

Step 8: Open the ExpressVPN app and Sign in using the email ID and password that you created while buying the ExpressVPN subscription.

Step 9: Click the Power icon to connect to a VPN server. That’s all. Your FireStick is now secured with the fastest VPN.

BewbsandBeer Addon Overview
BewbsandBeer’s user interface is simple and easy to navigate. The add-on cannot be tweaked or customized much.
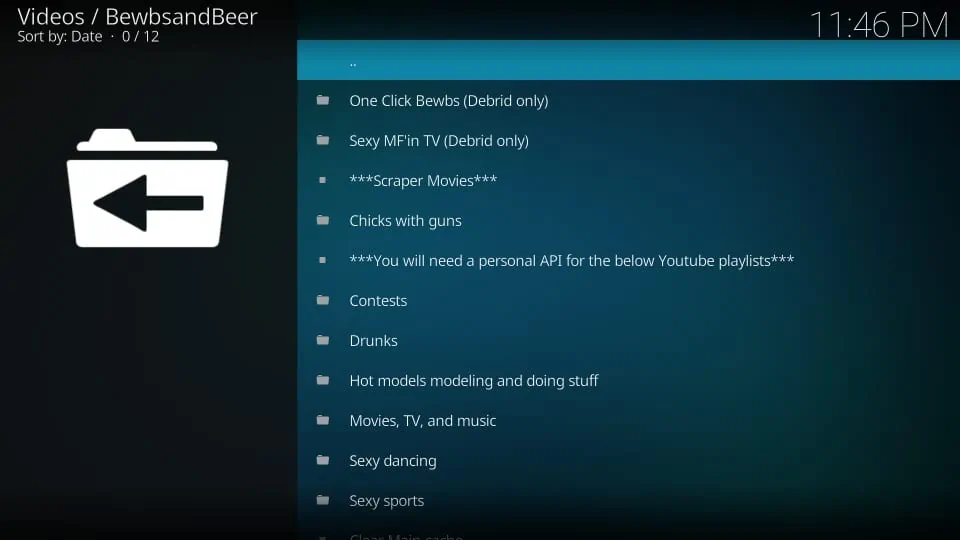
Open BewbsandBeer, and you will see a bunch of folders wherein the contents are categorized: One Click Bewbs (Debrid only), Sexy MF’in TV (Debrid only), Chicks with guns, and a bunch of YouTube playlists. At the bottom is the option to clear your cache.
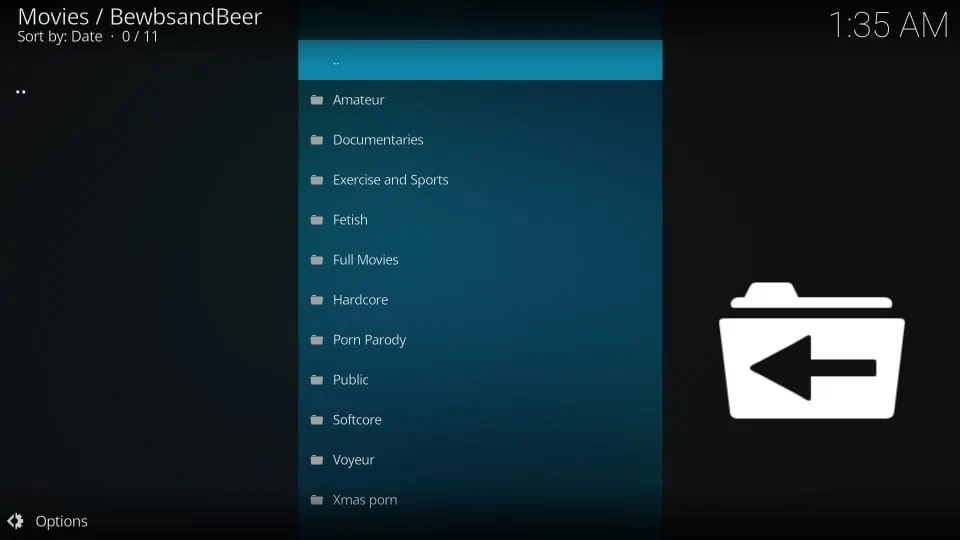
Under the One Click Bewbs (Debrid only) folder, you get tons of adult content in various categories, from Amateur and Documentaries to Softcore and Xmas Porn.
The Sexy MF’in TV (Debrid only) section houses adult reality shows, anthologies, and comedy series.
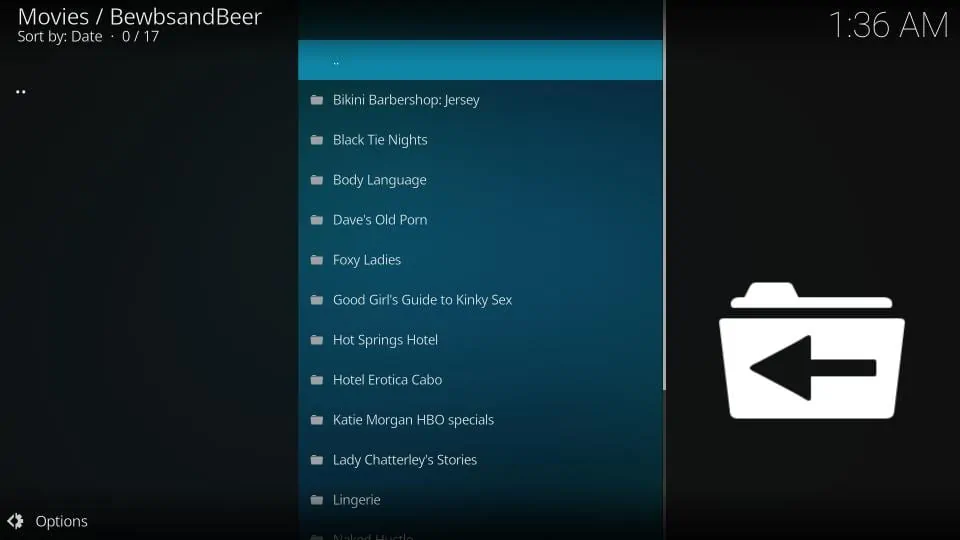
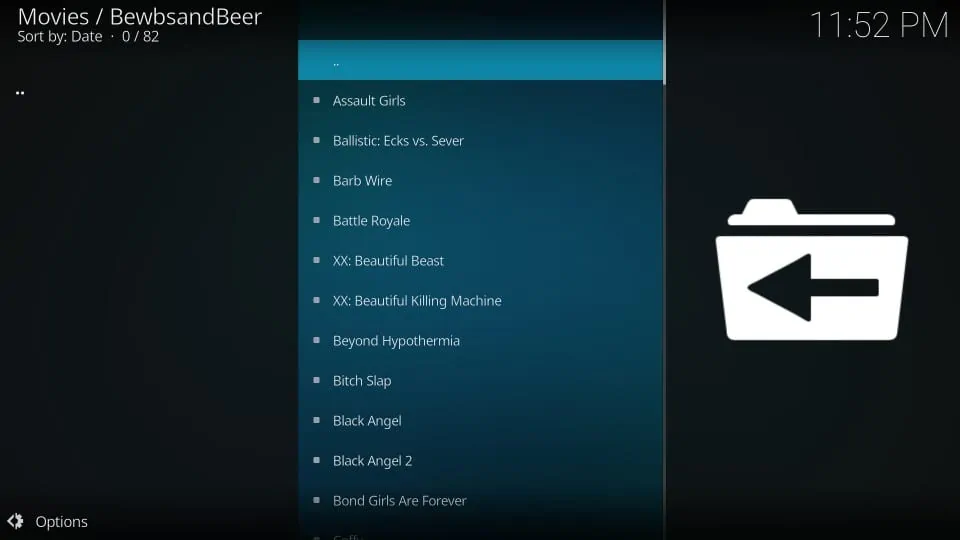
The Chicks with Guns folder contains women-centric action movies in 720p or 1080p. Here, you will find some steamy adventures to satisfy your cravings.
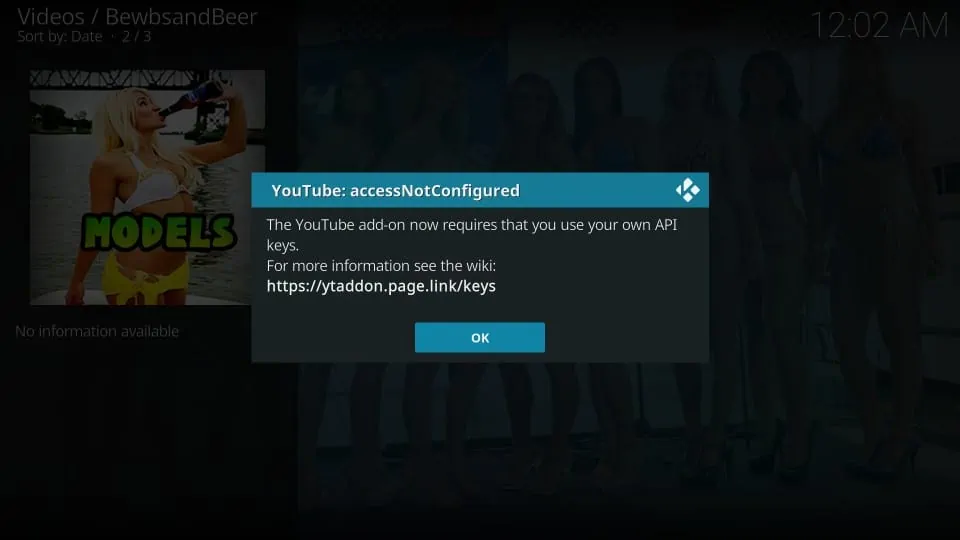
The BewbsandBeer addon features a bunch of YouTube playlists, including contests, drunks, hot models modeling and doing stuff, movies, TV, Music, sexy dancing, and Sexy sports. However, to access this content, you must have a YouTube addon and an API key for YouTube on Kodi. Otherwise, a pop-up window will appear that looks like this.
Looks a bit technical? Don’t worry! Let’s make things easy for you. We will start by installing the YouTube addon first.
Note: You can start setting up the API key if you already have the YouTube Kodi addon.
How to Install YouTube Kodi Addon
Installing the YouTube addon is easy because the official Kodi repository hosts it. You don’t have to add a different repository to get the addon.
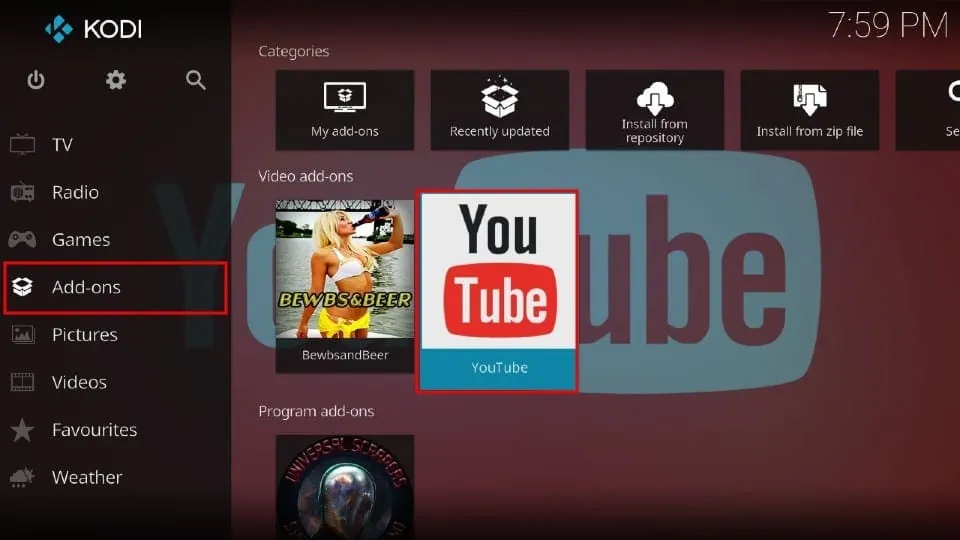
1. From the Kodi home screen, go to Add-ons.
2. Click Install from repository.
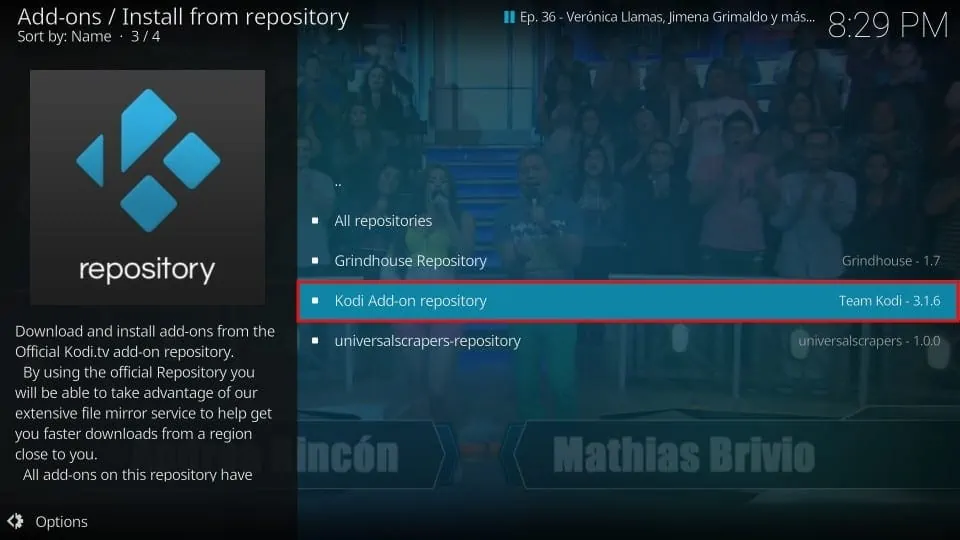
3. Click Kodi Add-on repository.
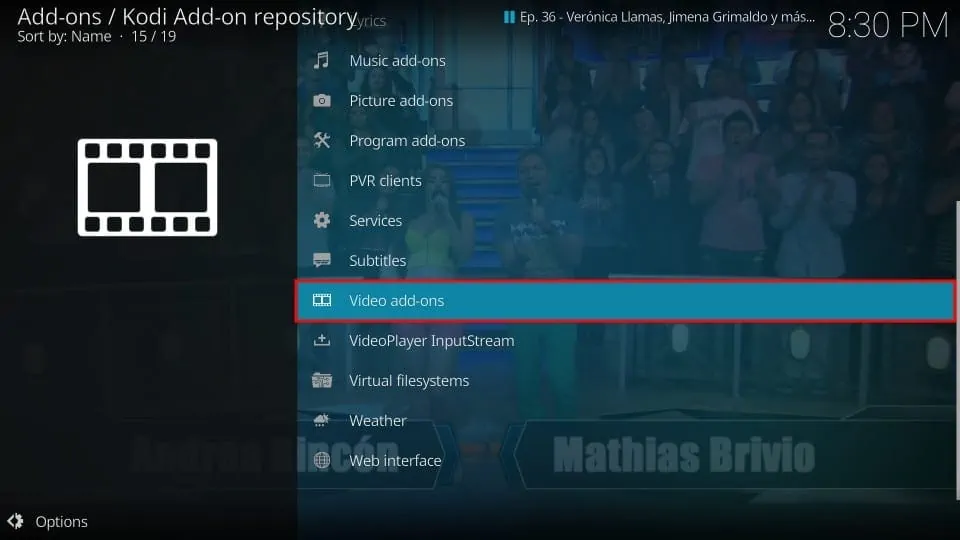
4. Click Video add-ons.
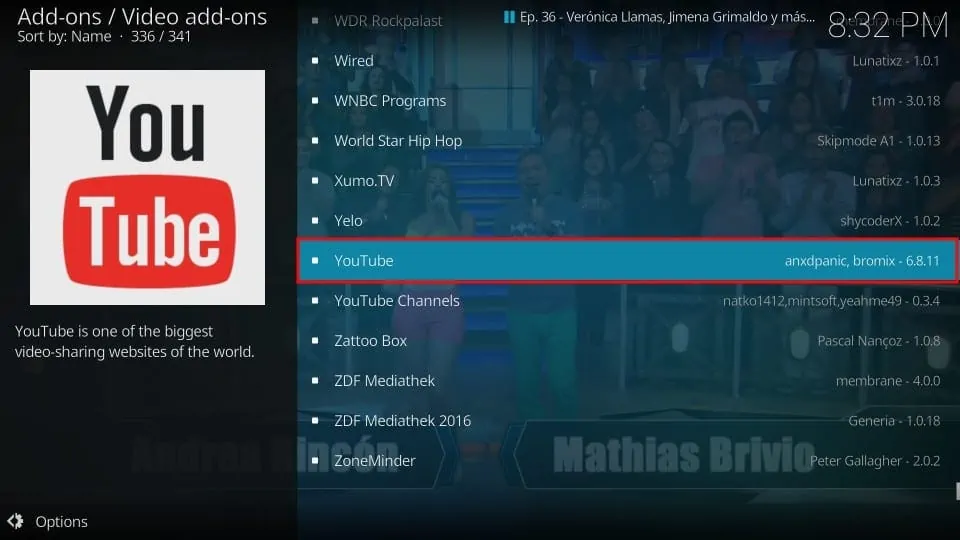
5. Scroll down until you see the YouTube addon.
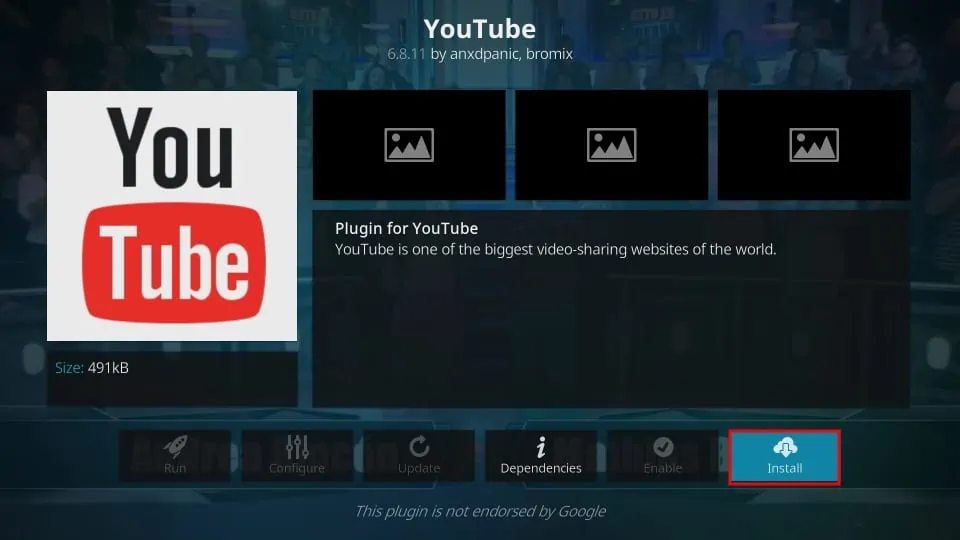
6. Click on Install. Wait for the installation to complete.
7. Now, you’re all set to use the YouTube Kodi addon. On the Kodi home screen, scroll to Add-ons and find YouTube on the right.
We did half of the work here. Now, let’s create a personal API key for the YouTube addon. Also, I recommend using the email associated with your YouTube account.
How to Set Up a Personal API Key for YouTube Addon on Kodi
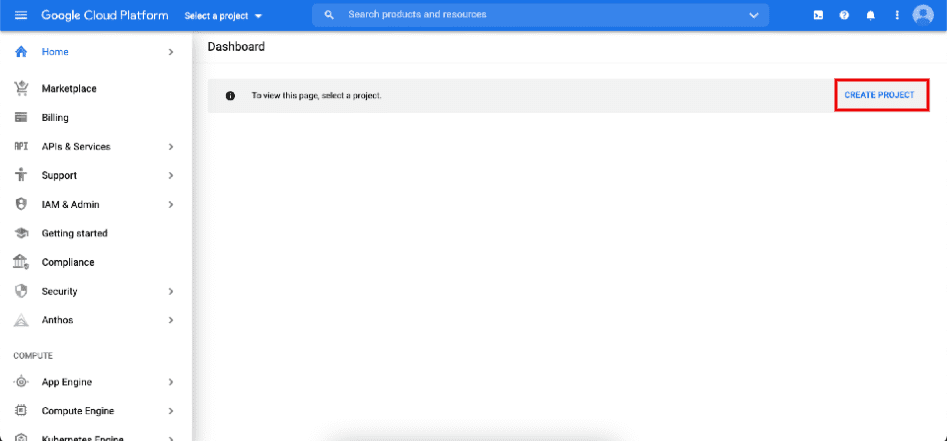
1. Open an internet browser on any device and go to https://console.cloud.google.com, or search for Google Cloud console and click the result with a matching URL. Sign in with your Google account.

2. Click on CREATE PROJECT.
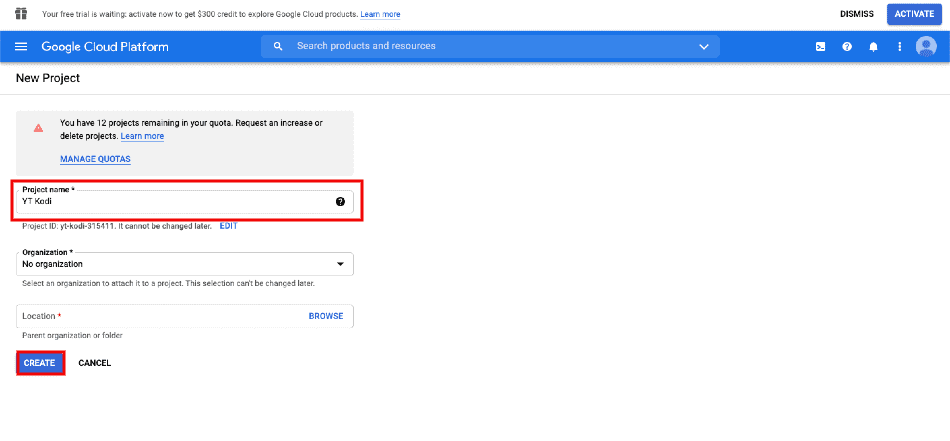
3. Type in any project name and click CREATE. I used YT Kodi for the project name.
4. Once the project is created, click on APIs & Services and Dashboard.
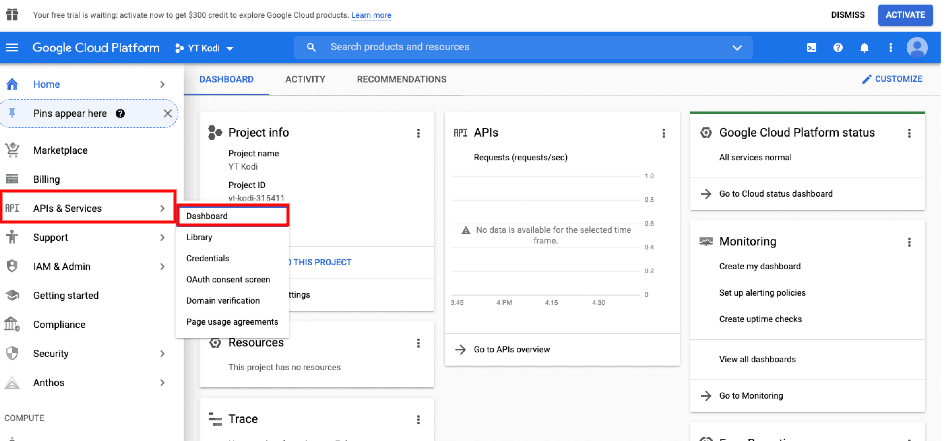
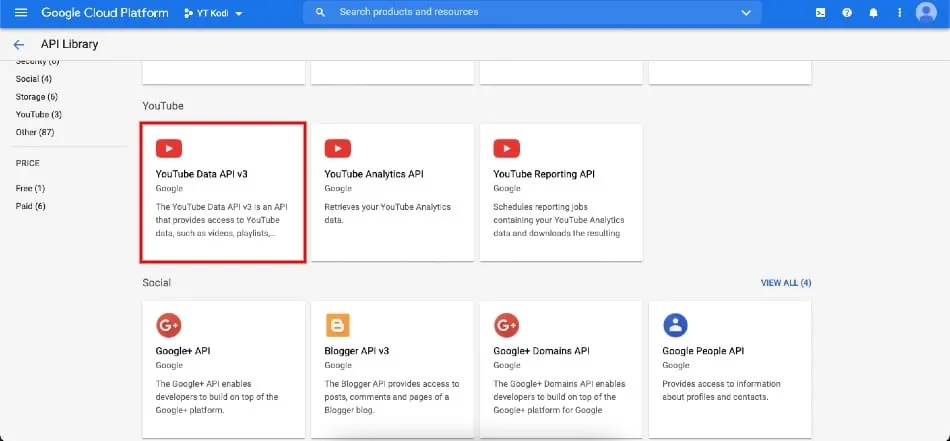
5. On the left menu, click Library.

6. Scroll down to the YouTube section and select YouTube Data API V3.
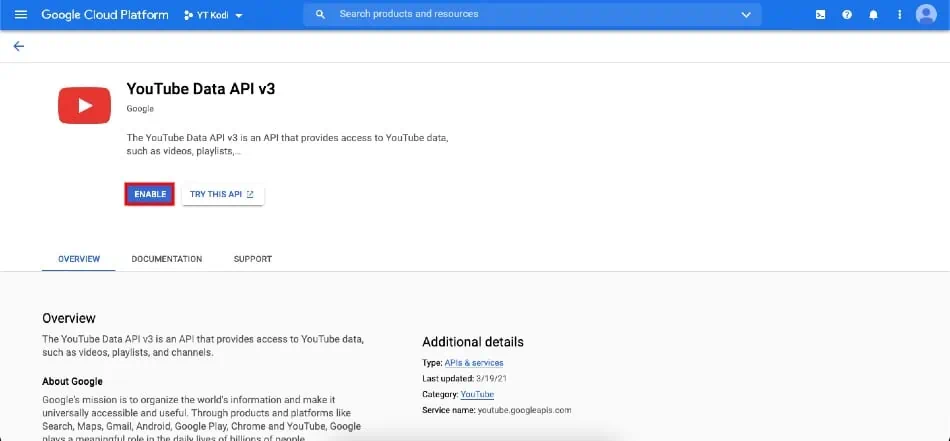
7. Click ENABLE.
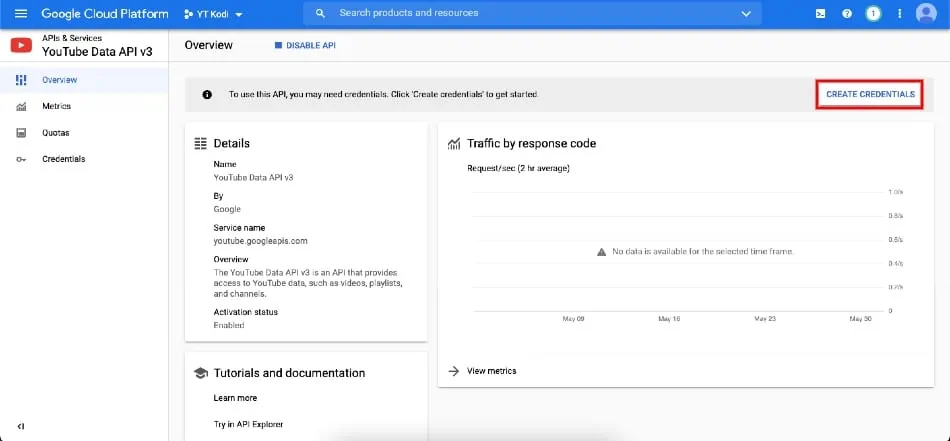
8. Select CREATE CREDENTIALS at the top-right corner.
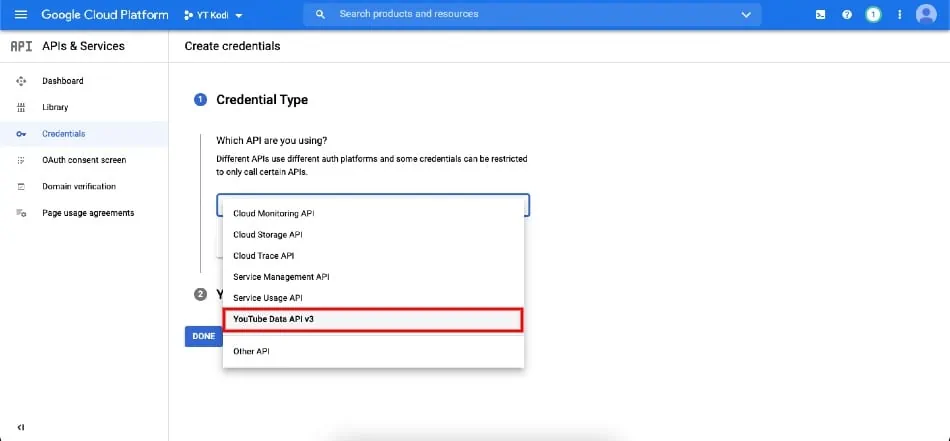
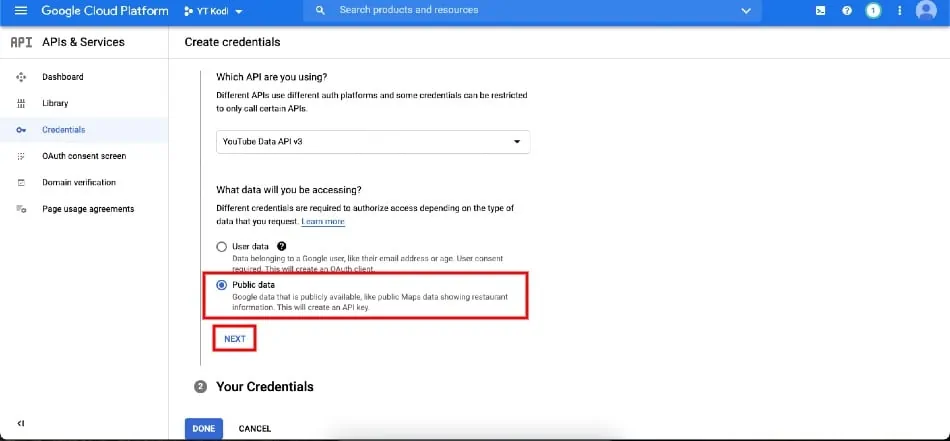
9. Where it says, Which API are you using? Click the drop-down menu and select YouTube Data API v3.
10. Where it says What data will you be accessing?, select Public data and click NEXT.
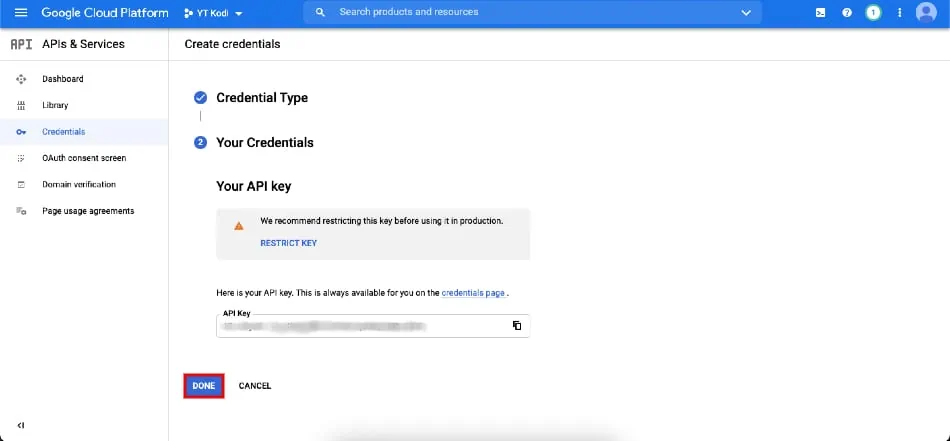
11. You will now receive an API key. Please copy and paste it somewhere safe and accessible, then click DONE.
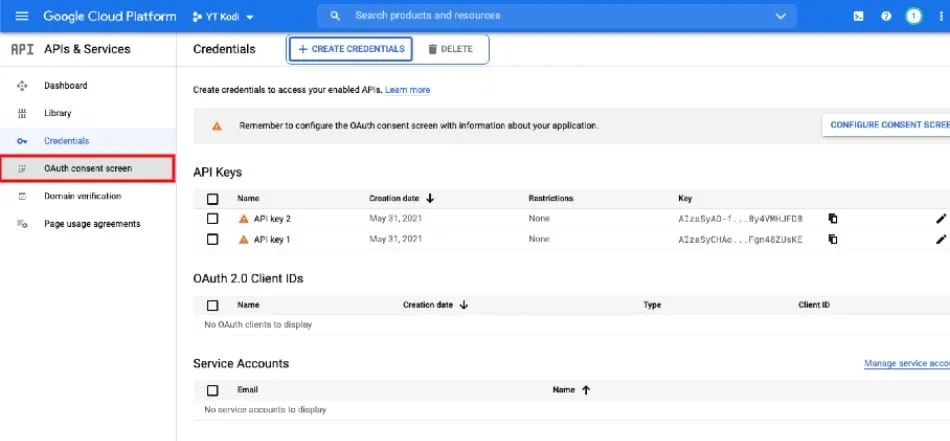
12. On the left menu, click on OAuth consent screen.
13. Under User Type, choose External. Then click CREATE.

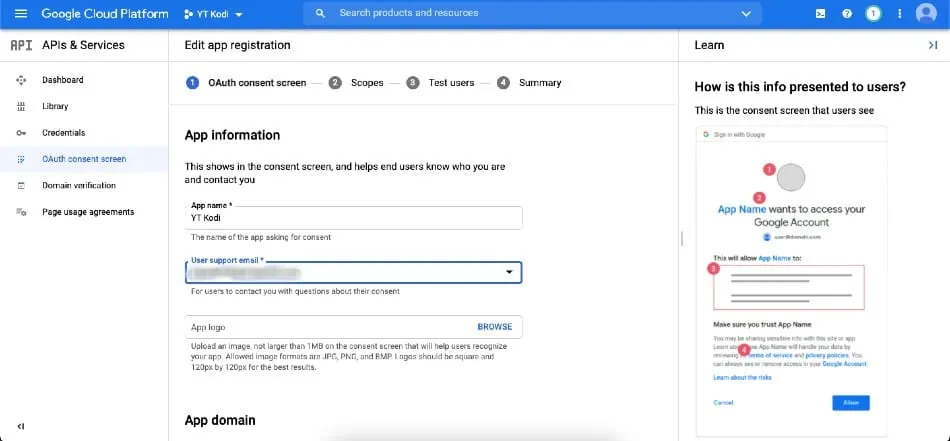
14. Under App information, enter the App name you chose earlier. Mine was YT Kodi.
15. Click the User support email drop-down box and select your email.
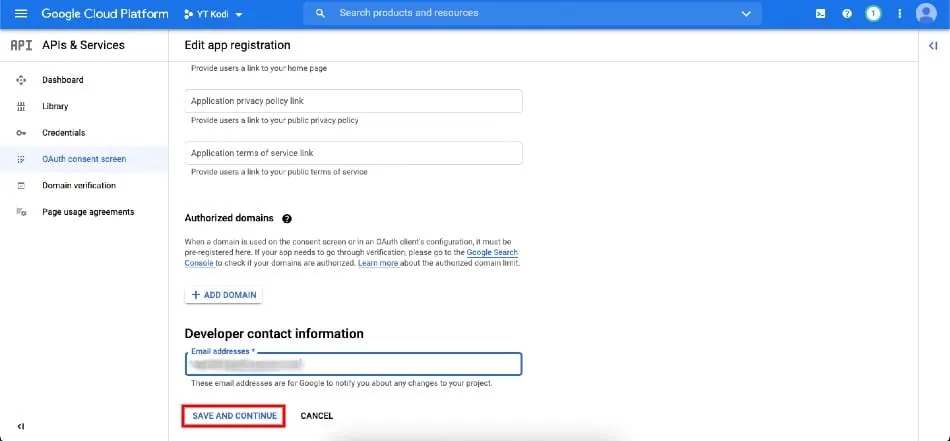
16. Scroll down and type in your email under Developer contact information (use the same email from the step prior). Click on SAVE AND CONTINUE.
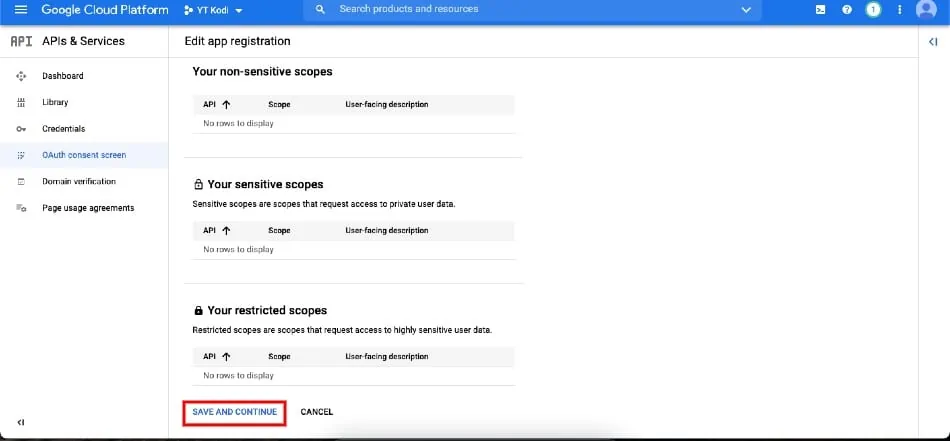
17. Again, click SAVE AND CONTINUE at the bottom of the page about scopes.
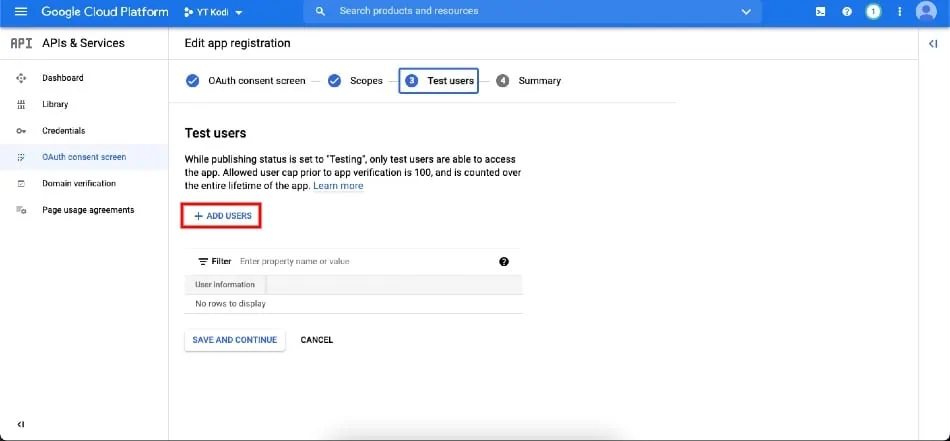
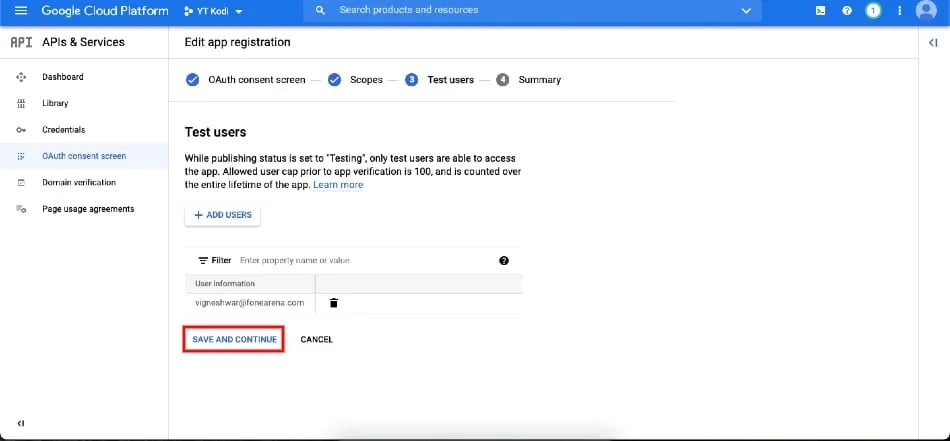
18. Under Test users, click on ADD USERS.
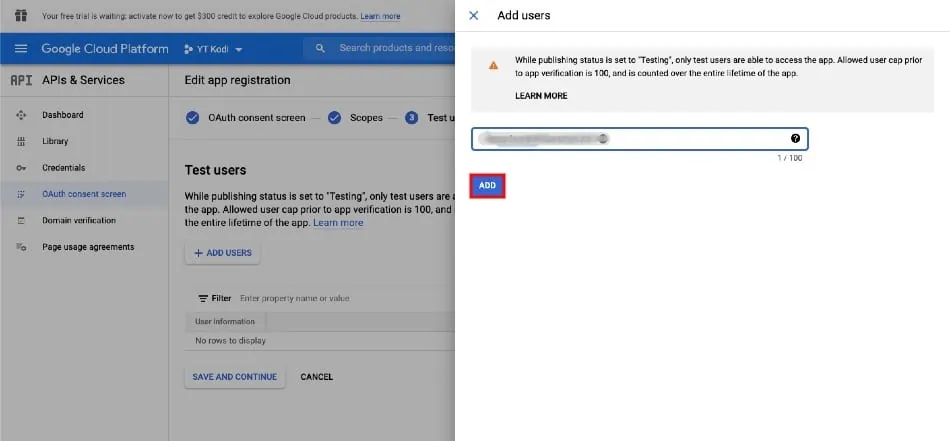
19. In the Add users window, enter the email address you used before. Then click on ADD.
20. On the Test users page, click SAVE AND CONTINUE.
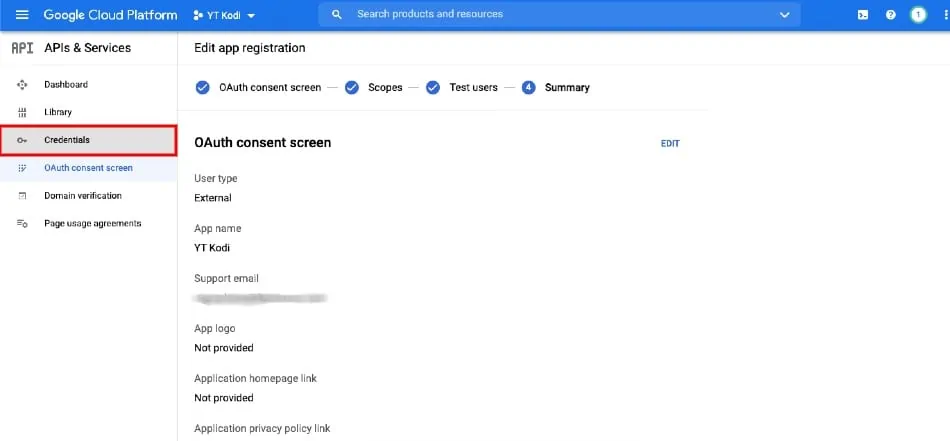
21. Now click on the Credentials tab on the left.
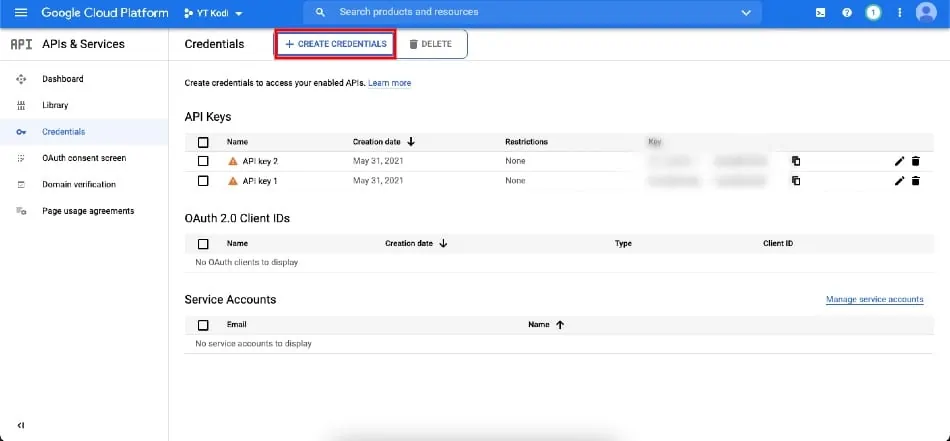
22. Click on CREATE CREDENTIALS.
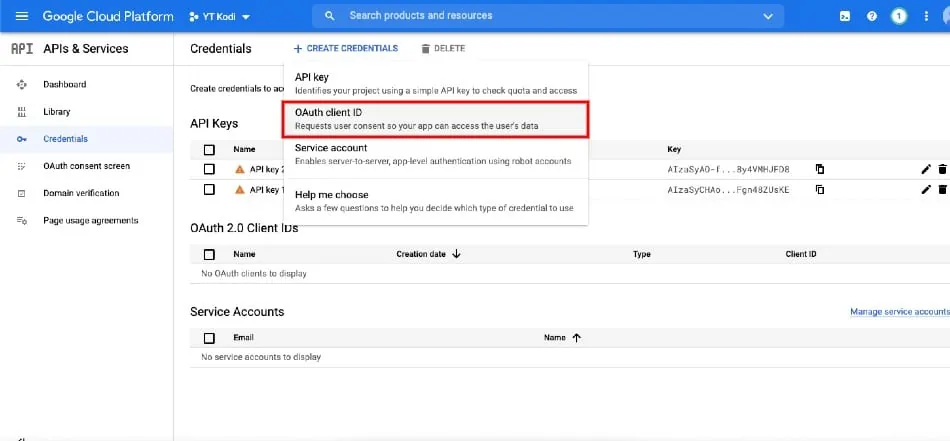
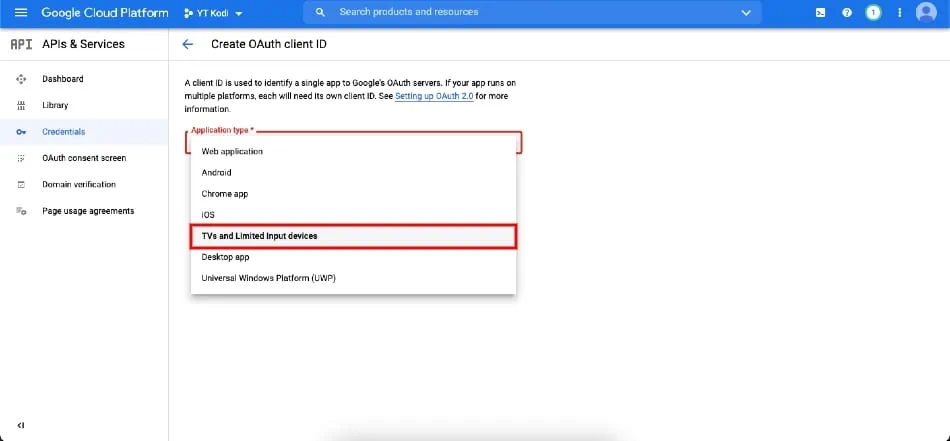
23. Choose OAuth client ID.
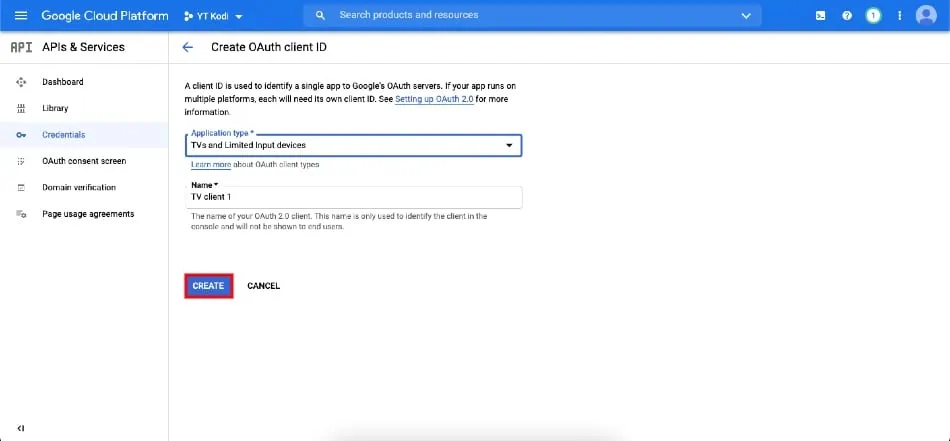
24. Click the drop-down menu for Application type and choose TVs and Limited Input devices.
25. Click CREATE.
26. Now, you will get a Client ID and Client Secret. Copy and paste them somewhere safe and accessible. Click OK.
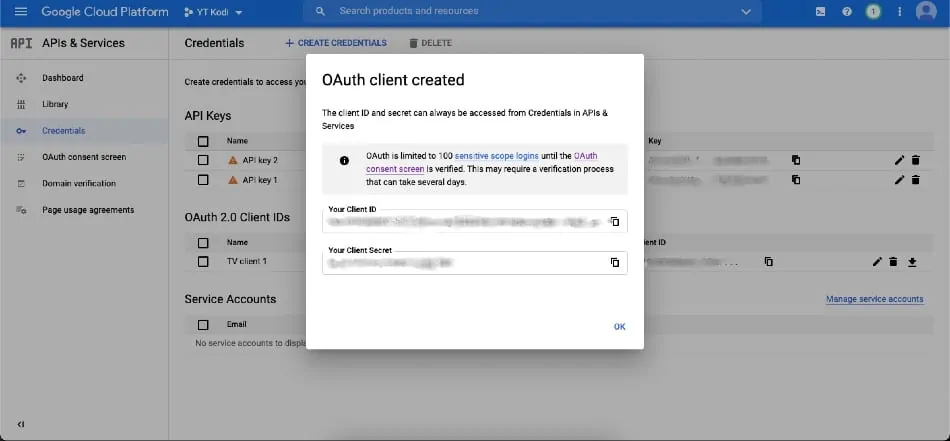
Congratulations! You got the API Key, Client ID, and Client Secret. We need to enter these credentials in the API section of the YouTube Kodi addon to get the content working. So, let’s go.
27. Launch Kodi.
28. Scroll down to Add-ons, and then scroll right and select YouTube.
29. Select Settings at the bottom.
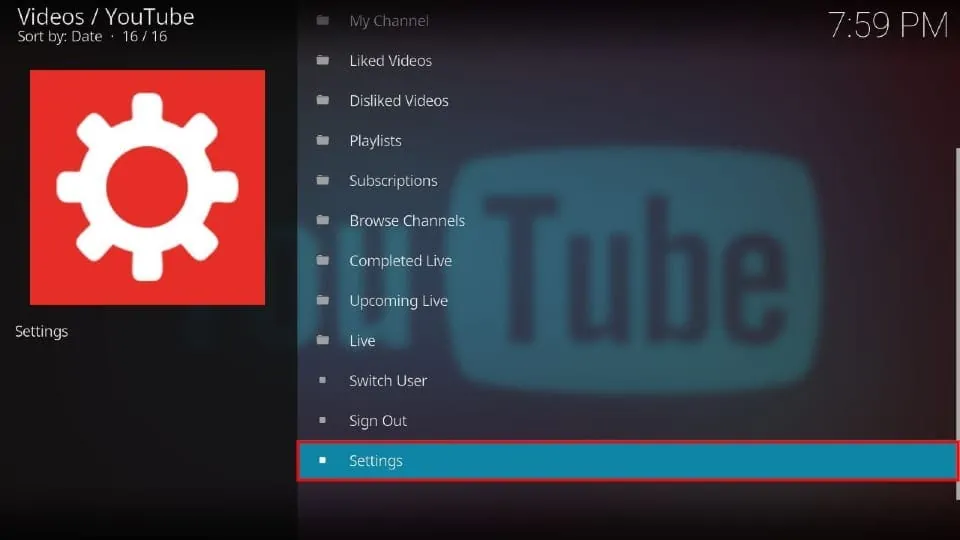
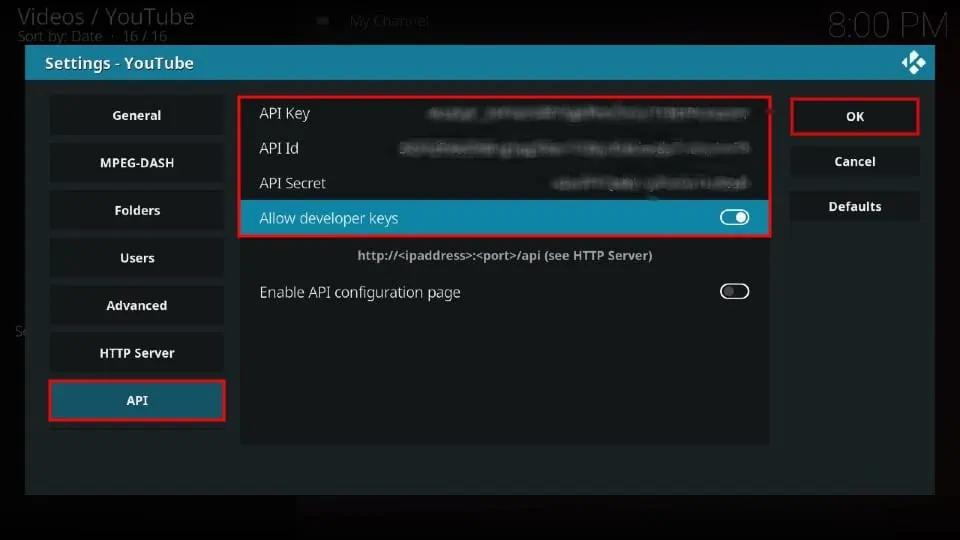
30. Choose the API tab and turn on Allow developer keys. Fill in the fields for API Key, API Id (your Client ID), and API Secret (your Client Secret). Click OK.
Finally, it is done!
Now, you can access all the content from the YouTube playlist hassle-free. I tried playing some content, and it worked well for me.


Wrapping Up
Kodi has tons of addons, but if you’re looking for fun with adult video content, you’ve got to try the BewbsandBeer Kodi addon. Comment on our post if you face any issues while installing the addon.
Related:
- How to Install FapZone Kodi Addon
- Install Cumination Kodi Addon
- Best Porn Kodi Addons
- How to Install XXX-O-DUS Kodi Addon

Suberboost Your FireStick with My Free Guide
Stay Ahead: Weekly Insights on the Latest in Free Streaming!
No spam, ever. Unsubscribe anytime.

Is there a brews and beer available without debrid?
Hi Michael,
The two categories available on BewbsandBeer are debrid only.