This article will demonstrate how to install the Daddylive Kodi addon on your device. The steps mentioned here apply to all Kodi-compatible devices, including FireSticks, Linux Systems, macOS systems, Computers, Smartphones, and others. I will also give a brief overview of the Daddylive Kodi addon by the end of this guide.
What is Daddylive Kodi Addon?
Daddylive, brought to you by the famous unverified DaddyLiveHD website, is a third-party live sports and TV addon.
The Live Sports section of Daddylive features schedules of upcoming and live events, categorized by sports such as soccer, cricket, boxing, snooker, and more. When you select an event, the add-on will display a list of streaming channels.
To directly access 660+ live TV channels, you can browse the Daddylive Kodi addon Live TV section.
Most channels are sports-related, but you can also find entertainment, news, and lifestyle networks.
If you get a playback error on Daddylive, I recommend using a trusted VPN to block interference from your ISP. I use and recommend ExpressVPN.
Attention Kodi Users!
Governments and ISPs worldwide monitor your online activities. If you use third-party Kodi addons, you should always use a reliable Kodi VPN to hide your identity and prevent issues with your streaming experience. Currently, your IP is visible to everyone.
I use ExpressVPN, the fastest and most secure VPN in the industry. It is very easy to install on any device, including Amazon Fire TV Stick, PC, Mac, and Smartphones. It also includes a 30-day money-back guarantee. If you're not satisfied with their service, you can request a refund. ExpressVPN is offering a special NEW YEAR deal: get 4 months free and save 78% on the 2-year plan.
Install and Use Best Kodi VPN | Why you must use a VPN at all times
Is Daddylive Kodi Addon Safe & Legal?
Daddylive is a third-party Kodi add-on available via THE CREW REPO, an unverified repository. There is no guarantee of 100% safety, as the addon developers are unknown.
At FireStickTricks.com, we recommend that our readers do their due diligence before installing any addon like Daddylive.
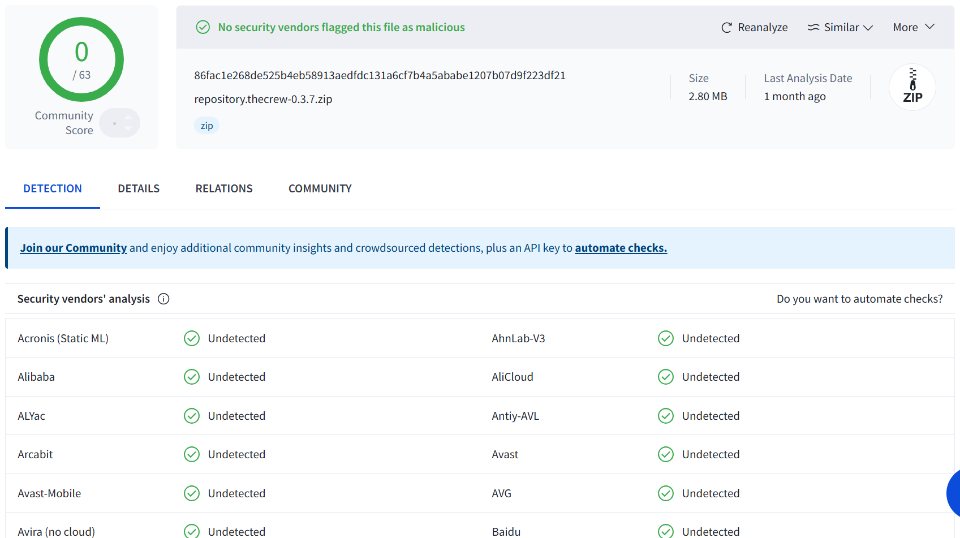
I always test the zip file of the repository that hosts the add-on I want to install on VirusTotal, an online virus checker tool. Fortunately, the tool showed no red flags with THE CREW REPO’s zip.
Community-made addons like Daddylive are known to operate in a legally gray area. Although Daddylive is just a mere scraper of live TV channel links that are publicly available, you have to be careful with what you stream via it.
At FireStickTricks.com, we advise our readers to use Daddylive only for educational purposes or to stream channels that are publicly available for free. Furthermore, we are strongly opposed to piracy and believe in accessing content on the internet only through legal means.
On a different note, if you want to keep your device, data, and internet activity private, we recommend using ExpressVPN. Your right to access the internet privately is your legal right!
Steps to Install Daddylive Kodi Addon
The steps to install the Daddylive Kodi addon are divided into four main parts:
- Allowing the Unknown sources.
- Addition of the repository link.
- Installation of the repository.
- Installation of the Daddylive Kodi Addon.
Please follow the attached screenshots for every step of the installation.
Legal Disclaimer: This guide is for informational purposes only. FireStickTricks.com does not own, host, operate, resell, or distribute any apps, services, or content mentioned.
Part 1: Allowing the Unknown sources
Since Kodi does not promote unofficial addons by default, we will first modify the settings in Kodi.
1. Click on the Settings Gear Icon on Kodi’s home screen.
![]()
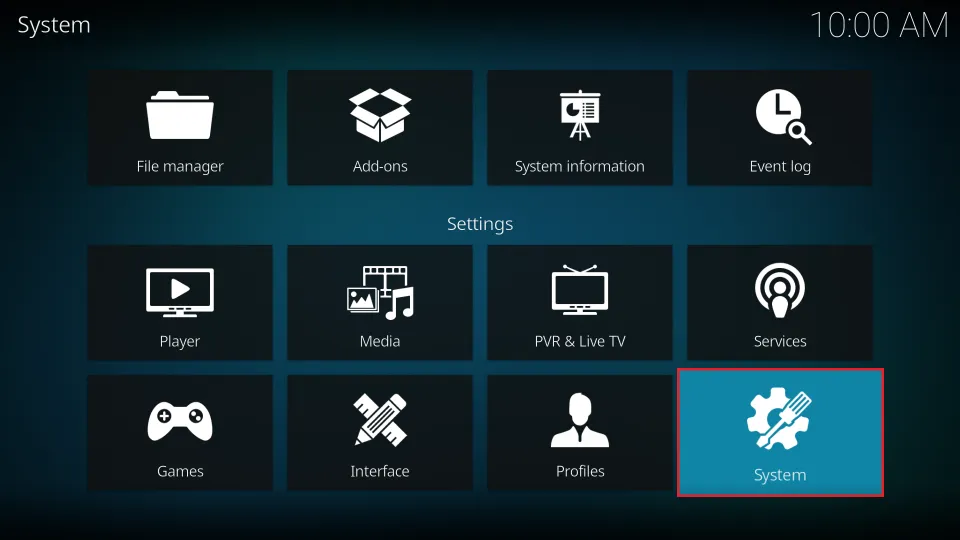
2. Select System.
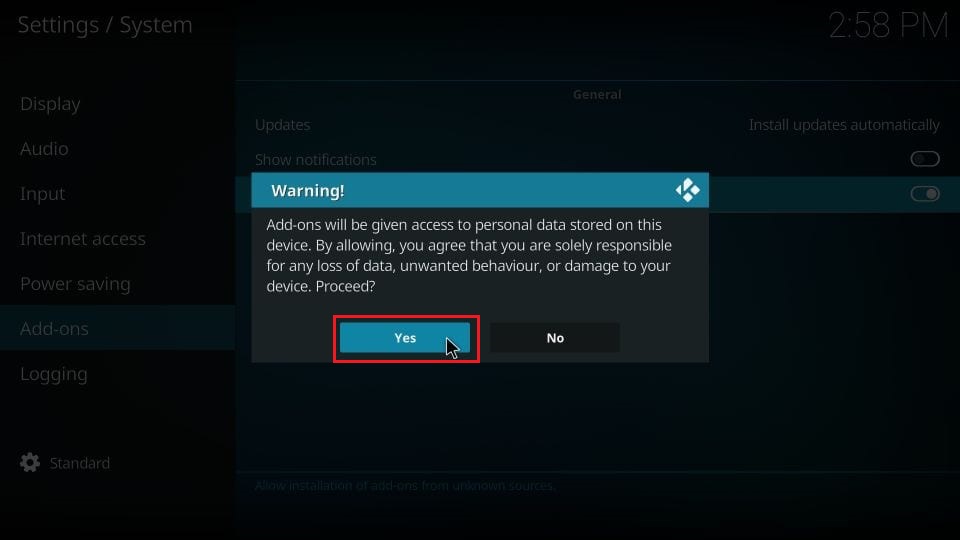
3. Select Add-ons and then Enable the Unknown sources.
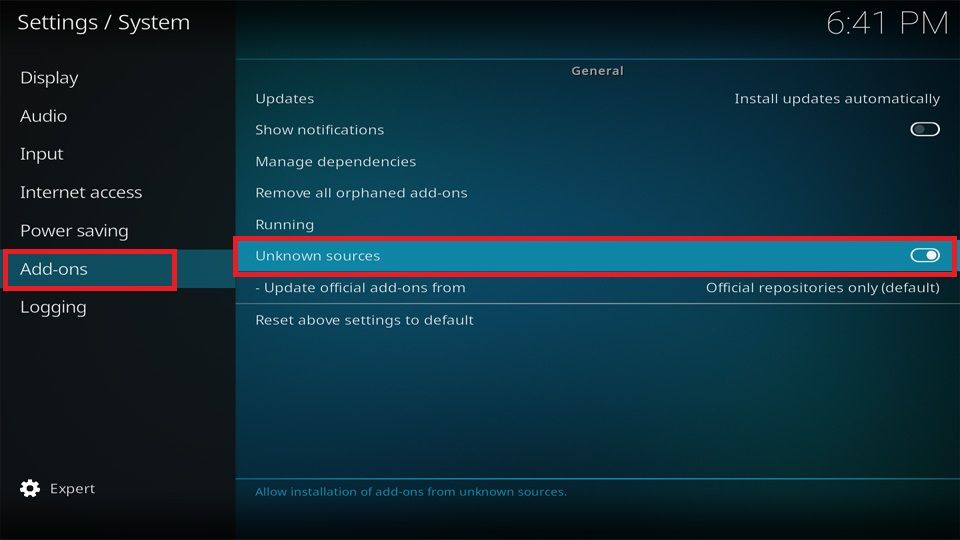
4. Select YES and return to the home screen.
Part 2: Adding the repository link
We will now add the repository link to Kodi.
1. Click on the Settings icon.
![]()
2. Select File Manager.
![]()
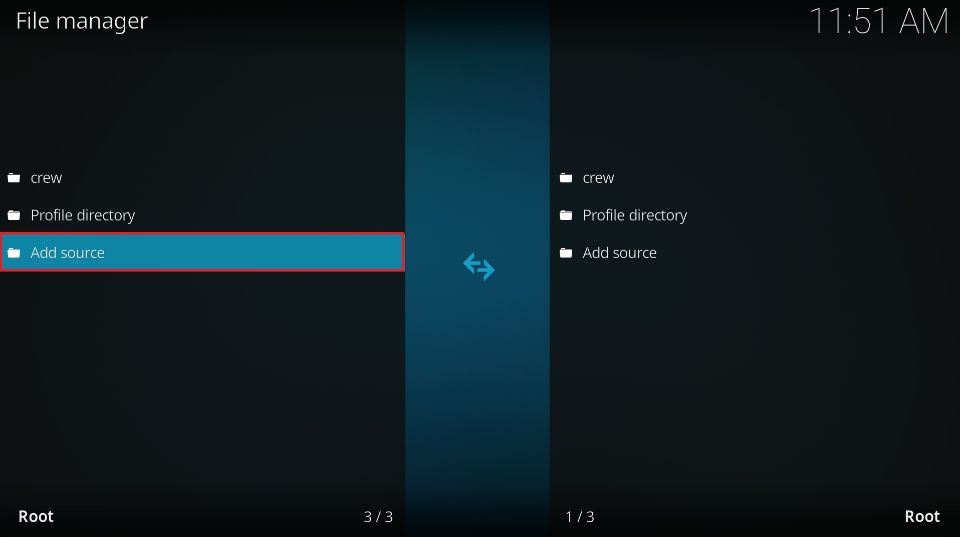
3. Select Add source.
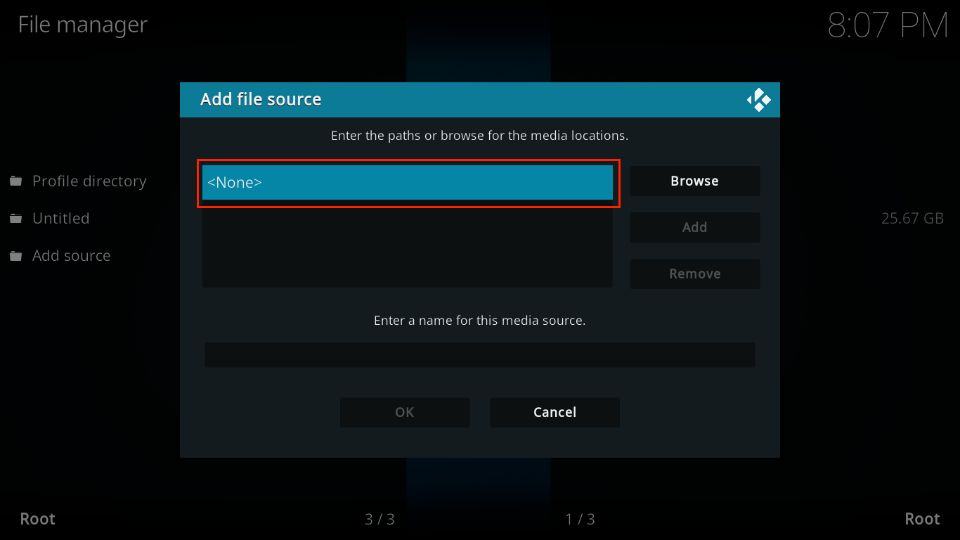
4. Select <None>.
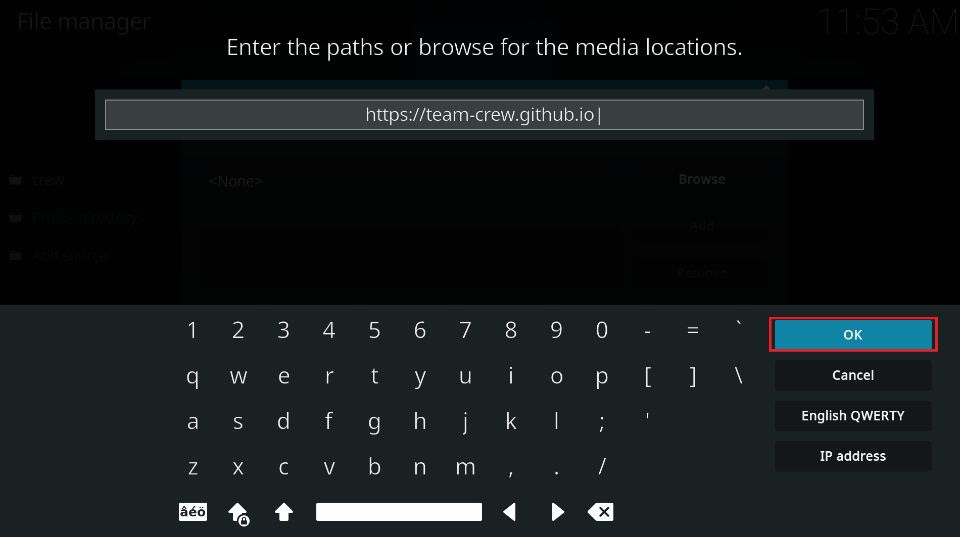
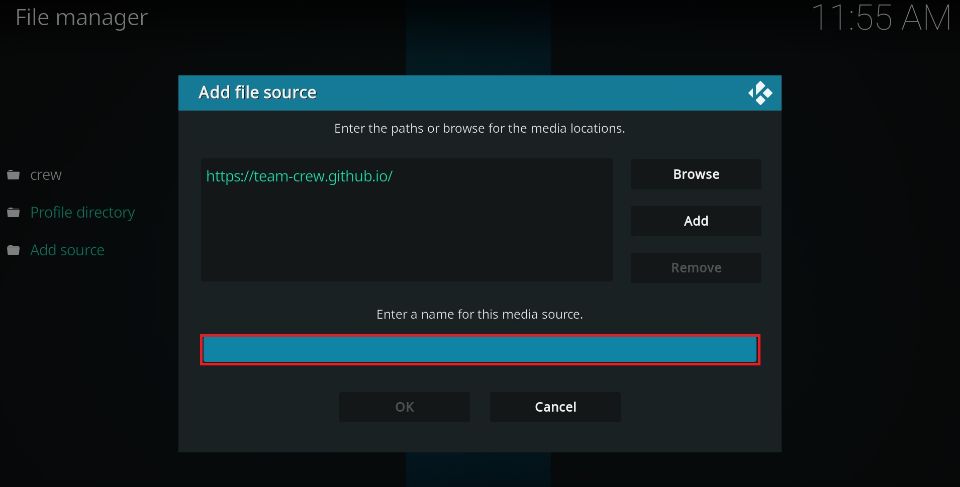
5. Type the link https://team-crew.github.io/ in the text box and press OK.
Note: The URL belongs to the Crew Repository. FireStickTricks is not related to its developers and does not own this URL.
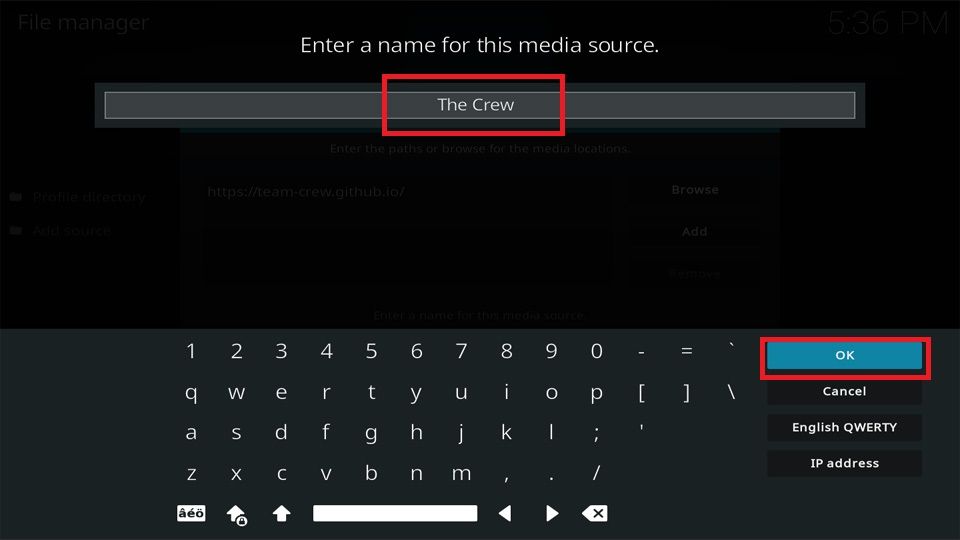
6. Click in the Enter a name box.
7. Give the source a name and select OK. I have named it The Crew. Remember the name during the further installation process.
8. Select OK.
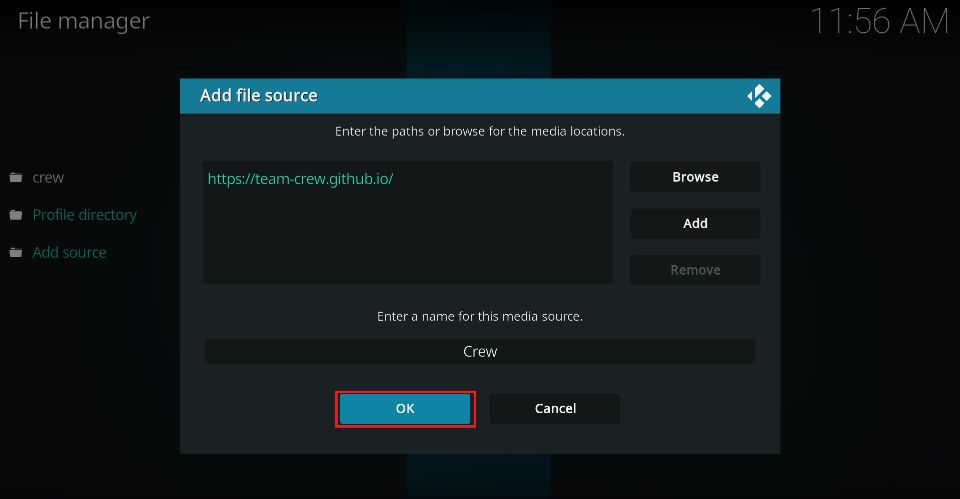
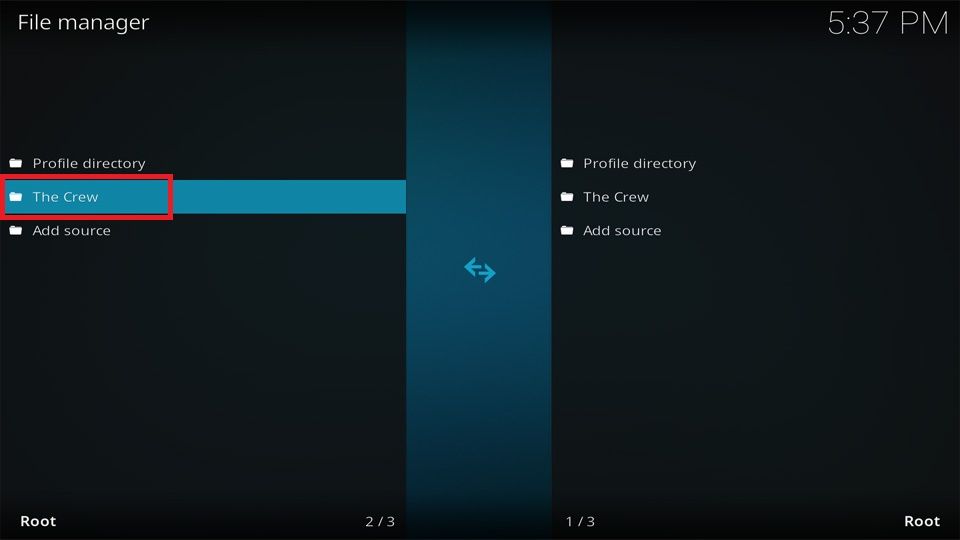
9. The repository source’s name will now appear on the screen. Confirm and return to the home screen.
Part 3: Installation of The Crew Repository
This section will install the Crew Repository that hosts the Daddylive Kodi Addon.
1. Click on Settings Gear Icon.
![]()
2. Select Add-ons.
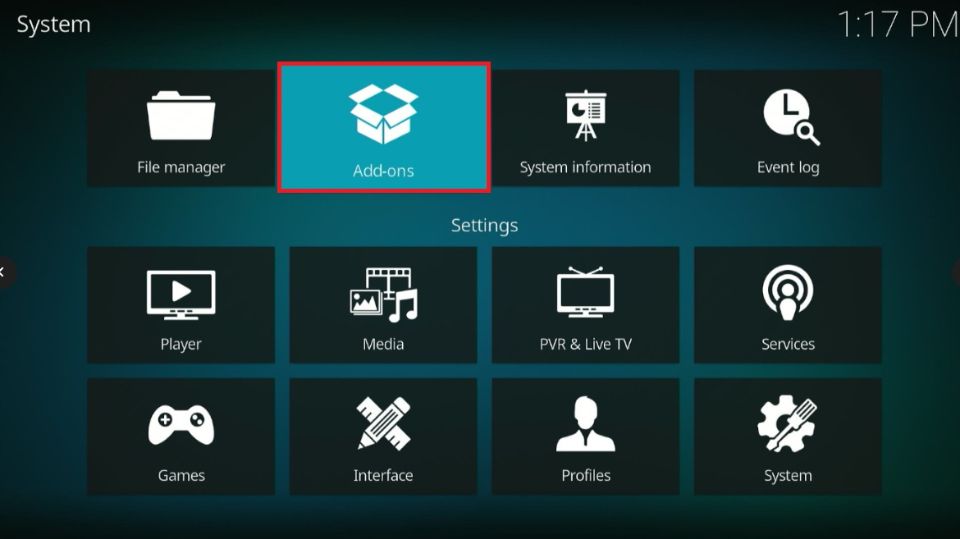
3. Select the option, ‘Install from zip file.’
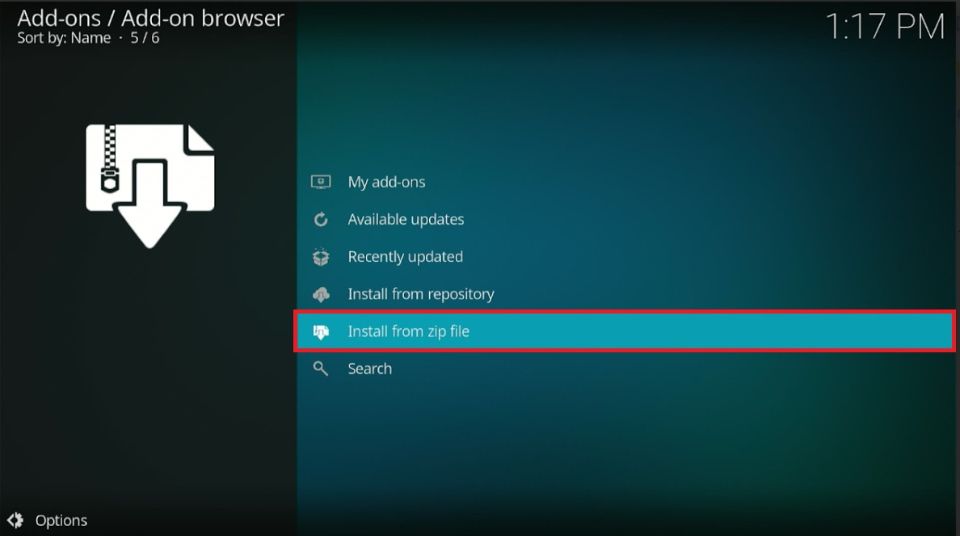
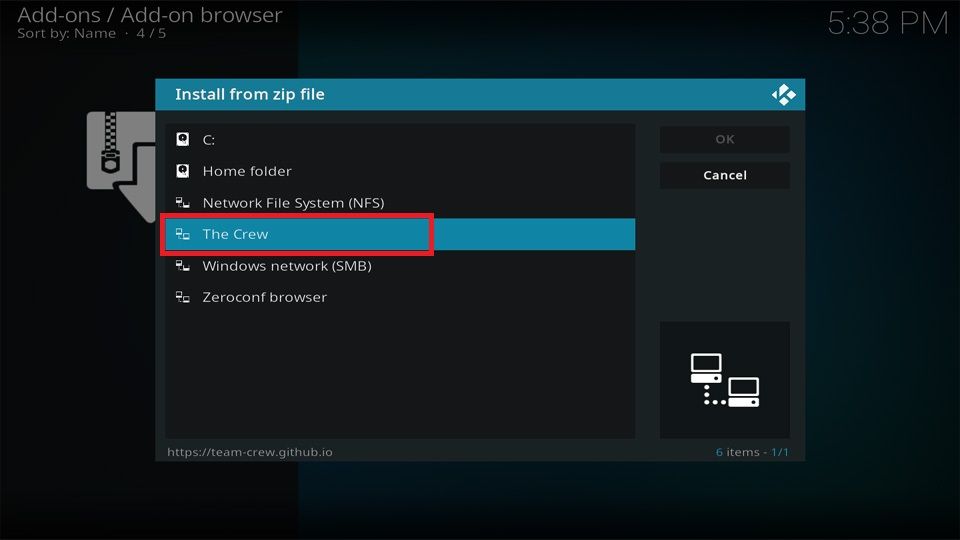
4. Select the repository source name (The Crew or the one you named).
5. Click on the link repository.thecrew-X.X.X.zip and wait for the screen. After a few seconds, you will notice The Crew Repository Add-ons installed prompt on the top right corner of the screen.
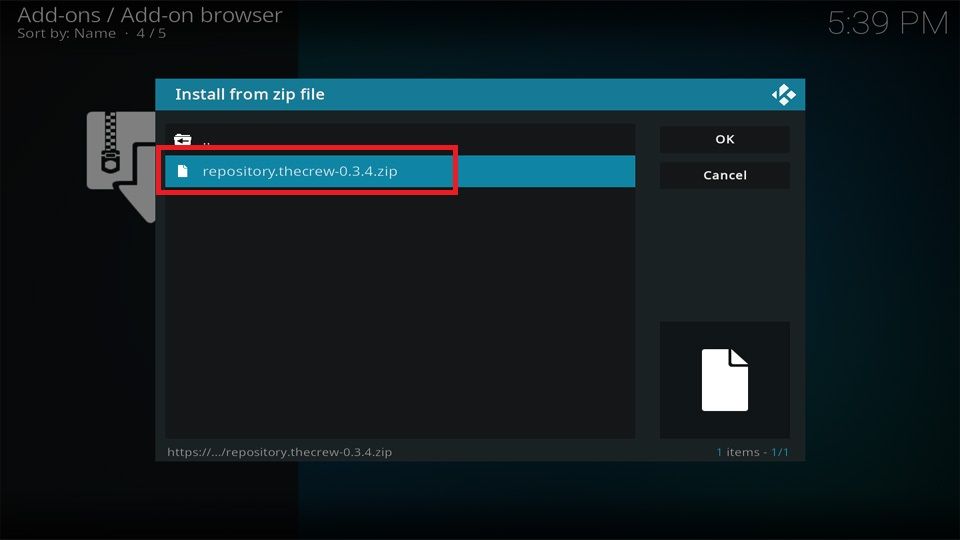
6. Return to the home screen when you see the installation success prompt.

Part 4: Installation of the Daddylive Kodi Addon
This part will install the Daddylive Kodi Addon. It should not take more than 2-4 minutes.
1. Click on the Settings icon.
![]()
2. Select Add-ons.
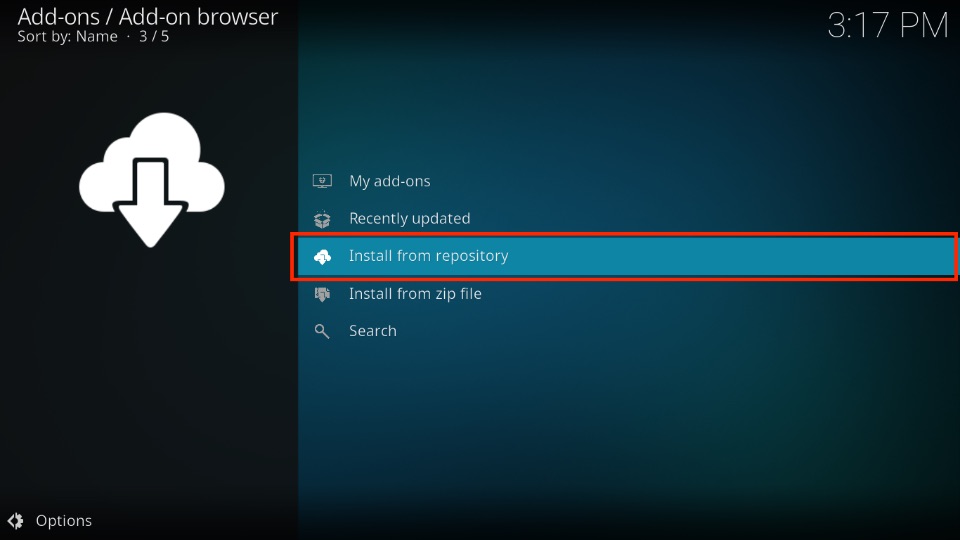
3. Select ‘Install from repository.’
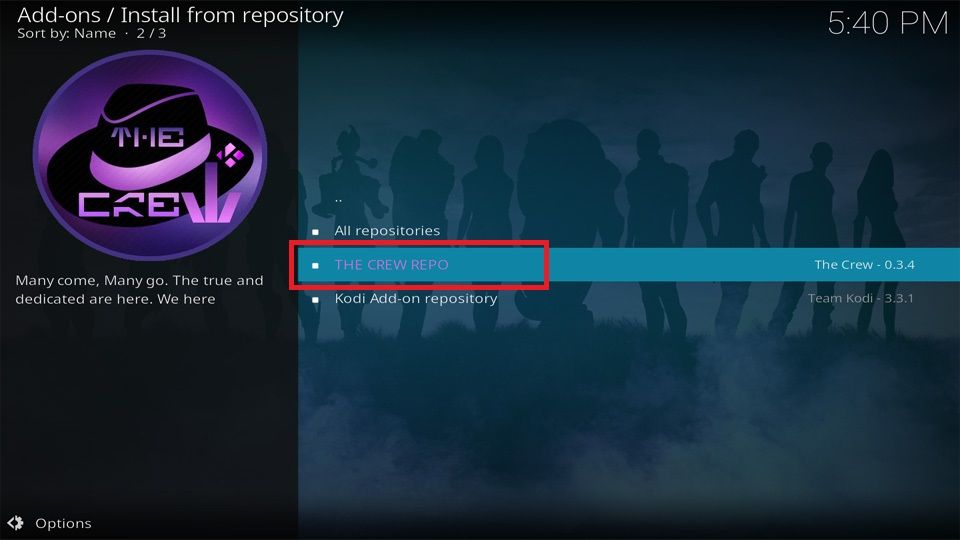
4. Select THE CREW REPO.
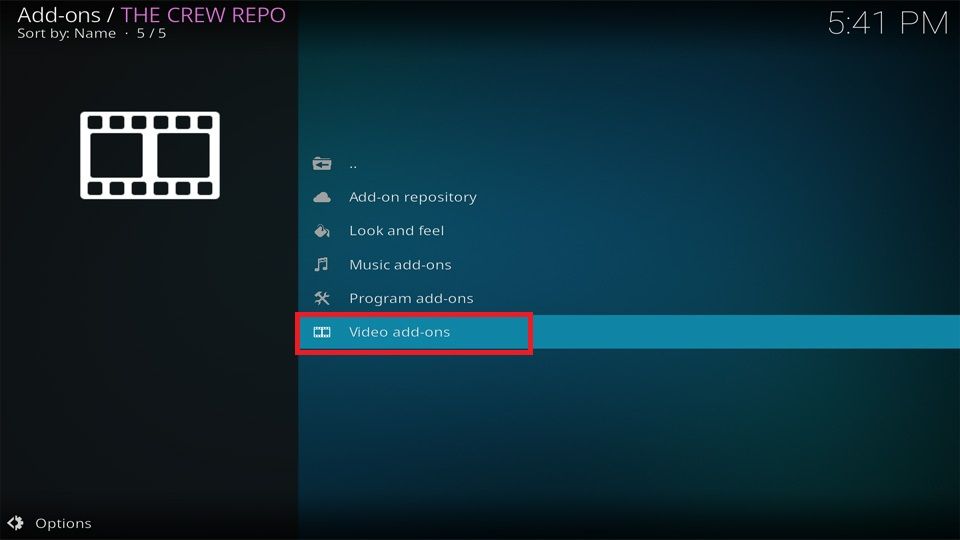
5. Select Video add-ons.
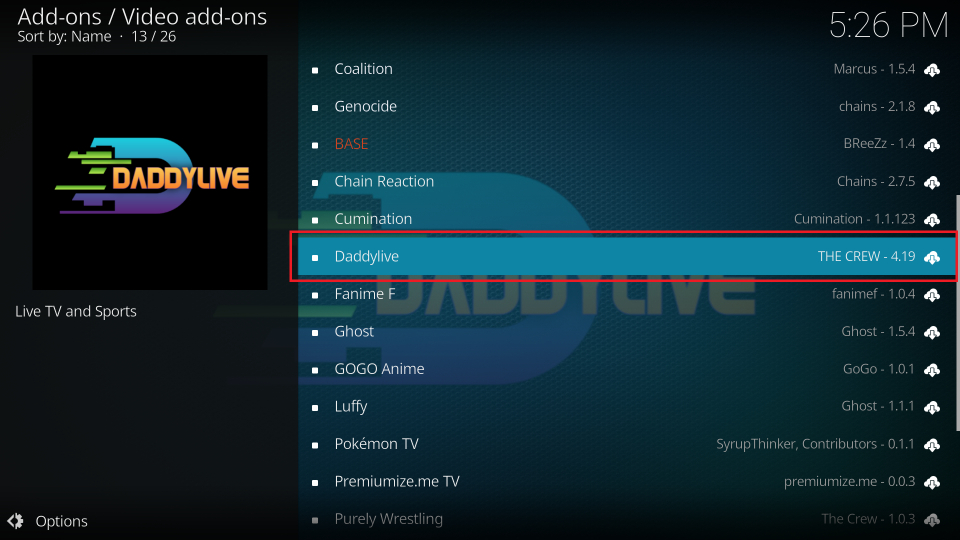
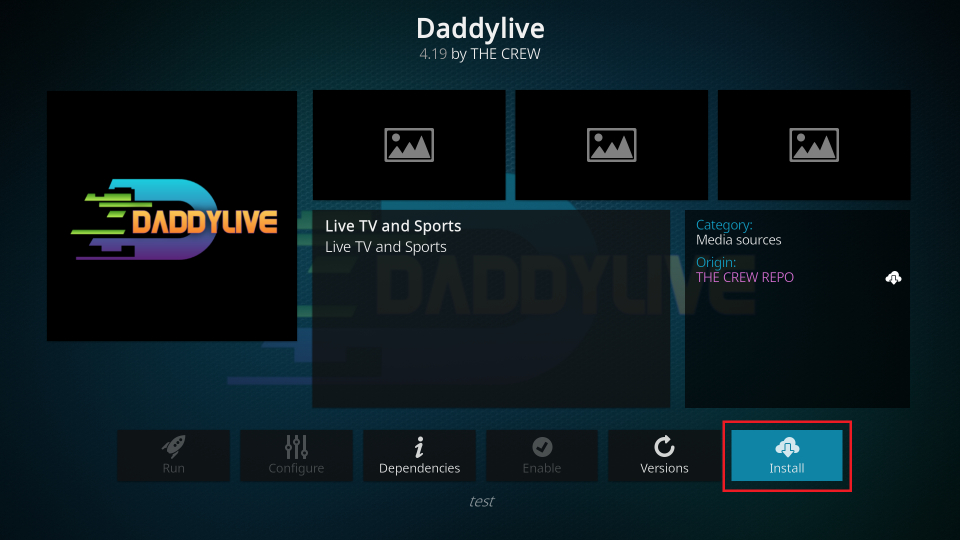
6. Scroll and select the Daddylive addon.
7. Click on Install.
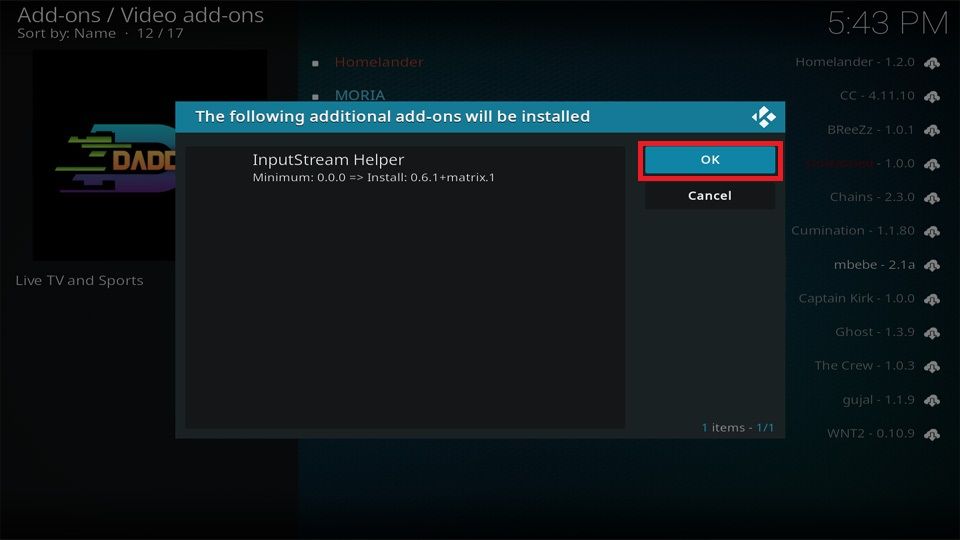
8. Select OK on the prompt box.
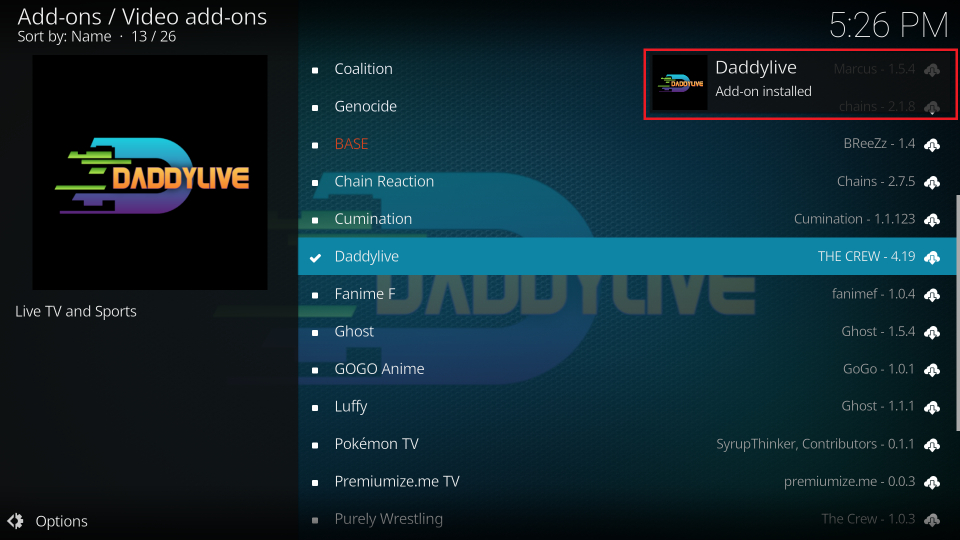
9. The message “Daddylive Add-on installed” will appear in the top right corner of the screen. This completes the installation of the Daddylive Kodi Add-on.
Now that the add-on is installed on your device, I’ll show you how to access and use it to stream content.
Before you start streaming with Kodi Addons or Builds, I would like to warn you that everything you stream on Kodi is visible to your ISP and Government. This means, streaming copyrighted content (free movies, TV shows, live TV, and Sports) might get you into legal trouble.
Thankfully, there is a foolproof way to keep all your streaming activities hidden from your ISP and the Government. All you need is a good VPN for Kodi. A VPN will mask your original IP which is and will help you bypass Online Surveillance, ISP throttling, and content geo-restrictions.
I personally use and recommend ExpressVPN, which is the fastest and most secure VPN. It is compatible with all kinds of streaming apps and devices.
NOTE: We do not encourage the violation of copyright laws. But, what if you end up streaming content from an illegitimate source unintentionally? It is not always easy to tell the difference between a legit and illegal source.
So, before you start streaming on Kodi, here's how to get VPN protection in 3 simple steps.
Step 1: Get the ExpressVPN subscription HERE. It comes with a 30-day money-back guarantee. Meaning, you can use it free for the first 30-days and if you are not satisfied with the performance (which is highly unlikely), you can ask for a full refund.
Step 2: Click HERE to download and install the ExpressVPN app on your streaming device. If you are using a FireStick, I have given the exact steps starting with Step 4 below.
Step 3: Click the Power icon to connect to a VPN server. That's all. Your connection is now secure with the fastest and best VPN for Kodi.

The following are the steps to install Kodi VPN on your Fire TV devices. If you have other streaming devices, follow Step 1-3 above.
Step 4: Subscribe to ExpressVPN HERE (if not subscribed already).
Step 5: Go to Fire TV Stick home screen. Click Find followed by Search option (see image below).

Step 6: Type Expressvpn in the search bar and select when it shows up.

Step 7: Click Download.

Step 8: Open the ExpressVPN app and Sign in using the email ID and password that you created while buying the ExpressVPN subscription.

Step 9: Click the Power icon to connect to a VPN server. That’s all. Your FireStick is now secured with the fastest VPN.

An Overview of the Daddylive Kodi Addon
On the Kodi home screen, select Add-ons on the left panel and click on the DADDYLIVE thumbnail.
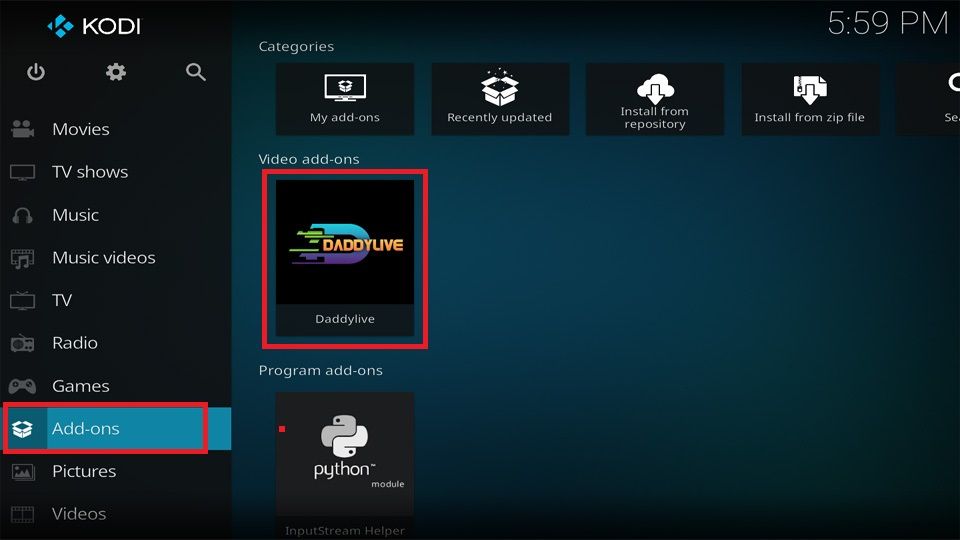
The Daddylive Kodi Addon’s home screen has two main sections: LIVE SPORTS and LIVE TV.
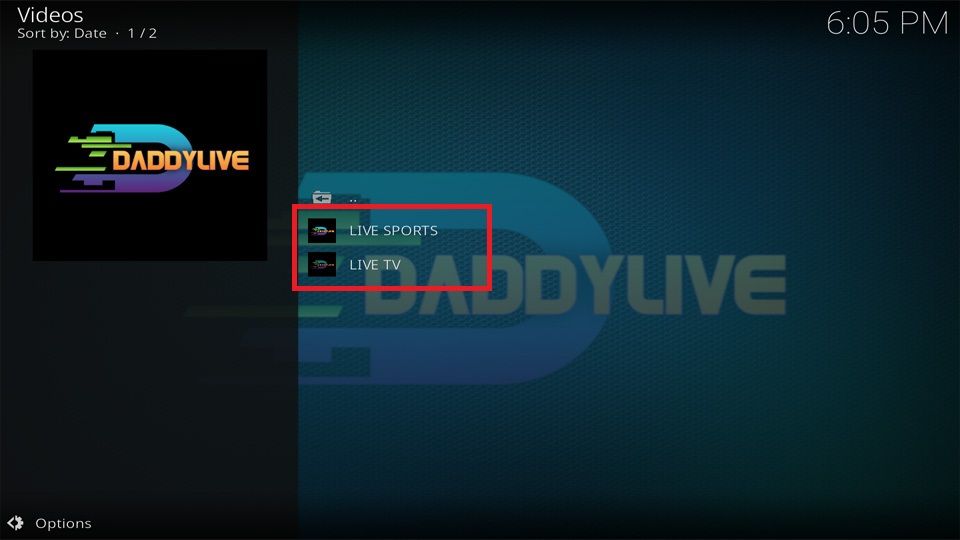
You can select each section to see what has been added. LIVE SPORTS offers almost every type of sports content worldwide, while the LIVE TV section offers miscellaneous content.
The Live TV section allows you to watch live sports content, movies, TV shows, kids’ animation, and much more.
Lastly, I recommend using a trusted VPN service. While you can choose any VPN service on the web, I recommend ExpressVPN. It is the fastest and most secure VPN.
Frequently Asked Questions
DaddyLive is a third-party Kodi addon that streams live TV channels, mainly focused on sports and international content. It pulls content from the DaddyLive website and organizes it for easy access within Kodi.
Since DaddyLive accesses unofficial streaming sources, its legality depends on your region. Using a trusted VPN is recommended to protect your privacy and avoid potential legal issues.
Yes, to install third-party addons like DaddyLive, go to Settings > System > Add-ons, then enable Unknown Sources.
Yes, using a VPN helps hide your streaming activity and bypass geo-restrictions, which is especially important when using third-party addons.
No, DaddyLive is free to use and doesn’t require registration or login credentials. However, since it pulls streams from the web, availability may vary.
Yes, DaddyLive can be installed on any device that supports Kodi, including FireStick, Android TV, Windows, macOS, and more.
Wrapping Up
I hope this guide to installing the Daddylive Kodi addon on your device has been helpful. If there is anything else you would like to know about the addon, you can ask in the comments section below. I will respond with the best available solution.
Related:
- How to Install Red Bull TV Kodi Addon (Official)
- How to Install Rising Tides Kodi Addon
- Best Kodi Sports Addons – Watch Live Sports on Kodi
- Mad Titan Sports Kodi Addon

Suberboost Your FireStick with My Free Guide
Stay Ahead: Weekly Insights on the Latest in Free Streaming!
No spam, ever. Unsubscribe anytime.

Leave a Reply