In this guide, I will show you how to install any addon on a Kodi build. The method demonstrated here works on Kodi 20 Nexus and lower versions.
A Kodi build is a package that bundles preinstalled add-ons, tools, utilities, all in one place. The builds also lend a new appearance to the Kodi interface with custom skins; a lively build is a desirable change from the monotonous default interface of Kodi. This in turn also changes the navigation structure and how you interact with Kodi. But, most importantly, Kodi builds come with several popular preinstalled addons sparing you the hassles of installing multiple addons individually.
I told you that builds come with many preinstalled addons. But, the build you are using may not necessarily have every addon you wish to use. Thankfully, all the builds also allow you to install additional Kodi addons. You may install just about any addon you want. However, as I have already said, builds have their own interface and hence the addon installation process may vary (albeit only slightly).
The objective of this guide is to show you how to install those addons over Kodi builds that don’t come bundled with the build. Keep reading!
Attention Kodi Users!
Governments and ISPs worldwide monitor your online activities. If you use third-party Kodi addons, you should always use a reliable Kodi VPN to hide your identity and prevent issues with your streaming experience. Currently, your IP is visible to everyone.
I use ExpressVPN, the fastest and most secure VPN in the industry. It is very easy to install on any device, including Amazon Fire TV Stick, PC, Mac, and Smartphones. It also includes a 30-day money-back guarantee. If you're not satisfied with their service, you can request a refund. ExpressVPN is offering a special NEW YEAR deal: get 4 months free and save 78% on the 2-year plan.
Install and Use Best Kodi VPN | Why you must use a VPN at all times
Quick Intro
In this guide, I will use Element Reborn Build to demonstrate how to install addons over the Kodi builds. Even though each build has a unique interface, the functions and navigation remain more or less the same. If you are using any other build, you will find a similar, if not the same, set of options.
The addon installation process with a build is also much the same as with the default Kodi interface (that uses Estuary skin).
I’m using Element Reborn Kodi build in this demonstration. It is one of the most widely used builds and packs several popular addons. You may also install a different build from cMaN’s Wizard as it has many. You can also explore more builds for Kodi outside cMaN’s Wizard.
Prepare to Install Kodi Addons on Builds
The first thing you want to decide is which addon you want to install. You could pick one of the best Kodi addons and get started. For this guide, I am going with the LiveNet addon from LooNatics Asylum Repo. You may choose a different addon that isn’t preinstalled with Element Reborn Build.
The next thing we want to do is make sure the Unknown Sources is active/enabled so that Kodi accepts third-party add-ons. Now, since you have already installed a third-party build, you must have already turned this option on. But, just in case you disabled it for some reason, let’s enable it again.
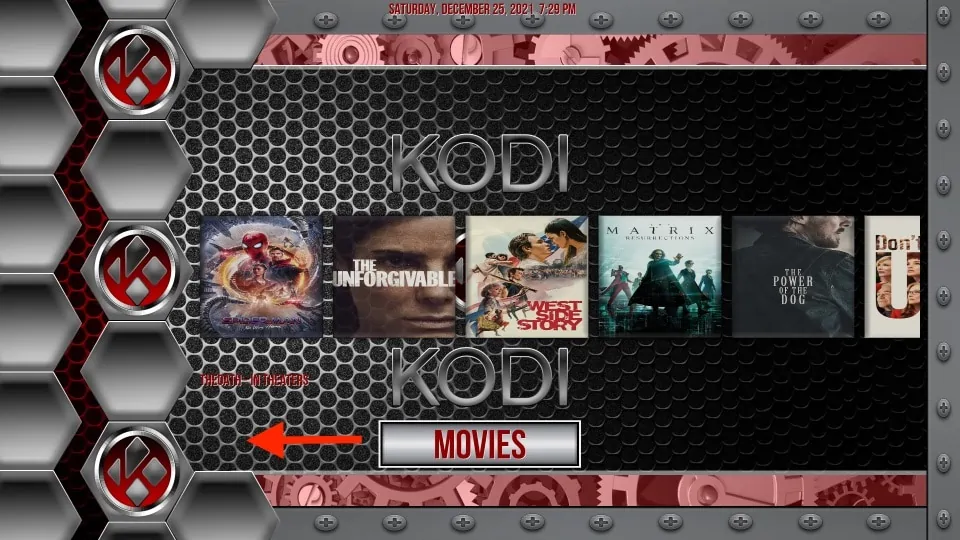
1. Launch Kodi and this is the home screen you see with Element Reborn Build. Go to the left side of the menu side to land on the System page.
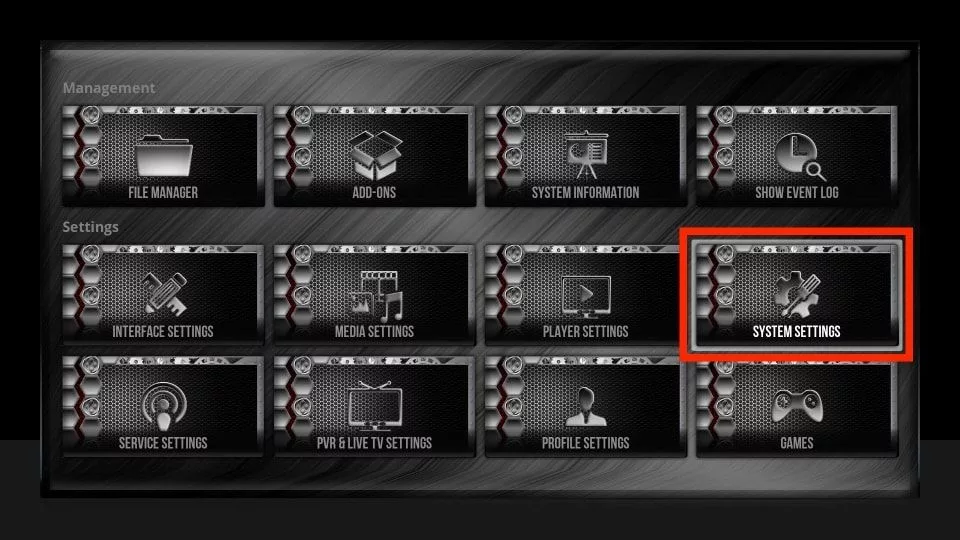
2. Select System.

3. Now, click System Settings or System on the list of options.
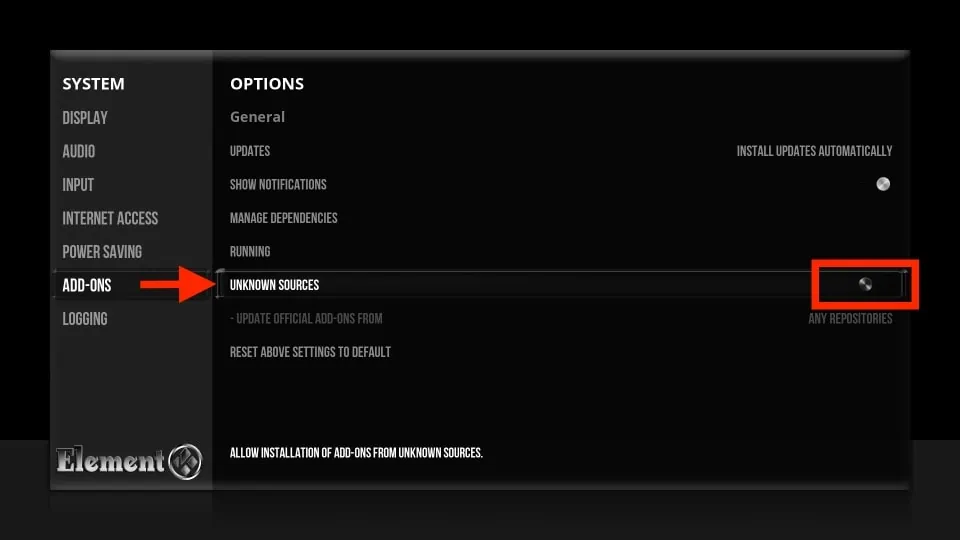
4. Select Add-ons on the left side of the next window. You will find Unknown Sources on the right side. If it is disabled, click it to turn it on.
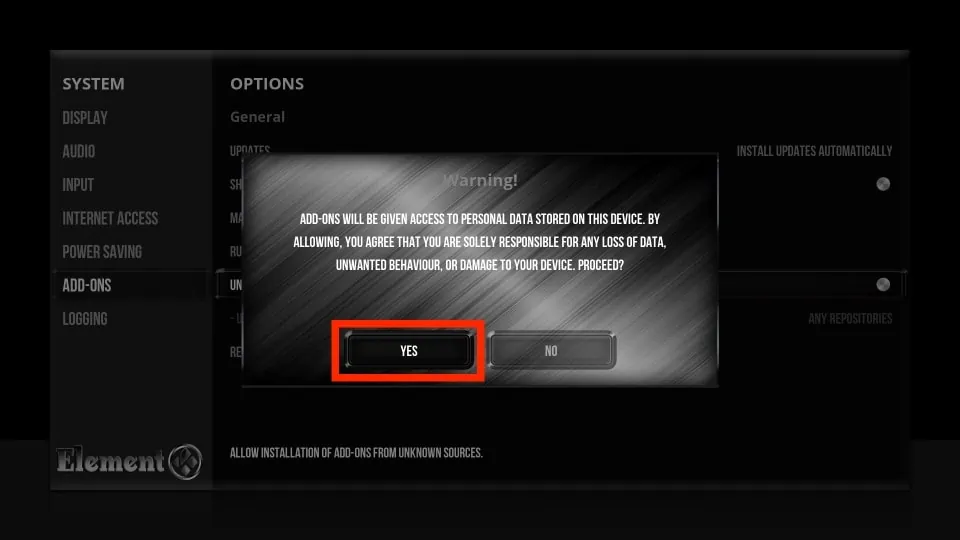
5. Click Yes to continue.
When that’s taken care of, you can start installing Addons over Element Reborn Build. I will show you how.
How to Install Kodi Addons on Builds
I broke up the installation process the same as usual. Here are the parts:
- Part 1: Add the source URL to Kodi
- Part 2: Install the repository
- Part 3: Install the desired addon from the repository
Of course, the Element Reborn Build’s interface is different than the default Kodi interface. But the options are much the same.
Part 1: Add the Source URL to Kodi
Follow these installation steps:
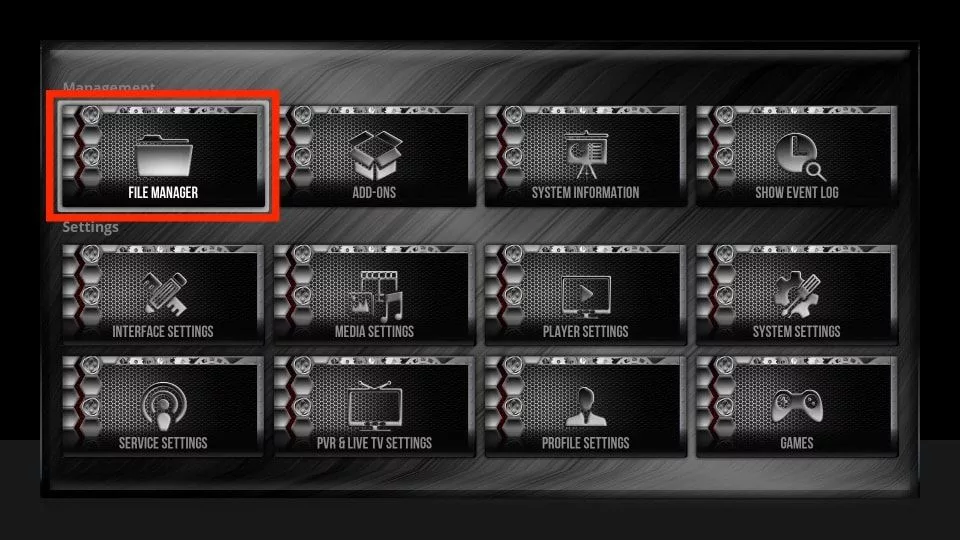
1. On the default Kodi interface, you would navigate from the home screen to Settings > File Manager to add the source. However, the Element Reborn Build interface offers the File Manager option inside the System page.
Whichever build you’re using, find File Manager among your settings.
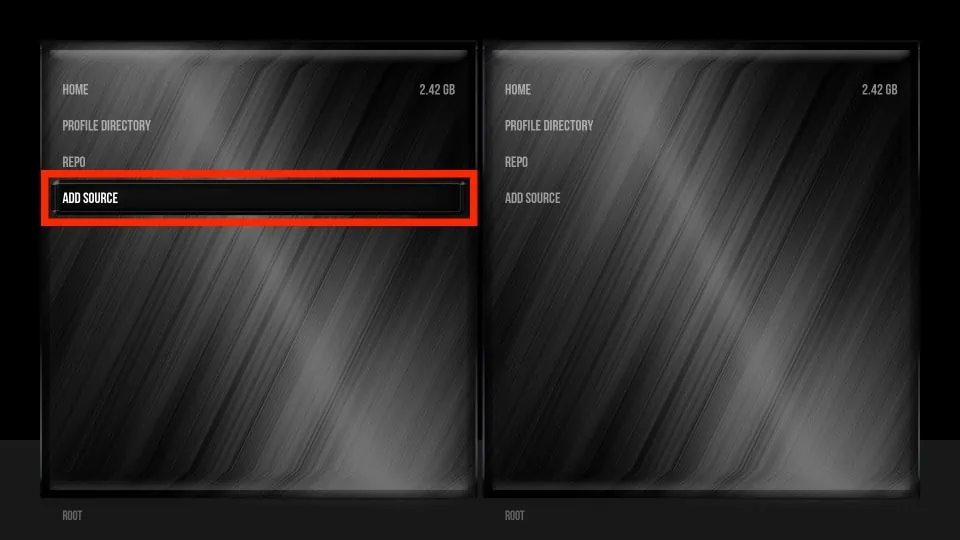
2. Now, go ahead and click Add source either on the left or right (it makes no difference).
3. Click <None>.
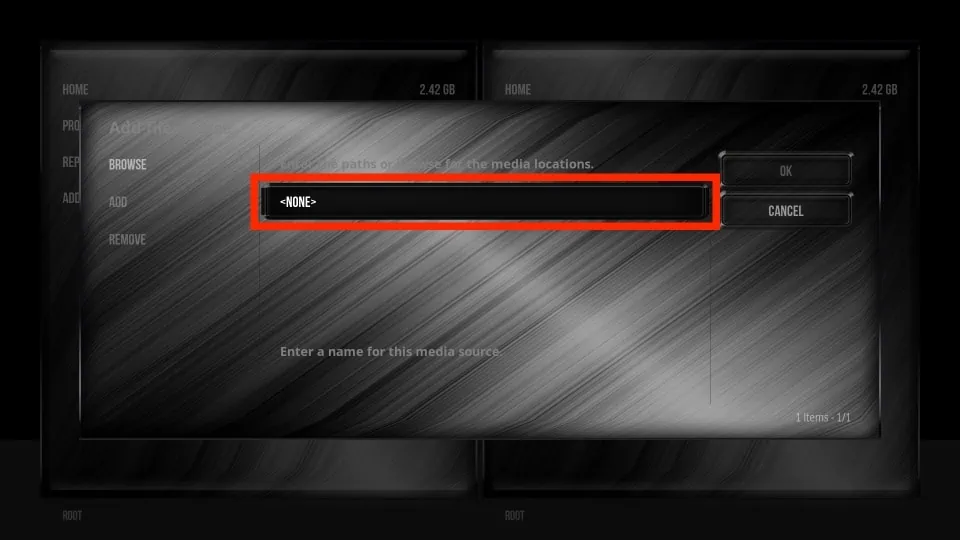
4. Type in the source URL in the text field. Click the Done or OK button.
Note: As I mentioned, I’m going to install LiveNet from the LooNatics Asylum Repository. If you want to try a different addon, check out my list of the best Kodi addons.
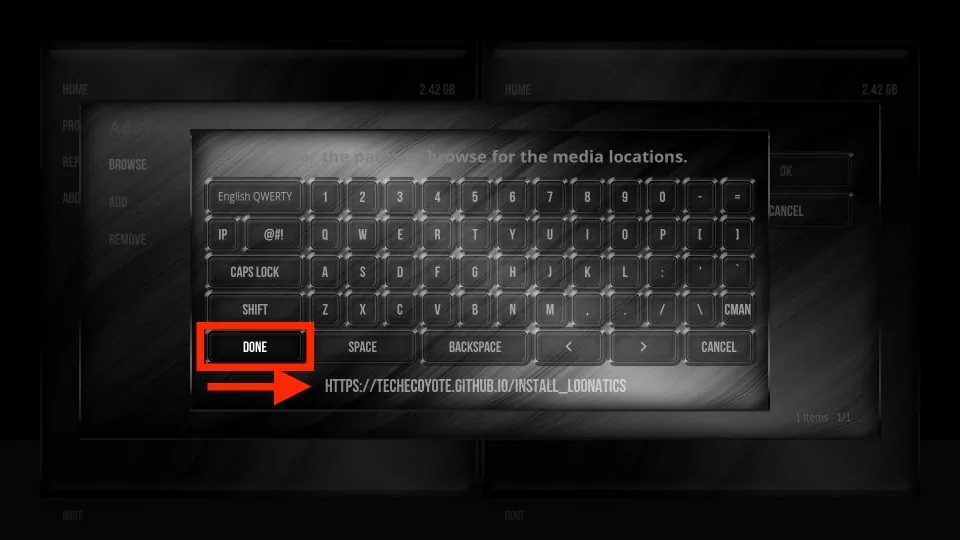
5. Next, type in a name for the source you entered in the previous step. You may add any name you like.
Note: I am going with the default one, INSTALL_LOONATICS.
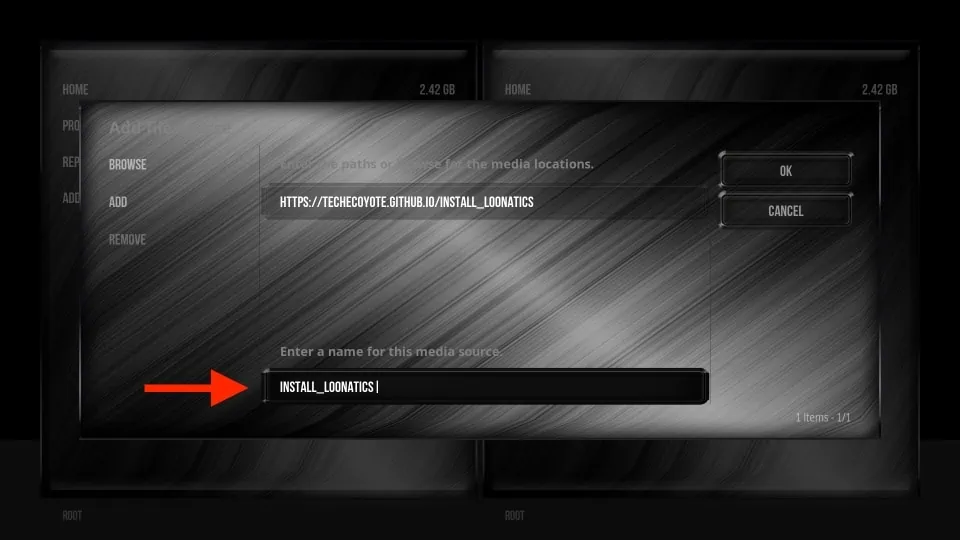
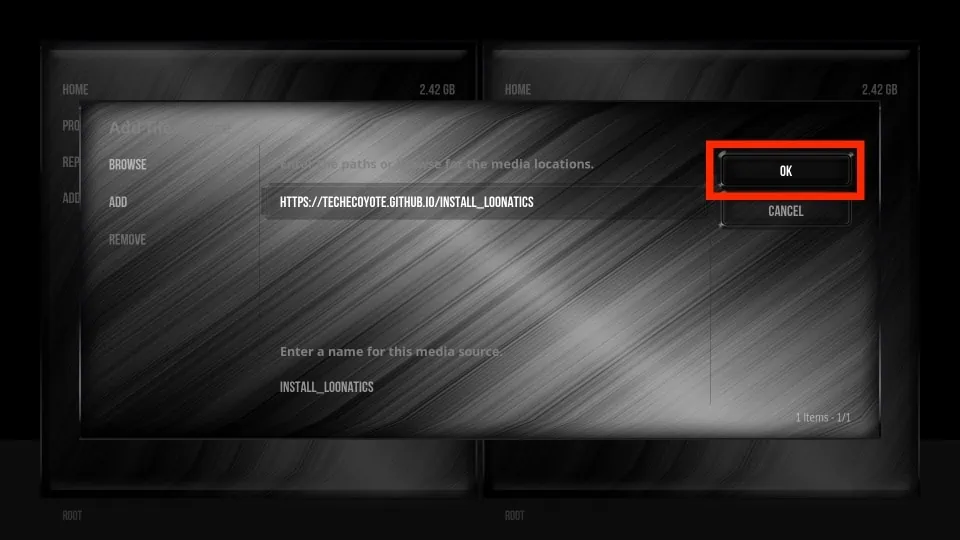
6. Click on OK to continue.
Part 2: Install the Repository
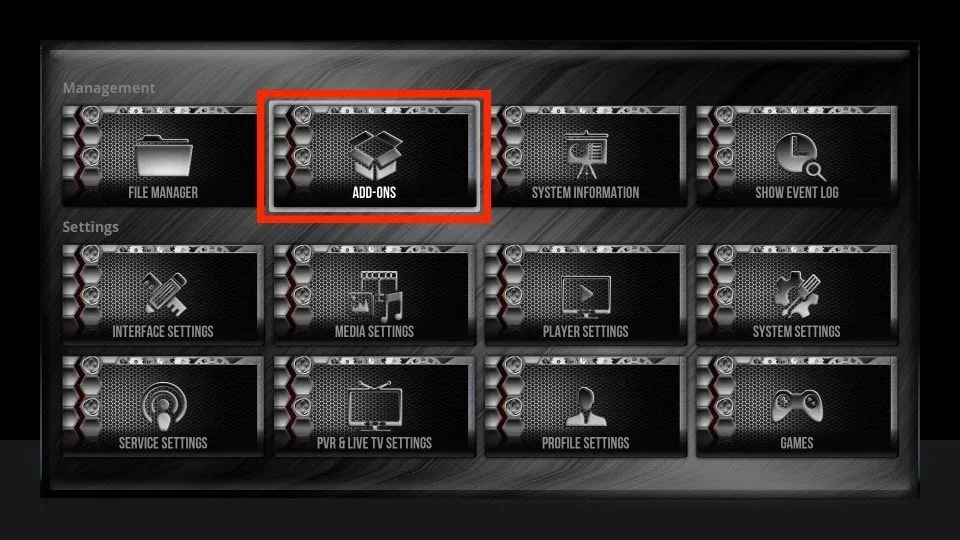
1. Now, go one page back and click Add-ons.
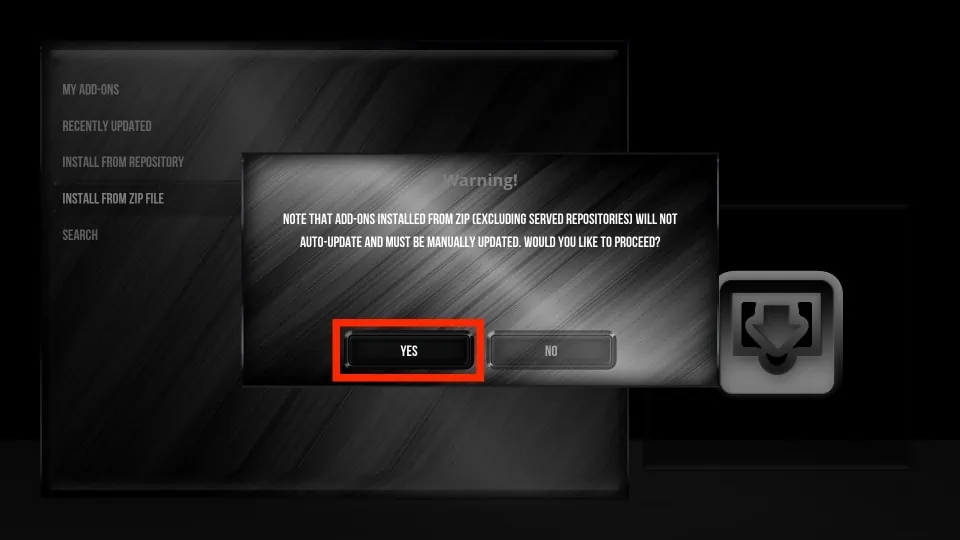
2. Open the option Install from zip file.
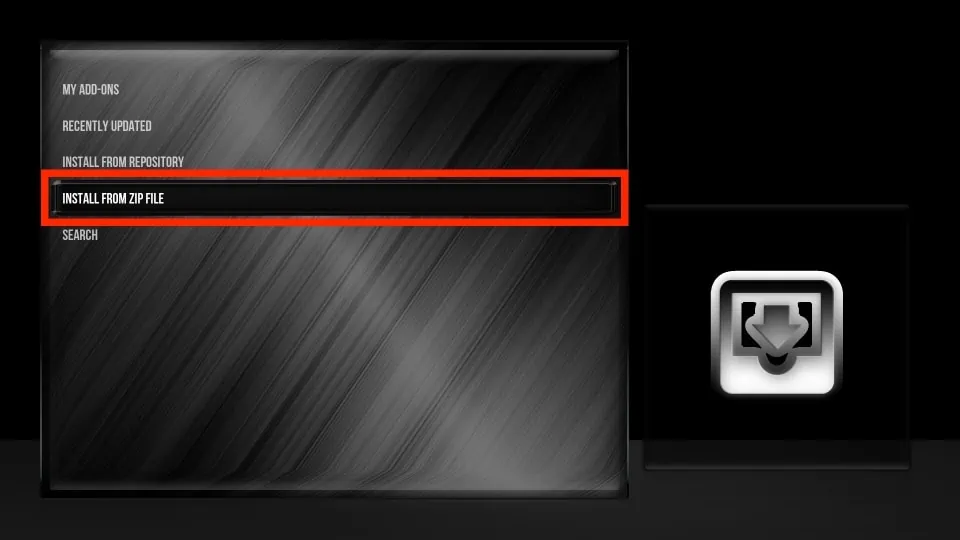
3. On Kodi 19, you’ll receive a warning. Click Yes to continue.
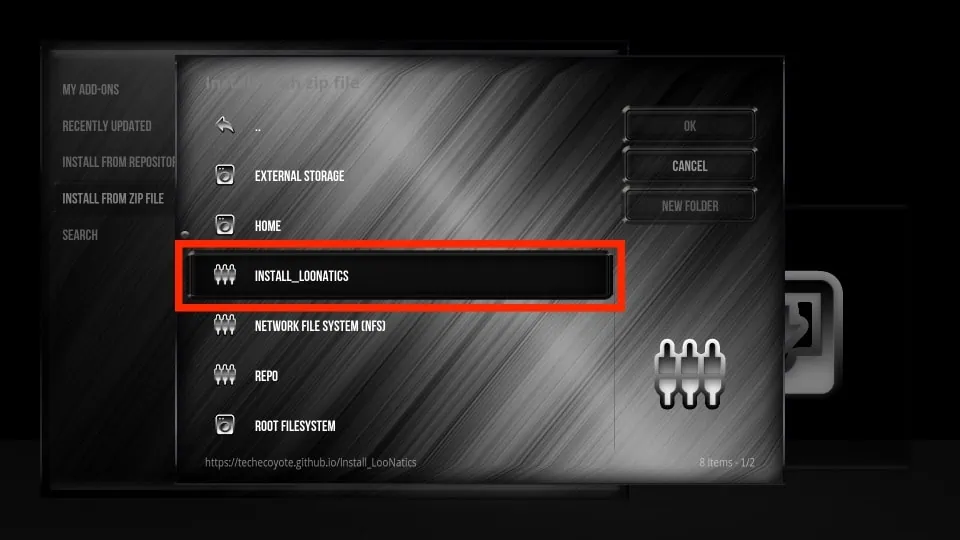
4. Click the name you added earlier. In my case, it is INSTALL_LOONATICS.
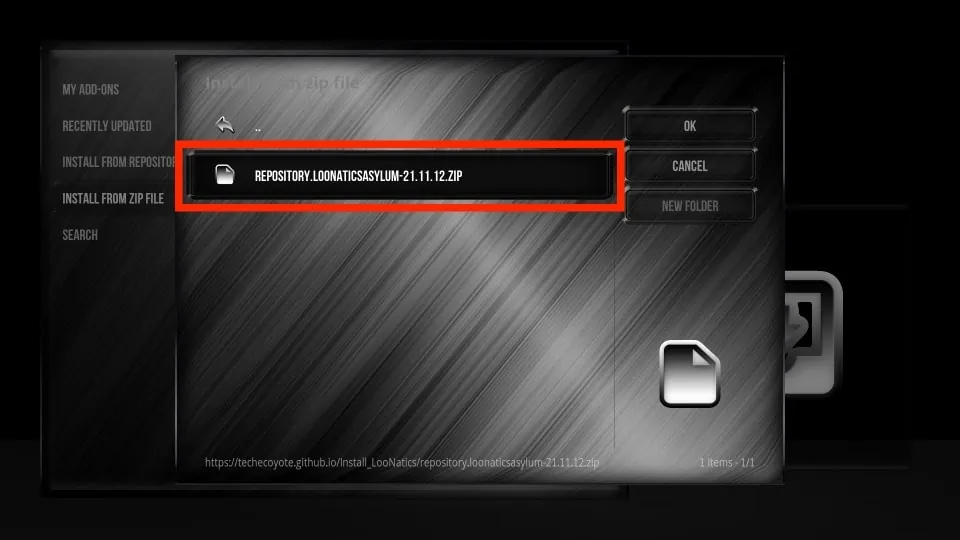
5. Now, click the file that contains repository.[your repository name].zip.
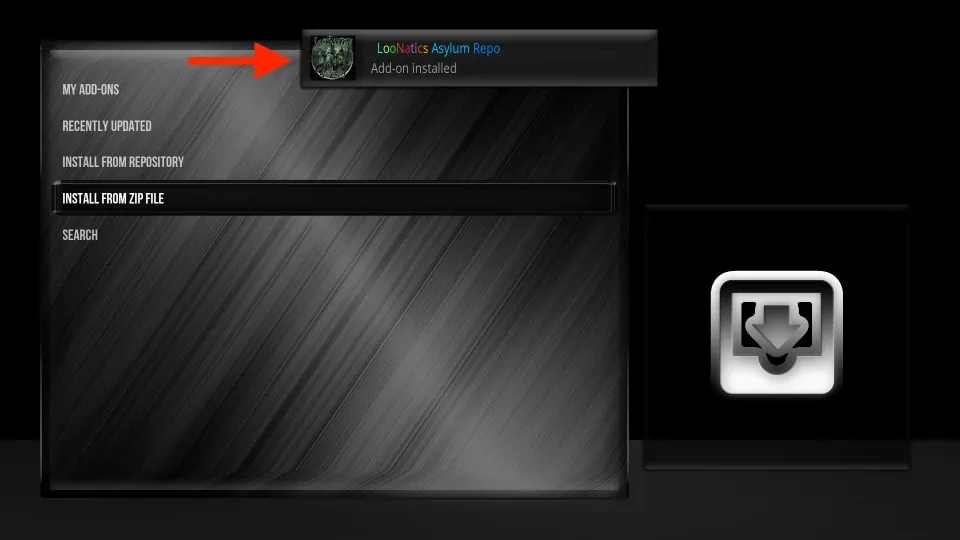
6. Wait until the notification Add-on installed is displayed on the top of your screen.
Part 3: Install the Desired Addon From the Repository
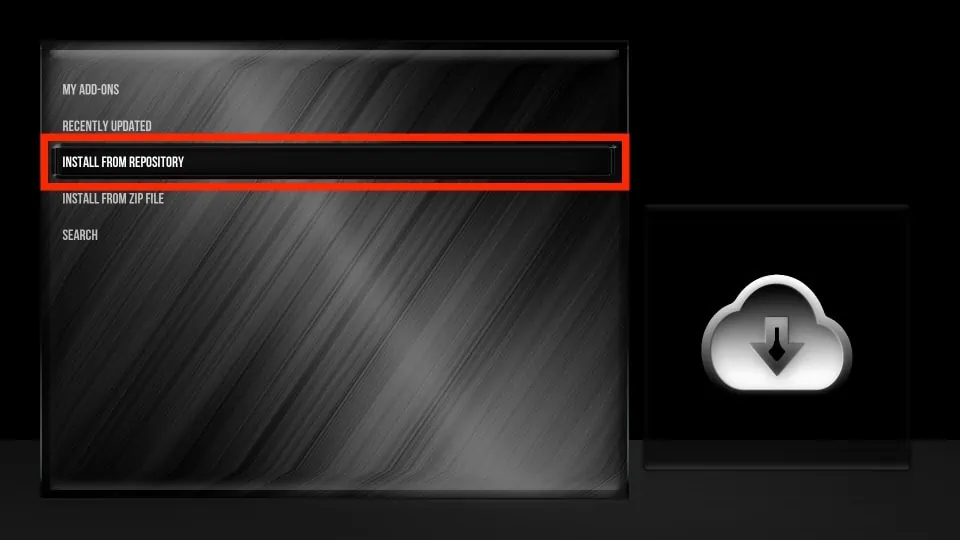
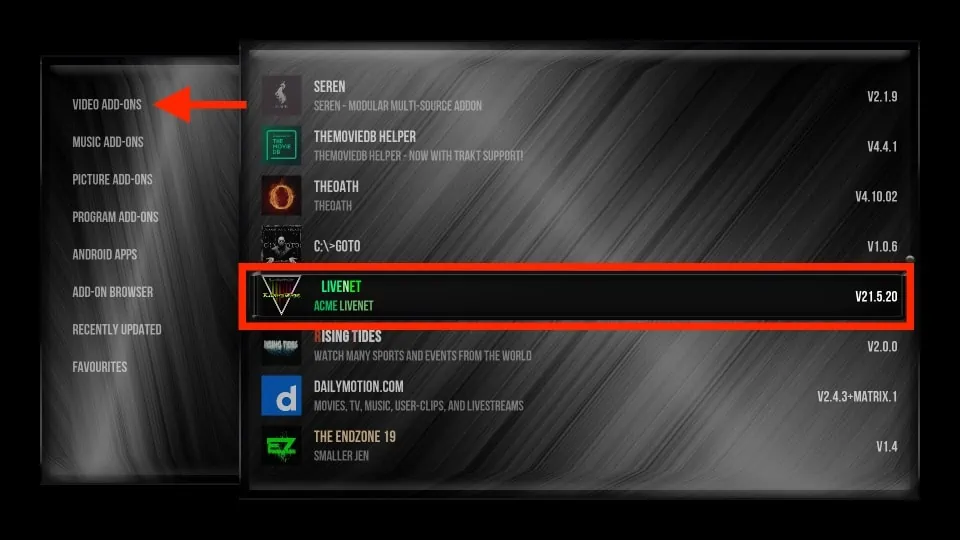
1. Stay on the same screen and click Install from repository.
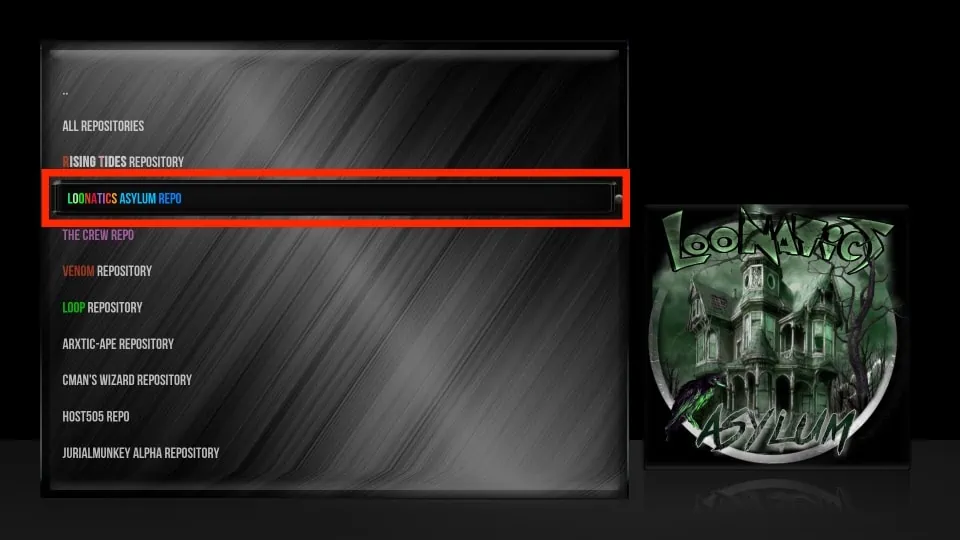
2. If required, scroll down to find the addon you want to install and select it. I’m selecting LOONATICS ASYLUM REPO.
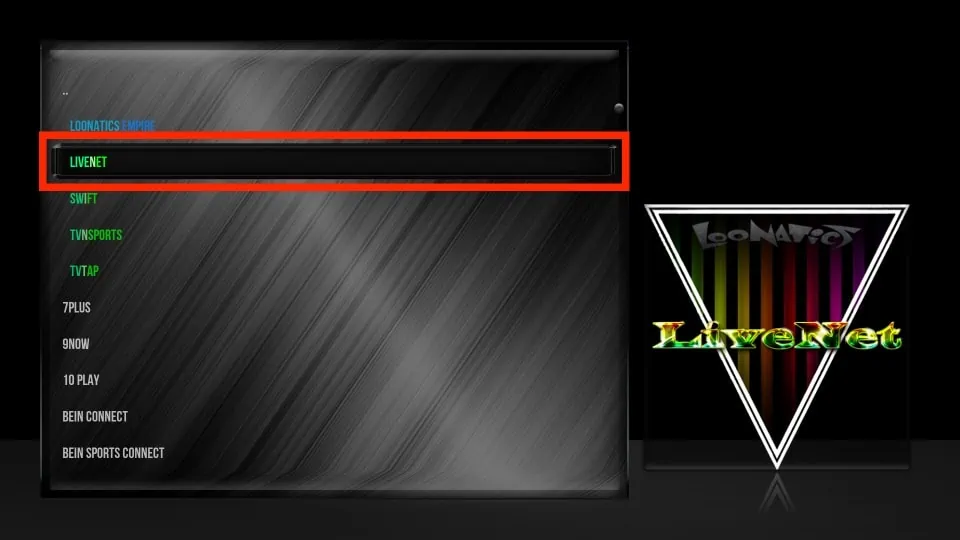
3. Click Video add-ons.

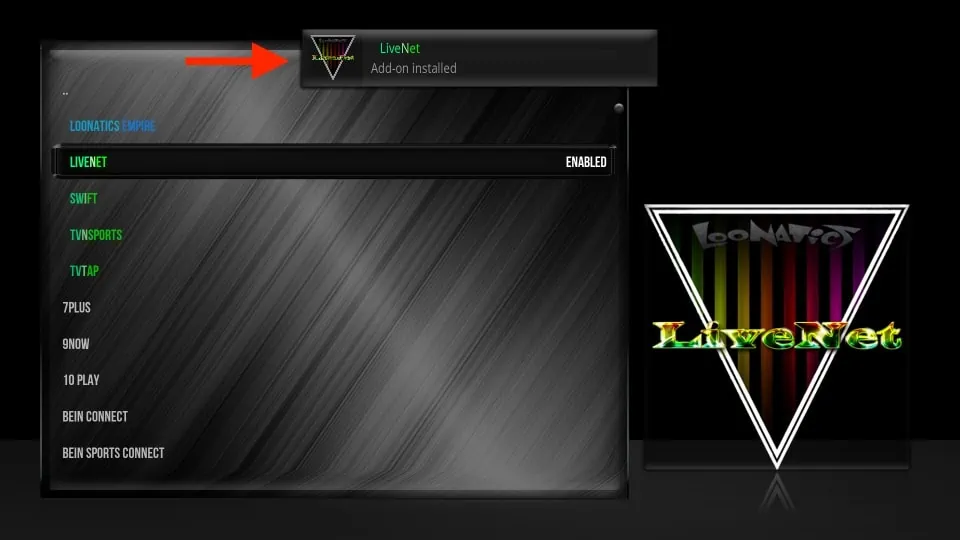
4. Click the addon you want to install. I’m choosing LIVENET.
5. Click the Install option.
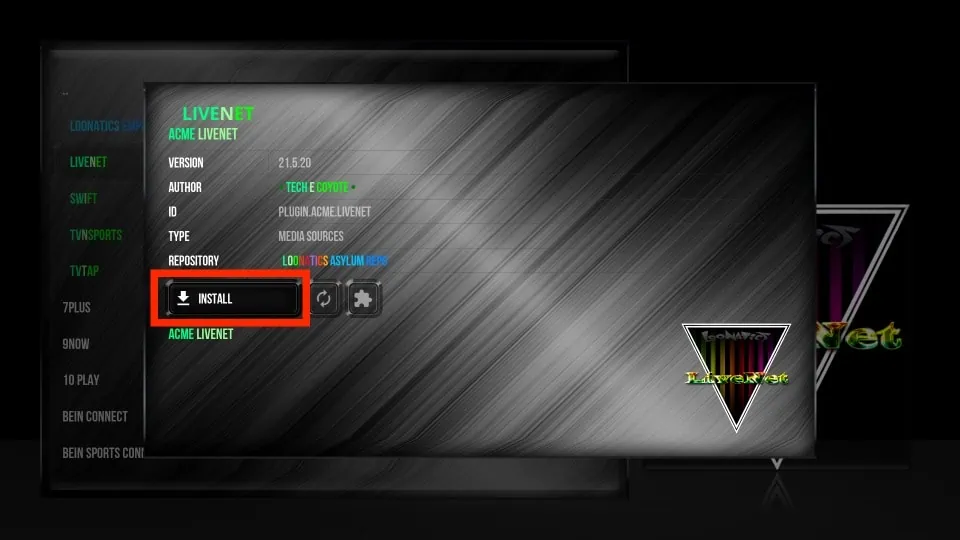
6. Let the Add-on installed notification appear on the top side of the next screen.
And, this is how you install an addon on Element Reborn Build. As I said, it will be almost the same as with any other build.
Go back to the Element Reborn Build main-screen. Navigate to the Add-ons page. Then, select Video add-ons from the left tab.
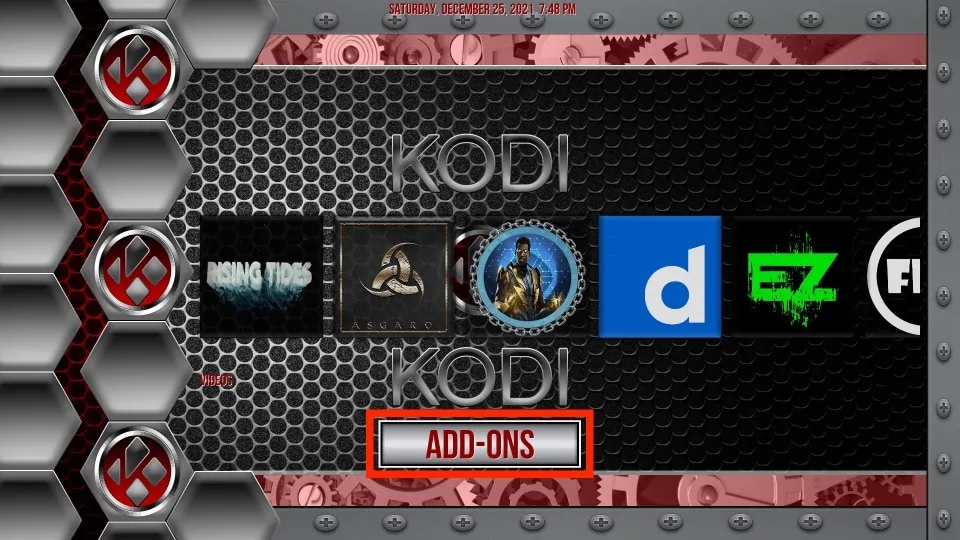
Now, you will find the LIVENET addon among other addons on the list.
This is how you install an addon over a build.
Before you start streaming with Kodi Addons or Builds, I would like to warn you that everything you stream on Kodi is visible to your ISP and Government. This means, streaming copyrighted content (free movies, TV shows, live TV, and Sports) might get you into legal trouble.
Thankfully, there is a foolproof way to keep all your streaming activities hidden from your ISP and the Government. All you need is a good VPN for Kodi. A VPN will mask your original IP which is and will help you bypass Online Surveillance, ISP throttling, and content geo-restrictions.
I personally use and recommend ExpressVPN, which is the fastest and most secure VPN. It is compatible with all kinds of streaming apps and devices.
NOTE: We do not encourage the violation of copyright laws. But, what if you end up streaming content from an illegitimate source unintentionally? It is not always easy to tell the difference between a legit and illegal source.
So, before you start streaming on Kodi, here's how to get VPN protection in 3 simple steps.
Step 1: Get the ExpressVPN subscription HERE. It comes with a 30-day money-back guarantee. Meaning, you can use it free for the first 30-days and if you are not satisfied with the performance (which is highly unlikely), you can ask for a full refund.
Step 2: Click HERE to download and install the ExpressVPN app on your streaming device. If you are using a FireStick, I have given the exact steps starting with Step 4 below.
Step 3: Click the Power icon to connect to a VPN server. That's all. Your connection is now secure with the fastest and best VPN for Kodi.

The following are the steps to install Kodi VPN on your Fire TV devices. If you have other streaming devices, follow Step 1-3 above.
Step 4: Subscribe to ExpressVPN HERE (if not subscribed already).
Step 5: Go to Fire TV Stick home screen. Click Find followed by Search option (see image below).

Step 6: Type Expressvpn in the search bar and select when it shows up.

Step 7: Click Download.

Step 8: Open the ExpressVPN app and Sign in using the email ID and password that you created while buying the ExpressVPN subscription.

Step 9: Click the Power icon to connect to a VPN server. That’s all. Your FireStick is now secured with the fastest VPN.

Wrapping Up
So, here is how to install addons on Kodi with a build installed. If you are using any build other than Element Reborn, just look for the key options I mentioned and you will be good to go. For instance, to add the source, locate the File Manager option. To install the repository, you want to find the Add-ons option within Settings so that you may use the Install from zip file option. And, to finally install the addon, look for Install from repository in the same place you found Install from zip file. In other words, the build changes the exterior, but the insides and the basic functions remain intact. How did you like this guide? Please feel free to comment below with any questions or suggestions.
Related:
- How to Update Kodi on Fire Stick
- How to Install Multiple Kodi Builds
- How to Stop Kodi Buffering
- How to Set up Trakt on Kodi

Suberboost Your FireStick with My Free Guide
Stay Ahead: Weekly Insights on the Latest in Free Streaming!
No spam, ever. Unsubscribe anytime.

I had the same issue trying to do the Titanium build. When you go back to the step that says ‘Click JESUSBOX’ the zip file is not there.
Hi Heather, the Jesus Box link is only for demonstration purposes. If it does not work, you can use a link that works. Here is our list of working addons you could install on the Titanium Build: https://www.firesticktricks.com/best-kodi-addons.html
Great advice. Cheers 🍻
I loaded titanium, tried to add the adult ultimate Whitecream. I got to install from zip and everything was good. Install from repo and it’s not there. Any ideas? Thank you
Hi Bill, which repository did you install for UWC adult addon? It is available via Kodil repository. You can install this repository from the following link: http://www.lvtvv.com/repo/
Maybe, you can explain how to uninstall an addon. Thanks
Hi Gerald, select the addon and long touch (on touch devices), right click (on computers), or press the menu key (on FireStick). Click Information on the popup. Click Uninstall on the next window
Everything seemed to download correctly, Kodi opened no issues, however I cant seem to get any movies to play or even the menu options anywhere? Do I need to do more still?
Hi, which build are you using?
I couldn’t get the add on to do right on the Titanium Build. I did everything you said do but the add on would not load when I checked install from zip file. I’m trying to add the adult add on to my Titanium Build.
Hi Daryl, which addon exactly are you trying to install?
great help and explanation
thank you very much!
I have Kodi 18 nebula skin I recently got iagl add on and I’m wondering if I am able to add it directly to the nebula skin
Hi Frank, you can install any addon over any build if you have the source link. Within the build, find the File manager option and add the link. Next, find the option Install from zip file to install the repository from the added link. Later, find Install from repository option, open the repository you just installed and look up for the desired addon in the Video add-ons section.