In this guide, I will show you how to install the Add That Source Kodi addon. You may use the same method for any compatible device, including FireStick Lite, FireStick 4K, Fire TV Cube, and Android TV boxes. Before I explain how to install the Add That Source Kodi addon, here’s some quick context.
Kodi is one of the most popular open-source media software to date. It lets you access millions of hours of content across various formats, including videos, music, and games. However, to enjoy all this content, you need to integrate addons. That’s where repositories come into play.
A repository, or repo, is where bits of software are stored and distributed. The concept is similar to Google Play Store or Apple App Store. Addons, on the other hand, are pieces of software that can be added to a program to enhance the features and user experience.
Kodi repositories contain addons, which are essentially apps for Kodi. Repositories come in the form of ZIP files. Kodi has an official repository, but the options are limited. But don’t worry—that’s why we’re using Add That Source.
Add That Source for Kodi is a useful addon that lets you add repositories in just a few minutes. It has a vast collection of repositories so you don’t run out of entertainment. It can be accessed through the DaButcher Repository, which is a third-party source compatible with both Kodi 18 Leia and Kodi 19 Matrix.
Attention Kodi Users!
Governments and ISPs worldwide monitor your online activities. If you use third-party Kodi addons, you should always use a reliable Kodi VPN to hide your identity and prevent issues with your streaming experience. Currently, your IP is visible to everyone.
I use ExpressVPN, the fastest and most secure VPN in the industry. It is very easy to install on any device, including Amazon Fire TV Stick, PC, Mac, and Smartphones. It also includes a 30-day money-back guarantee. If you're not satisfied with their service, you can request a refund. ExpressVPN is offering a special NEW YEAR deal: get 4 months free and save 78% on the 2-year plan.
Install and Use Best Kodi VPN | Why you must use a VPN at all times
How to Install Add That Source Addon on Kodi
Here are the steps to install Add that Source Addon on Kodi:
Legal Disclaimer: This guide is for informational purposes only. FireStickTricks.com does not own, host, operate, resell, or distribute any apps, services, or content mentioned. Some services discussed may be unverified, and FireStickTricks.com cannot confirm their legal status in every region. Users are responsible for ensuring that any content they access complies with applicable laws.
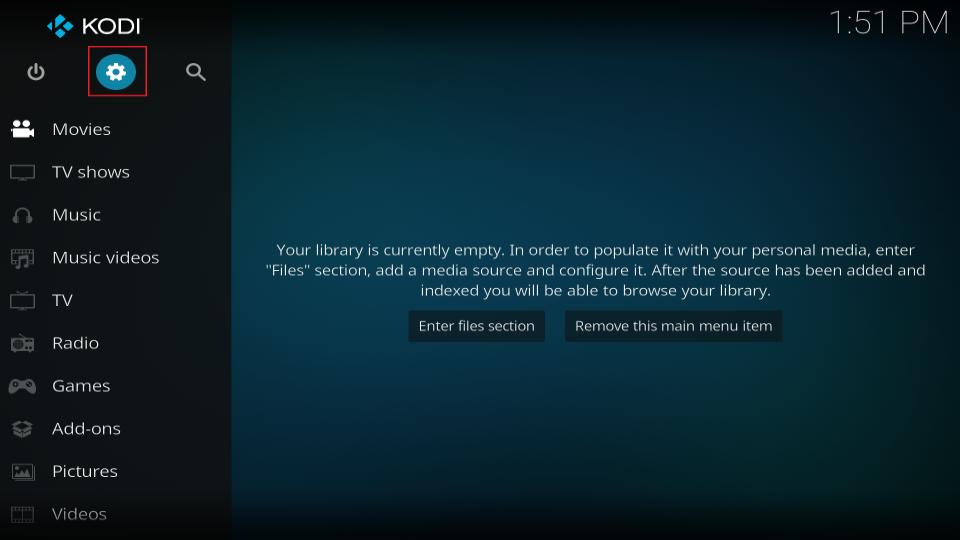
1. Open Kodi. On the Kodi home screen, select the settings gear.
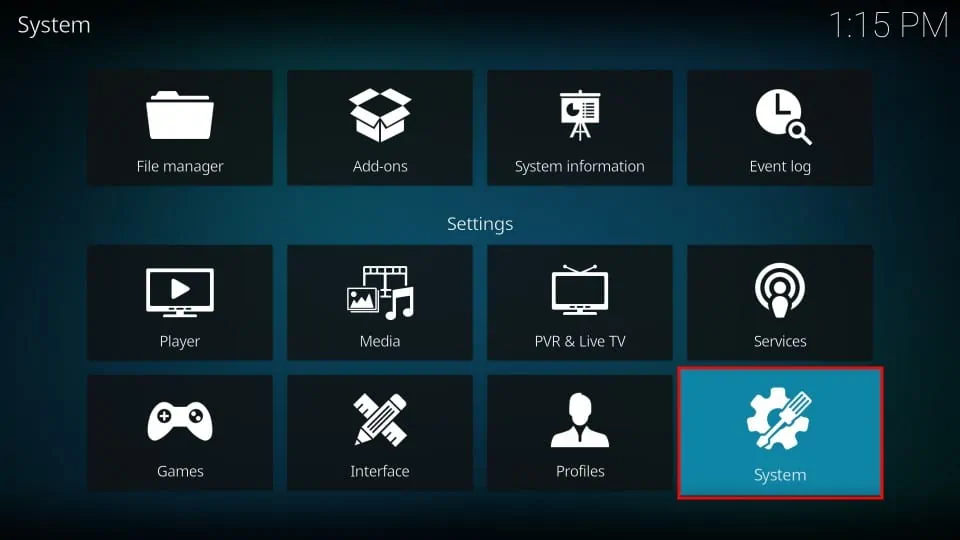
2. Find System in the bottom right corner of the screen and select it.
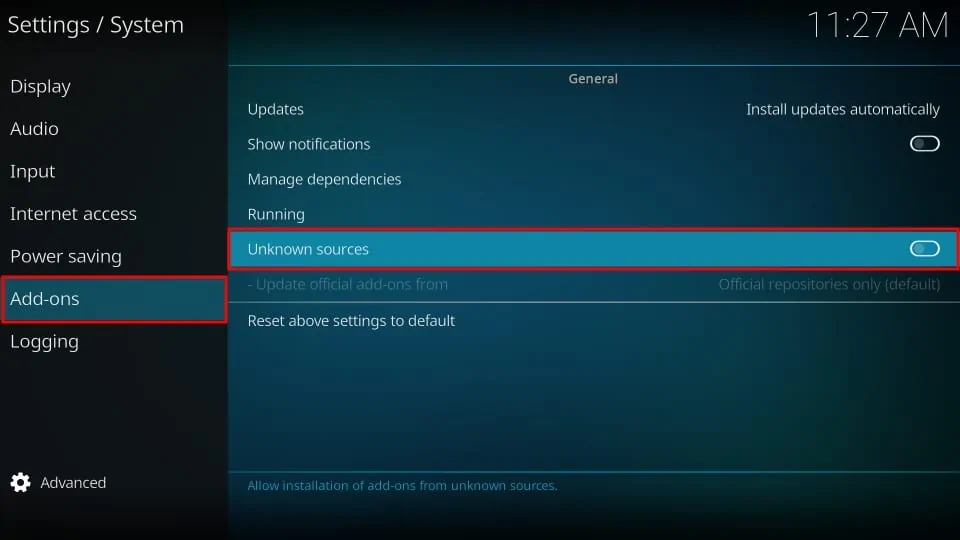
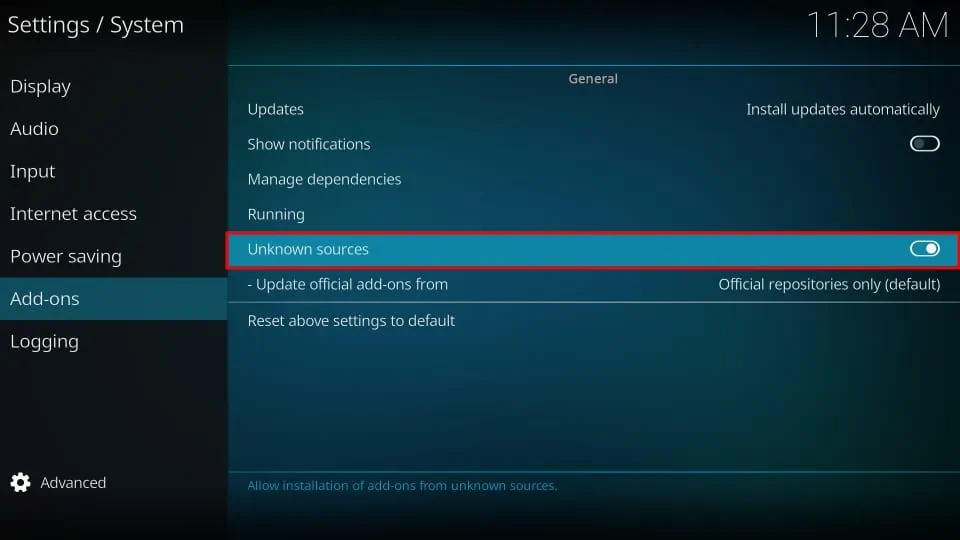
3. Scroll down to Add-ons. You should see Unknown sources in the right panel. Scroll across and down to it, then select it to turn it on.
Note: By default, this option is disabled for privacy and security reasons. Third-party sources like DaButcher Repository can’t be installed unless you enable Unknown sources.
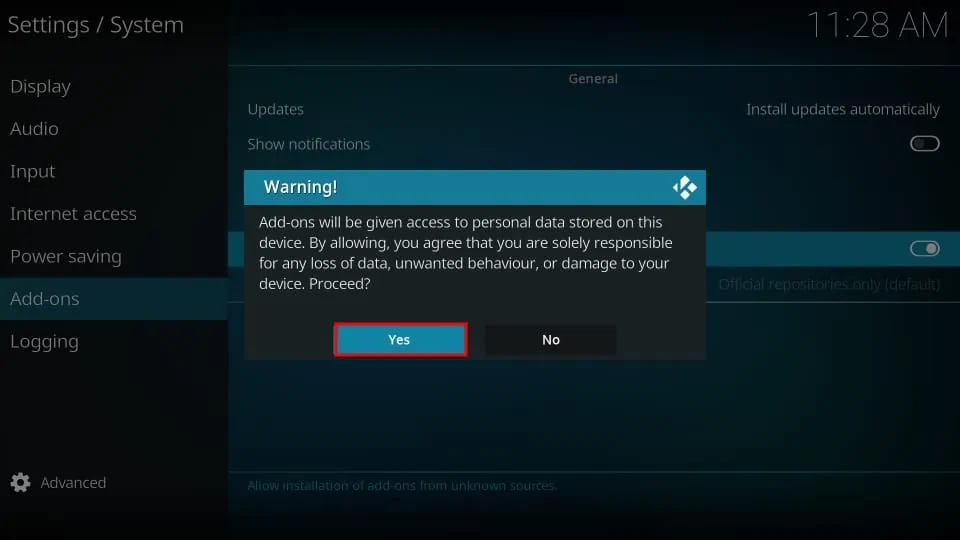
4. When a warning pops up, select Yes.
5. Unknown sources is on when the switch is highlighted and toggled to the right.
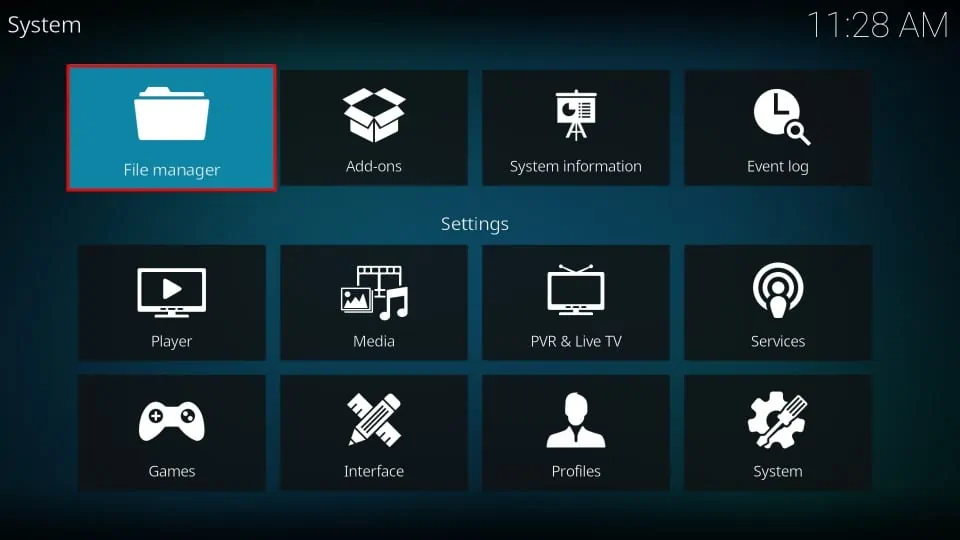
6. Use your remote’s back button to return to settings. Then choose File manager.
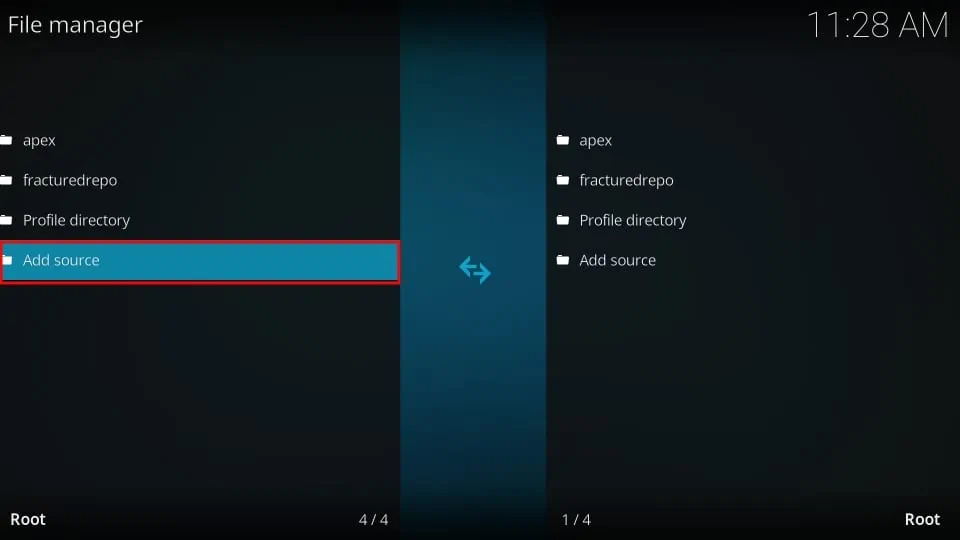
7. Click Add source.
8. Select <None>.

9. A window with a virtual keyboard will pop up, asking you to enter a URL. Type http://dabutcher.org/repo/ and then click OK.
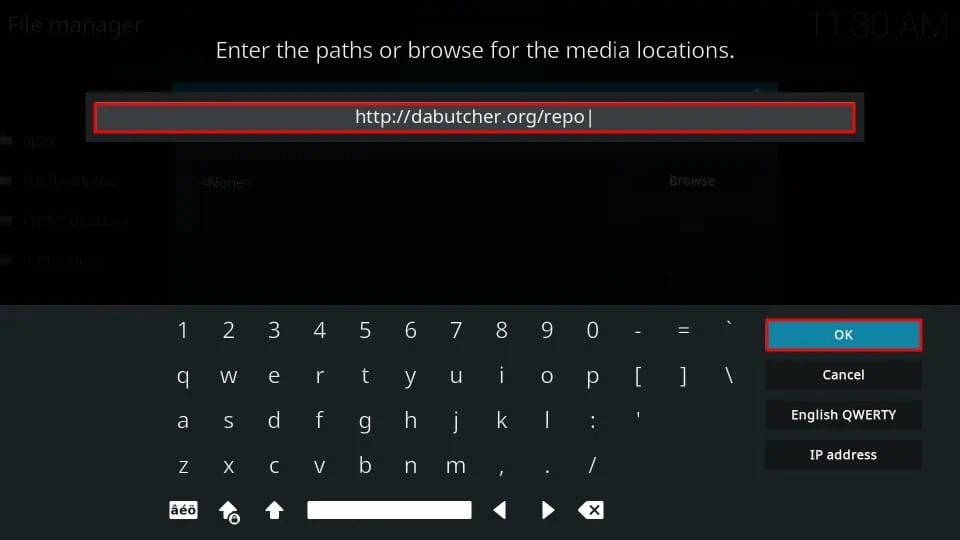
Note: Be sure not to make any typos.
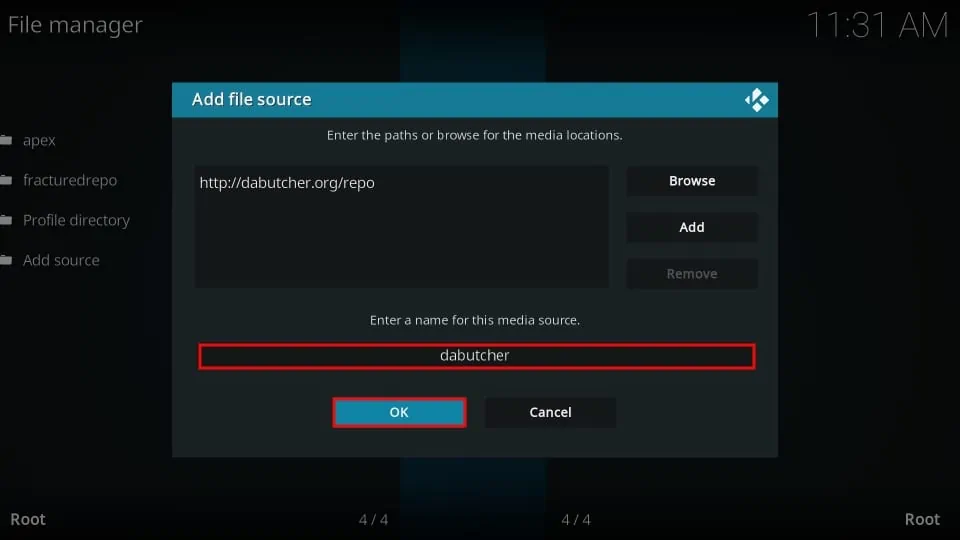
10. You will be asked to enter a source name. Type dabutcher and then click OK.
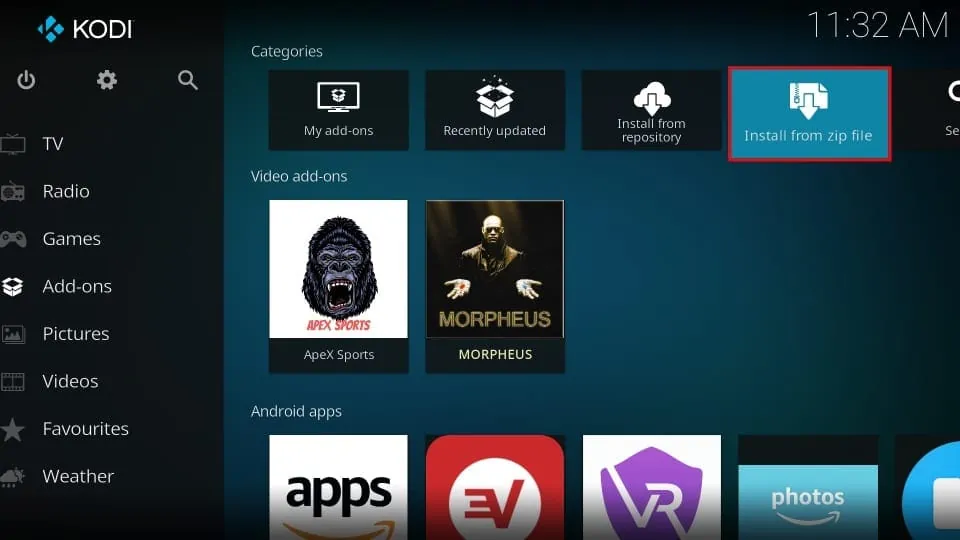
11. Return to the Kodi home screen and select Add-ons on the left-hand menu.
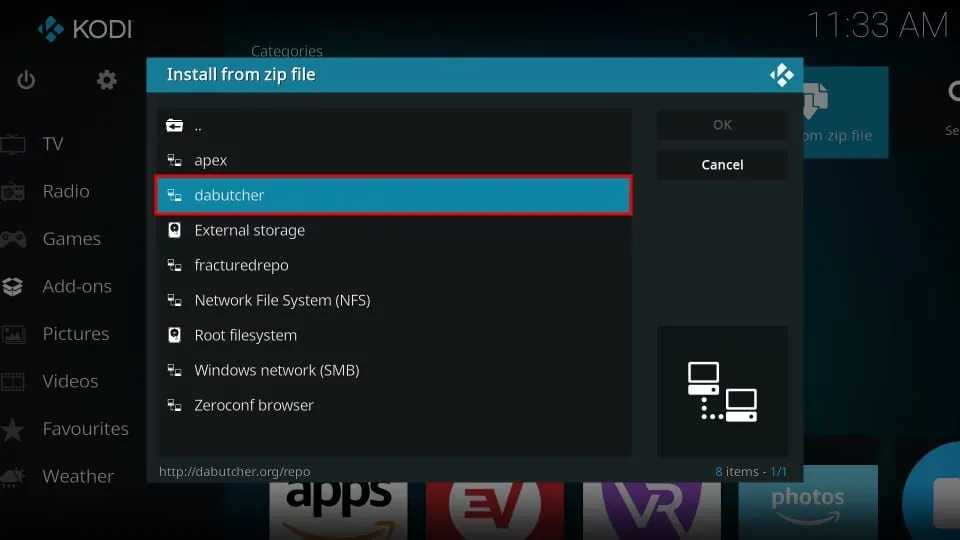
12. Click Install from zip file.
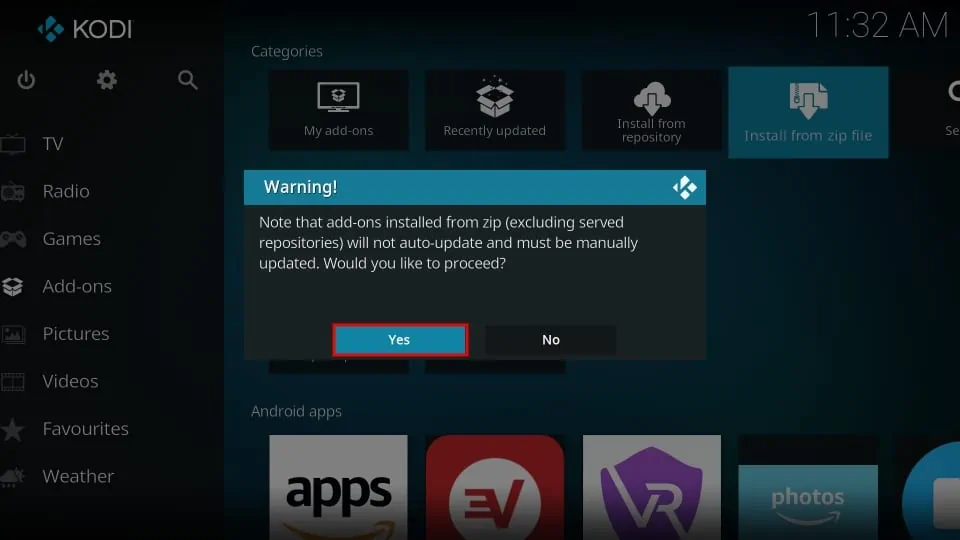
13. A message will appear to notify you that addons installed this way must be manually updated. Click Yes.
14. Choose dabutcher.
15. Find the newest version of the repository, represented by the highest number before .zip. In the screenshot below, it’s repository.dab-1.3.zip. Select it and click OK.
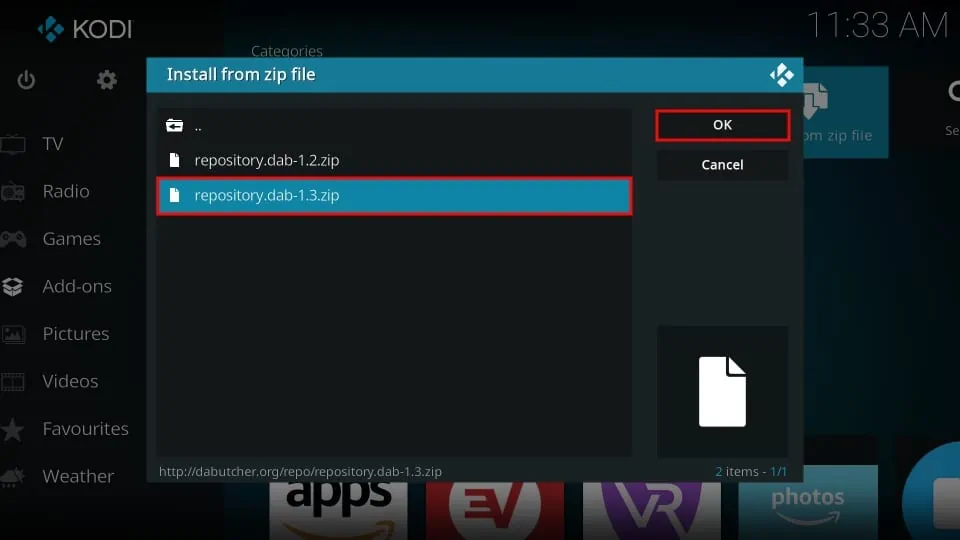
16. Wait until you get a notification saying the repository was installed successfully.
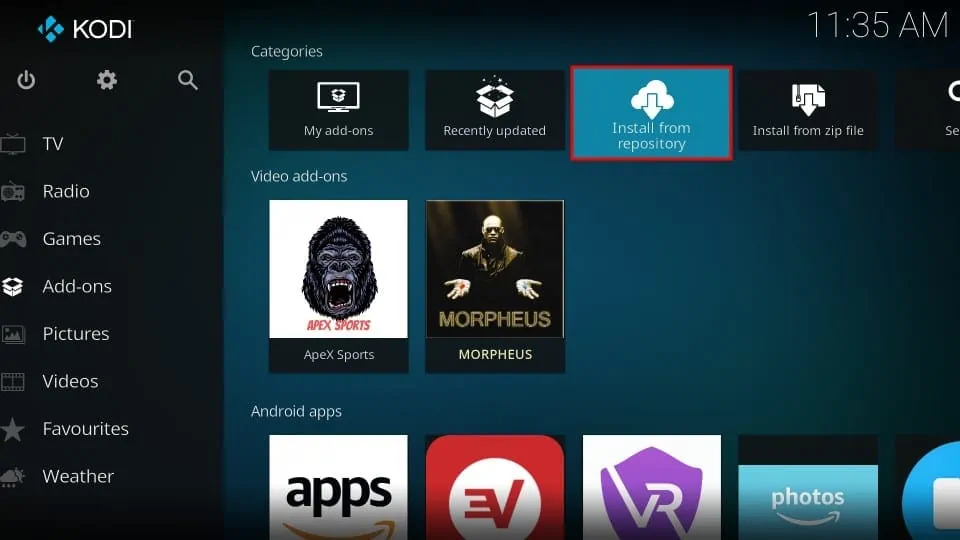
17. Return to the Kodi home page, scroll to Add-ons in the left-hand menu, and select Install from repository.
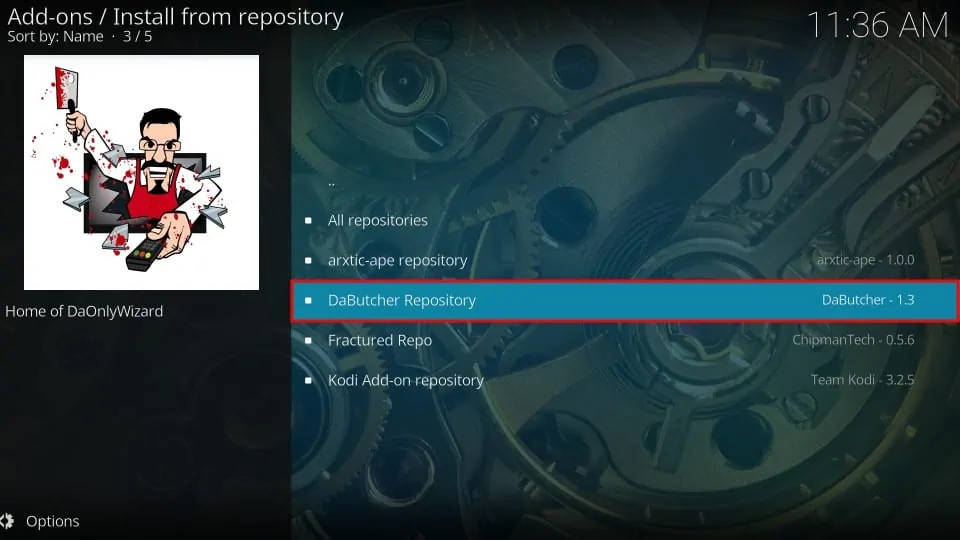
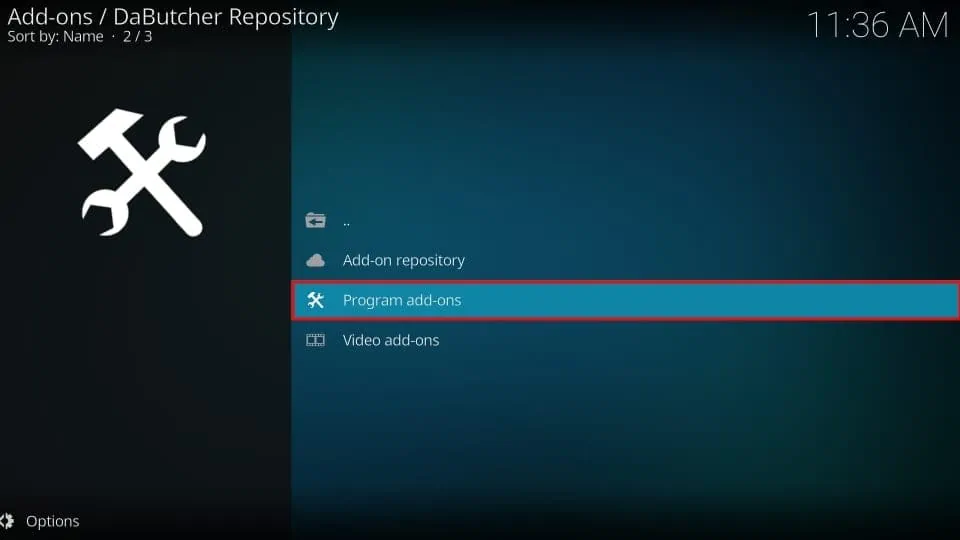
18. Select DaButcher Repository.
19. Select Program add-ons.
20. Now choose Add That Source.
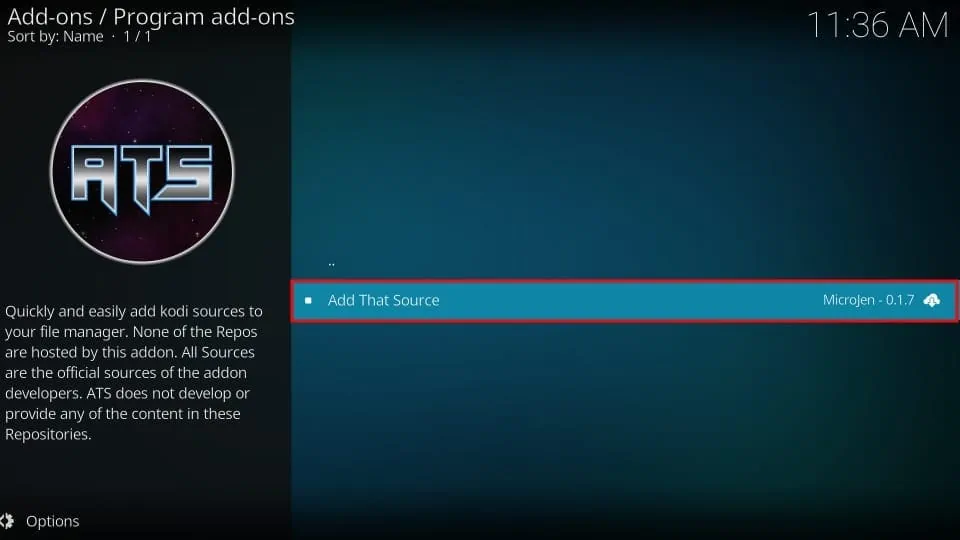
21. Select Install in the bottom-right corner.

Congratulations, you’ve finished the installation!
Before you start streaming with Kodi Addons or Builds, I would like to warn you that everything you stream on Kodi is visible to your ISP and Government. This means, streaming copyrighted content (free movies, TV shows, live TV, and Sports) might get you into legal trouble.
Thankfully, there is a foolproof way to keep all your streaming activities hidden from your ISP and the Government. All you need is a good VPN for Kodi. A VPN will mask your original IP which is and will help you bypass Online Surveillance, ISP throttling, and content geo-restrictions.
I personally use and recommend ExpressVPN, which is the fastest and most secure VPN. It is compatible with all kinds of streaming apps and devices.
NOTE: We do not encourage the violation of copyright laws. But, what if you end up streaming content from an illegitimate source unintentionally? It is not always easy to tell the difference between a legit and illegal source.
So, before you start streaming on Kodi, here's how to get VPN protection in 3 simple steps.
Step 1: Get the ExpressVPN subscription HERE. It comes with a 30-day money-back guarantee. Meaning, you can use it free for the first 30-days and if you are not satisfied with the performance (which is highly unlikely), you can ask for a full refund.
Step 2: Click HERE to download and install the ExpressVPN app on your streaming device. If you are using a FireStick, I have given the exact steps starting with Step 4 below.
Step 3: Click the Power icon to connect to a VPN server. That's all. Your connection is now secure with the fastest and best VPN for Kodi.

The following are the steps to install Kodi VPN on your Fire TV devices. If you have other streaming devices, follow Step 1-3 above.
Step 4: Subscribe to ExpressVPN HERE (if not subscribed already).
Step 5: Go to Fire TV Stick home screen. Click Find followed by Search option (see image below).

Step 6: Type Expressvpn in the search bar and select when it shows up.

Step 7: Click Download.

Step 8: Open the ExpressVPN app and Sign in using the email ID and password that you created while buying the ExpressVPN subscription.

Step 9: Click the Power icon to connect to a VPN server. That’s all. Your FireStick is now secured with the fastest VPN.

Add That Source Kodi Addon Overview
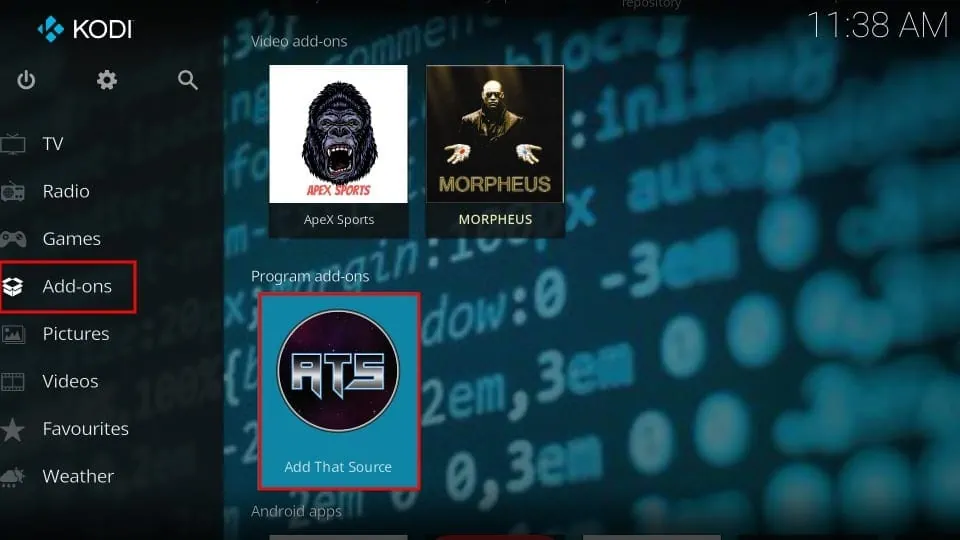
Return to the Kodi home screen and scroll down to Add-ons in the left-hand menu. You should find Add That Source under Program add-ons in the right portion of the screen.
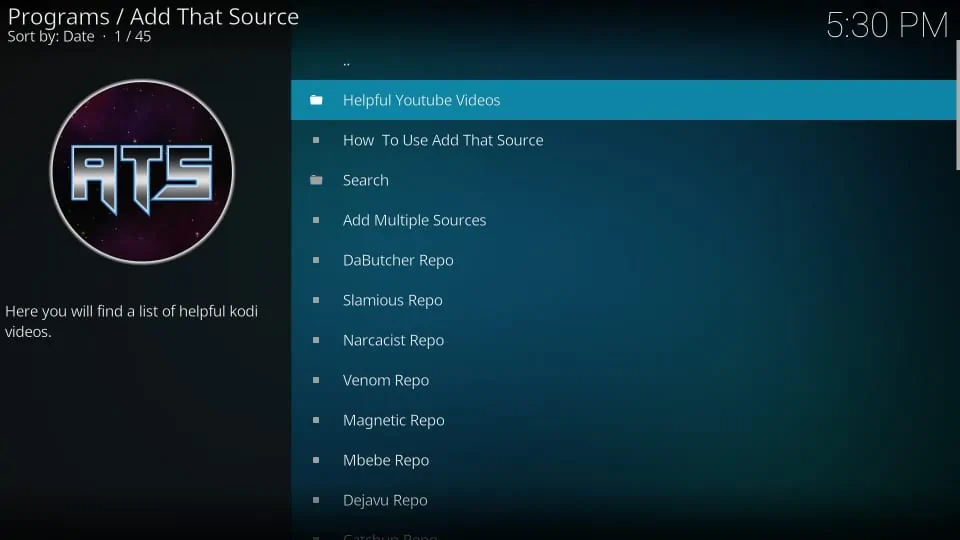
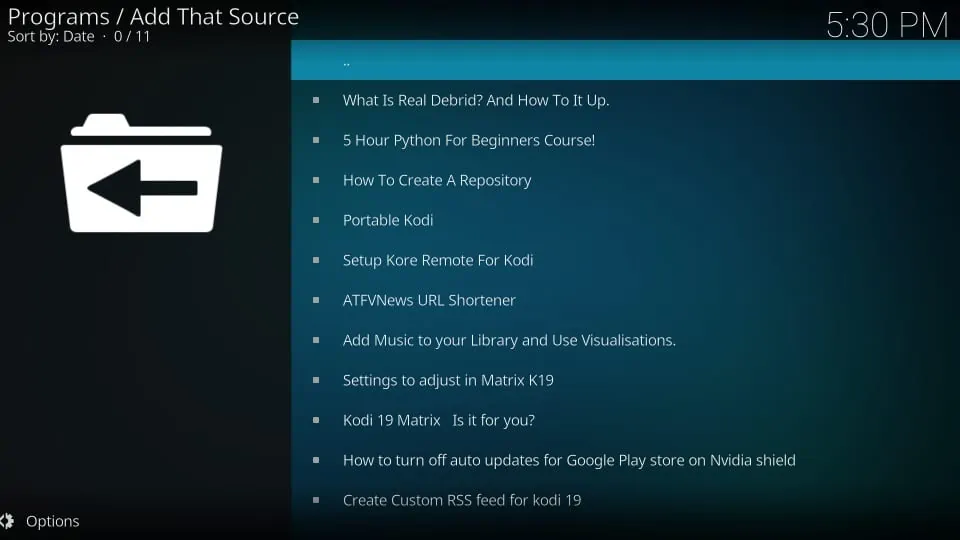
Add That Source addon has a simple interface that gets to the point. When you open the addon, you will see a list of repositories that you can install in just a few minutes:
- Helpful Youtube Videos
- How To Use Add That Source
- Add Multiple Sources
- DaButcher Repo
- Slamious Repo
- Narcacist Repo
- Venom Repo
- Magnetic Repo
- Mbebe Repo
- Dejavu Repo
- Catchup Repo
- Octopus Repo
- Nixgates Repo
If you want to get familiar with the Add That Source Kodi addon, you can go through the 5-minutes How to Use Add That Source YouTube video.
Under the Helpful YouTube Videos folder, you can access instructional content on Real-Debrid, Python, creating a repository, Portable Kodi, Kodi 19, and more.
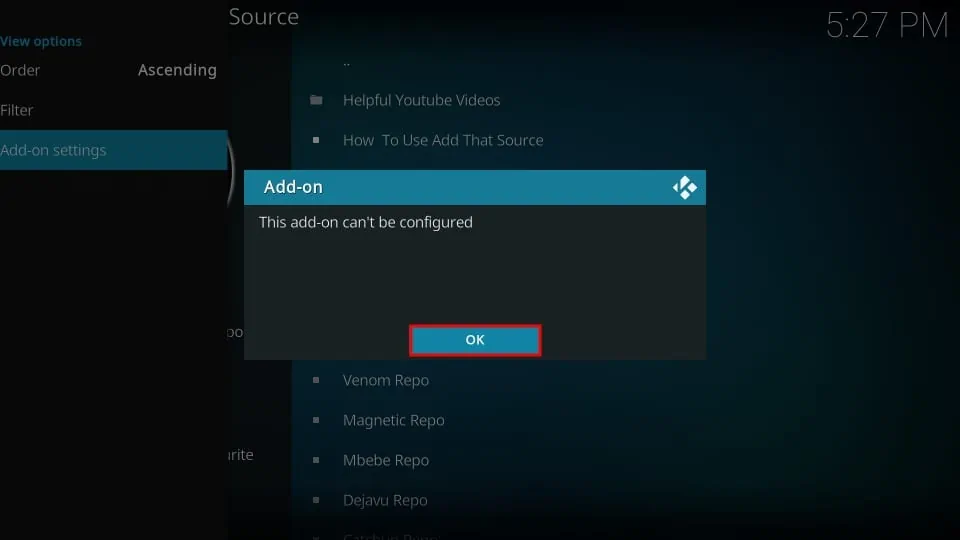
I tried exploring the settings for the Add That Source addon. Unfortunately, I was told This add-on can’t be configured.
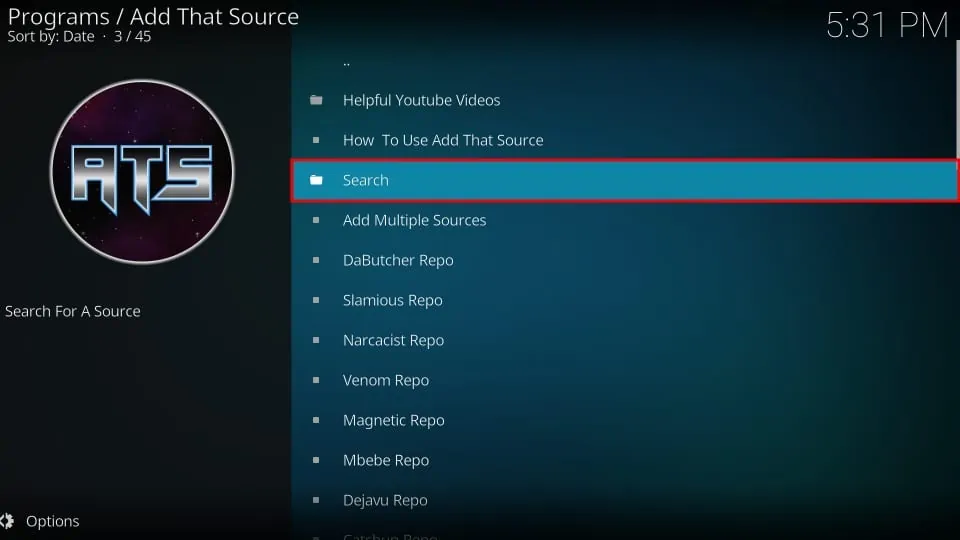
Since the Add That Source Kodi addon contains numerous repositories, scrolling through the entire list can be time-consuming. Thankfully, the addon has a Search option, where you can enter the name of the repository you want to install.
How to Install Any Addon From Add That Source
You can use the process below to install any addon found within Add That Source repositories list.
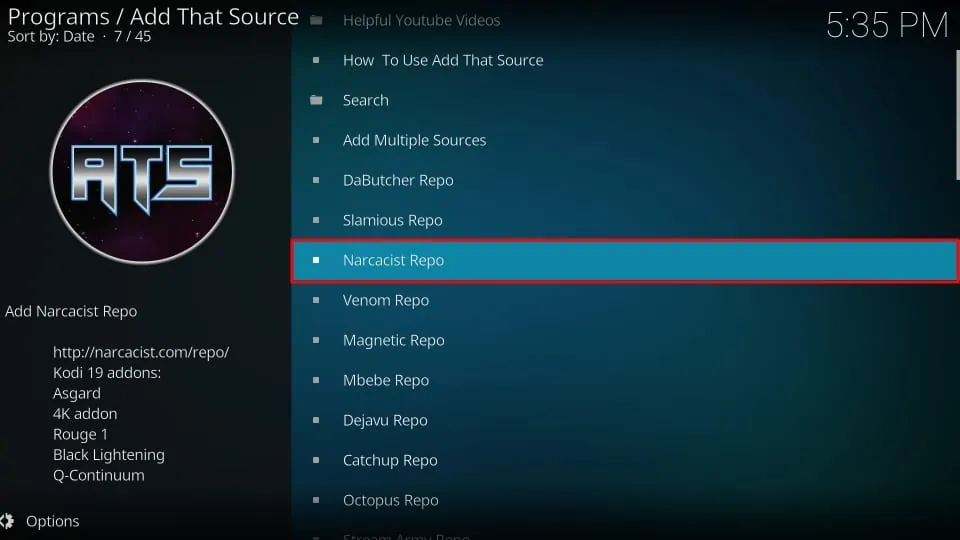
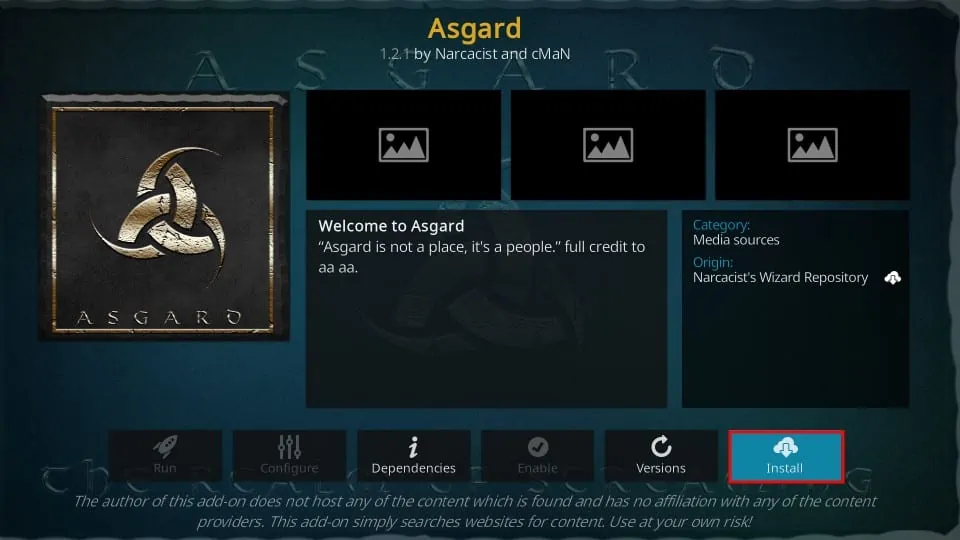
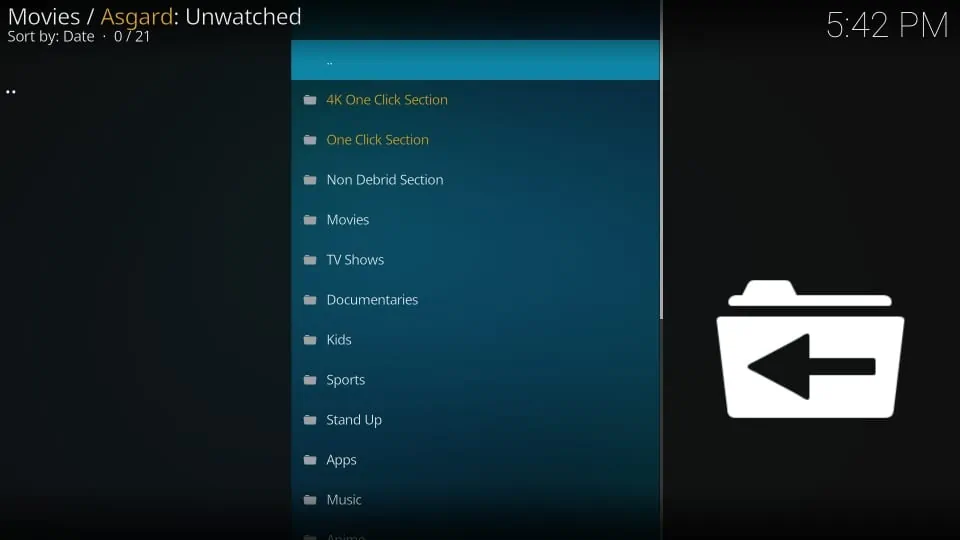
For this example, I’ll install Asgard, a popular all-in-one Kodi addon with sections for movies, TV shows, live sports and replays, live TV, and more.
Since Asgard is in the Narcacist Repository, this is the repository I’ll select from the list.
1. Choose Narcacist Repo. Note: If you want to install a particular addon other than Asgard, feel free to choose the repository that contains it.
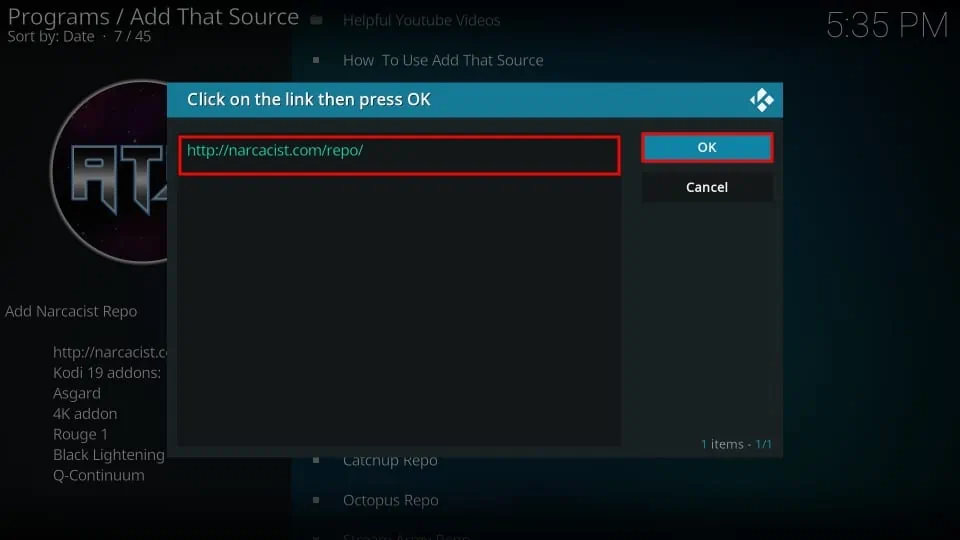
2. Select the only link available, and then click OK.
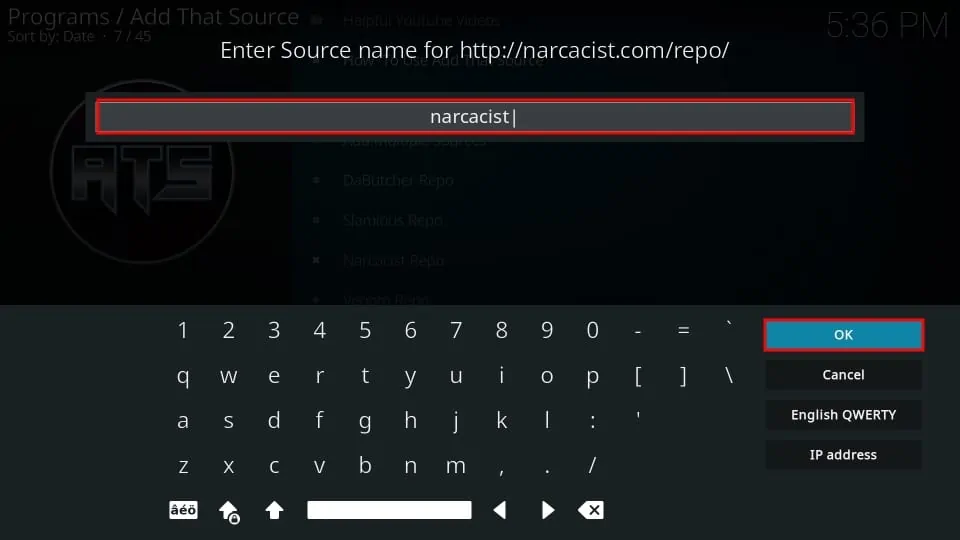
3. You must enter a name for the source. Type Narcacist as the source name and click OK.
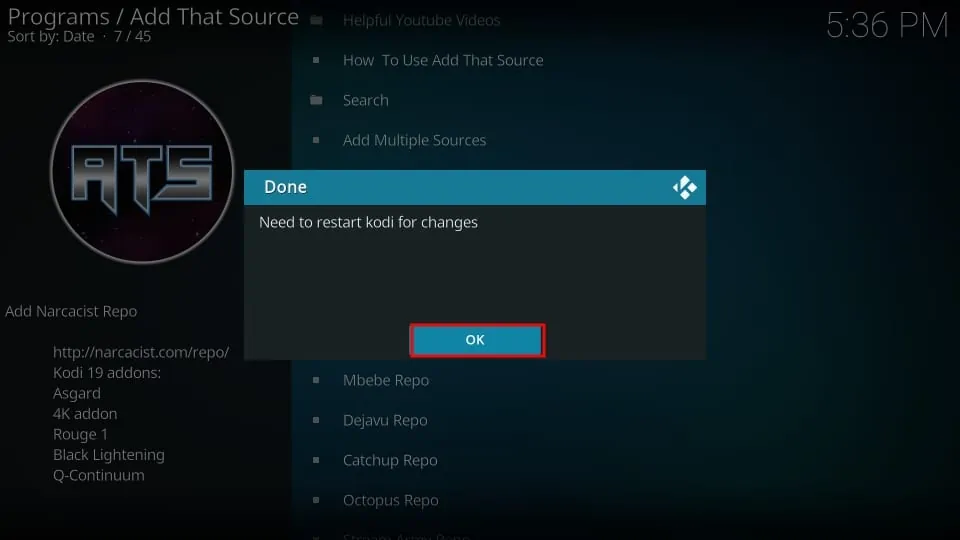
4. A short dialogue box will pop up to notify you that you need to restart Kodi. Click OK.
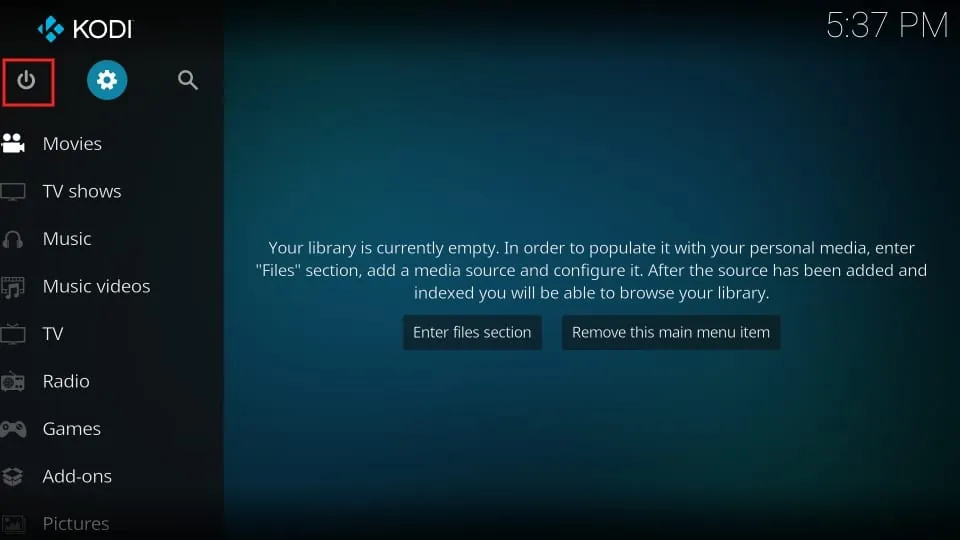
5. Go back to the Kodi home screen and click the power button in the top-left corner to exit.
6. Launch the Kodi app again and scroll to Add-ons in the left-hand menu.
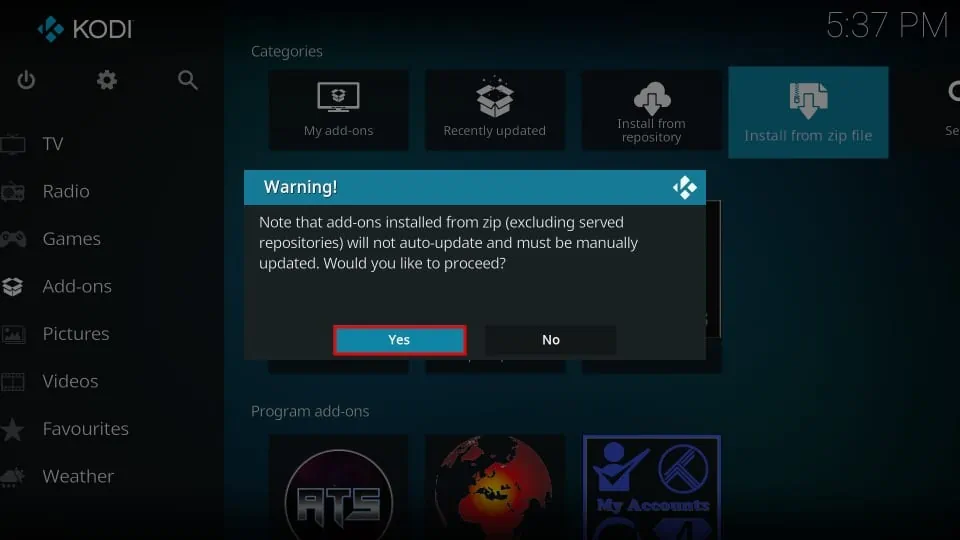
7. Scroll to the right and select Install from zip file. A short dialogue box will pop up to notify you that addons installed from zip (excluding official Kodi repositories) must be manually updated. Select Yes to proceed.
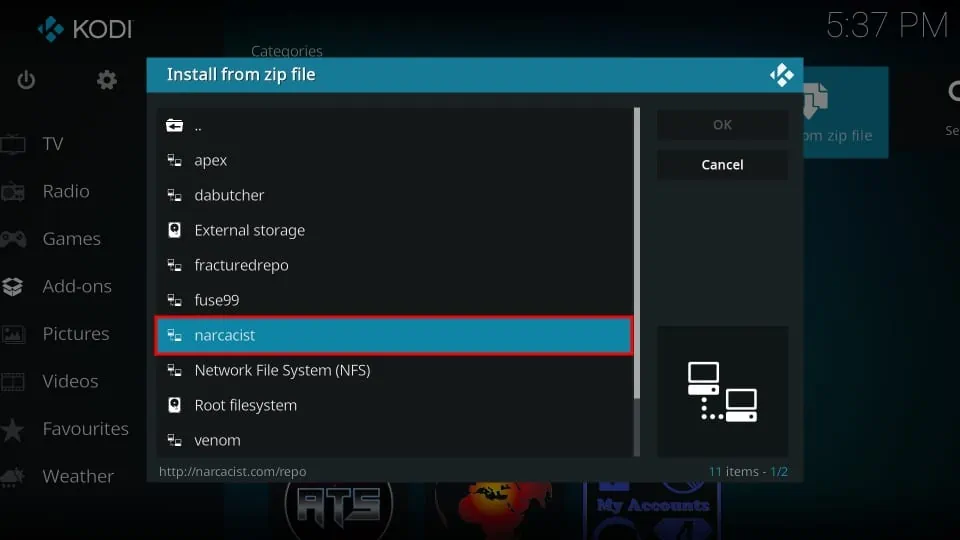
8. Click narcacist.
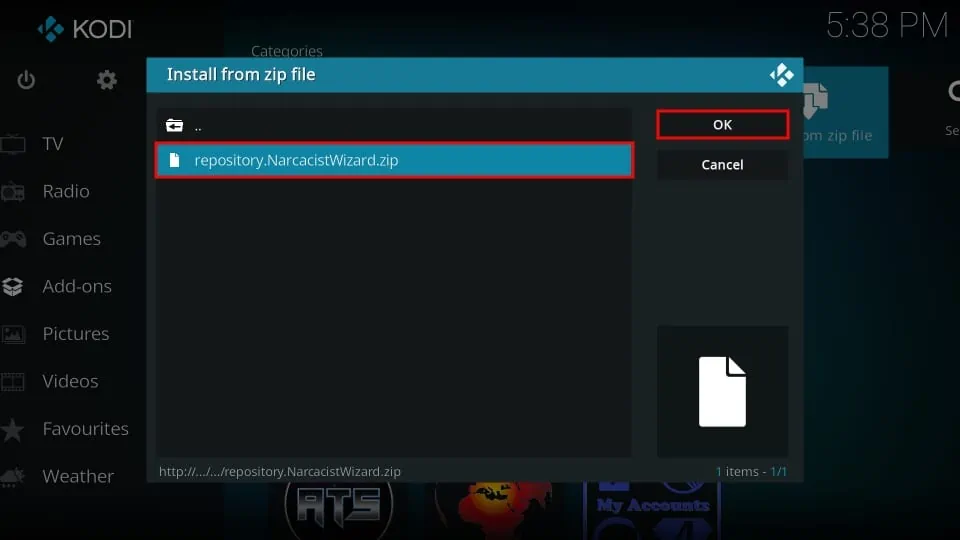
9. Select repository.NarcacistWizard.zip and click OK.
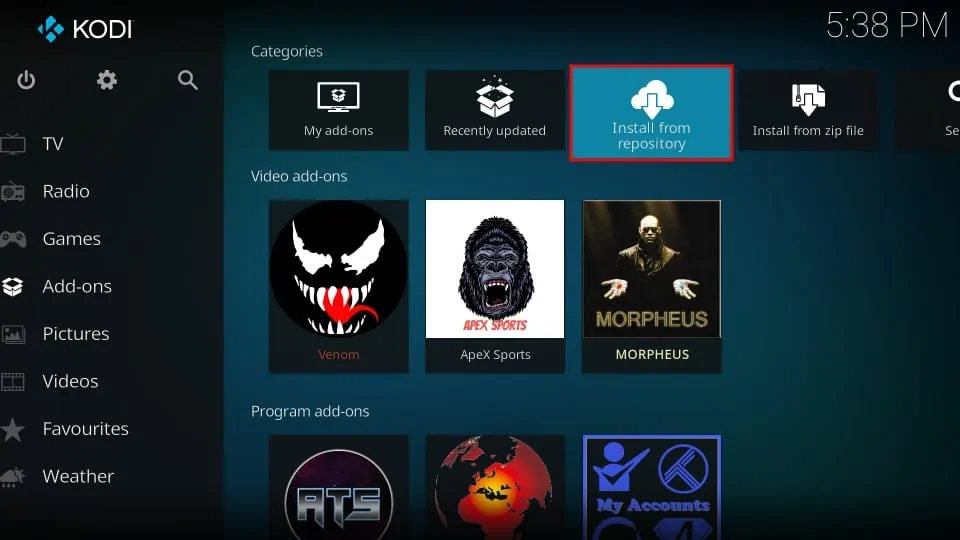
10. Go back to the Kodi home screen again and scroll down to Add-ons in the left-hand menu. Scroll to the right and choose Install from repository.
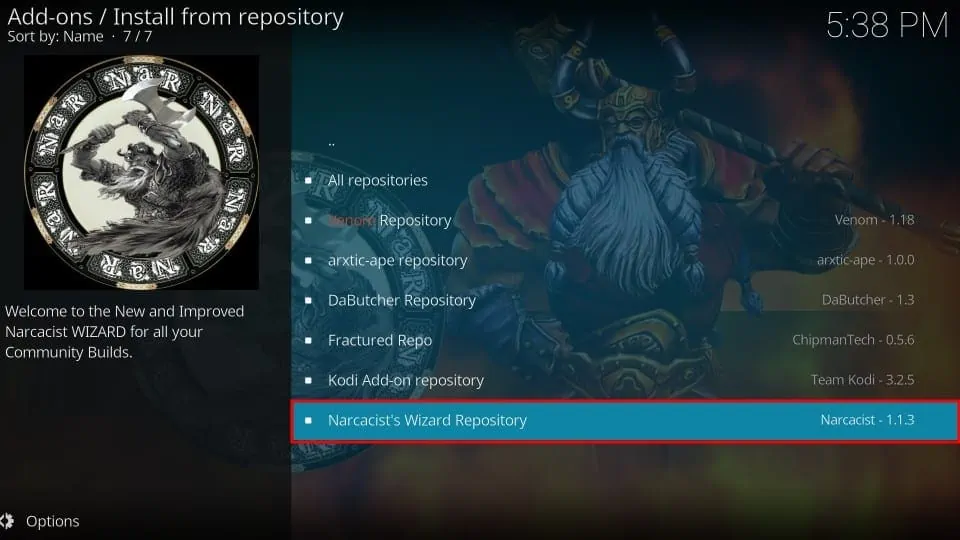
11. Select Narcacist’s Wizard Repository.
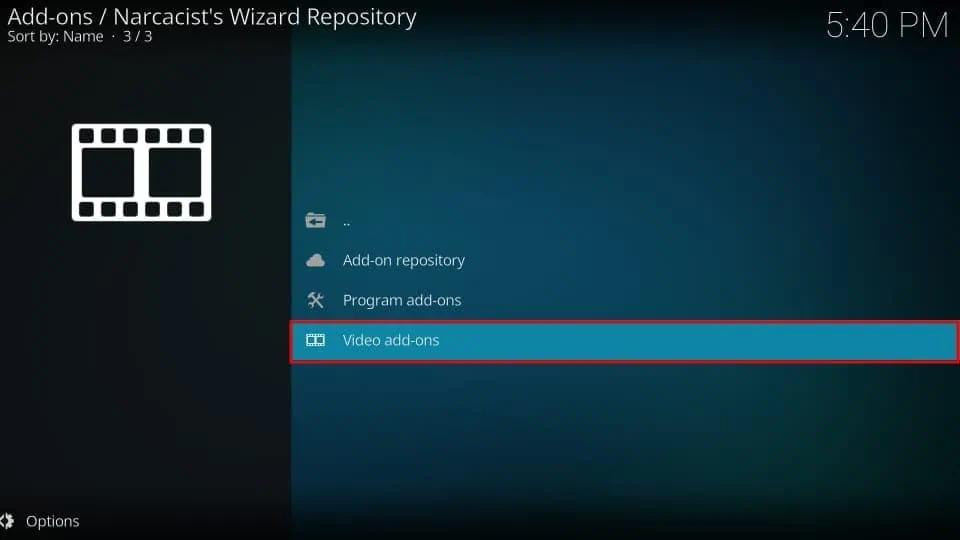
12. Choose Video add-ons.
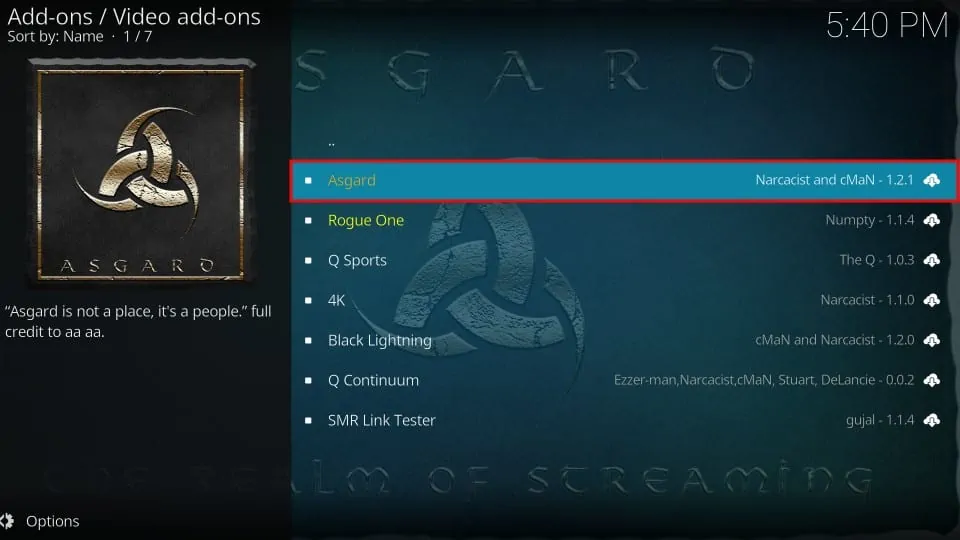
13. Select Asgard.
14. Click Install in the bottom-right corner.
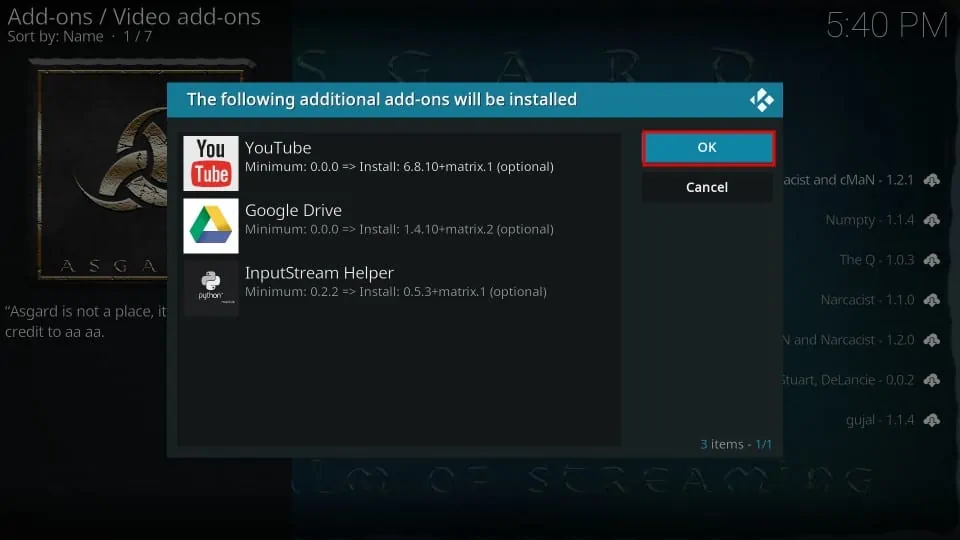
15. Select OK when you see a pop-up box showing the add-ons that will be installed.
16. Wait until you see a message in the top-right corner of your screen indicating the addons have been installed. Congratulations, you’ve finished installing an addon using Add That Source!
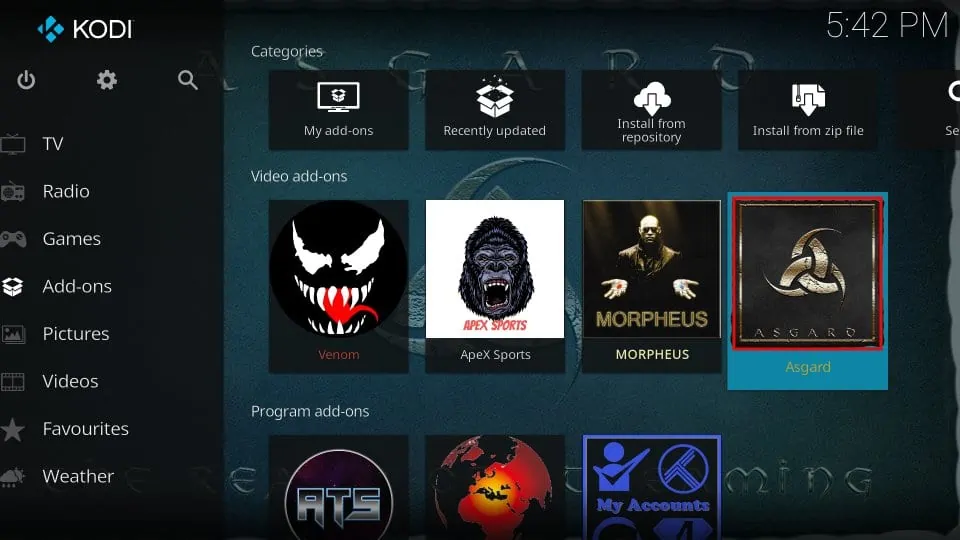
17. Go back to your Kodi home screen and scroll to Add-ons in the left-hand menu. Asgard should appear under Video add-ons.
Wrapping up
That’s everything you should know about the Add That Source Kodi addon. Now you’re ready to install all the top repositories in a few easy steps. Add That Source truly helps you enjoy Kodi to the fullest.
I hope you liked the article. Did you run into any issues during installation? How do you like Add That Source Kodi addon? Leave a comment to share your experience!
Related:
- How to Install Magic Dragon Kodi Addon
- How to Install Shazam Kodi Addon
- How to Install ApeX Sports Kodi Addon
- How to Delete Addons from Kodi

Suberboost Your FireStick with My Free Guide
Stay Ahead: Weekly Insights on the Latest in Free Streaming!
No spam, ever. Unsubscribe anytime.

How do I update ATS? Mine had old repositories and some never install at all.
Hi Joy. From the Home screen, select Add-ons, then in the Add-ons manager select the correct category for your add-on or go to My add-ons (this can also be done from the Home screen) and select All. Navigate to your add-on and select it. Then select Versions. Select the desired version and it will install.