Are you tired of your current Kodi interface? In this article, I’ll walk you through installing the Atomic Matrix build on Kodi. These instructions work for all devices that can run Kodi, such as Amazon FireStick, Nvidia Shield, Android TV boxes, tablets, smartphones, and computers. Before the instructions, I’ll briefly discuss what the build offers.
What Is Atomic Matrix?
If you’re an avid Kodi user, you are likely familiar with Kodi builds and how they work. These builds have been part of the Kodi community for years, offering functional and aesthetic upgrades that elevate your streaming experience.
Kodi builds provides a convenient all-in-one solution for those who don’t want to install individual addons one by one.
They come pre-configured with a variety of popular addons, making it easier to access the content you want without additional setup.
One standout build in this category is Atomic Matrix. It comes bundled with many video addons, which will download automatically when you boot up Kodi for the first time after installing the build.
It gives you instant access to a wide range of streaming options.
However, before diving into the installation process, one must consider some points: ensuring the legal implications of using a third-party addon and knowing how to protect your privacy with tools like VPNs are key factors to keep in mind.
Attention Kodi Users!
Governments and ISPs worldwide monitor your online activities. If you use third-party Kodi addons, you should always use a reliable Kodi VPN to hide your identity and prevent issues with your streaming experience. Currently, your IP is visible to everyone.
I use ExpressVPN, the fastest and most secure VPN in the industry. It is very easy to install on any device, including Amazon Fire TV Stick, PC, Mac, and Smartphones. It also includes a 30-day money-back guarantee. If you're not satisfied with their service, you can request a refund. ExpressVPN is offering a special NEW YEAR deal: get 4 months free and save 78% on the 2-year plan.
Install and Use Best Kodi VPN | Why you must use a VPN at all times
Is Atomic Matrix Build Safe and Legal?
Atomic Matrix is not available in the official Kodi repository, and a third-party provider is required. This is a concern for users. However, you don’t have to worry about the safety aspects, as we’ll be using the reputable Misfit Mods Repository to get the Atomic Matrix build.
That said, FireStickTricks.com can’t verify whether using Atomic Matrix is legal. This build is free, and the addons bundled with it pull their streams from various sources. FireStickTricks.com can’t verify the validity or legality of these sources, so it’s better to tread carefully. I always recommend using a VPN when streaming third-party addons.
How to Install Atomic Matrix on Kodi
Now, let’s discuss installing the build. I have divided the installation steps into several parts to make them easier to follow.here is quick overview:
Enable unknown sources on Kodi> add MisfitMods Repository> Install MisfitMod Wizard> Install Atomic Matrix build.
First, we’ll need to enable a setting called unknown sources. The second part is adding the Misfit Mods Repository, which hosts the Atomic Matrix build.
The third part is the Misfit Mods Wizard, which we’ll use to install the Atomic Matrix build. Let’s start with the first part, tweaking that Kodi setting.
Legal Disclaimer: This guide is for informational purposes only. FireStickTricks.com does not own, host, operate, resell, or distribute any apps, services, or content mentioned.
Part 1: Enabling Unknown Sources
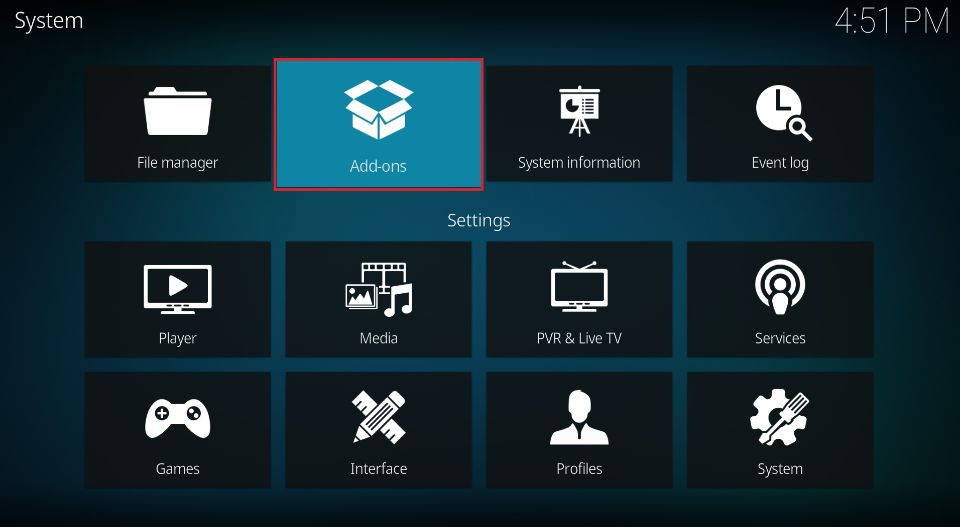
1. Start Kodi and click on Settings.
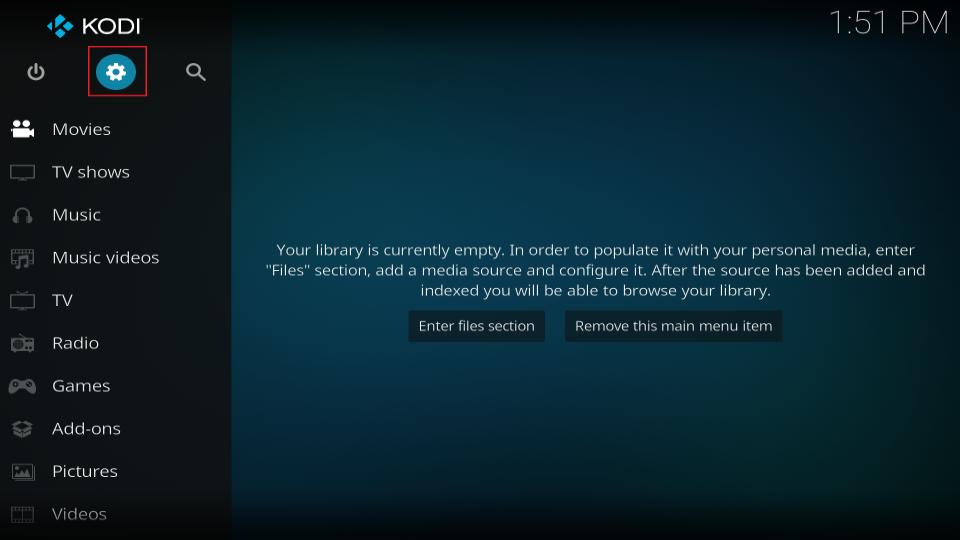
2. Select System from the grid.

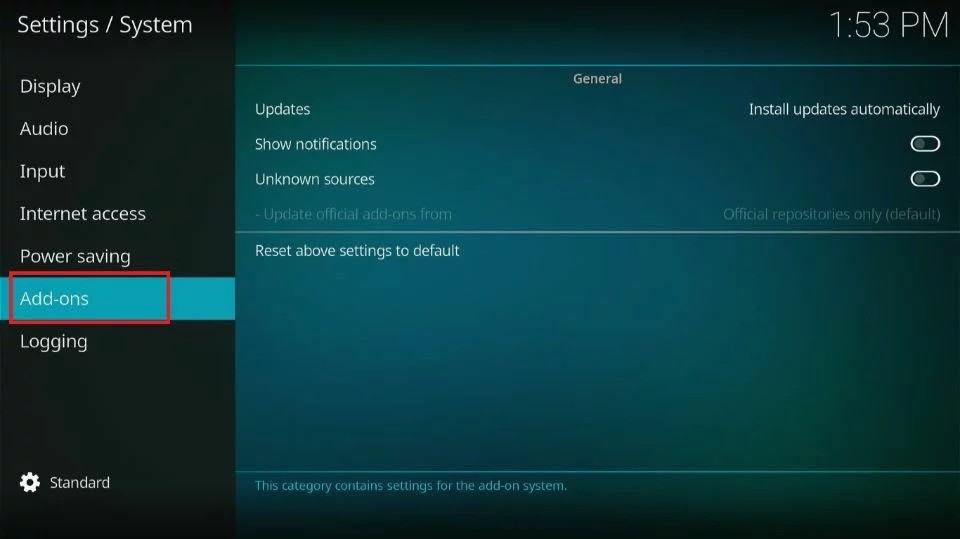
3. Select Addons on the left side.
4. Select Unknown Sources to switch the toggle to the right, enabling the setting.
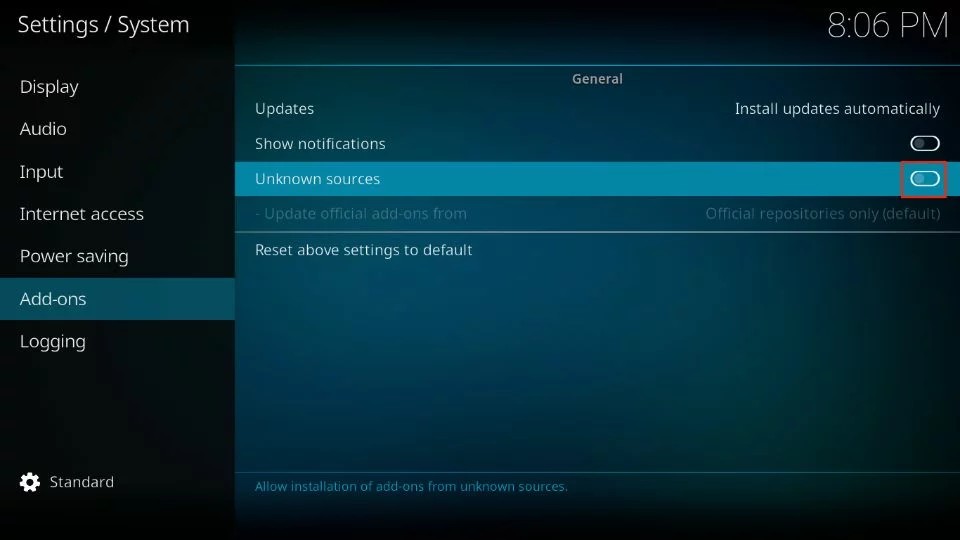
5. Select Yes on the warning to proceed.
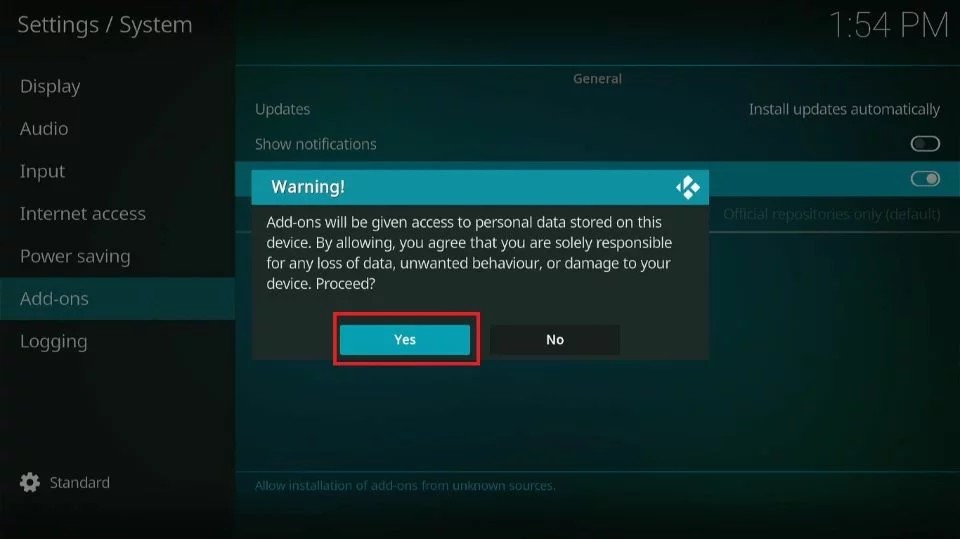
The setting is enabled so that we can add third-party sources now. Let’s add the repository.
Part 2: Installing the Misfit Mods Repository
1. Press the back button to return to the settings menu and click File Manager.
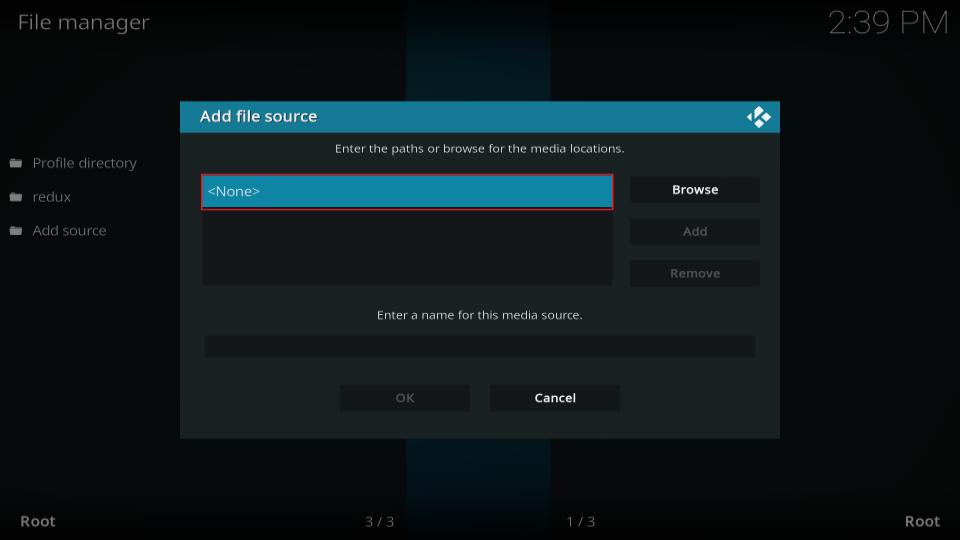
2. Select Add source.

3. Click where it says <None>.
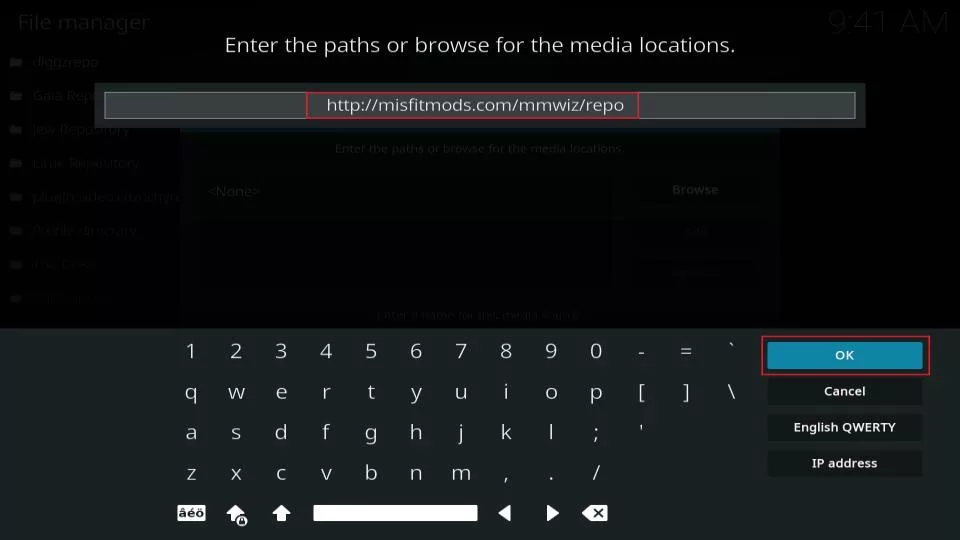
4. Enter http://misfitmods.com/mmwiz/repo exactly as I show it here. Click OK to move on.
Note: FireStickTricks.com doesn’t distribute or host the Misfit Mods Repository; its developers supply it.
5. Click the field to Enter a name for this media source.
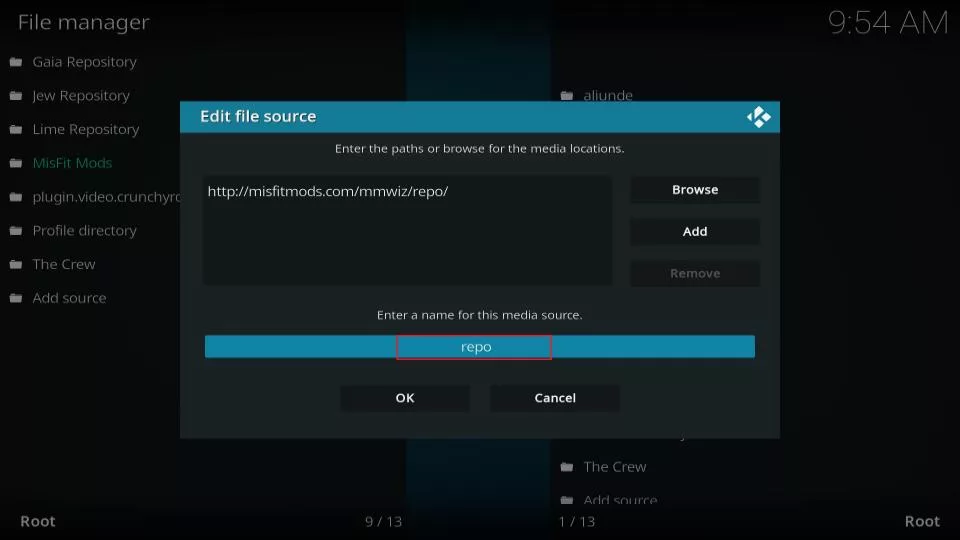
6. Enter and confirm the name misfits. Click OK.

7. Press your back button again to Settings and click on Addons.
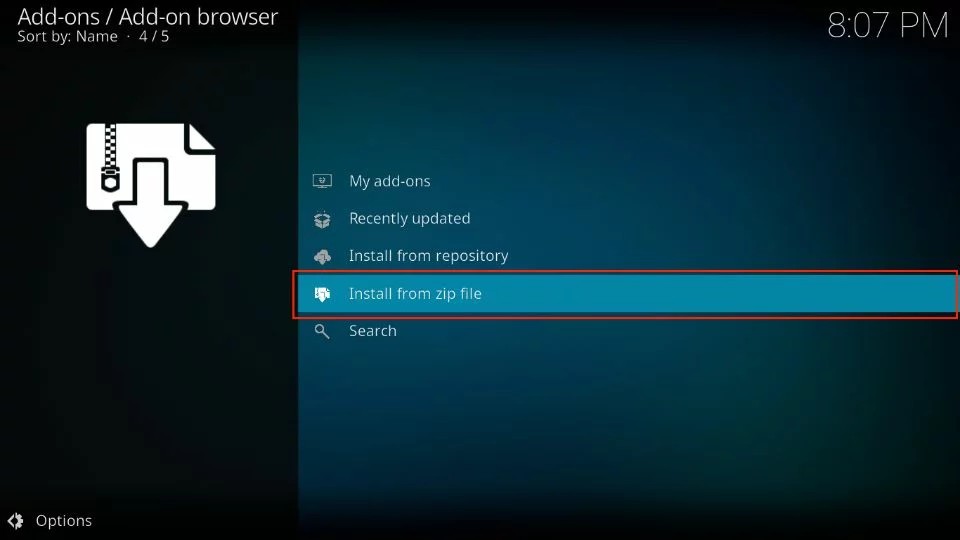
8. Click on Install from zip file.
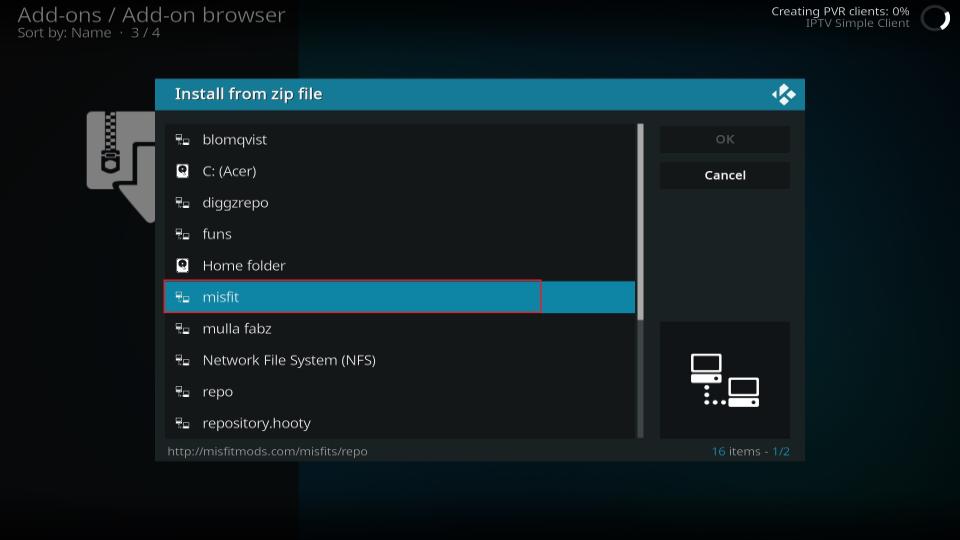
9. Click the misfits source we just added.

10. Select repository.misfitmods.x.x.zip. On some devices, you’ll have to press OK as well.

11. When the repository installation is complete, an “Addon installed” notification will appear in the top-right corner of your screen. Remain on this screen.
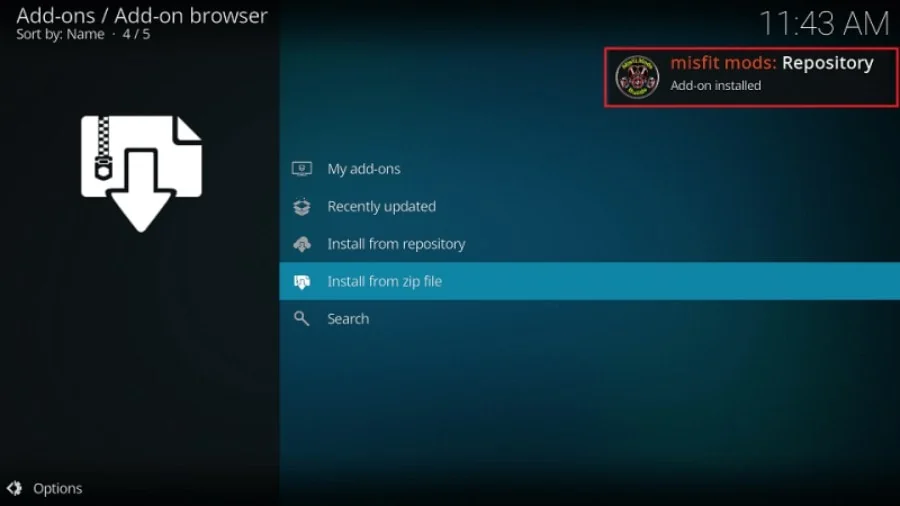
We need to get the Misfit Mods Wizard to install Atomic Matrix from the repository, so that’s what we’ll do next.
Part 3: Installing the Misfit Mods Wizard
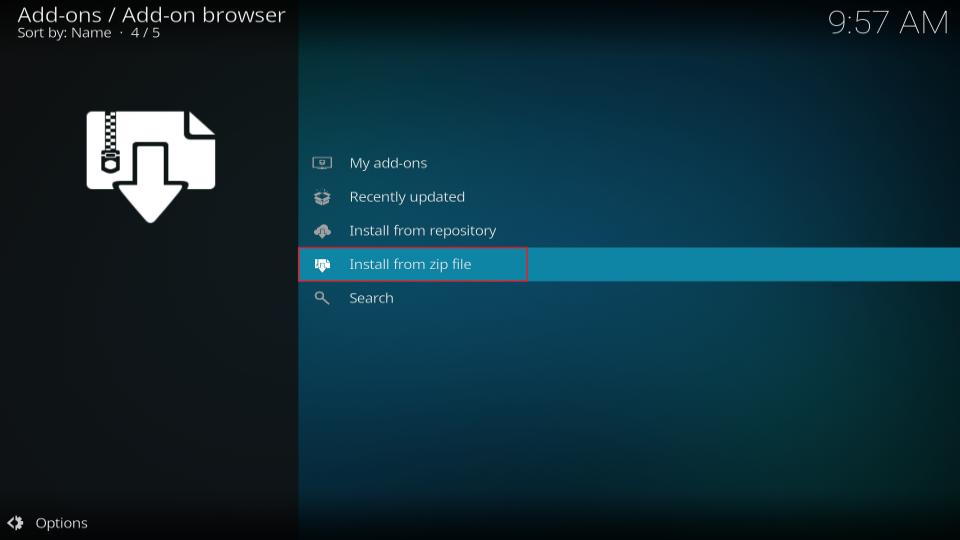
1. This time, select Install from zip file.
2. Select misfit.
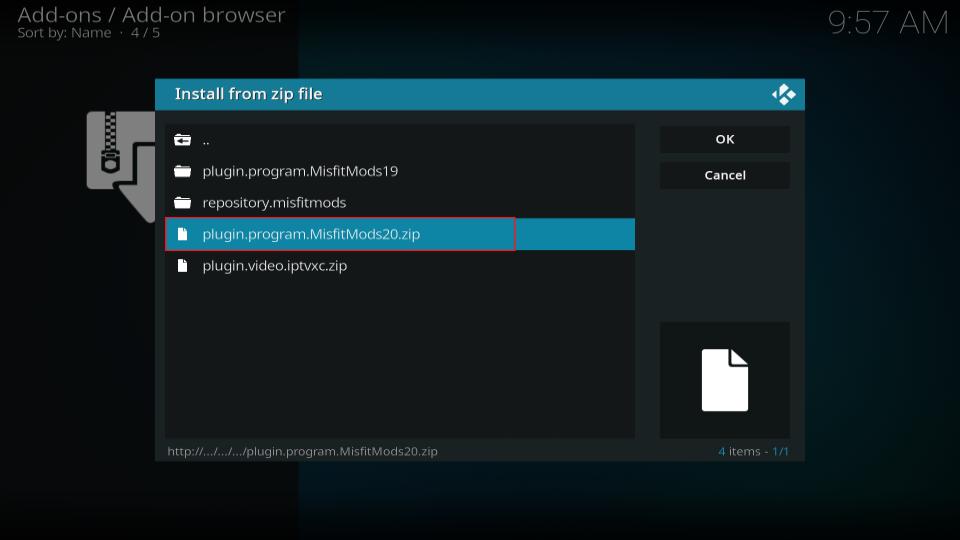
3. Select plugin.program.MisfitMods20.zip.
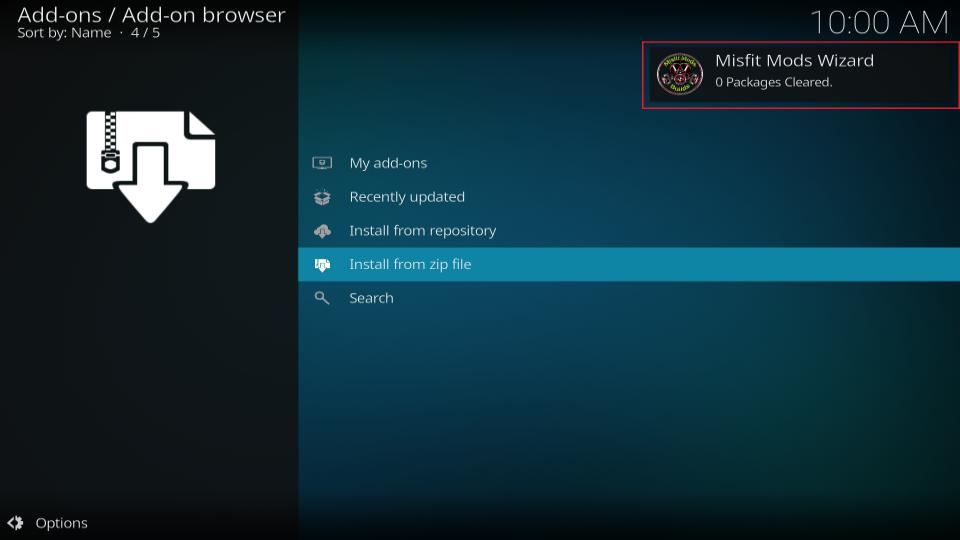
4. The wizard will install in some time. You will see a notification at the top right side of the screen (as shown in the image below).
Now that we have the Misfit Mods Wizard, we can finally get the Atomic Matrix build. Let’s do it!
Part 4: Installing the Atomic Matrix Build
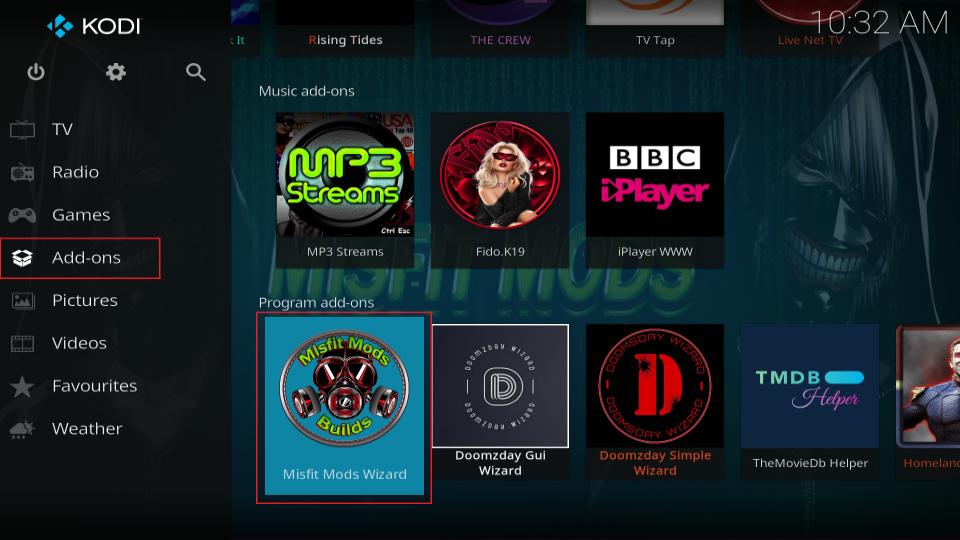
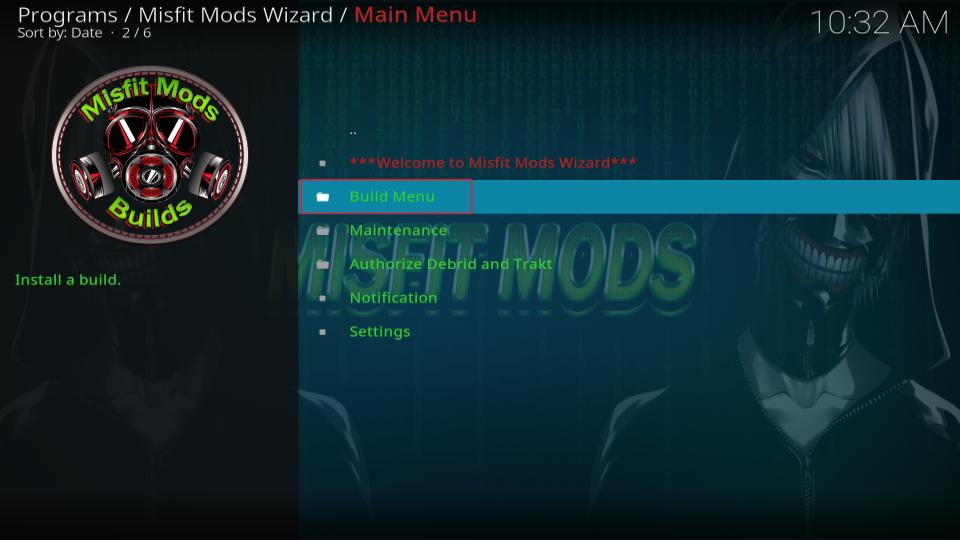
1. Select Addons and then select Misfit Mods Wizard.
2. Select Build Menu on the following page.
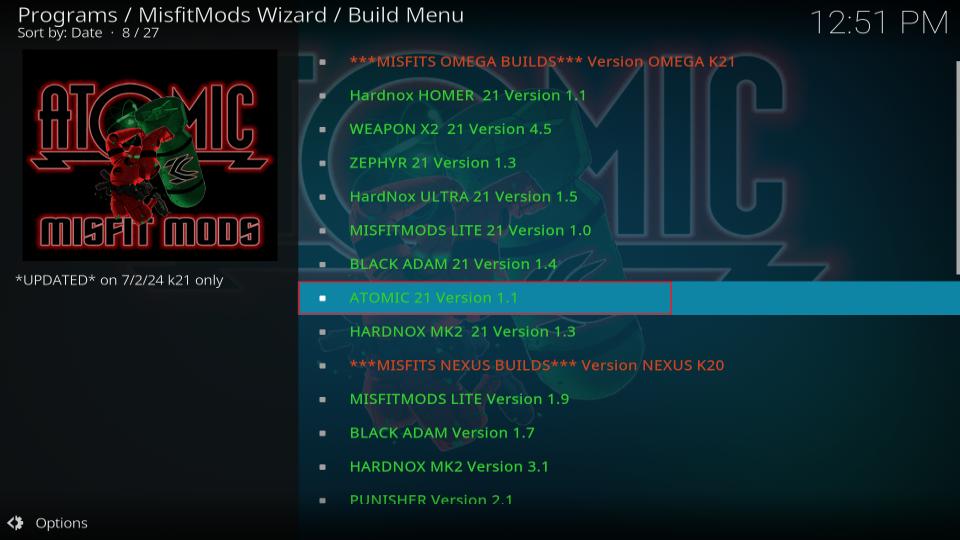
3. When the wizard opens, select ATOMIC 21 Version.
Note: 2.7 is the latest version as this article’s is in writing. If you see a newer version, select it.
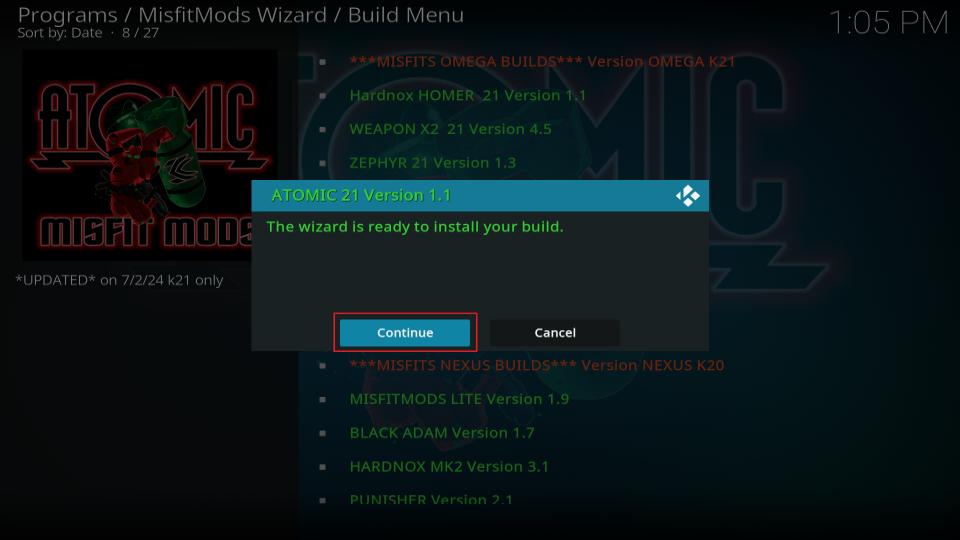
4. Select Continue.
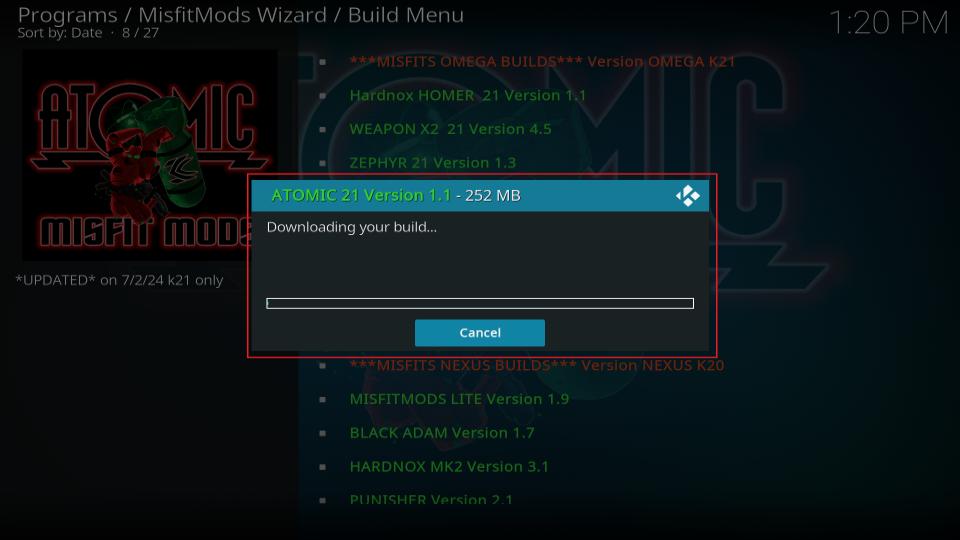
5. You’ll now be shown a progress bar for the installation.
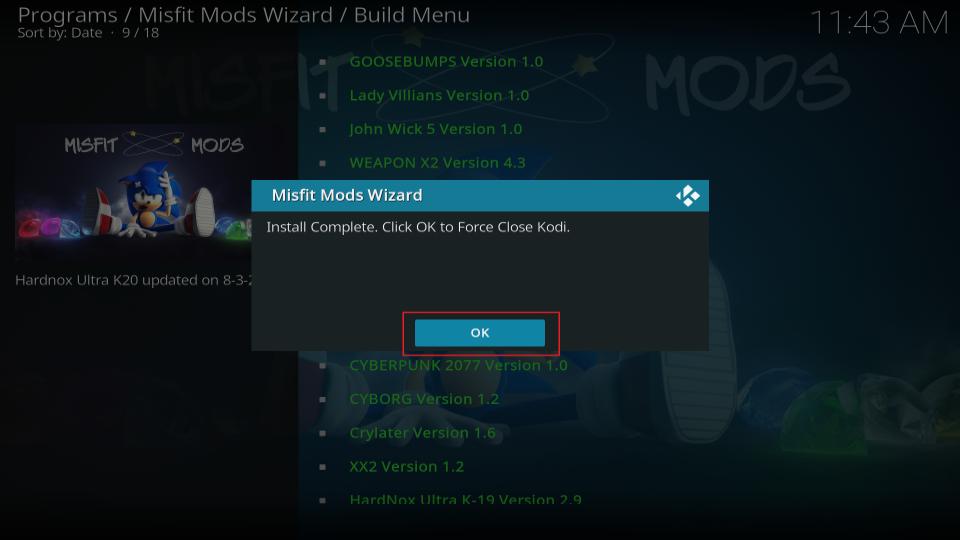
6. After the installation process is complete, you will see a prompt asking you to shut down Kodi before changes can be applied. Select OK to continue with the forced shutdown.
Before you start streaming with Kodi Addons or Builds, I would like to warn you that everything you stream on Kodi is visible to your ISP and Government. This means, streaming copyrighted content (free movies, TV shows, live TV, and Sports) might get you into legal trouble.
Thankfully, there is a foolproof way to keep all your streaming activities hidden from your ISP and the Government. All you need is a good VPN for Kodi. A VPN will mask your original IP which is and will help you bypass Online Surveillance, ISP throttling, and content geo-restrictions.
I personally use and recommend ExpressVPN, which is the fastest and most secure VPN. It is compatible with all kinds of streaming apps and devices.
NOTE: We do not encourage the violation of copyright laws. But, what if you end up streaming content from an illegitimate source unintentionally? It is not always easy to tell the difference between a legit and illegal source.
So, before you start streaming on Kodi, here's how to get VPN protection in 3 simple steps.
Step 1: Get the ExpressVPN subscription HERE. It comes with a 30-day money-back guarantee. Meaning, you can use it free for the first 30-days and if you are not satisfied with the performance (which is highly unlikely), you can ask for a full refund.
Step 2: Click HERE to download and install the ExpressVPN app on your streaming device. If you are using a FireStick, I have given the exact steps starting with Step 4 below.
Step 3: Click the Power icon to connect to a VPN server. That's all. Your connection is now secure with the fastest and best VPN for Kodi.

The following are the steps to install Kodi VPN on your Fire TV devices. If you have other streaming devices, follow Step 1-3 above.
Step 4: Subscribe to ExpressVPN HERE (if not subscribed already).
Step 5: Go to Fire TV Stick home screen. Click Find followed by Search option (see image below).

Step 6: Type Expressvpn in the search bar and select when it shows up.

Step 7: Click Download.

Step 8: Open the ExpressVPN app and Sign in using the email ID and password that you created while buying the ExpressVPN subscription.

Step 9: Click the Power icon to connect to a VPN server. That’s all. Your FireStick is now secured with the fastest VPN.

When you reboot Kodi, you’ll immediately see a new custom loading screen. Your Kodi will now be using the Atomic Matrix interface, which means the installation was successful.
You have to wait a little longer for streaming content as the build will download the addons it depends on for its streaming capabilities and other functionalities.

Conclusion
In this guide, I showed you how to install the Atomic Matrix build on Kodi. How was your experience with Atomic Matrix? Let me know in the comment section below.
If the neon-green theme doesn’t suit you, you can always try one of the other builds available through the Misfit Mods Wizard. For more options, check out my list of the best Kodi builds. Do remember to use a VPN , though. Happy streaming!
Related:
- How to Install Doomzday Kodi Build
- How to Install Misfit Mods Lite Kodi Build
- Install BMC Kodi Build
- How to Install No Limits Magic Kodi Build

Suberboost Your FireStick with My Free Guide
Stay Ahead: Weekly Insights on the Latest in Free Streaming!
No spam, ever. Unsubscribe anytime.

Leave a Reply