In this guide, I will show you how to install Seren Addon on Kodi 21 Omega and Kodi 20 Nexus. The detailed instructions work on all Kodi-supported platforms, including Android devices such as FireStick, Mobiles, and tablets, iOS devices like iPhones and iPads, and Computers, including Mac and Windows.
What is Seren Addon?
Seren is an on-demand Kodi addon that lets you stream shows, movies, and more with a simple interface and instant playback. With Seren, you can access a huge library of films and TV shows.
Unlike many free addons, Seren only works with premium services, such as Real-Debrid, All Debrid, and Premiumize. One of the benefits of using only premium links is the guarantee of high-quality streams and minimal buffering.
Seren also allows you to install custom providers for even more streaming options. One of the best providers for Seren is a4kScrapers, a known provider for other addons like a4kStreaming.
If you are looking for a reliable Kodi addon with a huge library of movies and TV shows, Seren is an excellent choice.
Attention Kodi Users!
Governments and ISPs worldwide monitor your online activities. If you use third-party Kodi addons, you should always use a reliable Kodi VPN to hide your identity and prevent issues with your streaming experience. Currently, your IP is visible to everyone.
I use ExpressVPN, the fastest and most secure VPN in the industry. It is very easy to install on any device, including Amazon Fire TV Stick, PC, Mac, and Smartphones. It also includes a 30-day money-back guarantee. If you're not satisfied with their service, you can request a refund. ExpressVPN is offering a special NEW YEAR deal: get 4 months free and save 78% on the 2-year plan.
Install and Use Best Kodi VPN | Why you must use a VPN at all times
Features of Seren
- Multiple sources
- Supports premium services like Real Debrid, All Debrid, and Premiumize
- Integrates with Trakt to help manage your watchlists
- A vast library of movies and TV shows, including the latest releases, hit shows, and timeless classics
- Simple and user-friendly interface
- Continues playback for TV show episodes
Is Seren Safe & Legal?
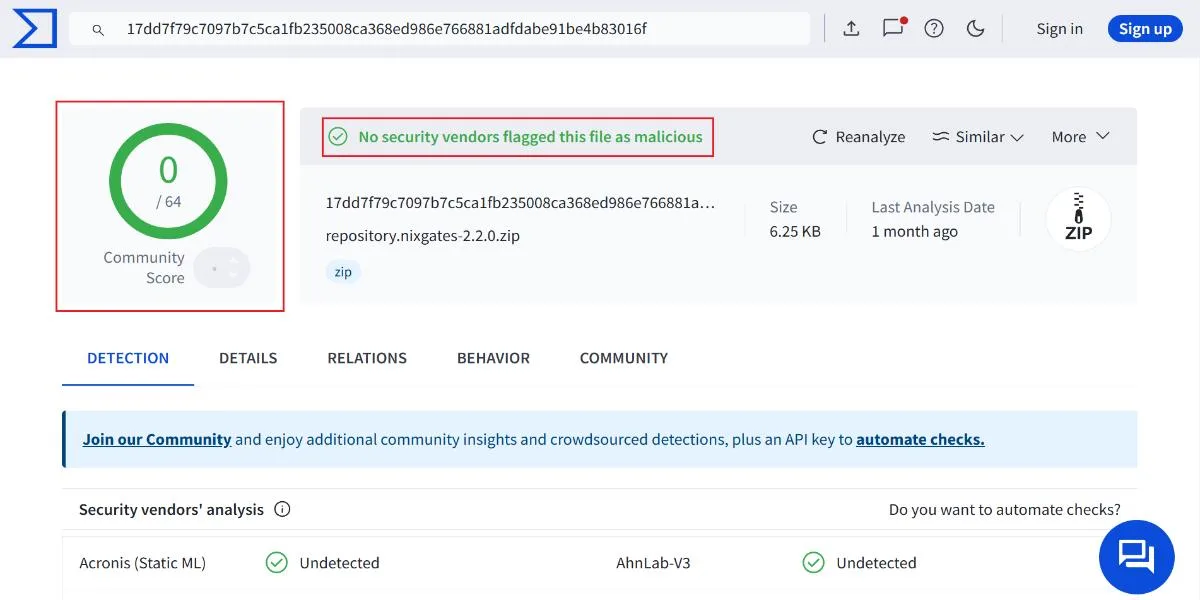
Third-party addons like Seren always raise safety concerns because they are hosted on unverified repositories. To protect your data and devices, you must scan them for malicious files before installing them.
I tested Nixgate’s zip file, the repository that hosts Seren, on VirusTotal to check for viruses and other malware. As you can see in the screenshot below, the repository doesn’t contain any malicious files.
Like other Kodi addons, Seren is an open-source plugin that pulls streaming links from external sites. The addon itself is legal, but using it to stream copyrighted content without permission may violate copyright laws in your country.
At FireStickTricks.com, we cannot verify Seren’s legal status. Legitimacy depends on the content sources and your country’s copyright protection laws.
That said, we don’t condone piracy and recommend only watching publicly available content. For added security and privacy, we suggest using a trusted VPN service when streaming on Kodi. I trust and use ExpressVPN on all my devices.
How to Install Seren Kodi Addon
Installing third-party addons like Seren is not allowed on Kodi. You will be required to change certain Kodi settings to allow installation from unknown sources. Given below are the steps to prepare Kodi to install the Seren Kodi addon:
Legal Disclaimer: This guide is for informational purposes only. FireStickTricks.com does not own, host, operate, resell, or distribute any apps, services, or content mentioned.
Part 1: Enable Unknown Sources
Follow these steps to enable Unknown sources on Kodi:
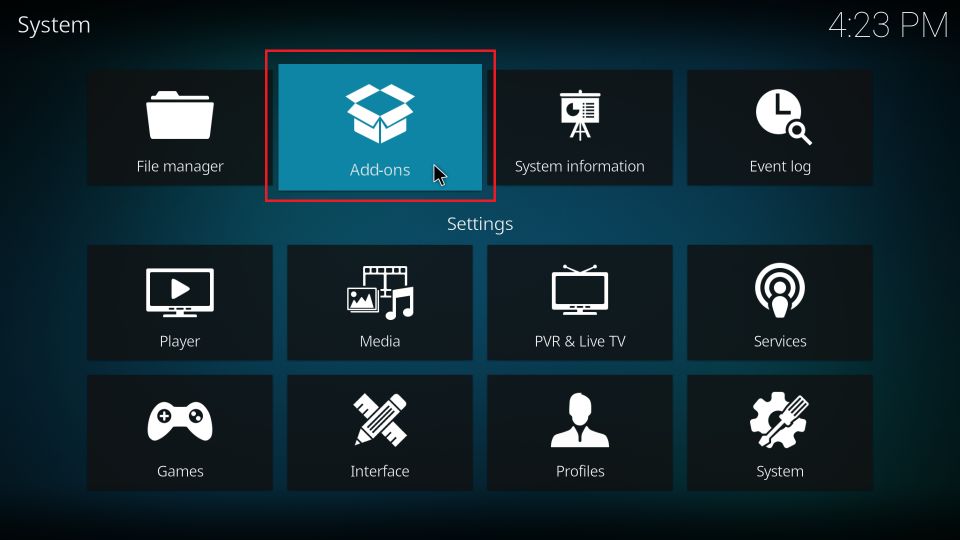
1. Access the Kodi Settings from the home screen by clicking the cog icon on the top left.
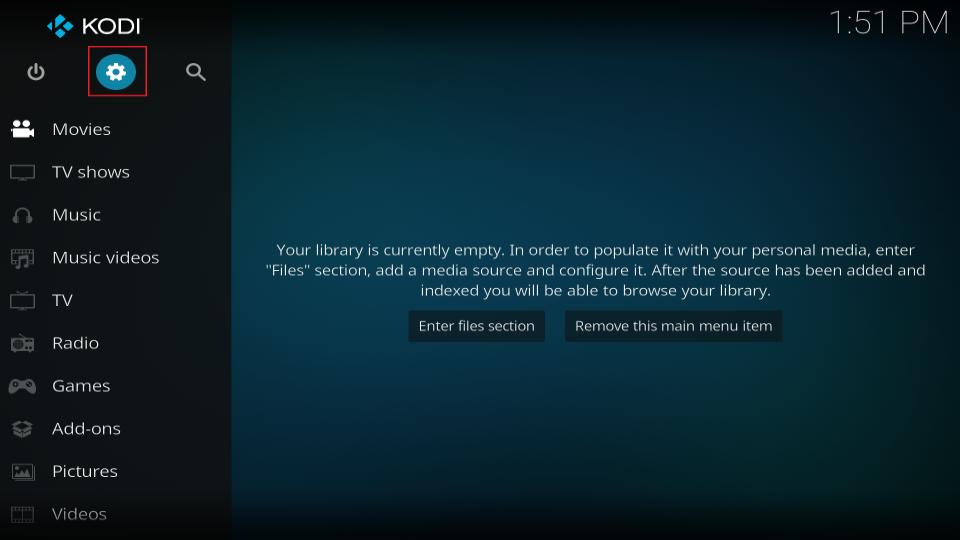
2. Select System on the next screen.
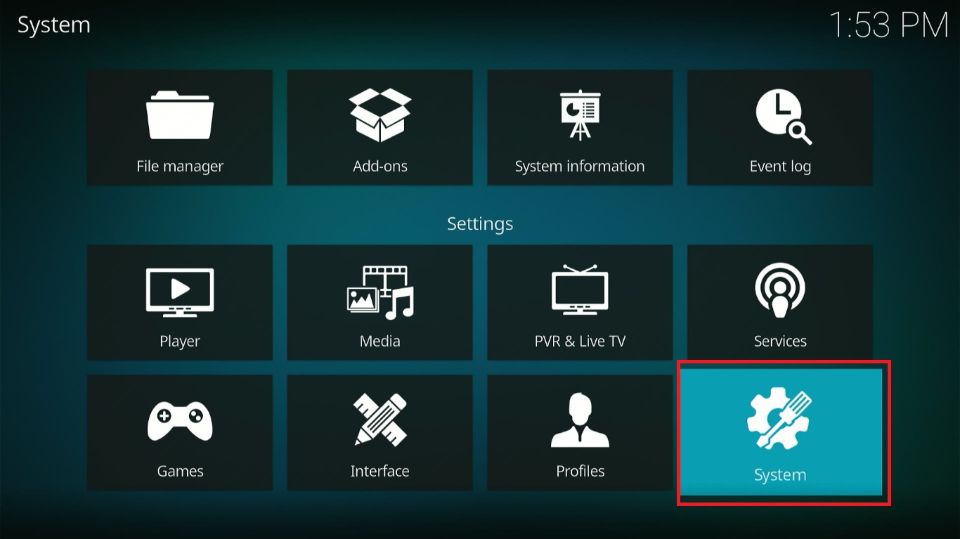
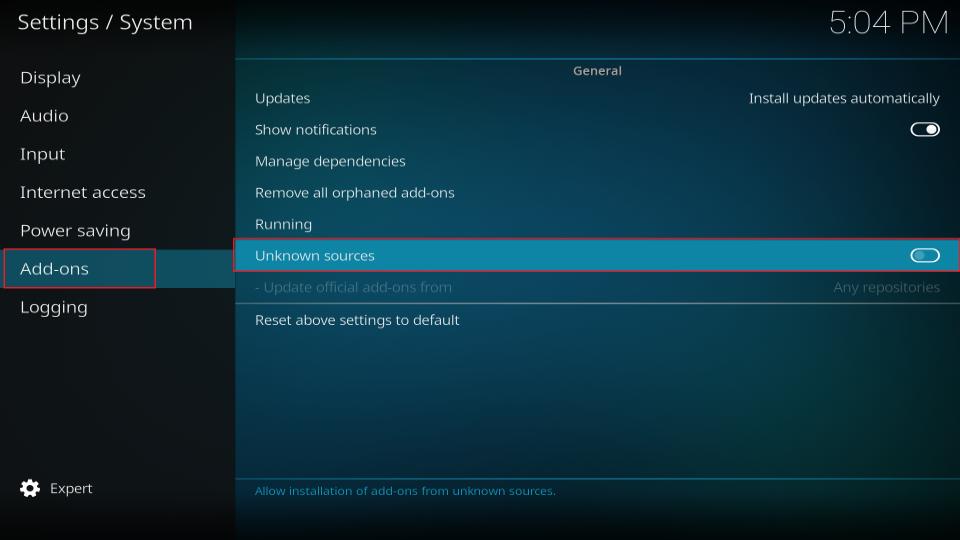
3. On the System window, navigate to Add-ons on the left menu bar. Scroll right to Unknown Sources and turn on the toggle.
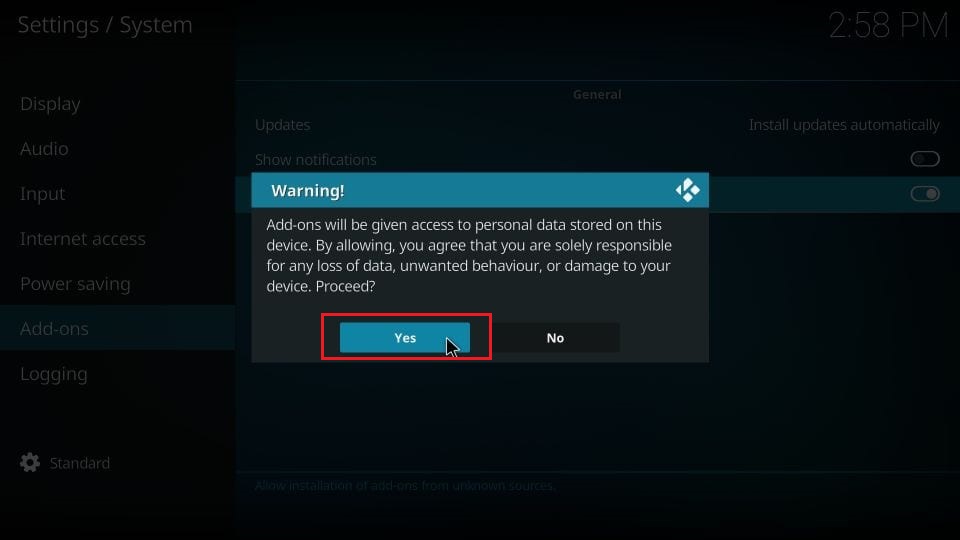
4. Click Yes when you see the Warning prompt.
Note: You may disable Unknown Sources after installing this addon.
You are now ready to install any third-party addon or repository.
Part 2: Install Nixgates Repo
Here is how you can install the repo:
1. Open the Settings again from Kodi’s home screen.
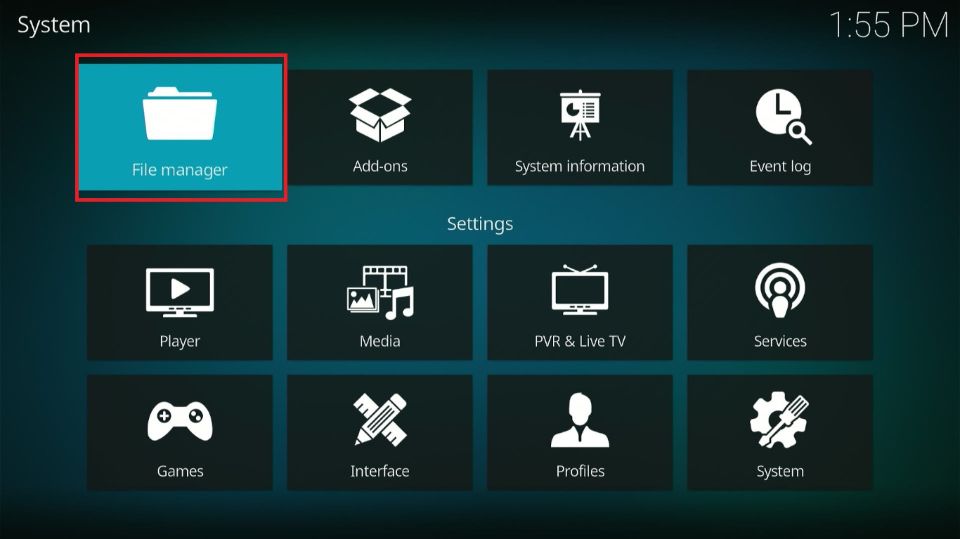
2. Now, navigate to the File manager and open it.
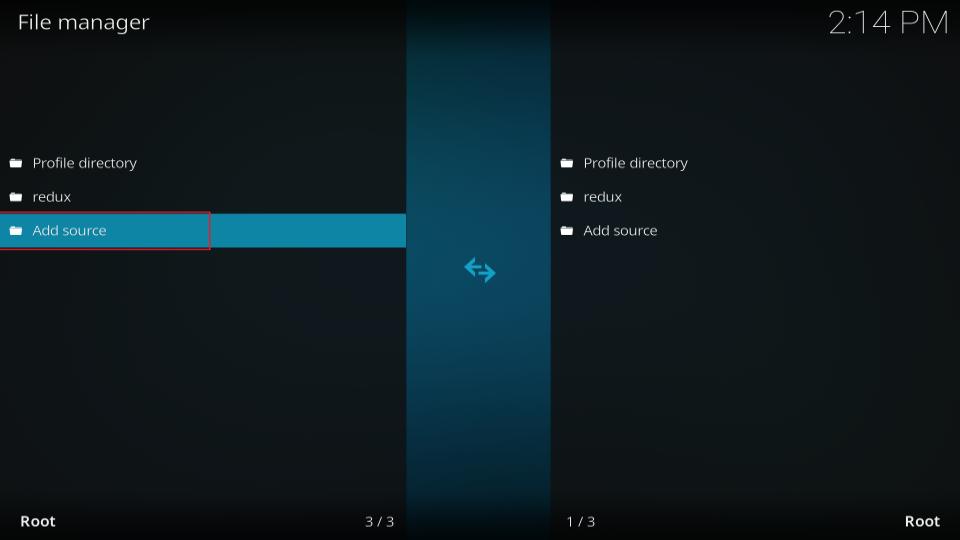
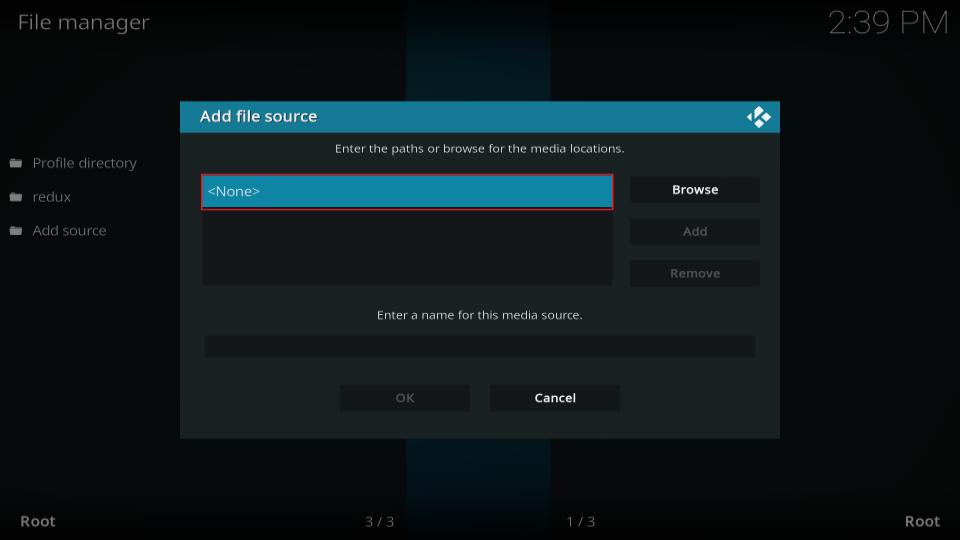
3. Click Add Source. The File manager window may appear as a double screen, but either option is okay.
4. Click <None> on the Add File Source window.
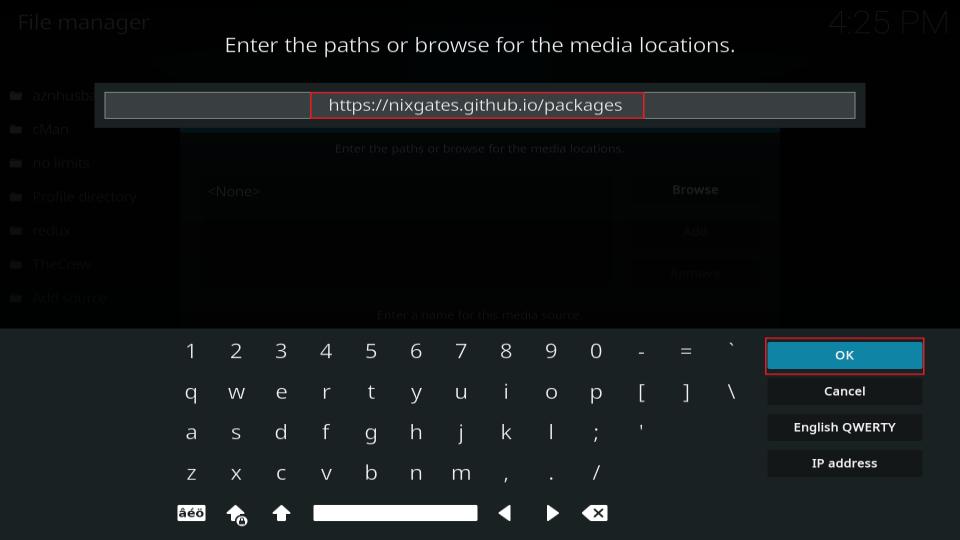
5. In the space provided in the window, type in the URL: https://nixgates.github.io/packages. Then, click OK.
Note: FireStickTricks.com does not host any third-party app/addon URLs. The URL above redirects to an external online location.
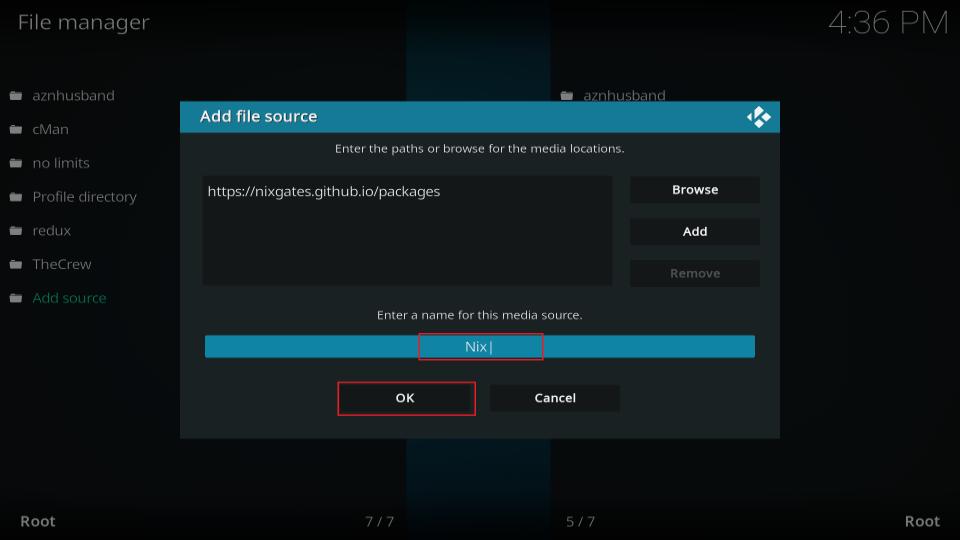
6. You need to name your media source. Type your preferred name and click OK. I chose Nix, which is short for Nixgates Repository.
Note: The names are set to packages by default; remove them, then type your preferred name.

7. Return to the Settings screen and click Add-ons.
8. Select Install from zip file on the next window.

9. Click the name that you added in Step 5 earlier. I am clicking Nix.
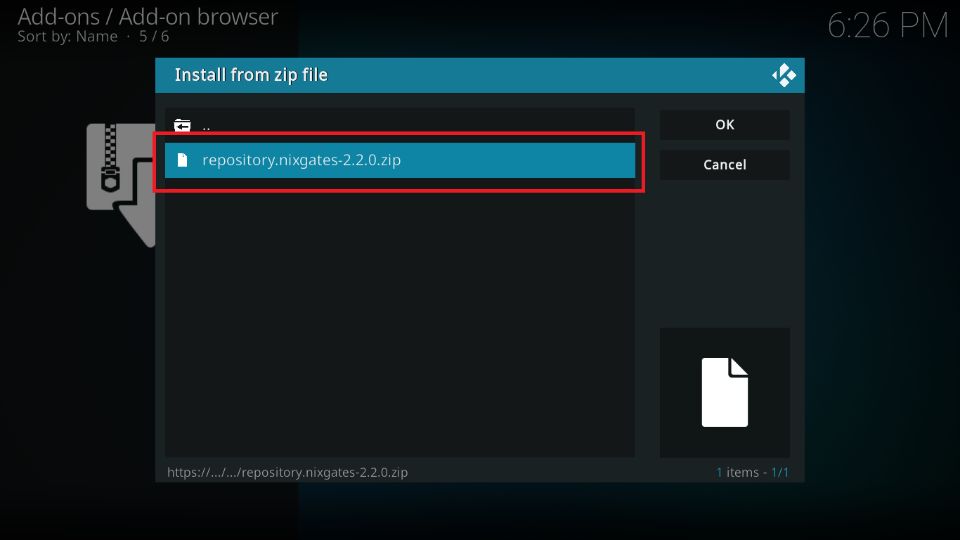
10. Click the zip file repository.nixgates-x.x.x.zip on the next screen.
Note: The version number might change when installing the Nixgates Repo.
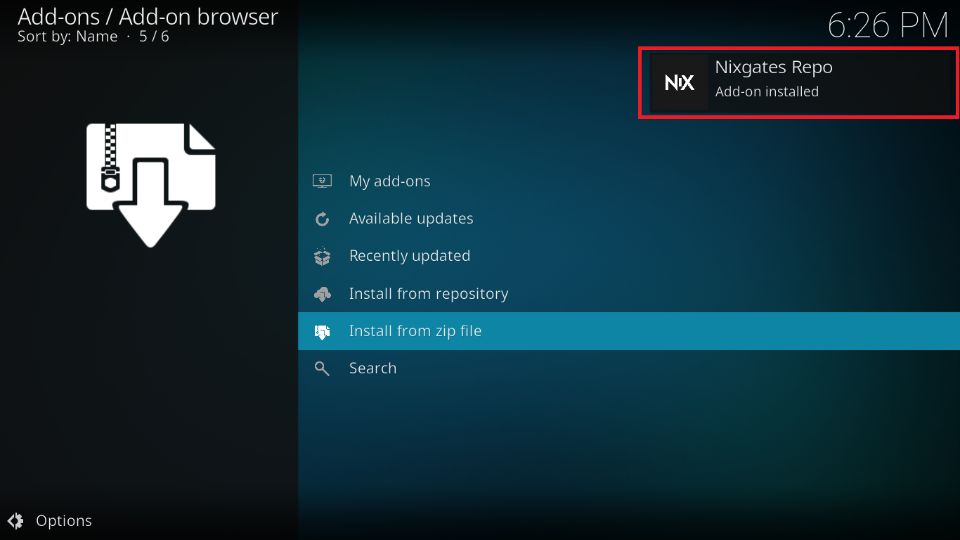
11. Now, wait for the notification that the Nixgates Repo Add-on installed. It will appear at the top right of your display.
Part 3: Install Seren Kodi Addon
Here are the steps:
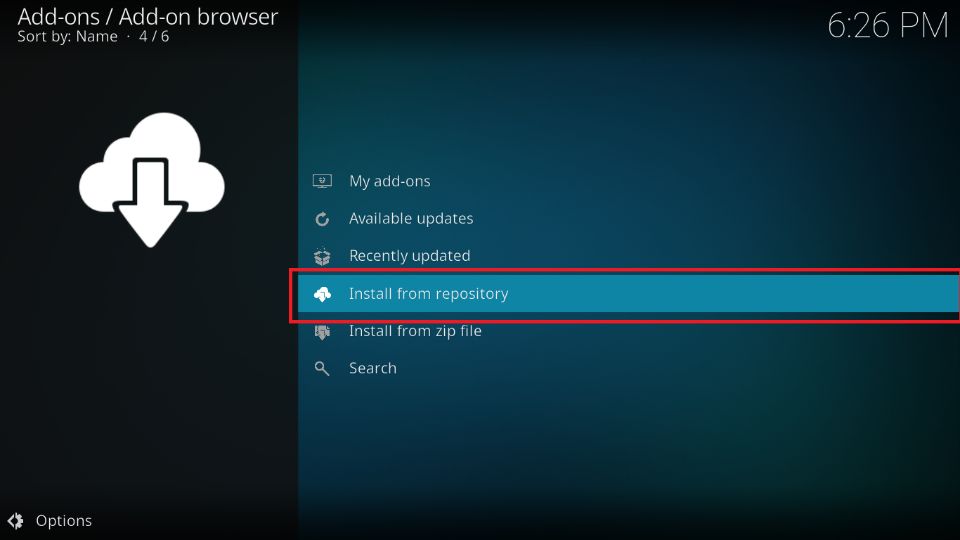
1. Click Install from repository while staying on the same window.
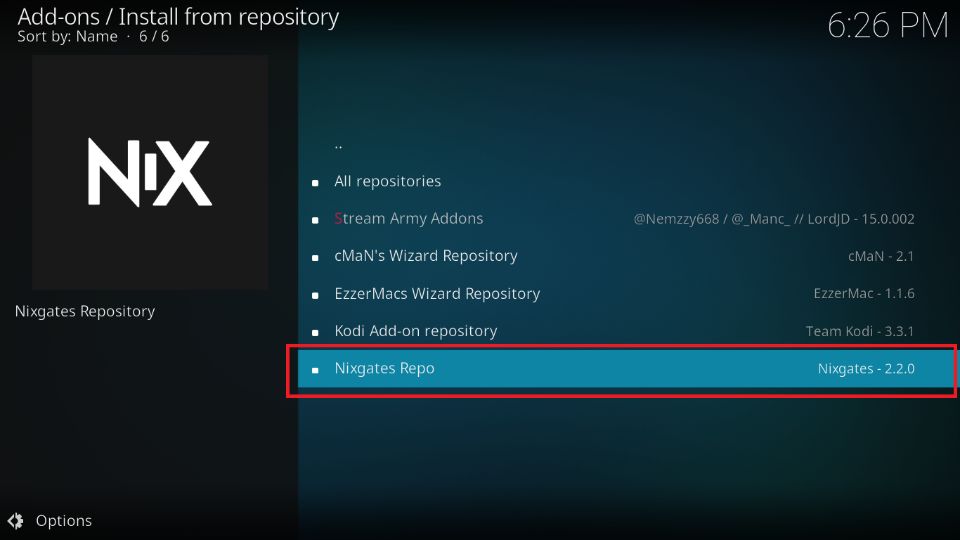
2. Click Nixgates Repo.
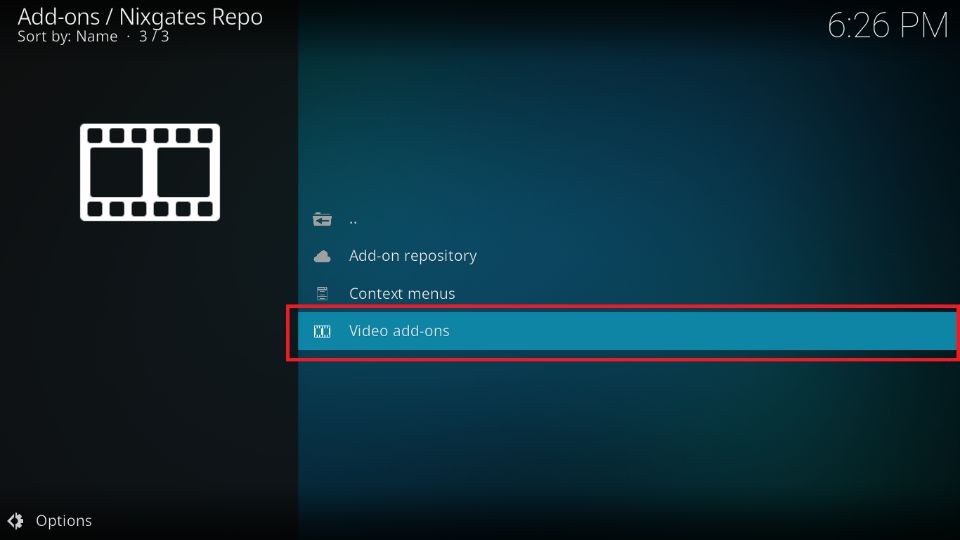
3. Open Video add-ons.
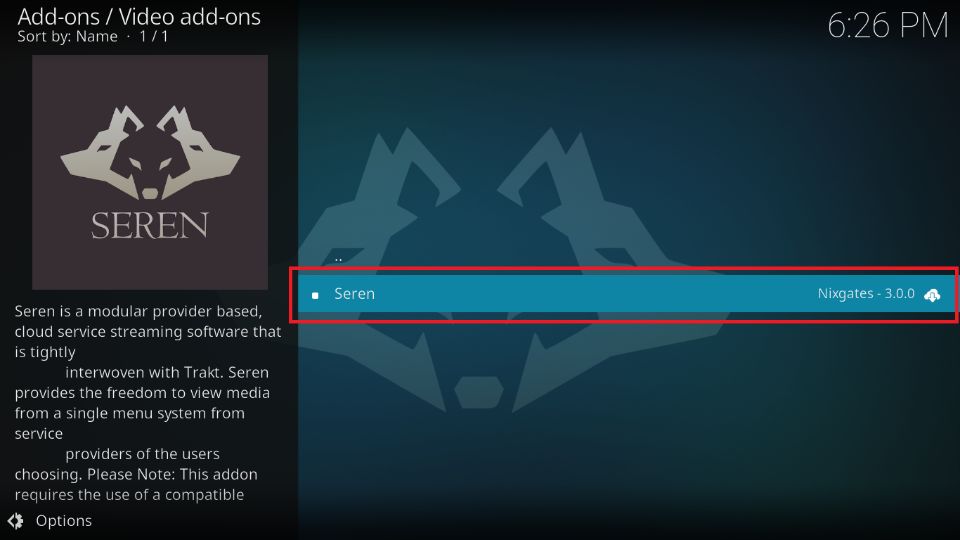
4. Click Seren to continue.
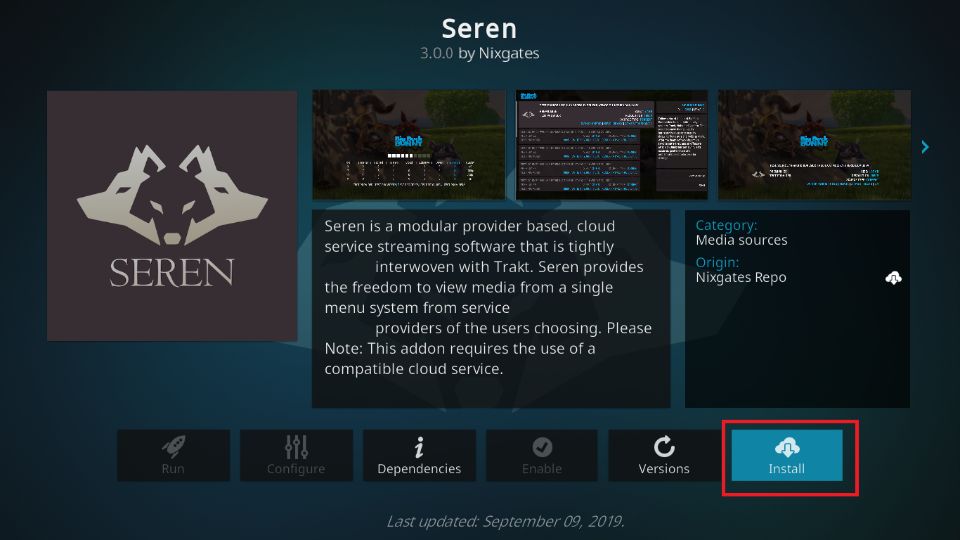
5. Click the Install button on the next screen.
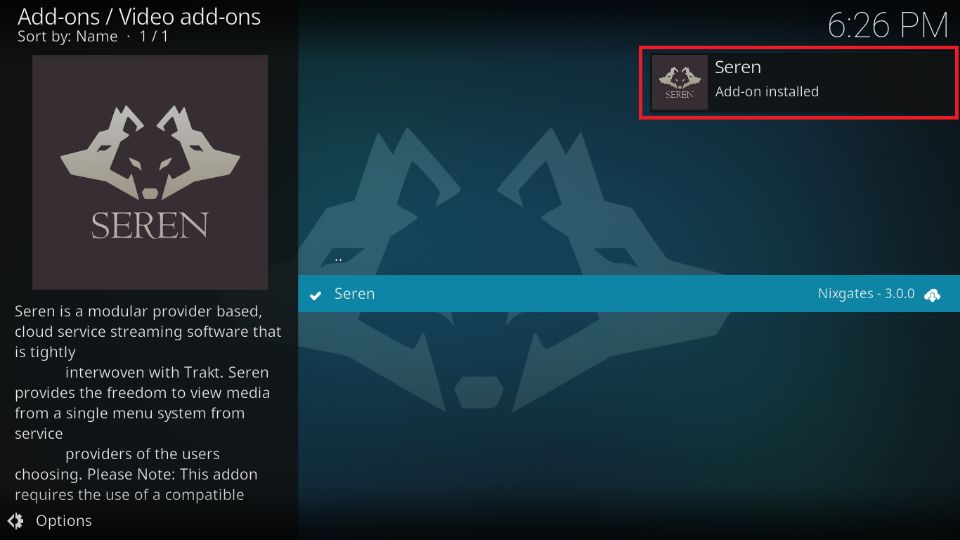
6. Wait for the Seren addon to install and the notification Seren Add-on installed to appear on the right-top of the screen.
You have successfully installed the Seren addon on Kodi.
Before you start streaming with Kodi Addons or Builds, I would like to warn you that everything you stream on Kodi is visible to your ISP and Government. This means, streaming copyrighted content (free movies, TV shows, live TV, and Sports) might get you into legal trouble.
Thankfully, there is a foolproof way to keep all your streaming activities hidden from your ISP and the Government. All you need is a good VPN for Kodi. A VPN will mask your original IP which is and will help you bypass Online Surveillance, ISP throttling, and content geo-restrictions.
I personally use and recommend ExpressVPN, which is the fastest and most secure VPN. It is compatible with all kinds of streaming apps and devices.
NOTE: We do not encourage the violation of copyright laws. But, what if you end up streaming content from an illegitimate source unintentionally? It is not always easy to tell the difference between a legit and illegal source.
So, before you start streaming on Kodi, here's how to get VPN protection in 3 simple steps.
Step 1: Get the ExpressVPN subscription HERE. It comes with a 30-day money-back guarantee. Meaning, you can use it free for the first 30-days and if you are not satisfied with the performance (which is highly unlikely), you can ask for a full refund.
Step 2: Click HERE to download and install the ExpressVPN app on your streaming device. If you are using a FireStick, I have given the exact steps starting with Step 4 below.
Step 3: Click the Power icon to connect to a VPN server. That's all. Your connection is now secure with the fastest and best VPN for Kodi.

The following are the steps to install Kodi VPN on your Fire TV devices. If you have other streaming devices, follow Step 1-3 above.
Step 4: Subscribe to ExpressVPN HERE (if not subscribed already).
Step 5: Go to Fire TV Stick home screen. Click Find followed by Search option (see image below).

Step 6: Type Expressvpn in the search bar and select when it shows up.

Step 7: Click Download.

Step 8: Open the ExpressVPN app and Sign in using the email ID and password that you created while buying the ExpressVPN subscription.

Step 9: Click the Power icon to connect to a VPN server. That’s all. Your FireStick is now secured with the fastest VPN.

How to Set Up Seren Kodi Addon with Real Debrid
As mentioned, Seren only fetches the links via premium services or providers. Let us find out how you can set up Real Debrid with Seren.
Note: Real Debrid is the best premium provider for its faster and better-quality links. Users have been experiencing issues following policy changes. Kodi community members are continuously developing workarounds for the RD issue. If you can’t keep up with these workarounds, check these Real Debrid alternatives in the meantime.
The first step is to create a Real Debrid account. To do this, visit the Real Debrid official website or follow our guide on installing and using Real-Debrid on Kodi.
Note: Real Debrid’s free subscription has limited features. Choose the paid subscription for high-quality and buffer-free playback. Apart from Seren, Real Debrid can be used with most Kodi addons and many FireStick streaming apps.
Once you have created a Real Debrid account, follow the instructions below to set it up on the Seren Kodi addon:
1. From the Kodi home screen, go to Add-ons. Then, open the Video add-ons and launch the Seren addon.
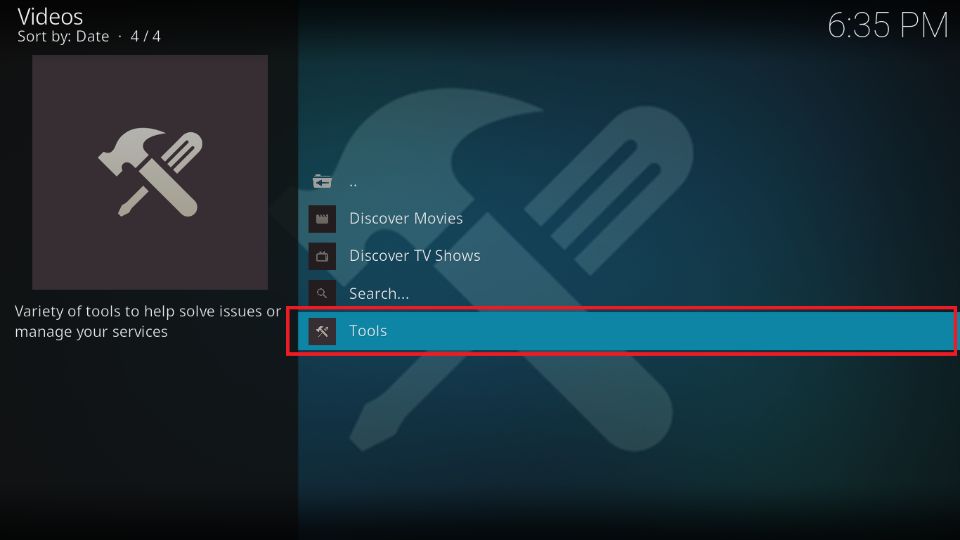
2. Click Tools on the main screen of Seren.
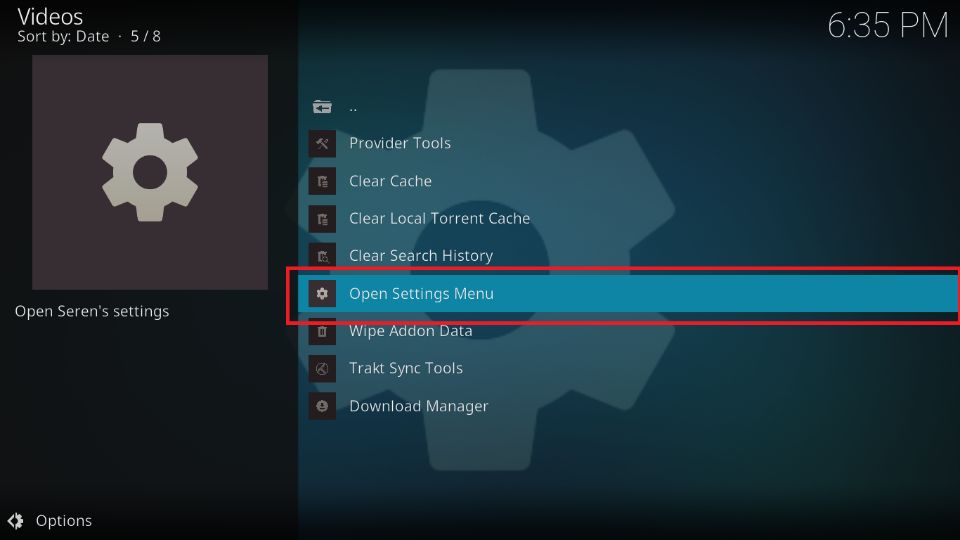
3. Click the Open Settings Menu on the following window.
4. Select the option Scraping on the left and the right.
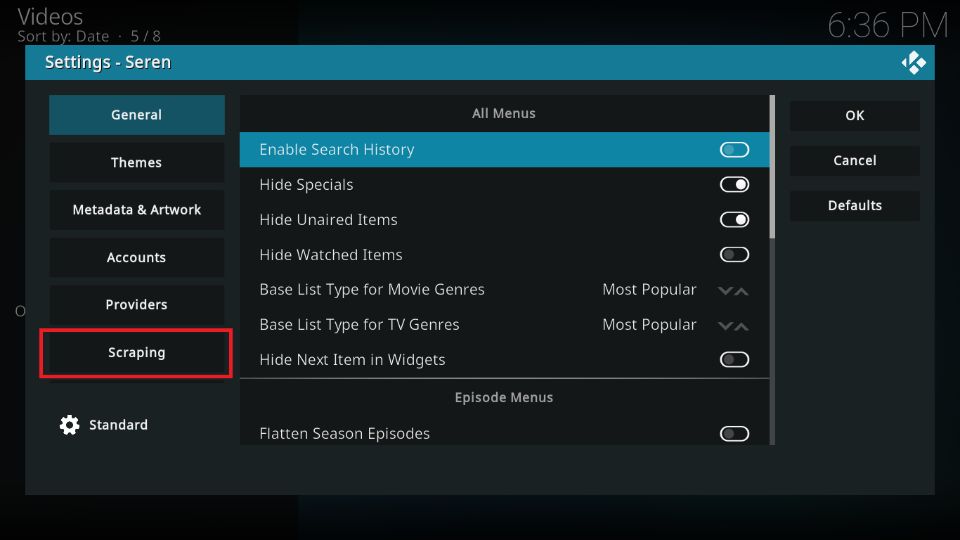
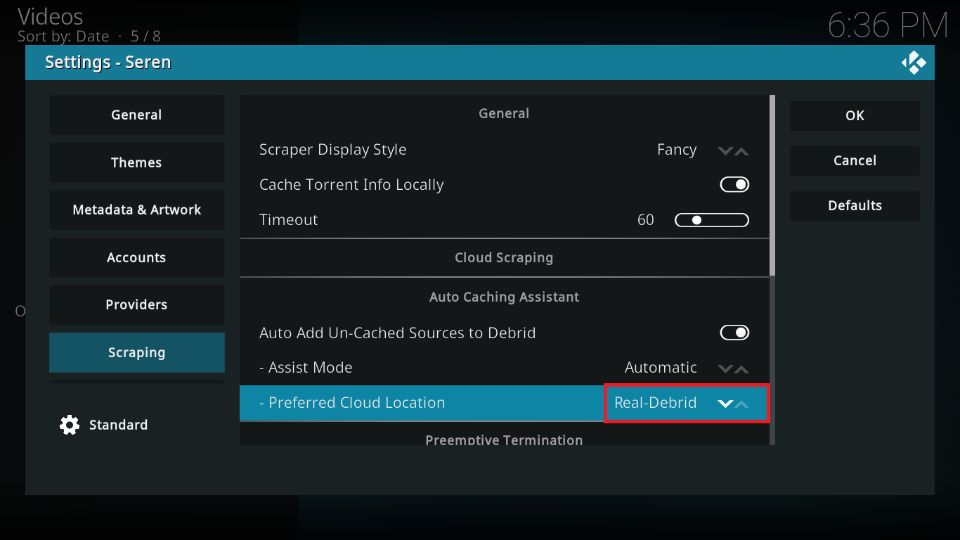
5. Under Auto Caching Assistant to Debrid, choose Real Debrid as the Preferred Cloud Location.
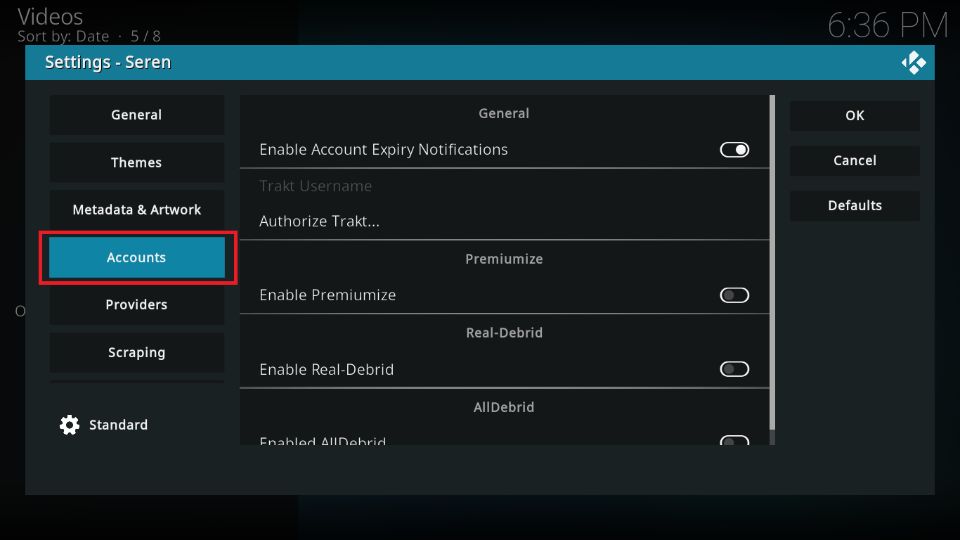
6. Now click the Accounts tab on the left.
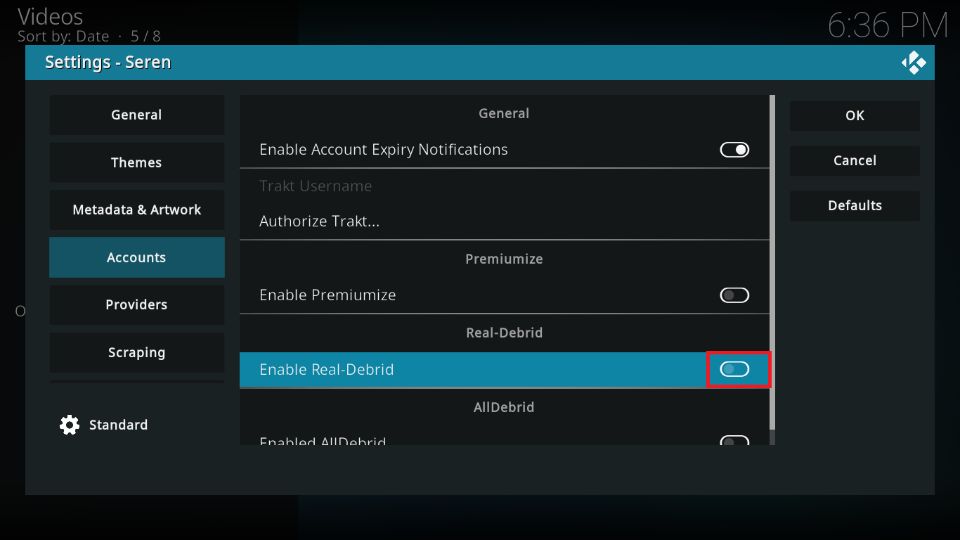
7. On the right, enable the option Enable Real Debrid.
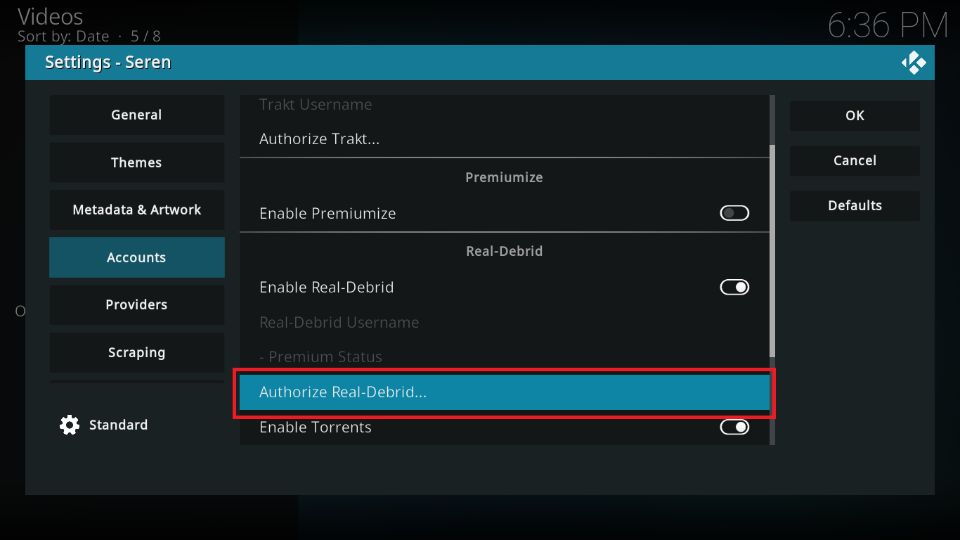
8. Scroll down on the same window and click Authorize Real Debrid.
9. You must now see a prompt with a code.
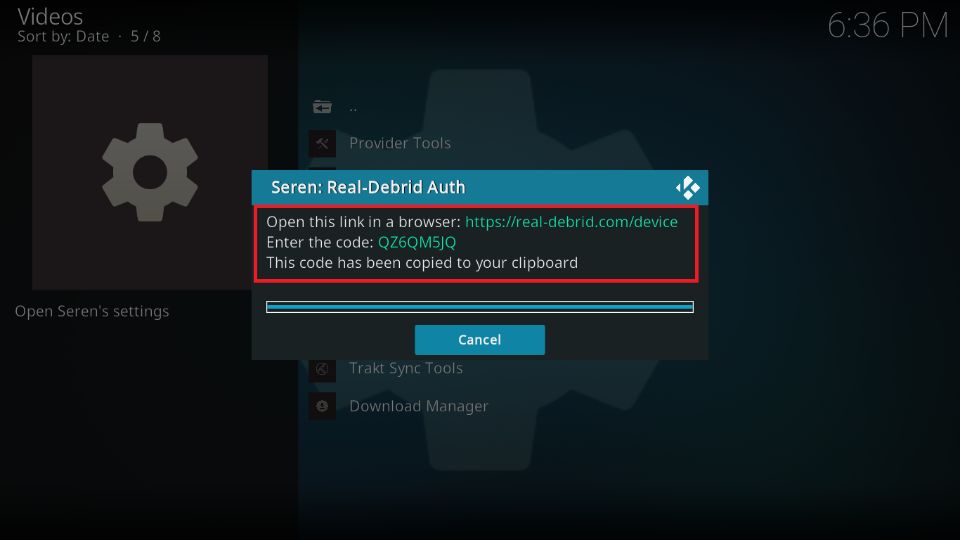
10. As the prompt instructs, use a mobile or computer browser and go to https://real-debrid.com/device.
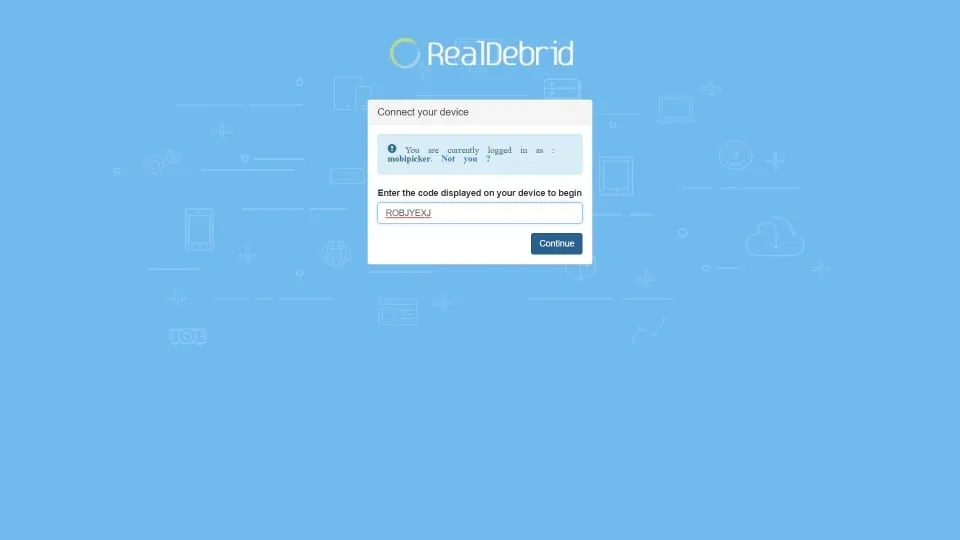
Enter the code from the prompt and click Continue (the code is NOT case-sensitive). The device authorization acknowledgment will be displayed on the next page of your browser.
If you are not already logged in to your Real Debrid account, the webpage will prompt you to log in with your credentials before authorizing the Seren Kodi addon.
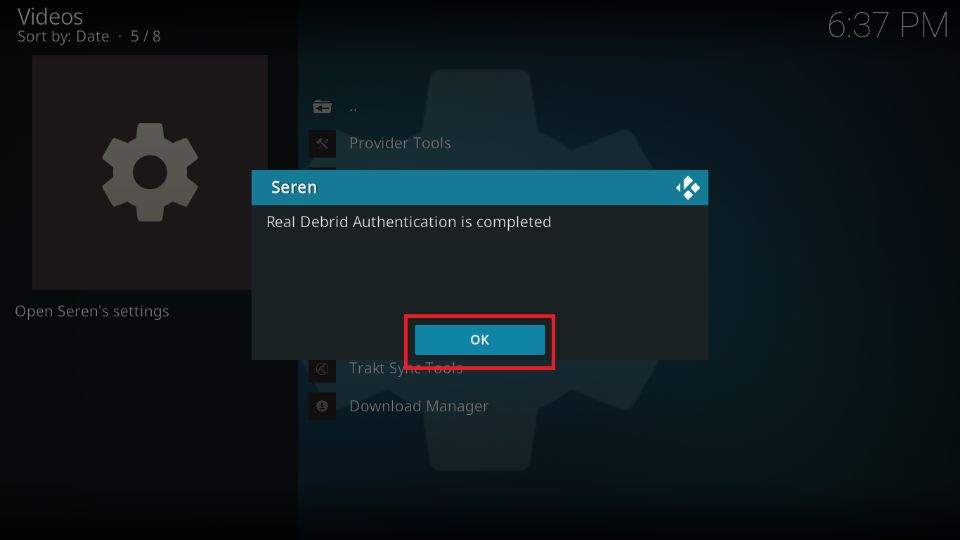
11. Upon successful authorization, you will see the following prompt on Kodi. Click OK to continue.
How to Install Provider Package on Seren Addon
Seren Kodi addon fetches the streams using Real Debrid, All Debrid, or Premiumize premium providers, as it does not come preinstalled with default providers.
However, if Seren doesn’t find any playable streams, even after authorizing the premium providers, you may try installing the Provider Packages. It takes only a few minutes. Here is what you need to do:
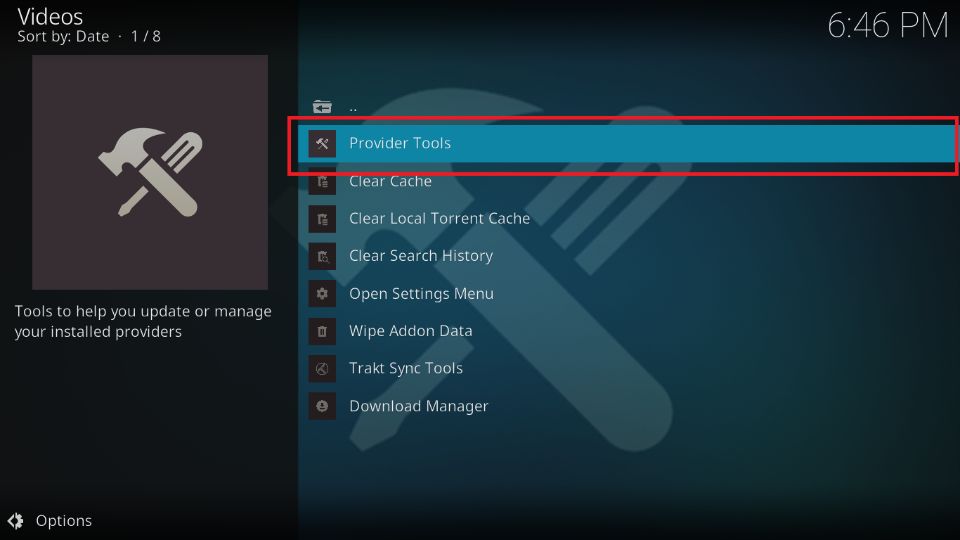
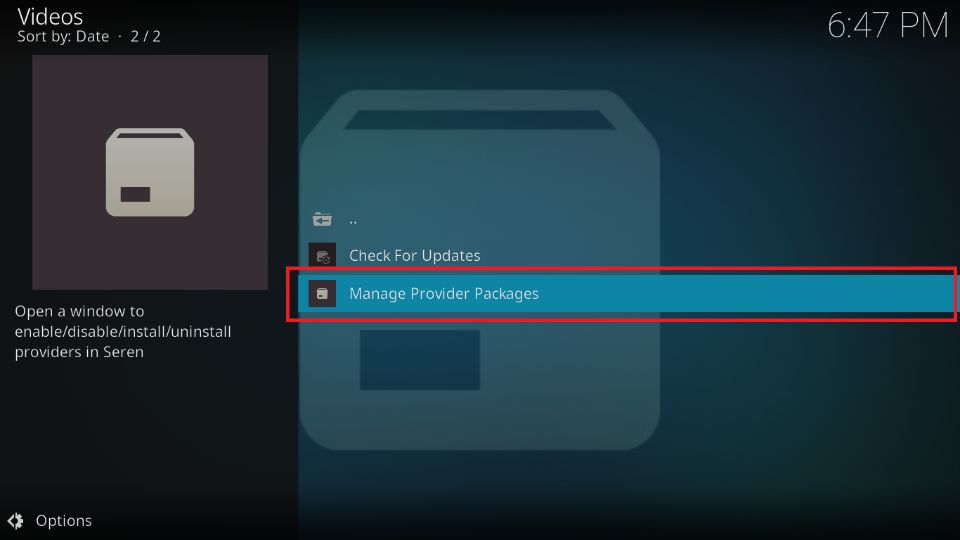
1. Open the Seren Kodi addon from the Kodi home screen> Add-ons > Video addons. Then, select Tools and open Provider Tools.
2. Choose Manage Provider Packages.
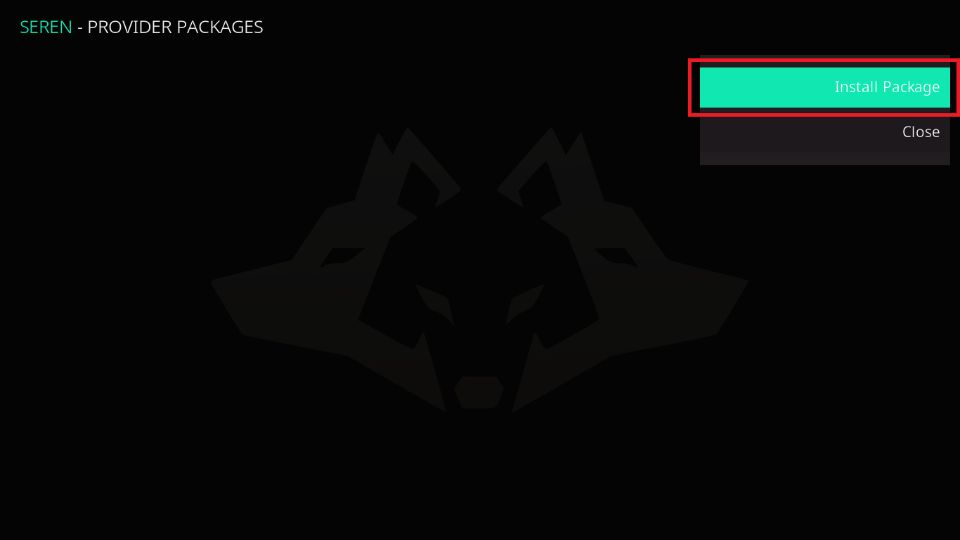
3. Select Install Package on the right.
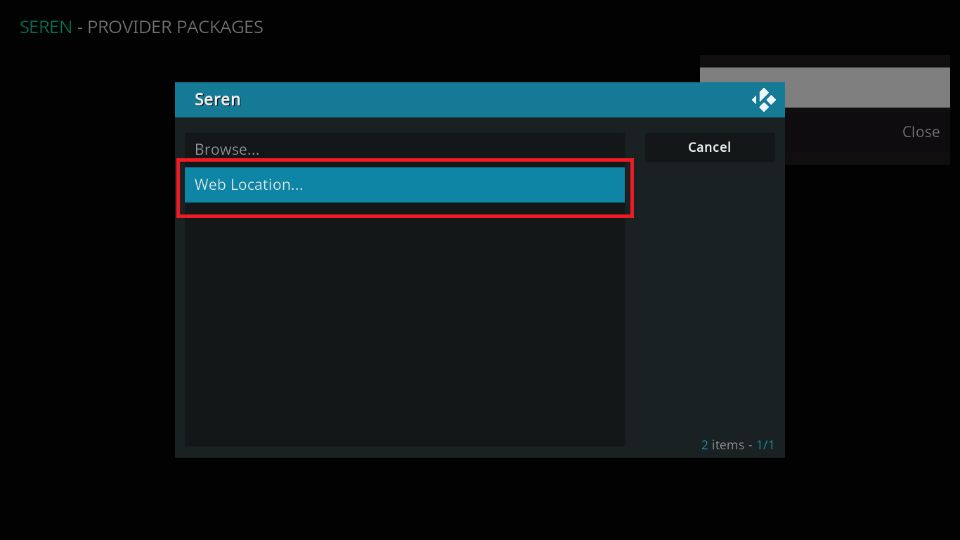
4. Click Web Location.
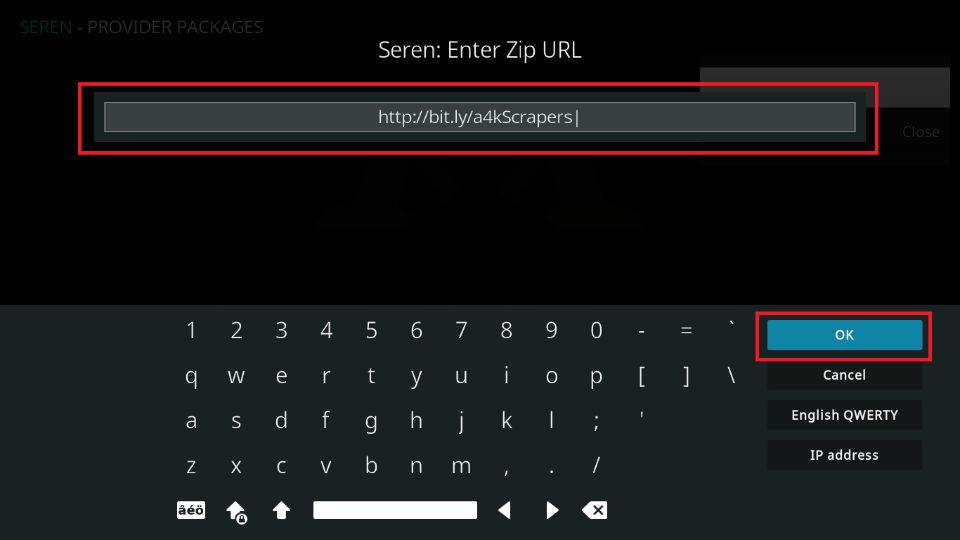
5. Enter the URL http://bit.ly/a4kScrapers and click OK.
6. Click Install.

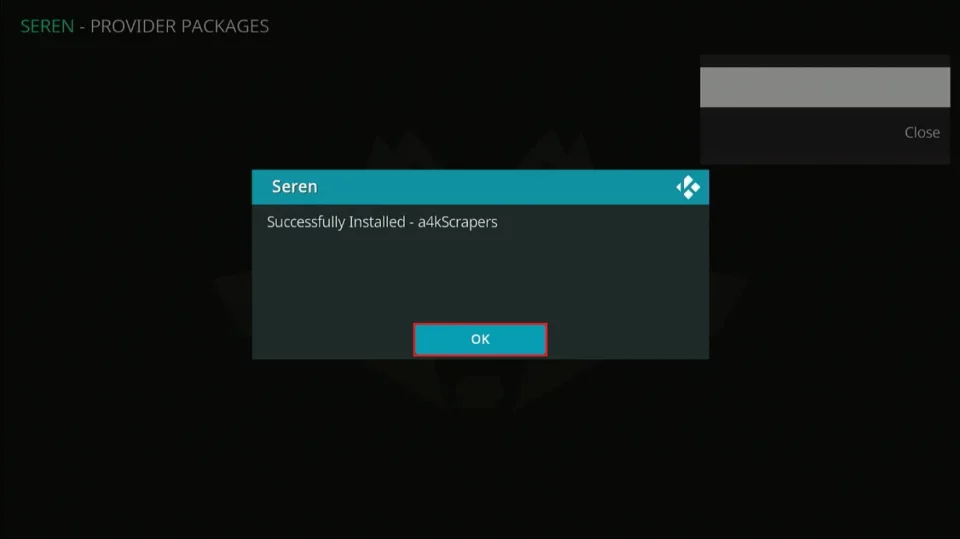
7. Click OK when you see the ‘Successfully Installed‘ prompt.
8. Click Close to get out of the Provider Packages section.

How to Use Seren Addon on Kodi
Now that you have authorized Real Debrid and installed the package provider, you can start watching your favorite movies and shows. This is the main screen of the addon:
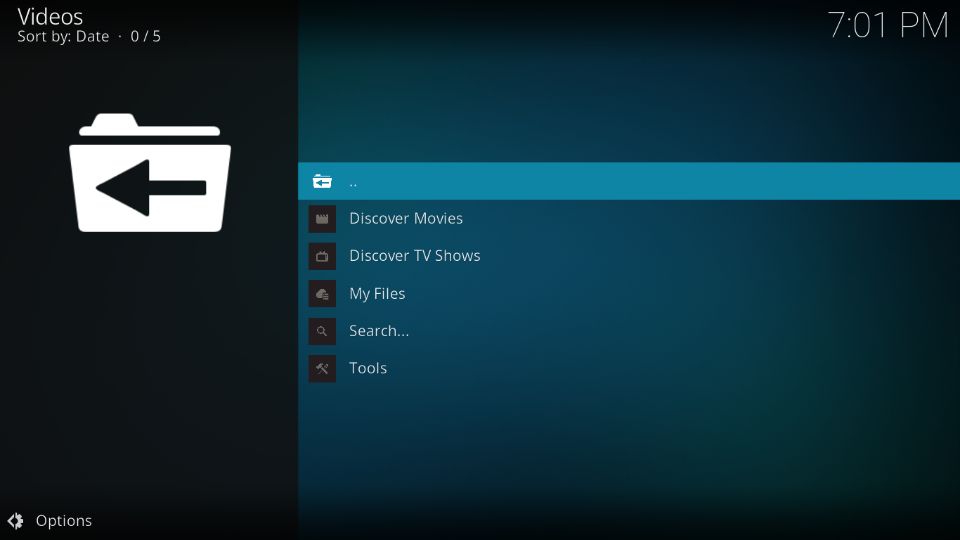
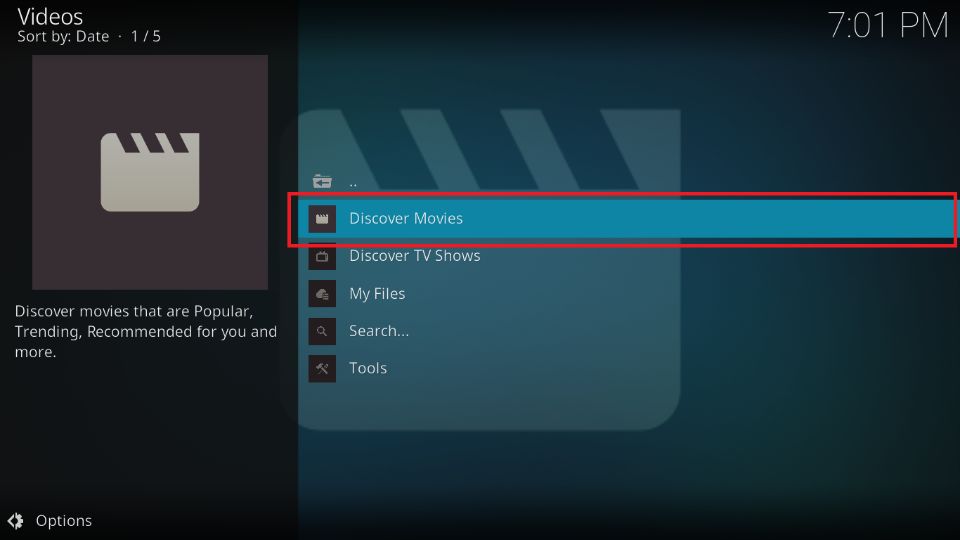
To watch movies, open Discover Movies.
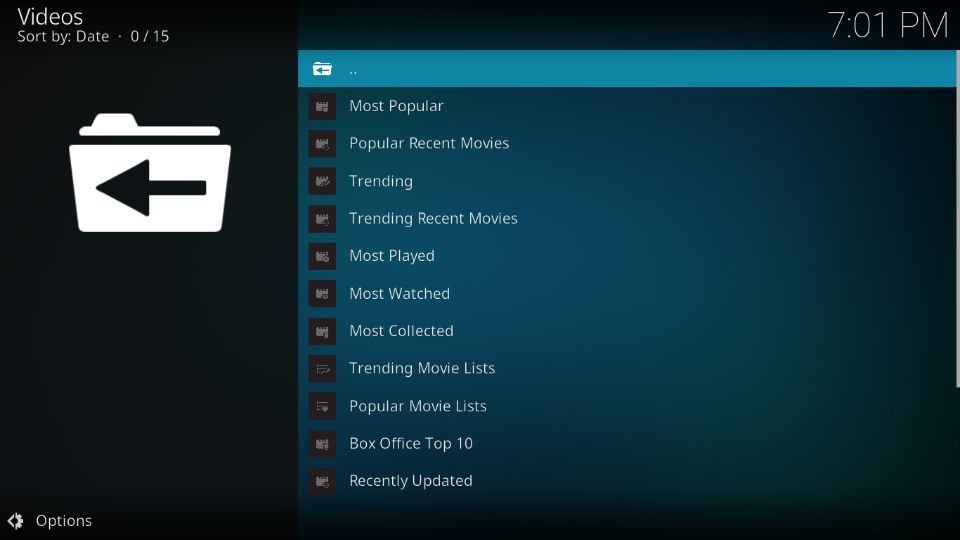
Inside are 15 sections like Most Popular, Most Watched, Most Collected, etc.
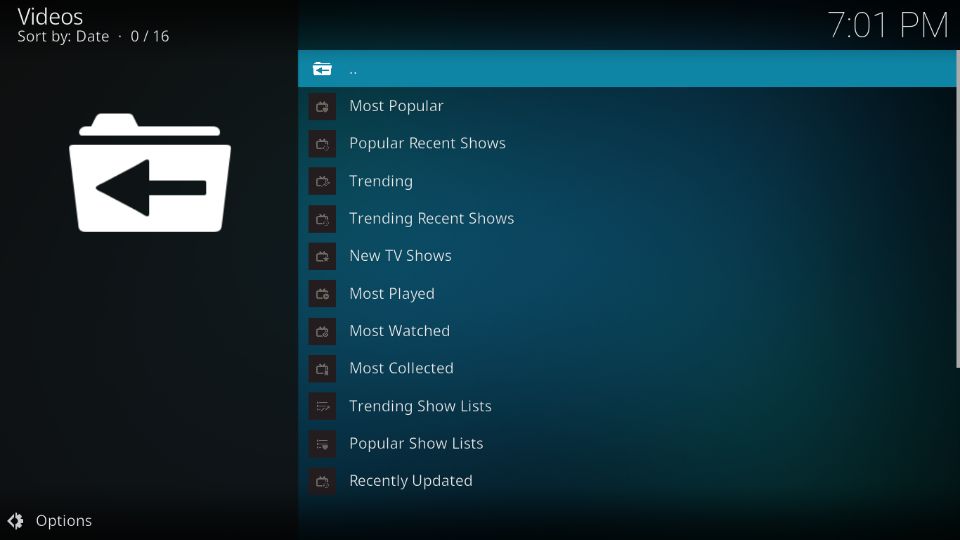
Next, we have Discover TV Shows.
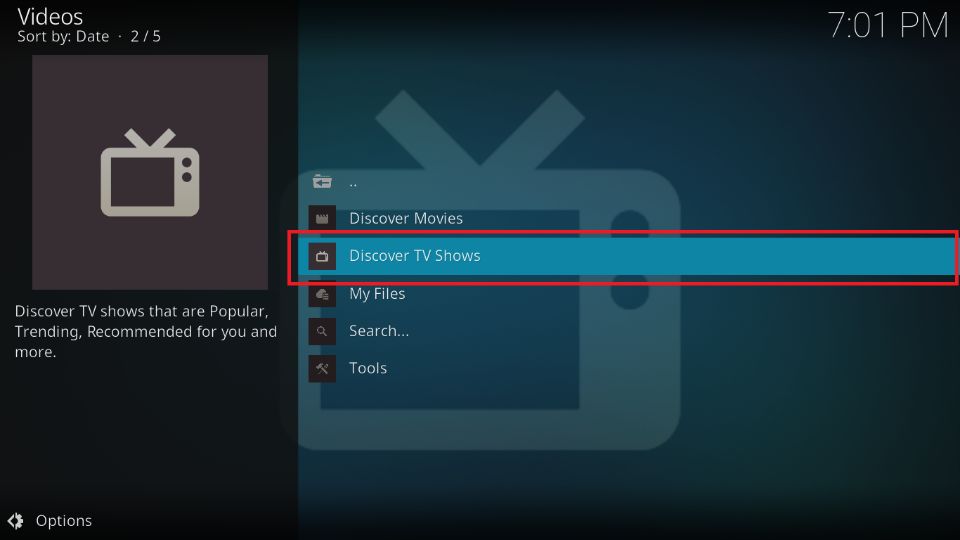
Inside Discover TV Shows, there are 16 sub-sections such as Trending, New TV Shows, Trending Show Lists, etc.
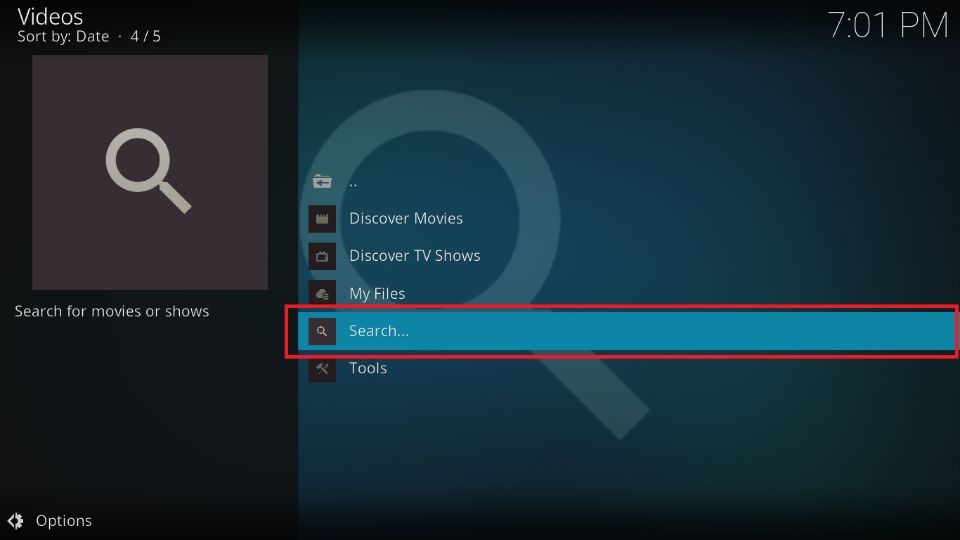
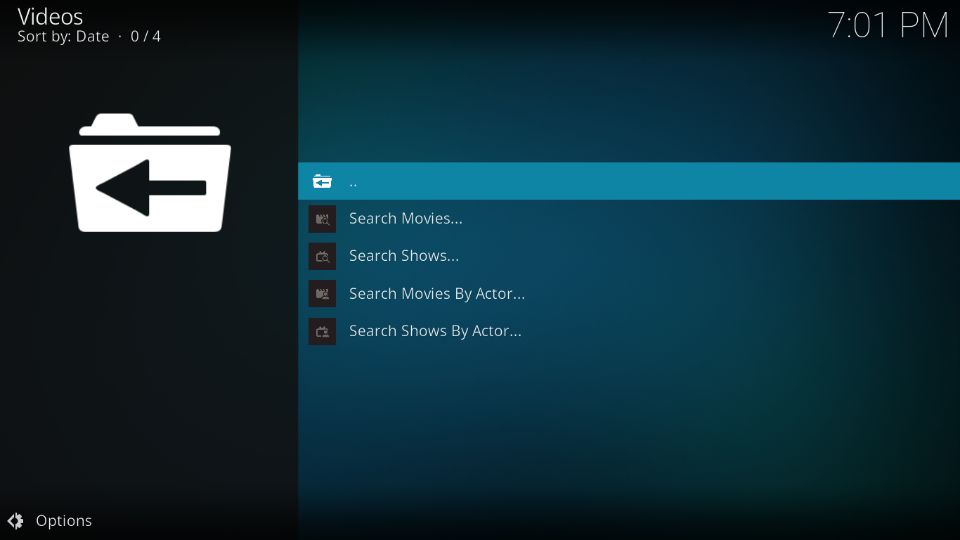
To find your favorite movie or TV show, open Search.
Inside, there are separate options to search for movies, shows, movies by actor, and shows by actor.
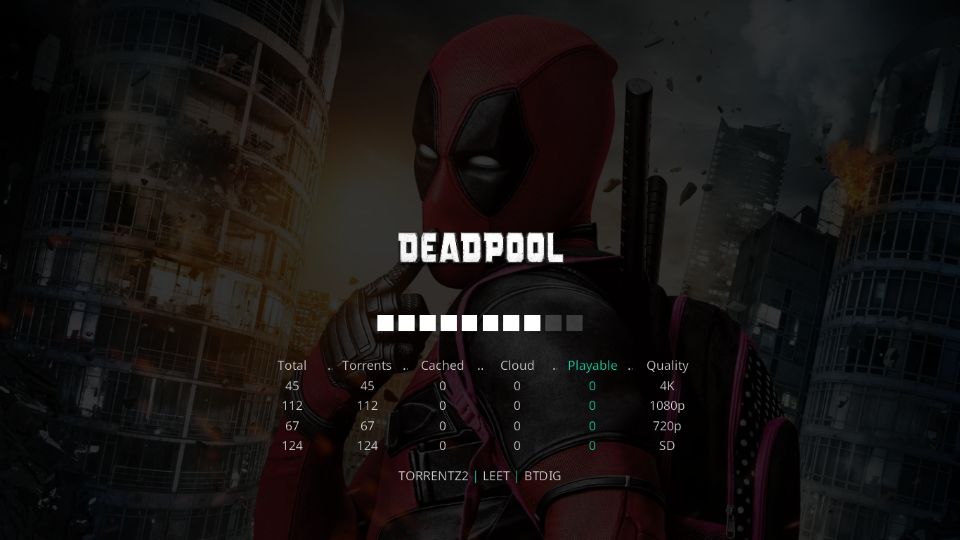
When you click the video to watch, Seren fetches the streams from Real Debrid (or All Debrid or Premiumize). This is what the work in progress will look like. Pulling the links is usually fast and takes only a few seconds.
Click one of the streams and start watching.
Frequently Asked Questions
Seren is a premium Kodi addon used to stream movies and TV shows with high-quality links. It is designed for speed, stability, and integration with services like Real-Debrid, Premiumize, and Trakt. Seren doesn’t scrape free sources; it focuses on premium ones for a smoother, buffer-free experience.
To install Seren, you need to add the Nixgates Repository to Kodi. From there, you can install Seren through the repository’s video add-ons section. Once installed, you must configure it with Real-Debrid or another premium account for it to function properly.
No, Seren does not work without premium debrid service like Real-Debrid or Premiumize. These services provide access to high-quality streaming links. Without one, the addon won’t fetch any content.
Seren is safe to install if downloaded from the official Nixgates repository. However, like many Kodi add-ons, its legality depends on how you use it and what content you stream. It’s recommended to use a VPN to protect your privacy when using third-party addons.
Yes, Seren fully supports Trakt integration, which allows you to sync your watch history, lists, and progress across devices. You can link Trakt in Seren’s settings under "Accounts." This makes content tracking and personalized streaming easier.
Wrapping Up
This is how you install, set up, and use the Seren addon on Kodi. This addon is an excellent choice for streaming movies and TV shows, offering high-quality streaming links through package providers and premium hosters.
We’d love to hear about your experience with Seren once you’ve installed it on your device. Share your thoughts in the comments below.
Related:
- How to Install Kodi on FireStick
- How to Update Kodi on FireStick
- How to Install GAIA Kodi Addon
- How to Install the Magic Dragon Kodi Addon

Suberboost Your FireStick with My Free Guide
Stay Ahead: Weekly Insights on the Latest in Free Streaming!
No spam, ever. Unsubscribe anytime.

I recently found Seren nearly by accident …Hooked it up to my Real Debrid account and VIOLA! The streams are awesome so far and Seren works so much better than the scrapers I was using previously. So glad I found this. Thank you for posting the easy to understand instructions! 💎
Hi Chris, I’m glad you are enjoying the Seren Kodi addon!