In this tutorial, you will learn to install Xanax build on Kodi 18.9 and lower versions. The installation method works on Amazon FireStick, Fire TV Stick & Fire TV Cube, Android TVs and Boxes, Android Mobiles & Tablets, Computers and more.
Legal Disclaimer: This guide is for informational purposes only. FireStickTricks.com does not own, host, operate, resell, or distribute any apps, services, or content mentioned. Some services discussed may be unverified, and FireStickTricks.com cannot confirm their legal status in every region. Users are responsible for ensuring that any content they access complies with applicable laws.
The build also comes with a decent collection of video add-ons including Exodus Redux, Deathstar and more. This makes sure you have plenty of streaming choices available. It is a build with a moderate size and works fine on most devices. We have also included Xanax to our list of Best Kodi Builds.
How to Install Xanax Build on Kodi
Attention Kodi Users!
Governments and ISPs worldwide monitor your online activities. If you use third-party Kodi addons, you should always use a reliable Kodi VPN to hide your identity and prevent issues with your streaming experience. Currently, your IP is visible to everyone.
I use ExpressVPN, the fastest and most secure VPN in the industry. It is very easy to install on any device, including Amazon Fire TV Stick, PC, Mac, and Smartphones. It also includes a 30-day money-back guarantee. If you're not satisfied with their service, you can request a refund. ExpressVPN is offering a special NEW YEAR deal: get 4 months free and save 78% on the 2-year plan.
Install and Use Best Kodi VPN | Why you must use a VPN at all times
I am about to take you through the installation process. However, before I do that, there is one thing you will need to take care of – enable the security option Unknown Sources. This will let you install any third-party build you want on Kodi including Xanax Build. Follow these steps:
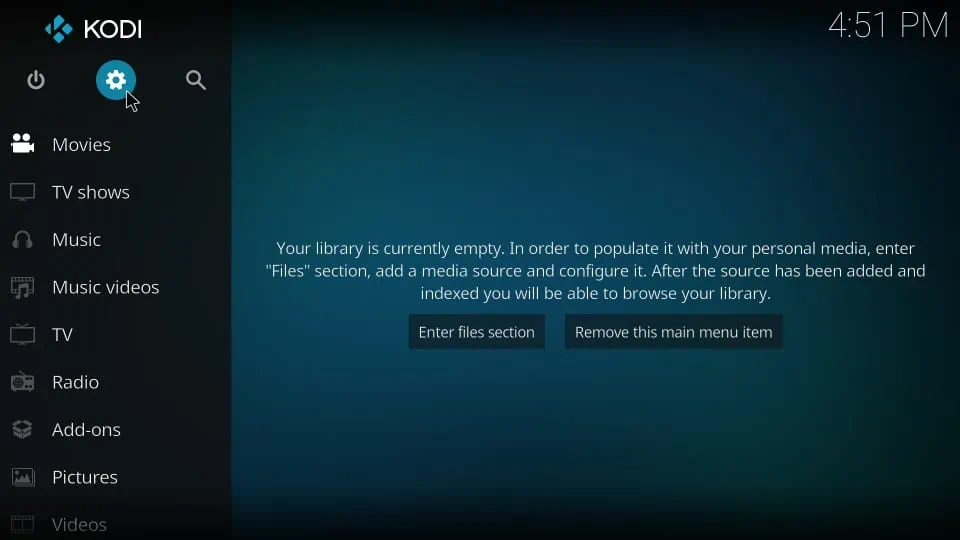
1. Open Kodi and stay on the home screen. Now click the gear icon in the top-left to open the Kodi Settings
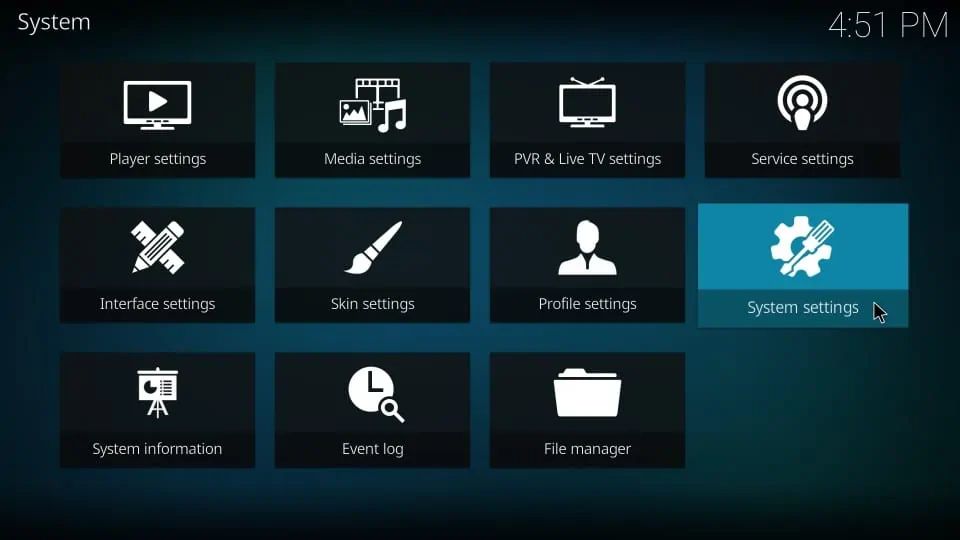
2. Now open System settings on the following screen
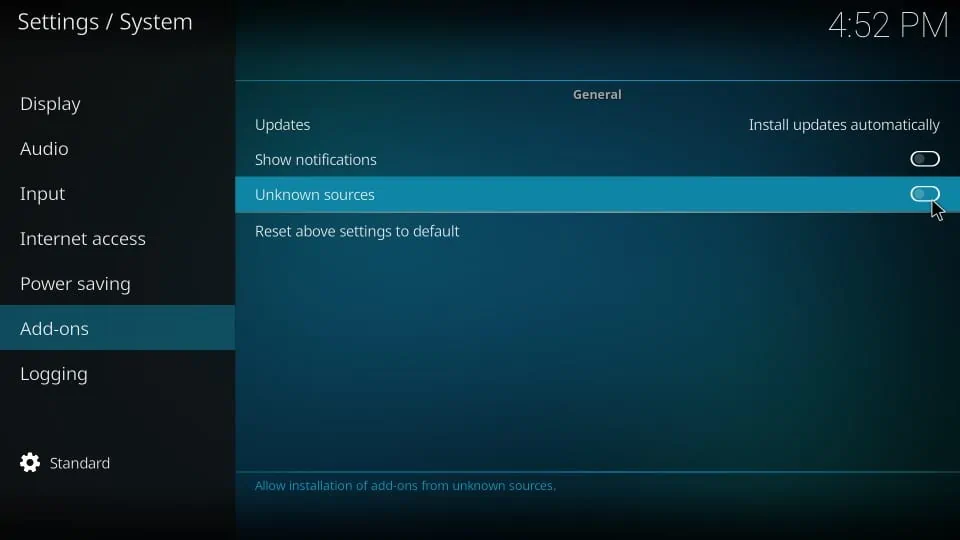
3. Highlight/select the menu item called Add-ons on the left. Now go to the right part and switch ON the option Unknown Sources
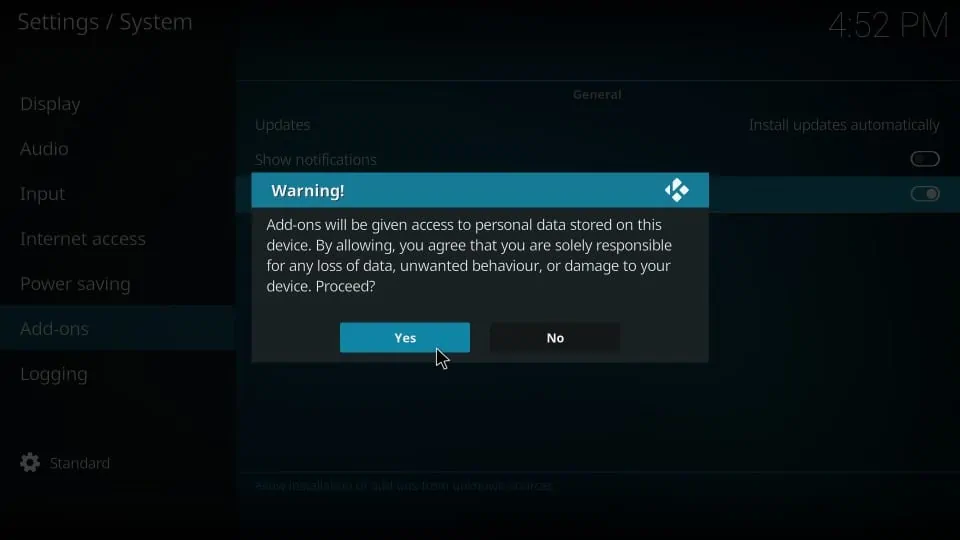
4. Confirm your intent to keep this option on by clicking Yes when prompted. Don’t bother yourself with this warning as Xanax is a safe build
Note: After installing Xanax build, it would be a good idea to turn Unknown Sources OFF again.
Detailed Installation Instructions
We now get started with the installation steps of Xanax build on Kodi. It may look a bit complicated but trust me it is not. Just follow each step carefully and do not break the order. Here we go:
1. You want to click the Settings option again on the home-screen of Kodi
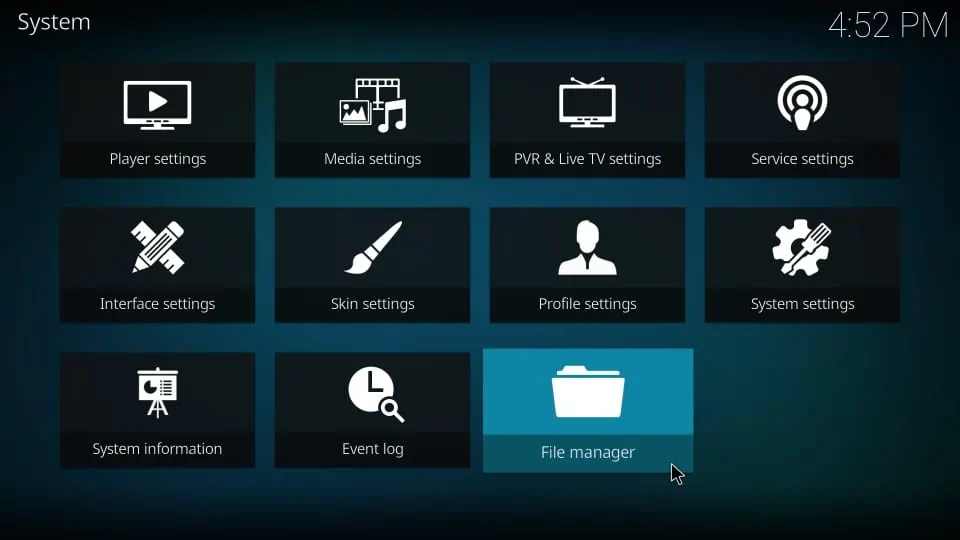
2. When you see this window, click File manager
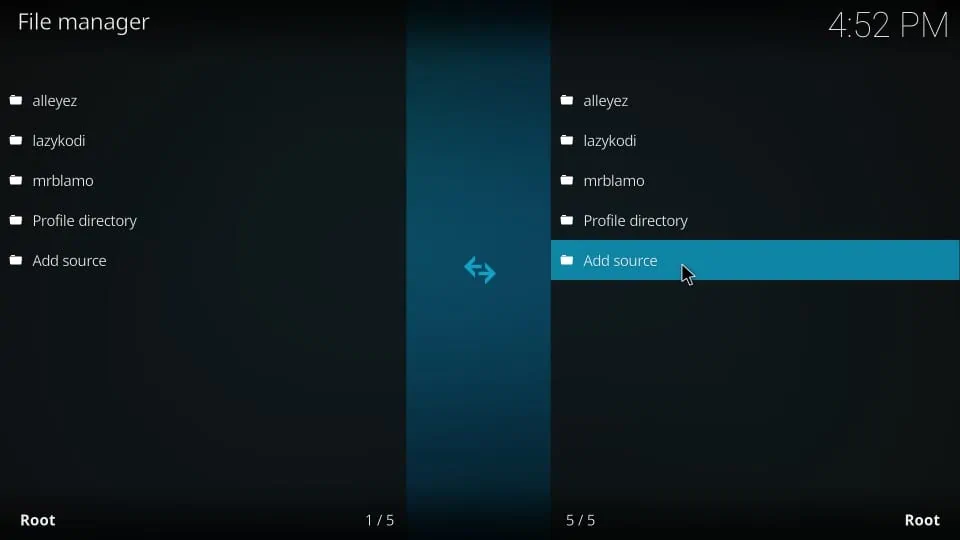
3. Now click the option Add source
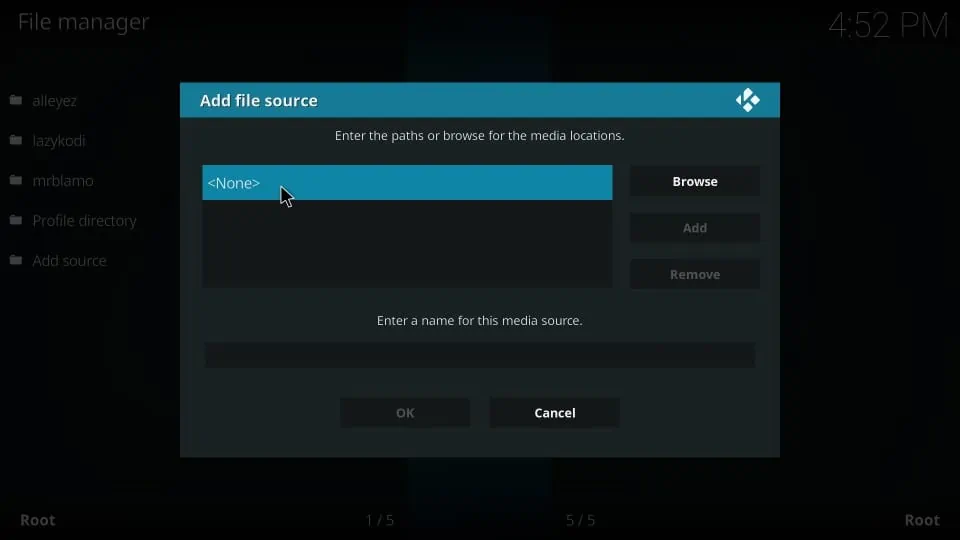
4. Next, click <None> to replace it with the source URL
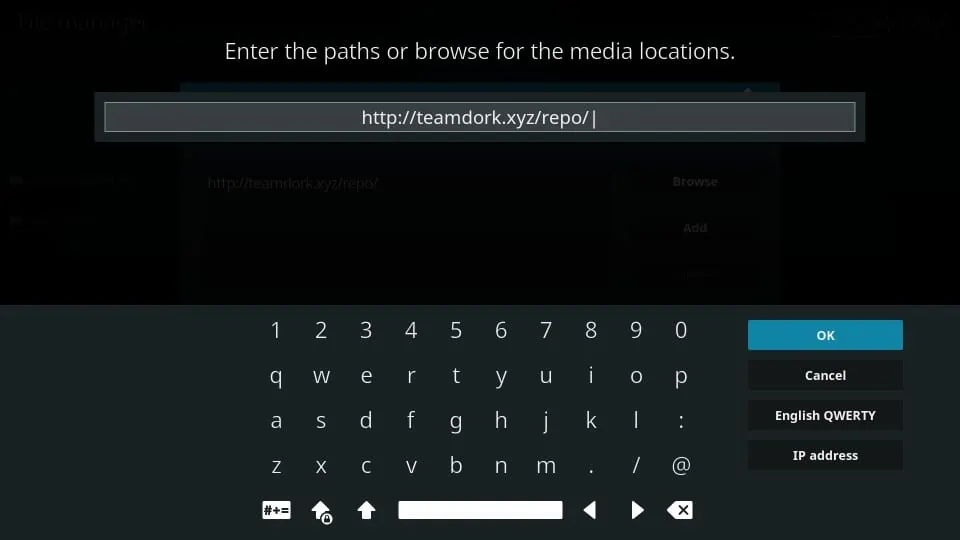
5. Go ahead and type the source path on the next window that appears.
Use the new link: http://xanaxrepo.com/repo/
Old URL http://teamdork.xyz/repo/ is not working
Type the URL carefully. It is case sensitive
Click OK
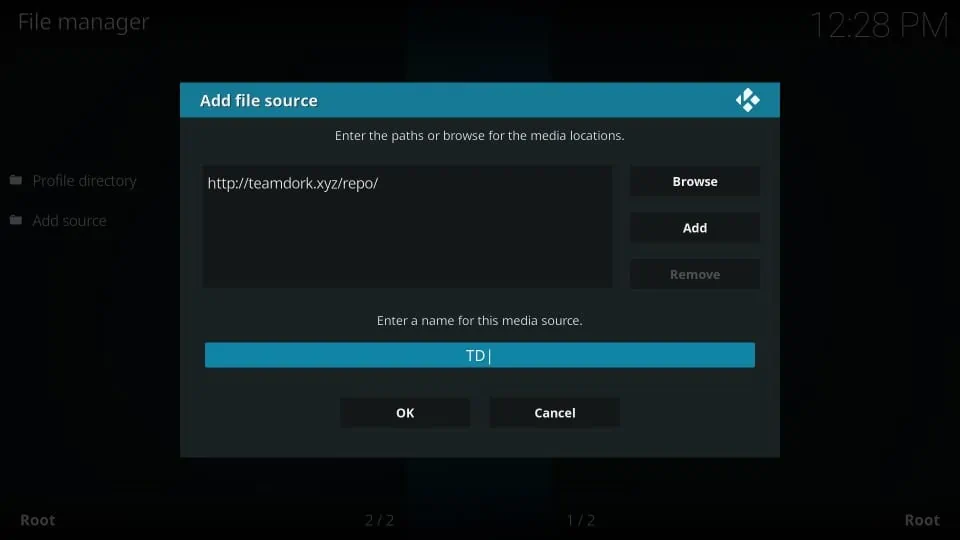
6. You now need to name the URL/path that you added above. Highlight the designated field as you see in the image below and choose any name you like. I am going with TD
Recheck and make sure your window looks similar to mine.
Click OK
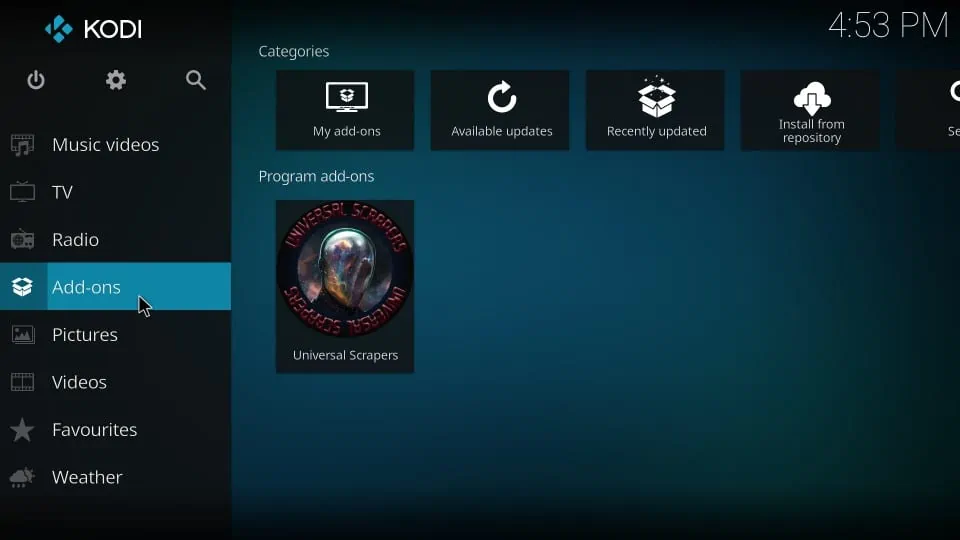
7. You now want to head back to the Kodi home-screen. When you are there, click Add-ons option on the left menu
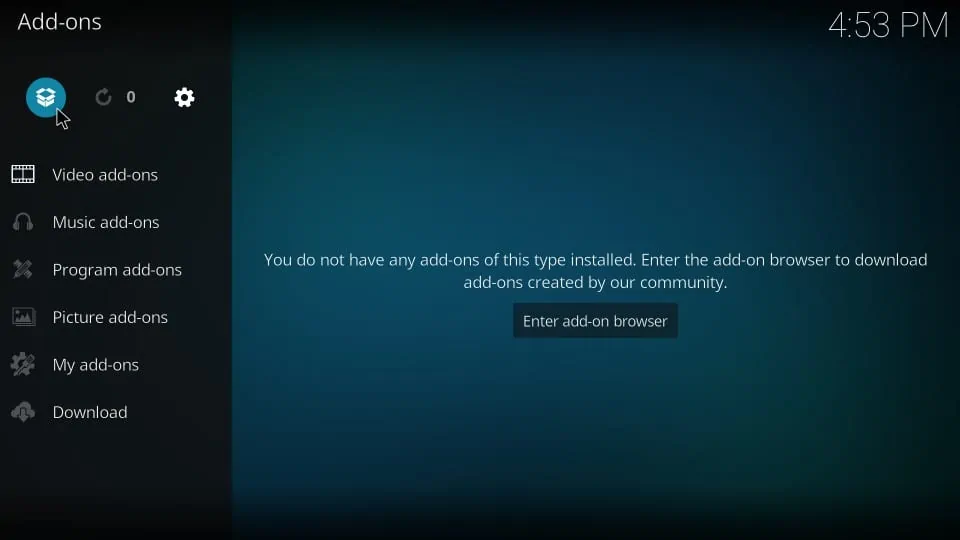
8. Go to the top-left corner of the next screen and click the symbol/icon representing an open-box to open Package installer
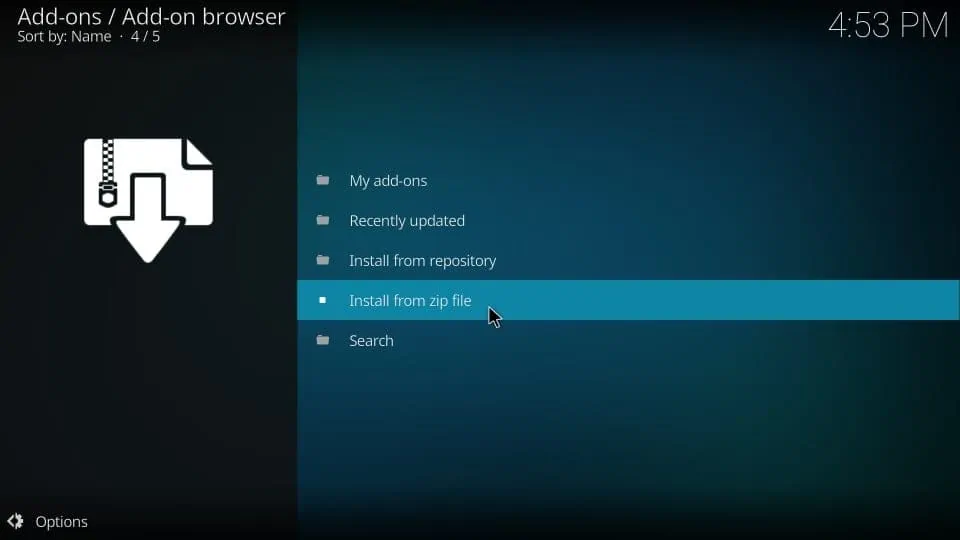
9. Go ahead and open Install from zip file
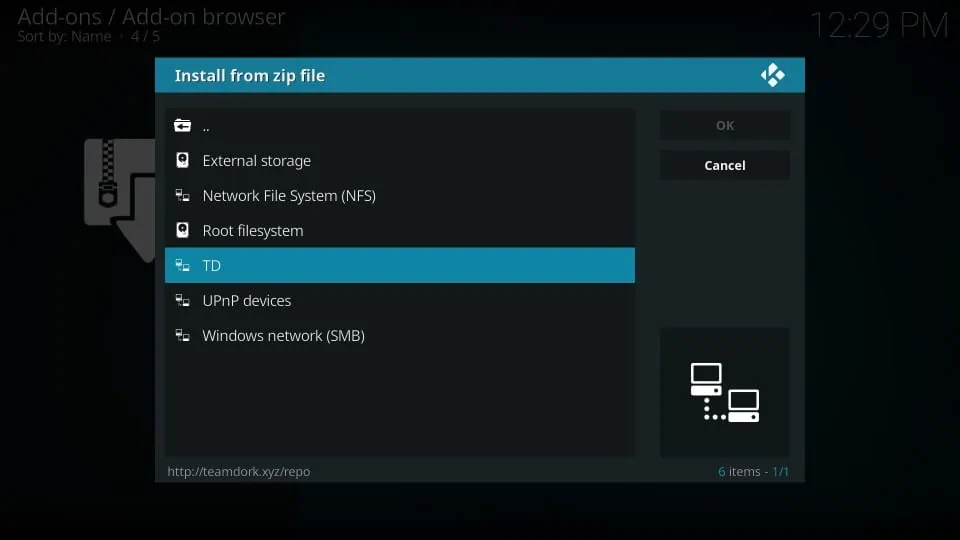
10. Now you want to click the source name you provided earlier. For example, I am clicking TD the source name I chose
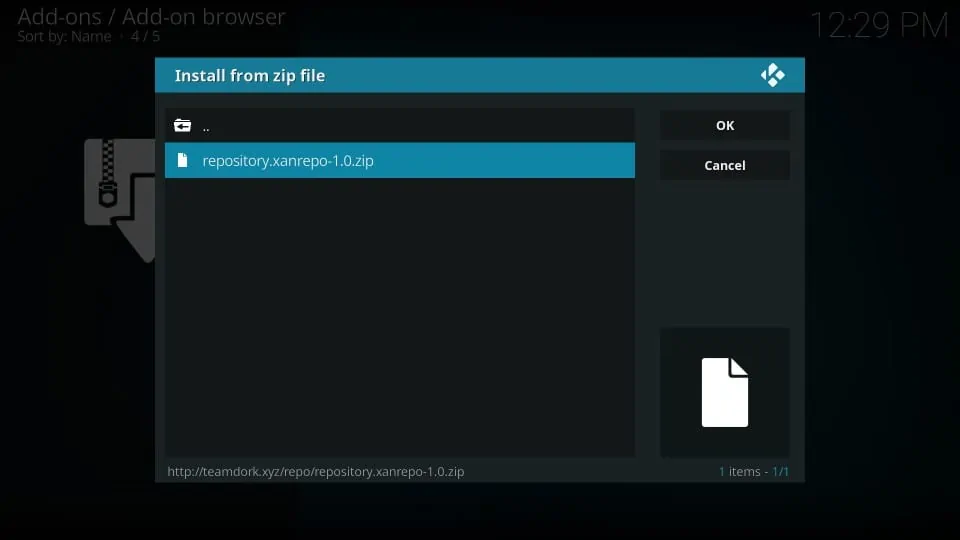
11. Now open the zip file repository.xanrepo-x.x.zip
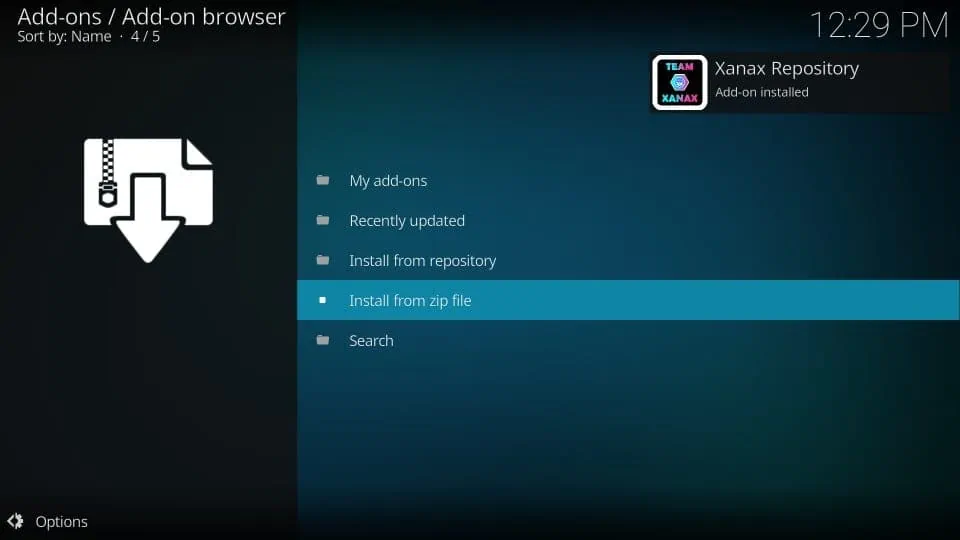
12. Xanax Repository should install in a minute. You will see the notification on the top-right
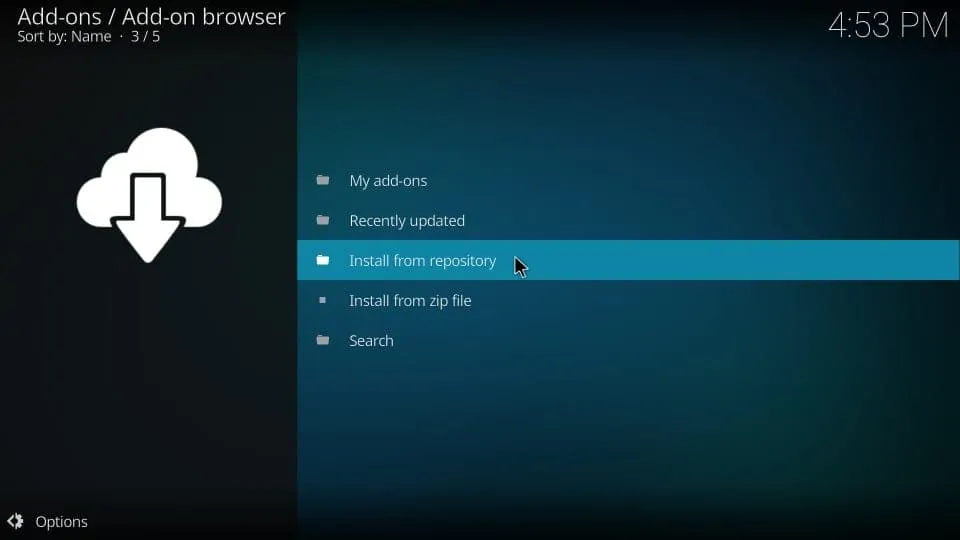
13. Now click the option Install from repository
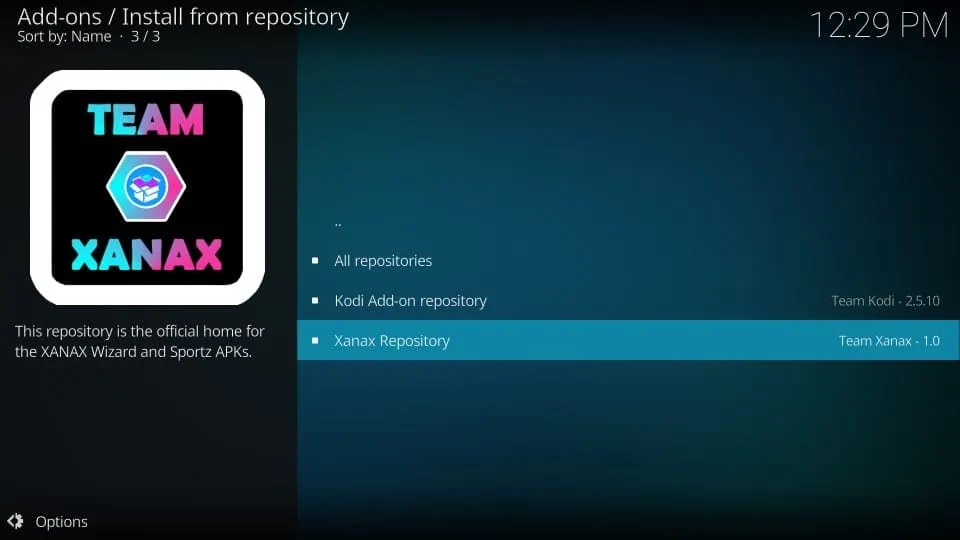
14. Go ahead and open the Xanax Repository
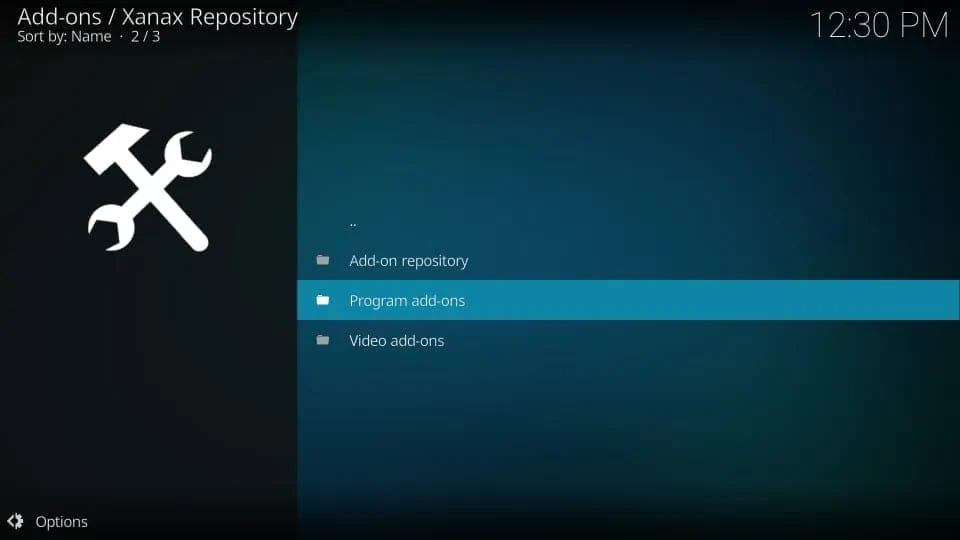
15. Open Program add-ons
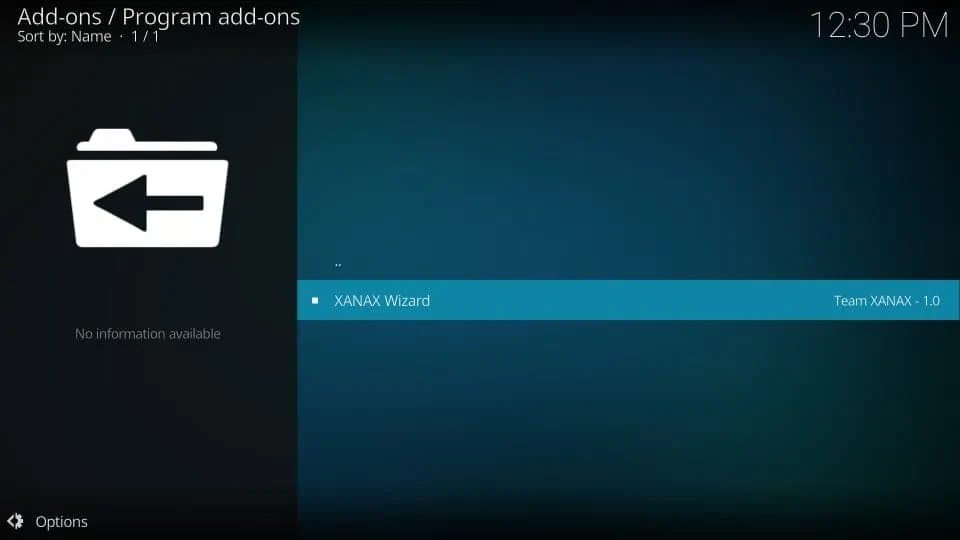
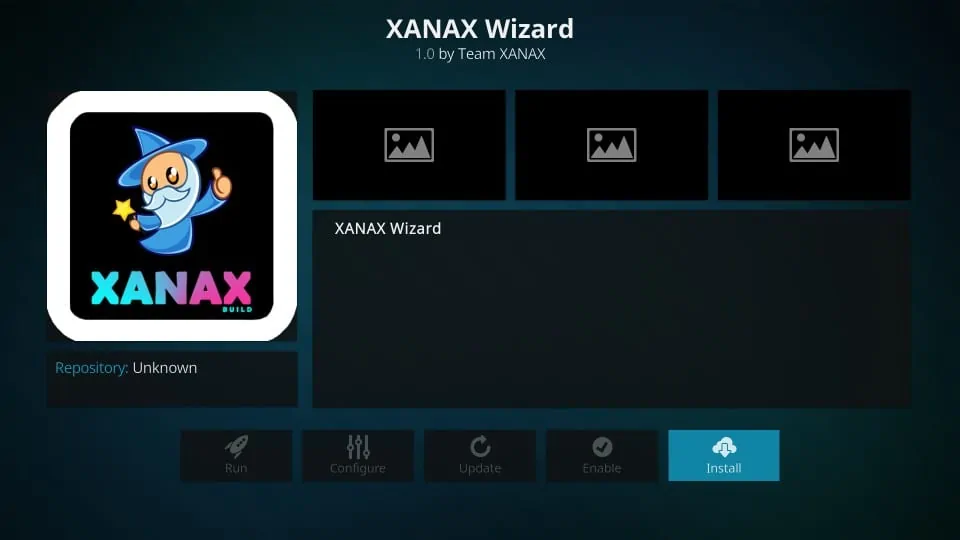
16. Click Xanax Wizard
17. Now click the option Install
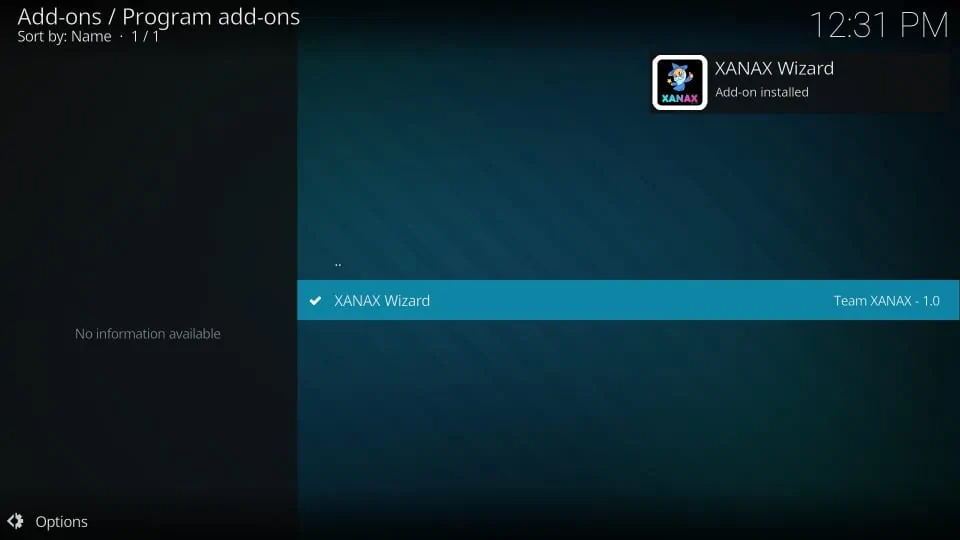
18. Wait for the notification Xanax Wizard Add-on installed
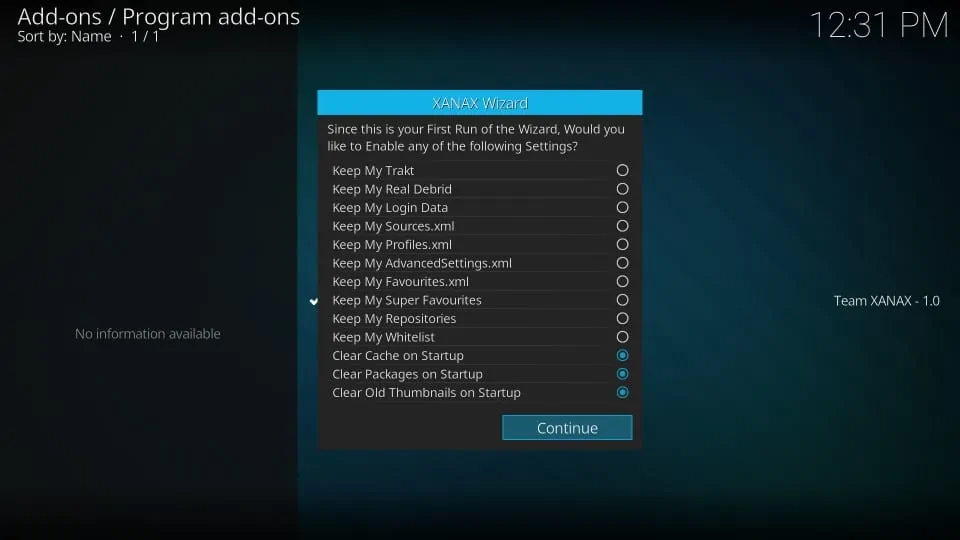
19. When prompted, click Continue
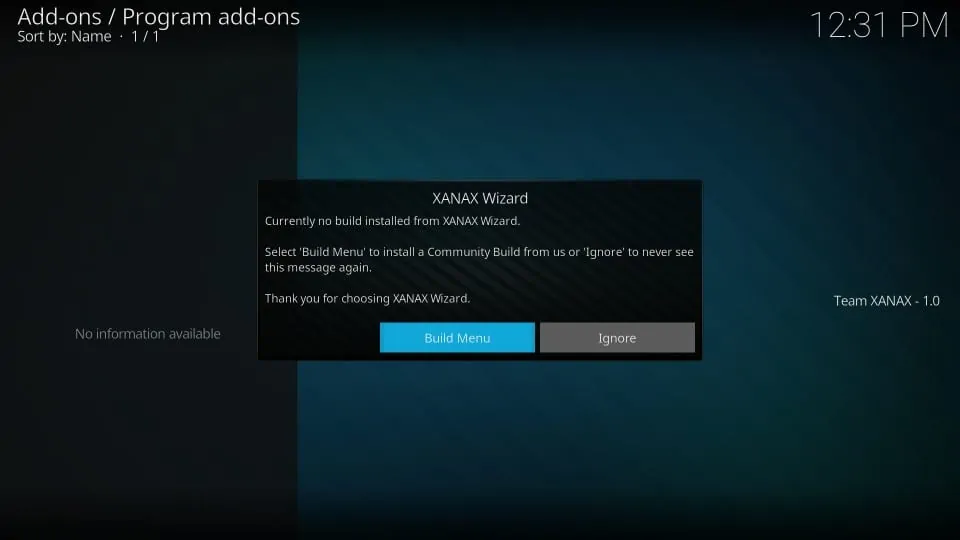
20. Now click Build Menu when you see this prompt
Note: In case you are on the Kodi home-screen, go to Add-ons > Program Add-ons > Xanax Wizard > Build Menu
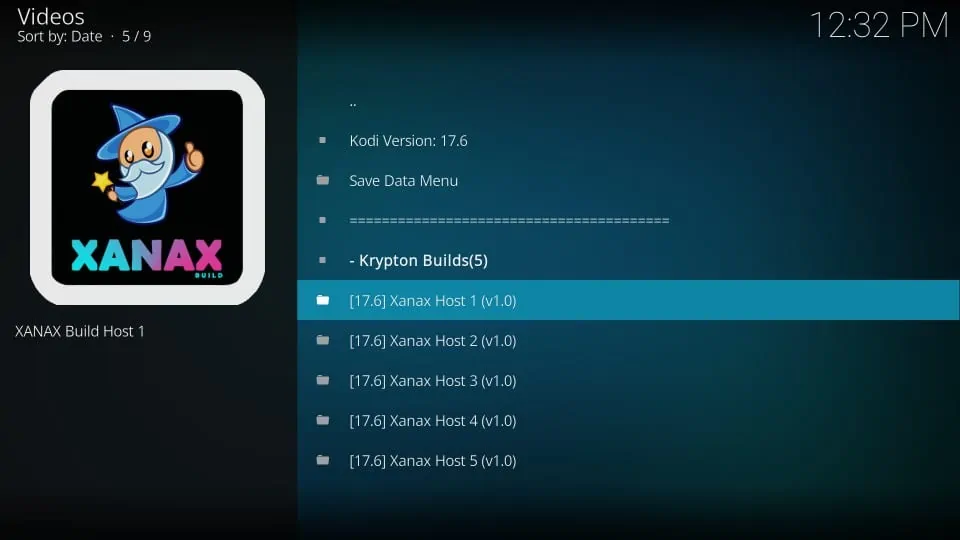
21. You will now see the Xanax Kodi build hosted on multiple servers. You can choose any server you like. If the build doesn’t install from a server, you may choose another. As I write this guide, there are 5 active servers for the build.
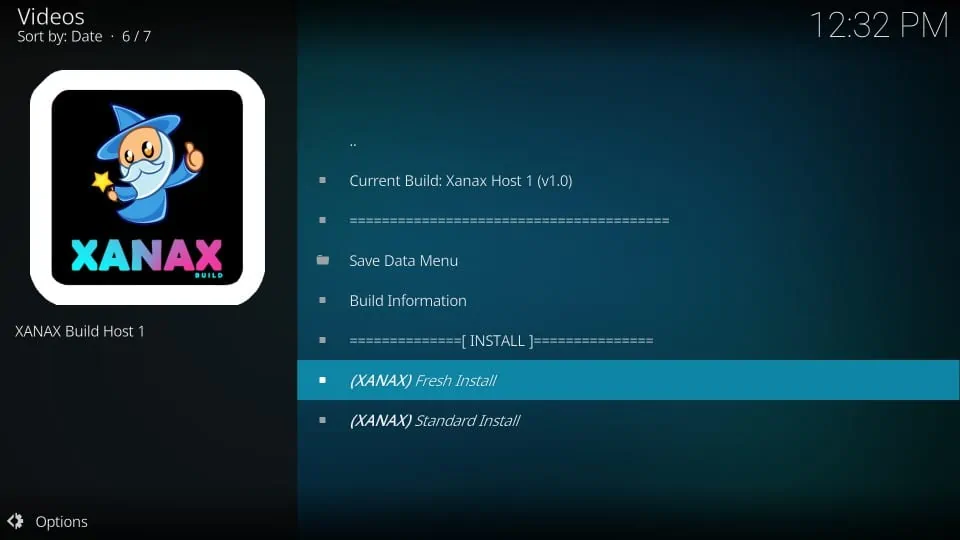
22. Click Fresh Install
You may also go for Standard Install. However, my experience says that wiping Kodi clean before installing any build is always a better idea.
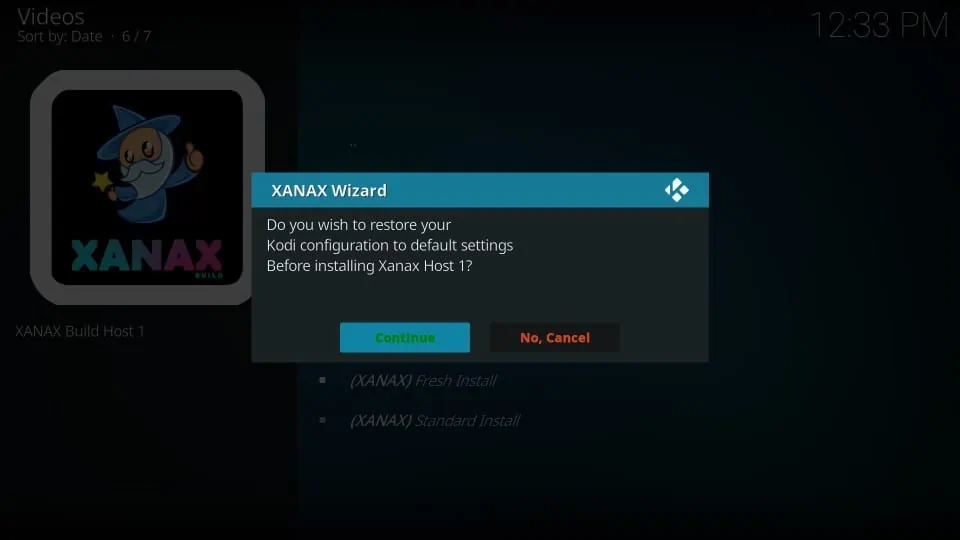
23. Click Continue to confirm that you give your consent to wipe Kodi clean and restore it to its default configuration
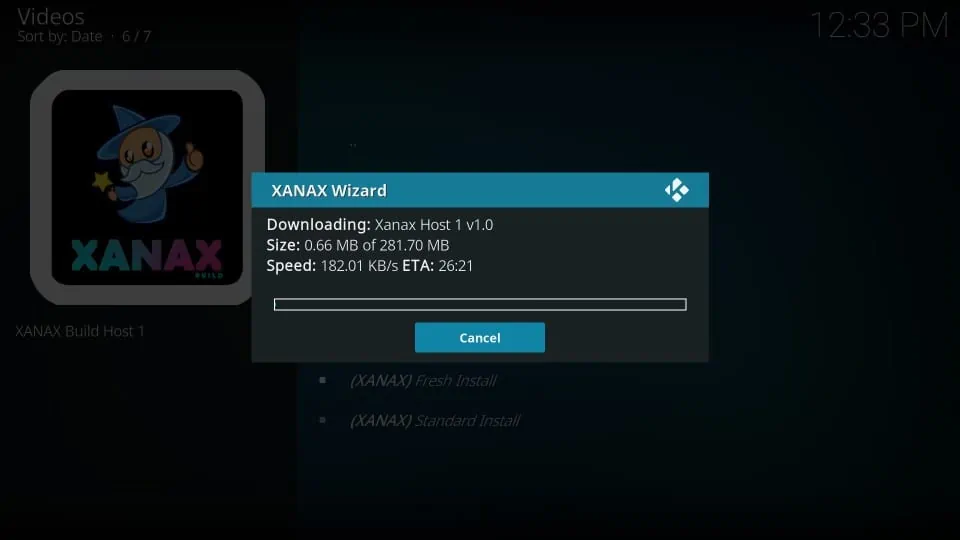
24. Wait for the build to download and install. It may take a few minutes and depends greatly on the device and connection speed
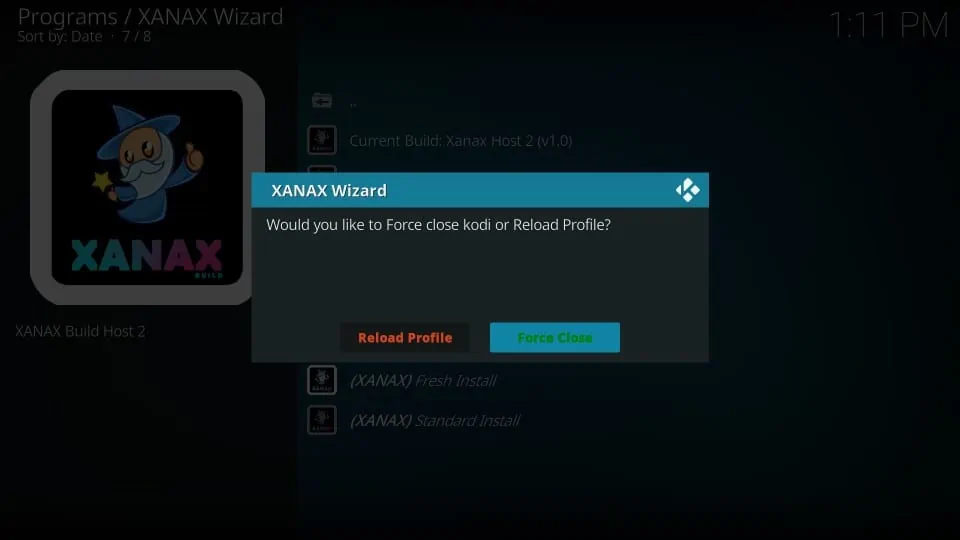
25. Click Force Close when the build is finally installed. Reload Profile option doesn’t really work and ends up crashing Kodi anyway.
Great! You have successfully installed Xanax Build on Kodi. Enjoy!
Before you start streaming with Kodi Addons or Builds, I would like to warn you that everything you stream on Kodi is visible to your ISP and Government. This means, streaming copyrighted content (free movies, TV shows, live TV, and Sports) might get you into legal trouble.
Thankfully, there is a foolproof way to keep all your streaming activities hidden from your ISP and the Government. All you need is a good VPN for Kodi. A VPN will mask your original IP which is and will help you bypass Online Surveillance, ISP throttling, and content geo-restrictions.
I personally use and recommend ExpressVPN, which is the fastest and most secure VPN. It is compatible with all kinds of streaming apps and devices.
NOTE: We do not encourage the violation of copyright laws. But, what if you end up streaming content from an illegitimate source unintentionally? It is not always easy to tell the difference between a legit and illegal source.
So, before you start streaming on Kodi, here's how to get VPN protection in 3 simple steps.
Step 1: Get the ExpressVPN subscription HERE. It comes with a 30-day money-back guarantee. Meaning, you can use it free for the first 30-days and if you are not satisfied with the performance (which is highly unlikely), you can ask for a full refund.
Step 2: Click HERE to download and install the ExpressVPN app on your streaming device. If you are using a FireStick, I have given the exact steps starting with Step 4 below.
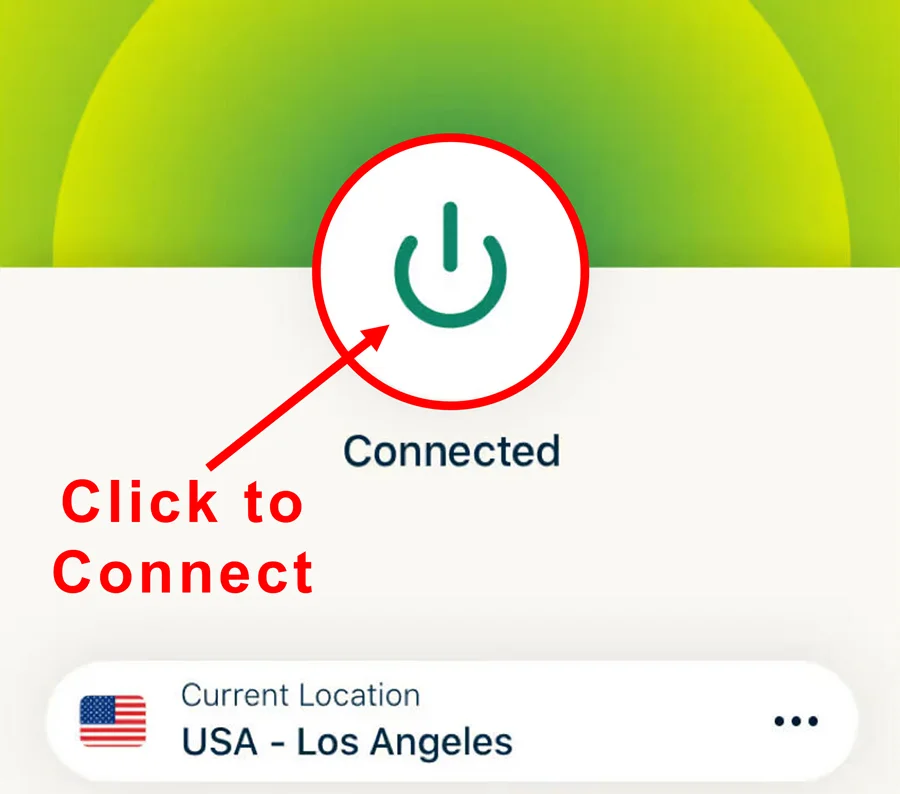
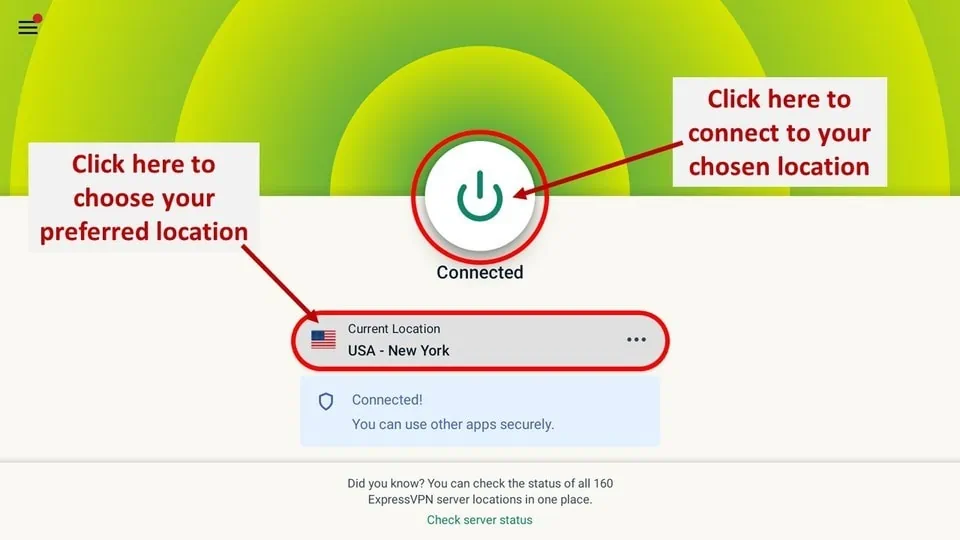
Step 3: Click the Power icon to connect to a VPN server. That's all. Your connection is now secure with the fastest and best VPN for Kodi.
The following are the steps to install Kodi VPN on your Fire TV devices. If you have other streaming devices, follow Step 1-3 above.
Step 4: Subscribe to ExpressVPN HERE (if not subscribed already).
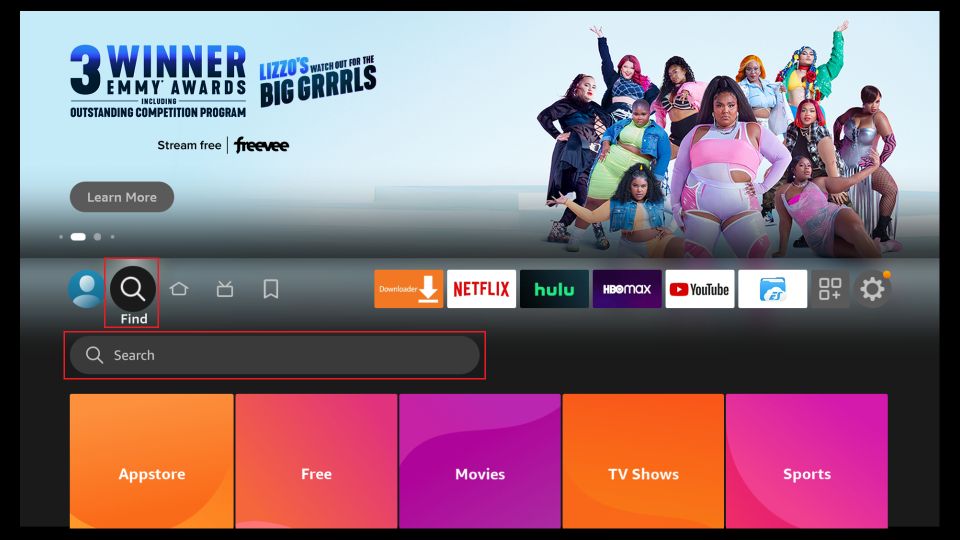
Step 5: Go to Fire TV Stick home screen. Click Find followed by Search option (see image below).
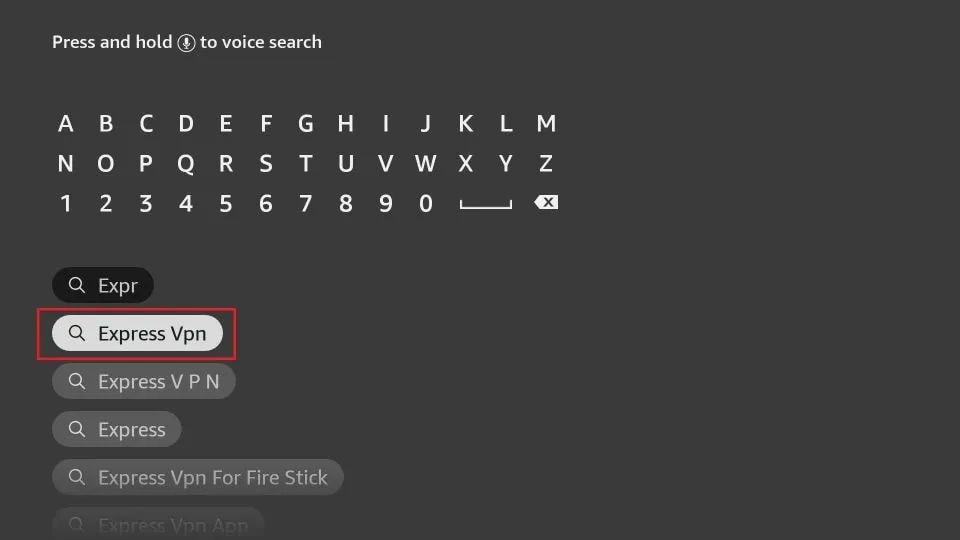
Step 6: Type Expressvpn in the search bar and select when it shows up.
Step 7: Click Download.
Step 8: Open the ExpressVPN app and Sign in using the email ID and password that you created while buying the ExpressVPN subscription.
Step 9: Click the Power icon to connect to a VPN server. That’s all. Your FireStick is now secured with the fastest VPN.
A Quick Overview of Xanax Kodi Build
Xanax Kodi build will get activated when you open Kodi for the first time after installing it. The first run of the build takes a while as it sets up, configures and updates addons and settings. Therefore, on the first run, allow the build a few minutes to get prepared for use.
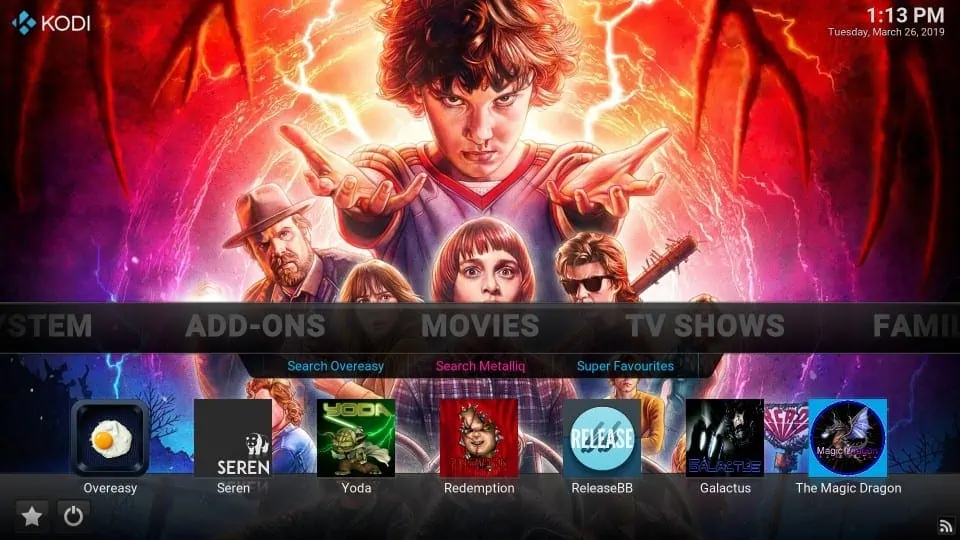
Here is the home-screen of Xanax Kodi Build:
Xanax look a lot like the Durex Kodi build. If you have used Durex before, you will feel a great sense of familiarity. That’s expected because Xanax is the replacement of Durex build.
The layout is pretty standard with the menu bar across the width of the build. The menu bar features important options like Movies, TV Shows, Family, Sports TV, Paid TV, Free TV, Sports, Music and more.
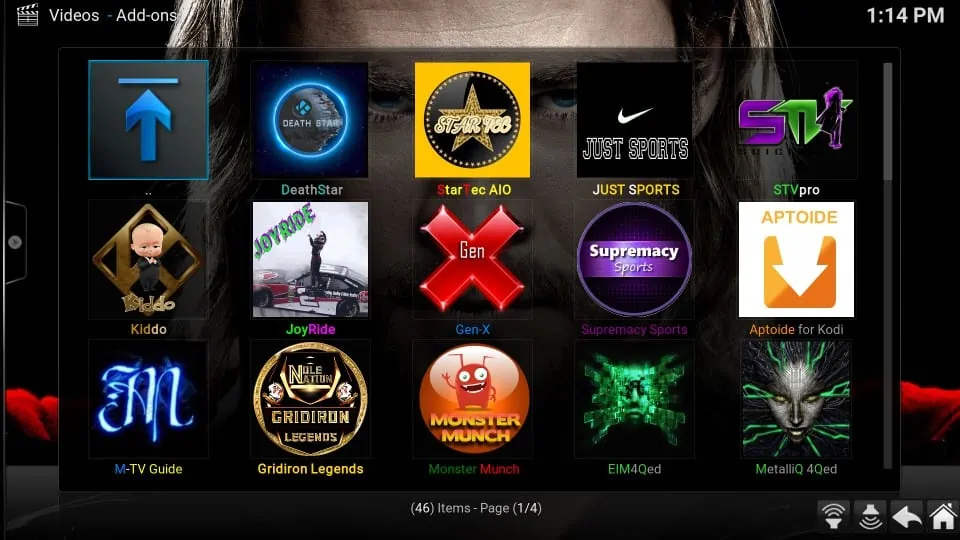
When you select a streaming related option, such as Movies, the related submenu items and corresponding video-addons appear underneath the menu bar. Here, you only see the featured addons. If you want to explore all the video add-ons you can go to Add-ons > Video Add-ons.
Here are some popular addons that come preloaded with Xanax Kodi Build:
This means you can stream Movies, Shows, Live TV, Sports videos, etc. with Xanax build on Kodi.
Verdict
Xanax is a moderately sized build that works smoothly on almost all the devices. The performance is acceptable even on the low-spec devices like Android Box and FireStick. The build offers a professional and easy to use interface. The standard layout makes sure you get familiar with it quickly if you have used Kodi builds before. If not, you still get the hang of it within minutes.
The build packs a decent collection of video-addons for all your streaming needs. With popular addons like Exodus Redux, DeathStar, there are plenty of options to watch your favorite content. It is a good build to have, especially if you loved Durex Kodi build.
Related:
- How to install Misfit Mods Lite Kodi Build
- How to Install Diggz Xenon Kodi Build
- How to install No Limits Magic Build
- How to Install Hard Nox Kodi Build

Suberboost Your FireStick with My Free Guide
Stay Ahead: Weekly Insights on the Latest in Free Streaming!
No spam, ever. Unsubscribe anytime.





There have been many occasions where I have had to uninstall Kodi all together and start over from scratch. The way that you download Kodi can also make a difference. I like to download Kodi from Kodi’s site but there are several ways to try if another fails
Good Luck