In this guide, I will show you how to install FEN addon on Kodi. This addon works on all the devices that support Kodi. This includes FireStick, Fire TV, Android, iOS, Android TV, Windows, Mac, Linux, and more.
FEN Kodi addon is a modern and efficient tool for streaming on-demand movies and TV shows. Despite being new, FEN has gained popularity for its reliable performance and decent library of content.
Known for its powerful scrapers, it is lightweight, fast, and delivers high-quality links quickly.
The FEN addon supports Trakt and can be paired easily from the addon settings, allowing users to sync their watchlist and history.
It also supports Real Debrid, and it is highly recommended that you use Fen with it. This will give you access to tons of premium-quality links.
The setup process for integrating Real Debrid with FEN is easy. The steps are provided later in the guide.
Attention Kodi Users!
Governments and ISPs worldwide monitor your online activities. If you use third-party Kodi addons, you should always use a reliable Kodi VPN to hide your identity and prevent issues with your streaming experience. Currently, your IP is visible to everyone.
I use ExpressVPN, the fastest and most secure VPN in the industry. It is very easy to install on any device, including Amazon Fire TV Stick, PC, Mac, and Smartphones. It also includes a 30-day money-back guarantee. If you're not satisfied with their service, you can request a refund. ExpressVPN is offering a special NEW YEAR deal: get 4 months free and save 78% on the 2-year plan.
Install and Use Best Kodi VPN | Why you must use a VPN at all times
How to Install FEN addon on Kodi
Before installing the FEN addon on Kodi, you must enable the Unknown Sources in the Kodi settings. Once done, you can install any addon from a third-party source, including Fen.
Turn on unknown sources on Kodi
1. Go to the Kodi Settings.
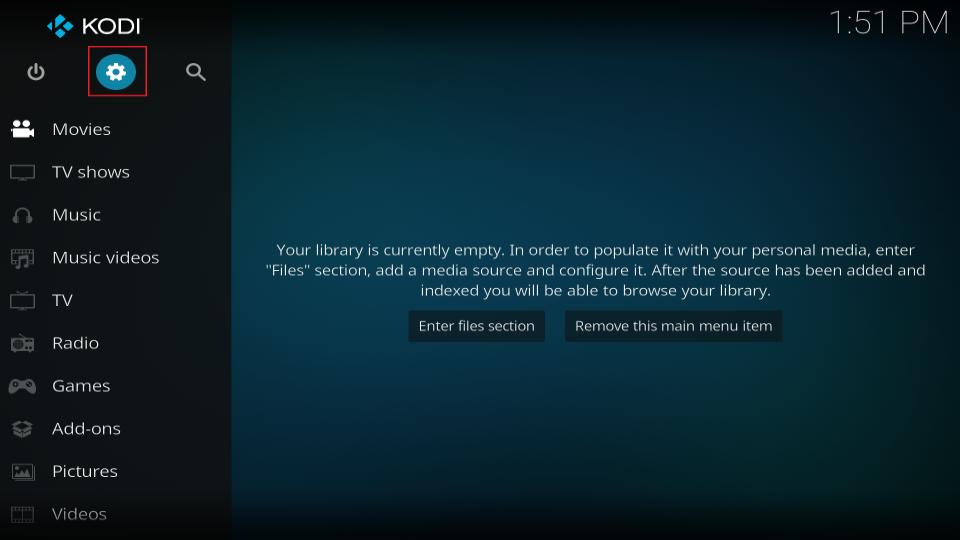
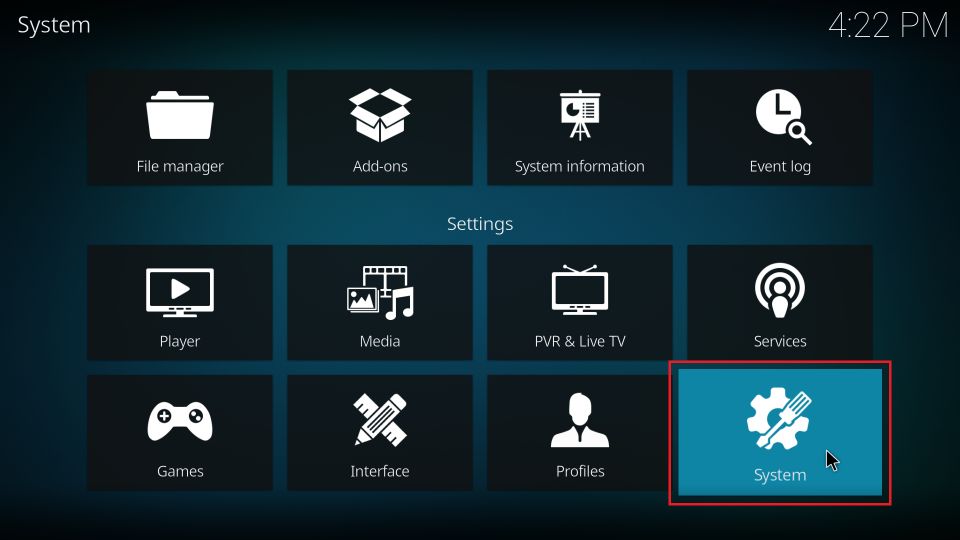
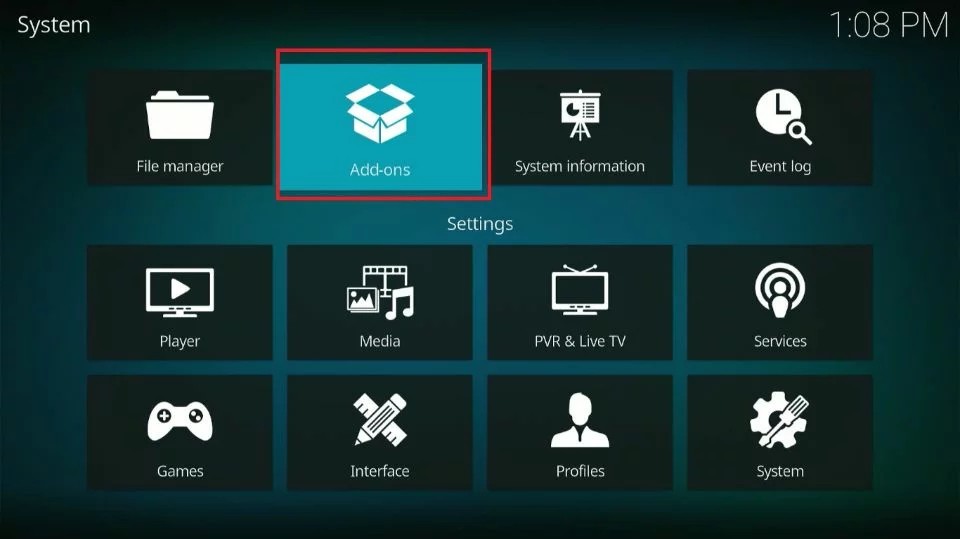
2. When these options are displayed, go ahead and click System.
3. Now, select the option Add-ons to the left. To the right of this window, click Unknown Sources and turn it ON.
Note: Don’t click it if it has already been switched ON.
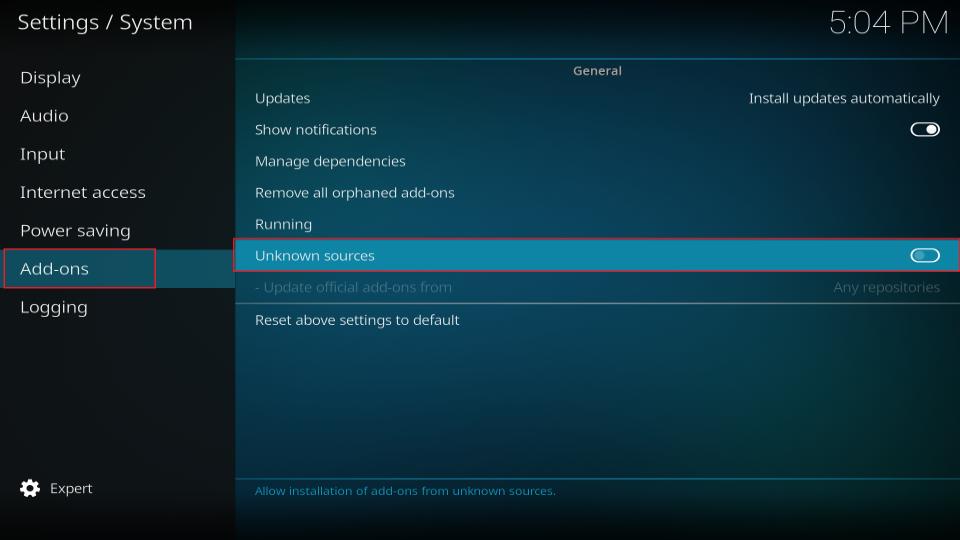
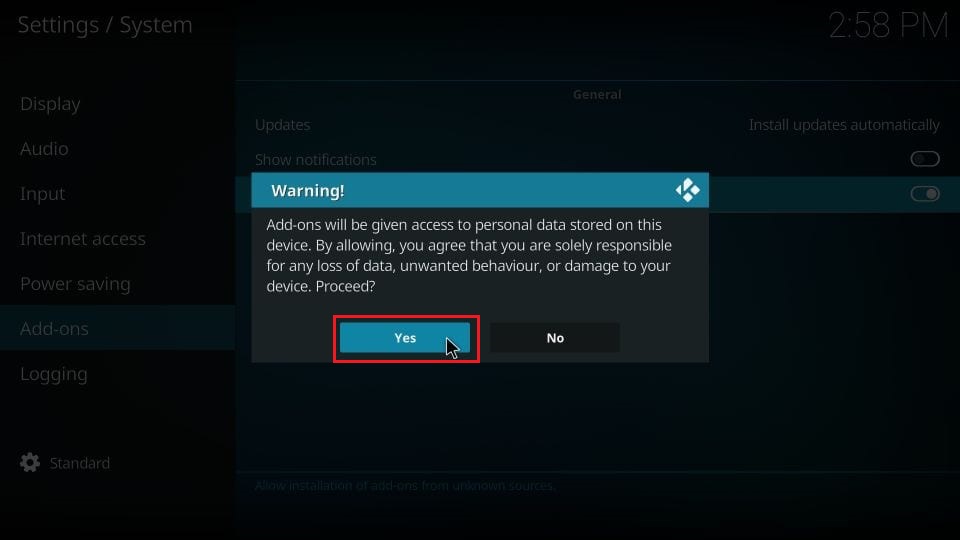
4. When you see this, click Yes to proceed.
You have configured the Kodi application correctly. Let’s install the Fen addon.
Fen Kodi addon installation steps
1. You may head back to the home screen of Kodi now and click Settings again.
2. Open the option File manager.
![]()
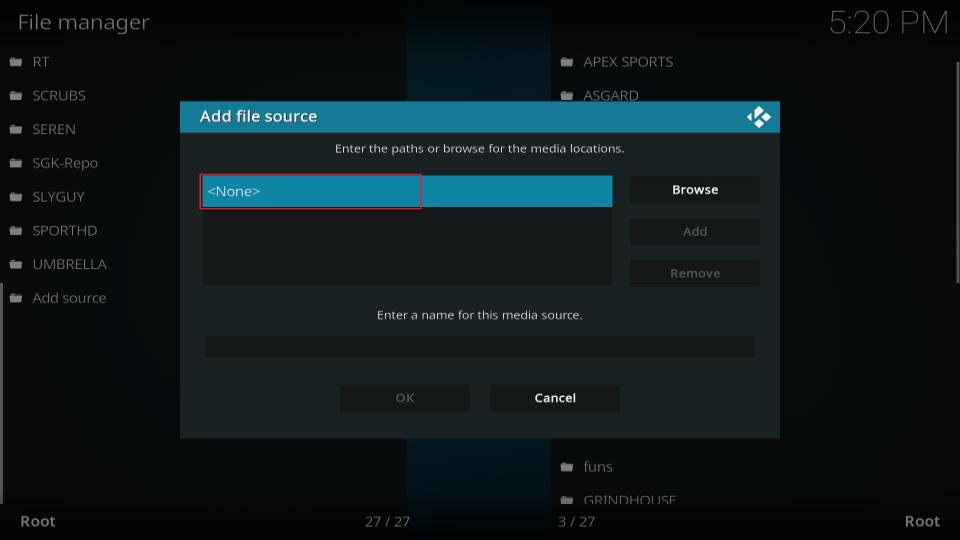
3. This is where you see the option Add source. Click it.

4. A popup window will appear. Click where you see <None>.
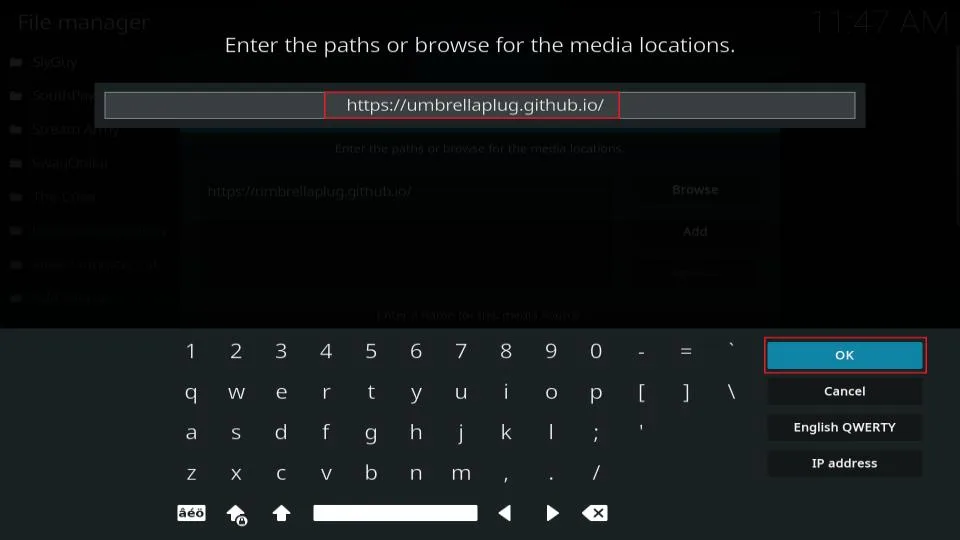
5. In this window, type the source URL from where the Fen Kodi addon will be downloaded: https://umbrellaplug.github.io. Check the URL and make sure it is correct. Click OK.
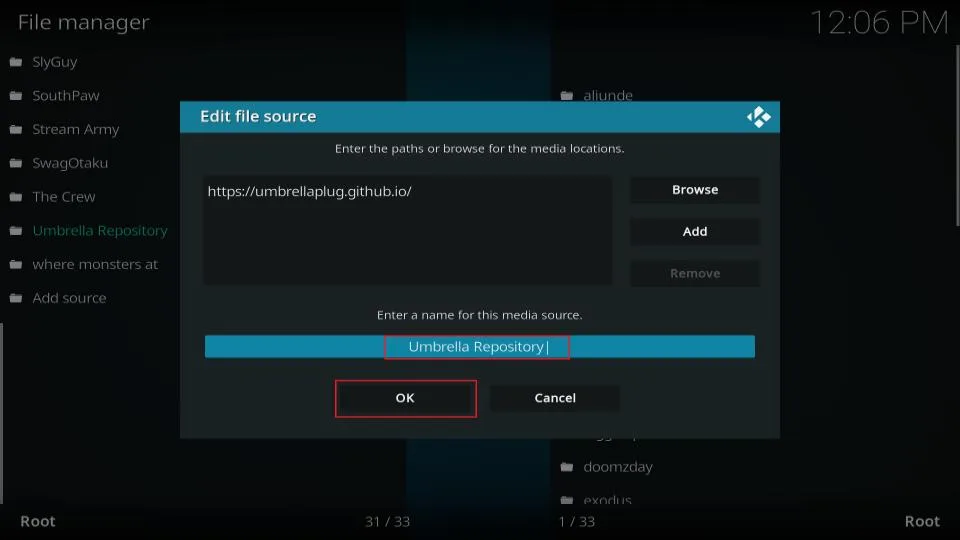
6. You must now be back on this popup window. Highlight the section or textbox for the source name and type the source name of your choice. I am using the name Umbrella Repository. Click OK.
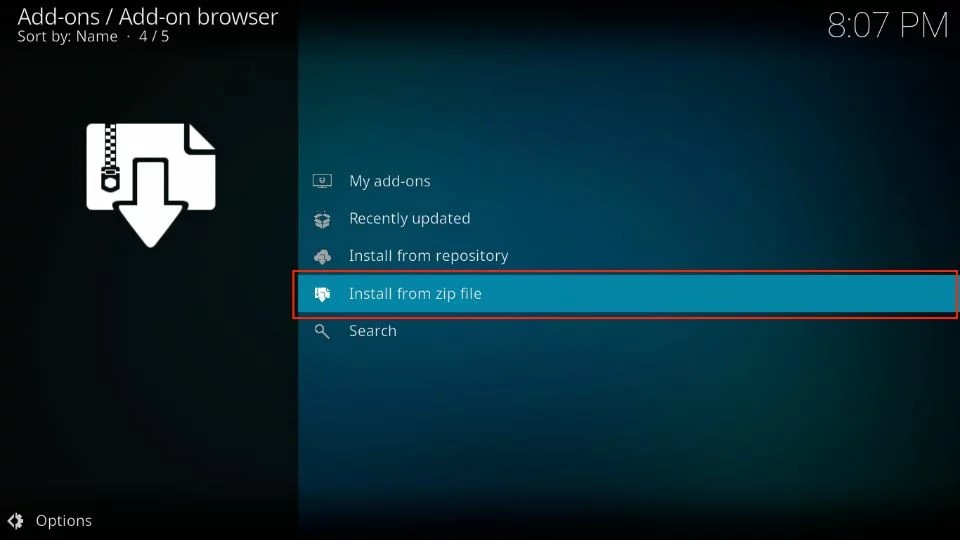
7. Return to the Settings window by pressing the back button once. Click Add-ons.
8. These are the options that are displayed in the next window. Click Install from zip file.
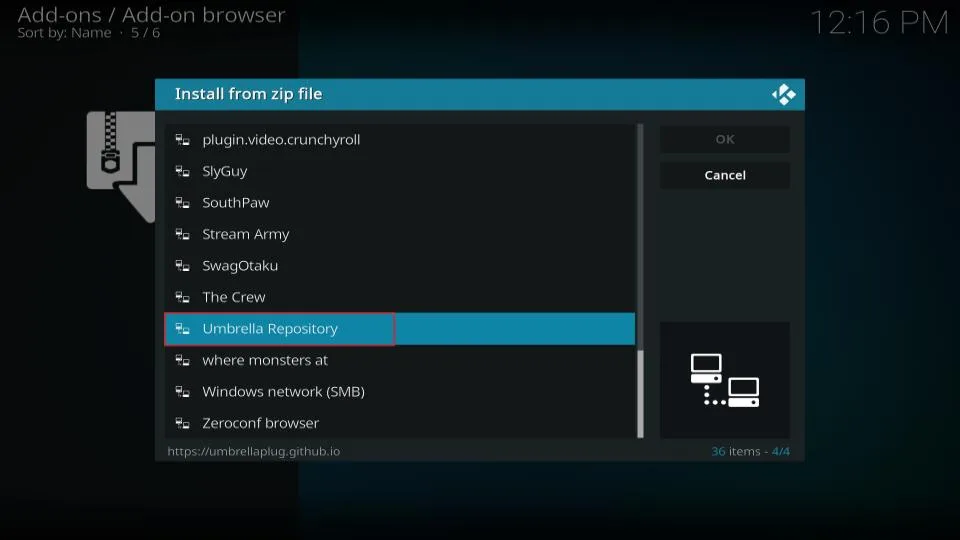
9. A popup window displays the source name you added previously. In this guide, it will be Umbrella Repository.
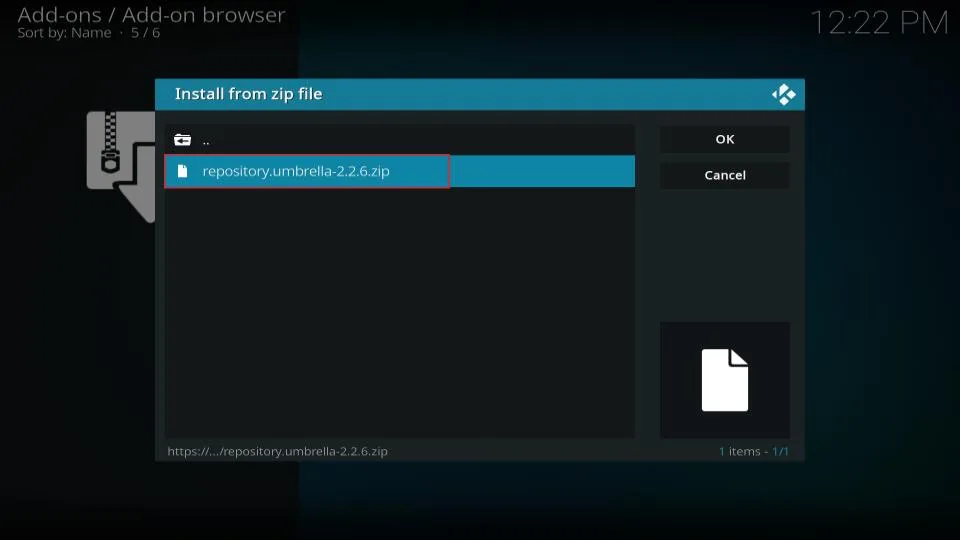
10. Click the zip file on the next window: repository.umbrella.-x.x.x.zip.
Note: The file’s version number displayed in the image below may be different from your screen.
11. You will see the Fen Kodi Add-on installed notification.
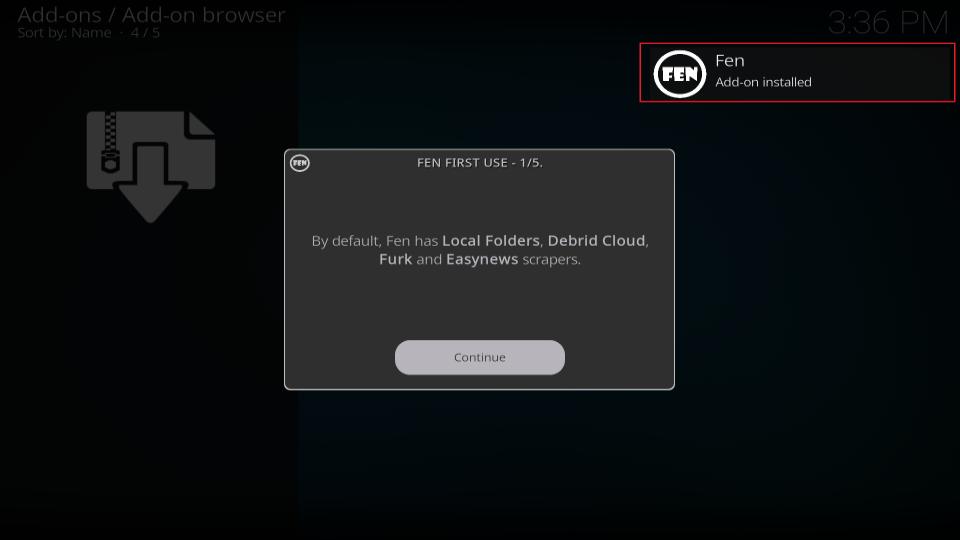
Great! You have successfully installed the Fen addon on Kodi.
Before you start streaming with Kodi Addons or Builds, I would like to warn you that everything you stream on Kodi is visible to your ISP and Government. This means, streaming copyrighted content (free movies, TV shows, live TV, and Sports) might get you into legal trouble.
Thankfully, there is a foolproof way to keep all your streaming activities hidden from your ISP and the Government. All you need is a good VPN for Kodi. A VPN will mask your original IP which is and will help you bypass Online Surveillance, ISP throttling, and content geo-restrictions.
I personally use and recommend ExpressVPN, which is the fastest and most secure VPN. It is compatible with all kinds of streaming apps and devices.
NOTE: We do not encourage the violation of copyright laws. But, what if you end up streaming content from an illegitimate source unintentionally? It is not always easy to tell the difference between a legit and illegal source.
So, before you start streaming on Kodi, here's how to get VPN protection in 3 simple steps.
Step 1: Get the ExpressVPN subscription HERE. It comes with a 30-day money-back guarantee. Meaning, you can use it free for the first 30-days and if you are not satisfied with the performance (which is highly unlikely), you can ask for a full refund.
Step 2: Click HERE to download and install the ExpressVPN app on your streaming device. If you are using a FireStick, I have given the exact steps starting with Step 4 below.
Step 3: Click the Power icon to connect to a VPN server. That's all. Your connection is now secure with the fastest and best VPN for Kodi.

The following are the steps to install Kodi VPN on your Fire TV devices. If you have other streaming devices, follow Step 1-3 above.
Step 4: Subscribe to ExpressVPN HERE (if not subscribed already).
Step 5: Go to Fire TV Stick home screen. Click Find followed by Search option (see image below).

Step 6: Type Expressvpn in the search bar and select when it shows up.

Step 7: Click Download.

Step 8: Open the ExpressVPN app and Sign in using the email ID and password that you created while buying the ExpressVPN subscription.

Step 9: Click the Power icon to connect to a VPN server. That’s all. Your FireStick is now secured with the fastest VPN.

How to Use FEN Kodi Addon
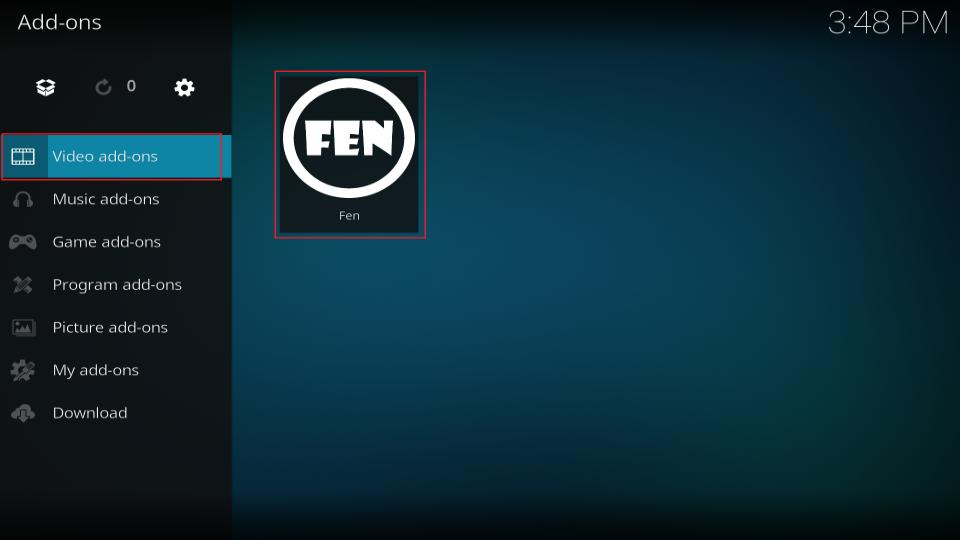
Fen is similar to the other Kodi addon for Movies & TV Shows. It looks quite a bit like the Exodus addon. However, the developers have declared that it is not a fork of Exodus. To access the Fen add-on or any other Kodi add-on, go to Kodi’s home screen. From there, go to Add-ons > Video add-ons.
You may now click and open the Fen addon.
You will see the following Changelog window when you run the Fen add-on for the first time. This window may also appear if the addon has been updated since the last time you opened it. Hit the back button to close this prompt.
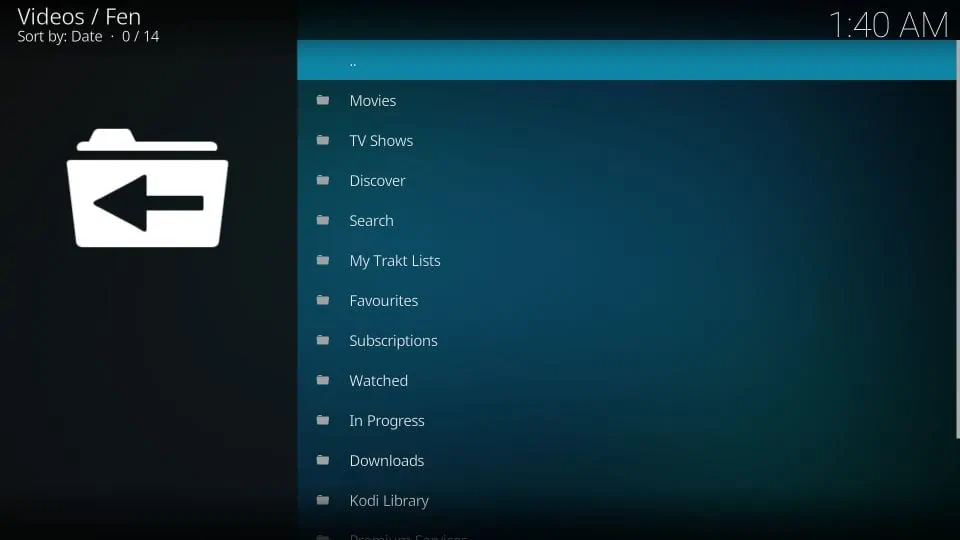
Here are the various categories on the main screen of the Fen Kodi addon. Movies & TV Shows are the primary categories that will get you started with streaming.
You will find the content divided into well-organized subcategories. For example, the Movies category is divided into subcategories: Trending, Popular, Premieres, etc. You may click the subcategory of your choice to explore the content. The subcategories are likely to have their subcategories.
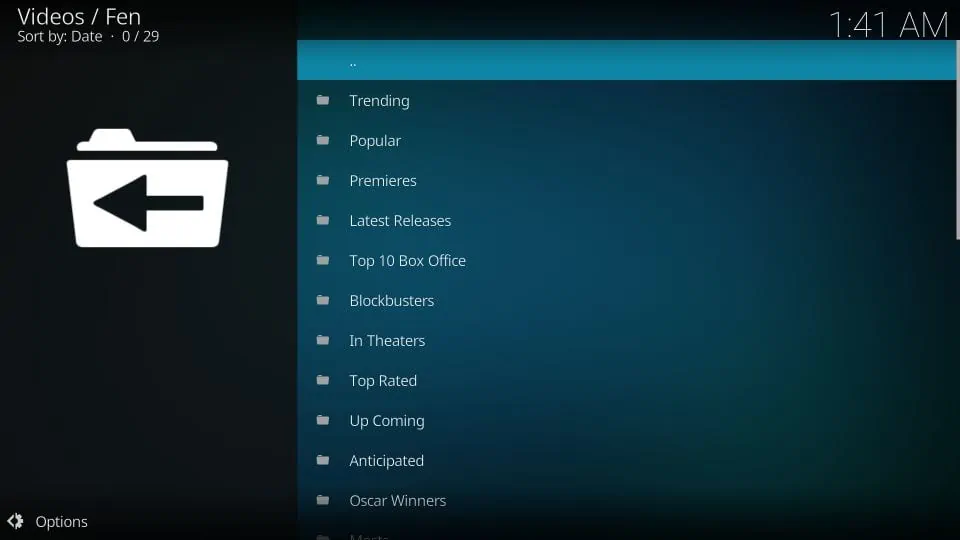
That is how you browse the content in the Fen Kodi addon. If you are looking for something specific, like you have the name of the movie you want to watch, you can use the Search option in the main window of the addon.
How to Set up Real Debrid with FEN Kodi addon
As I told you, Real Debrid offers premium links, which often work better than the free ones. Therefore, Using Fen with Real Debrid would be a good idea. You will need the Real Debrid Premium account. If you don’t have one, here is our detailed guide on Real Debrid.
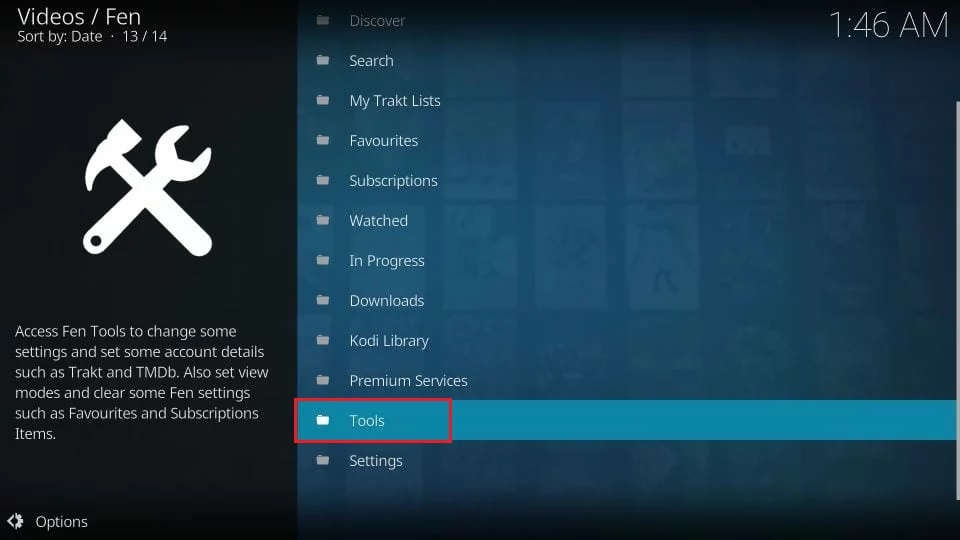
To set up Real Debrid with Fen addon, click Tools on the main screen.
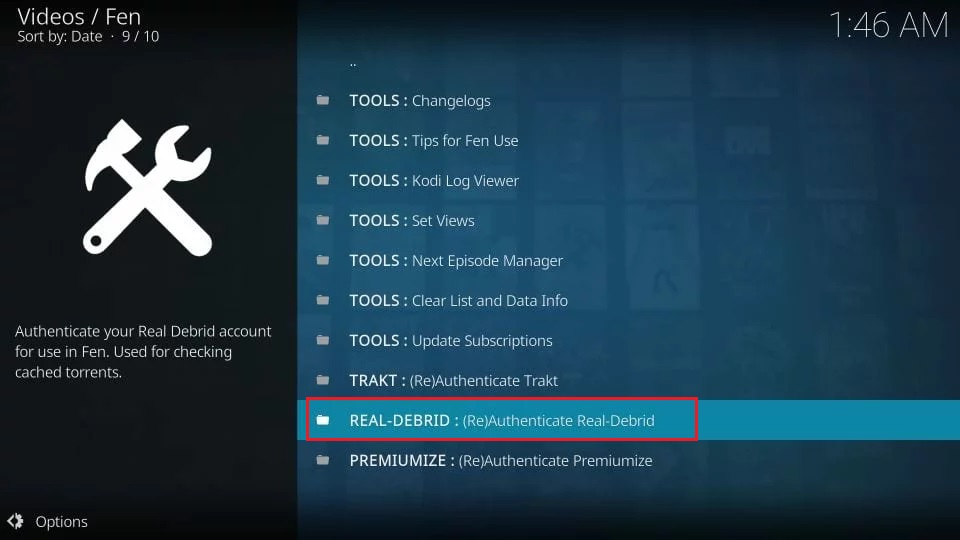
Next, click the option REAL-DEBRID: (Re)Authenticate Real-Debrid.
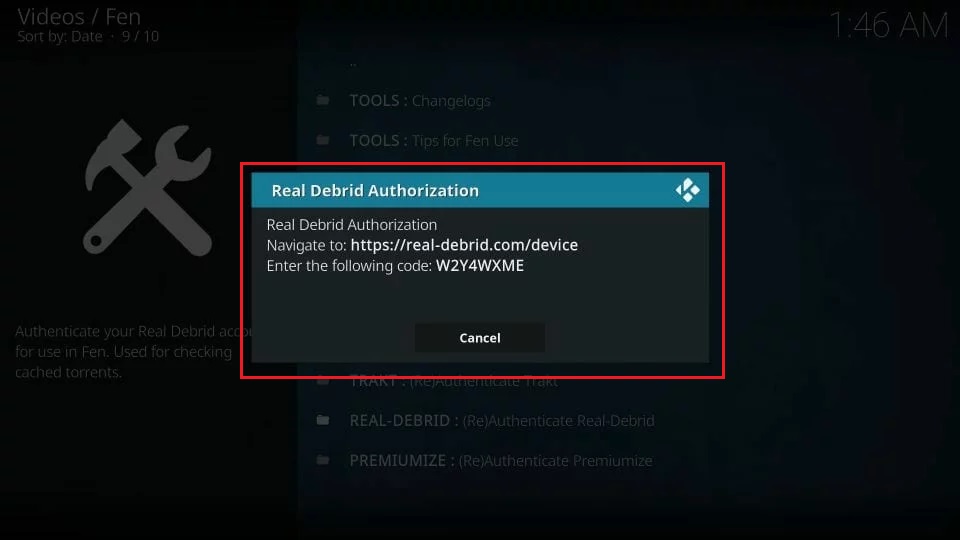
You should now see a dialog box with a code. Go to https://real-debrid.com/device in a computer or mobile browser and enter the code. It will validate your account. If required, sign in to your Real Debrid account.
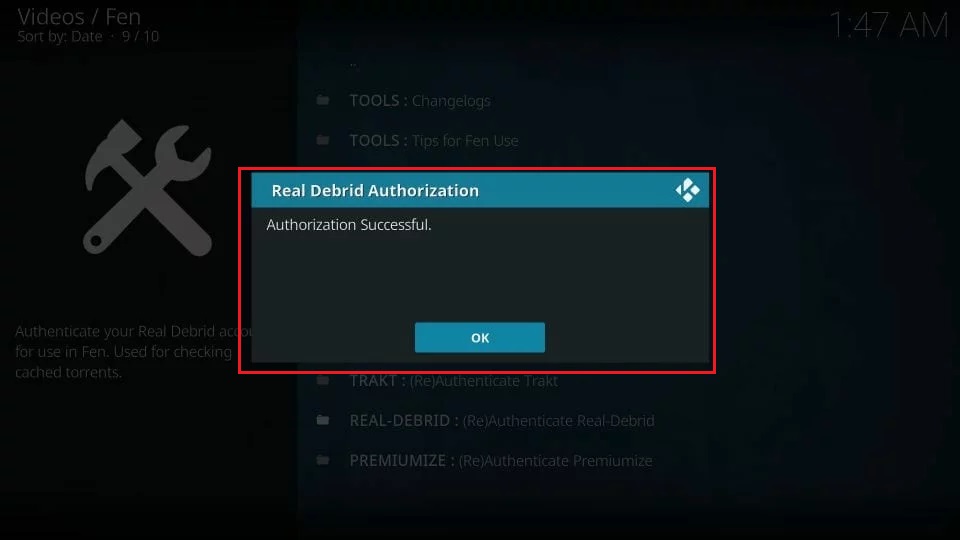
Back on Kodi, once your Real Debrid account is validated, you will see the Authorization Successful message.
Go back to the main screen of Fen addon, and pick the movie title or episode you want to watch. You will find a lot of premium links displayed in different colors than the free ones.
Wrapping Up
So, this is how you install and use the Fen addon on Kodi. FEN is a relatively new addon; however, it works better than many old addons. It is an on-demand addon, so you will only find the option to watch movies and shows. It pairs with Real Debrid and Trakt to provide a solid entertainment experience.
Related:
- How to Install ApeX Sports Kodi Addon
- How to Install Stirr Kodi Addon
- How to Install the Magic Dragon Kodi Addon
- Seren Kodi Addon

Suberboost Your FireStick with My Free Guide
Stay Ahead: Weekly Insights on the Latest in Free Streaming!
No spam, ever. Unsubscribe anytime.

FEN does not work
Hi, FEN may only work with Real Debrid. However, there are plenty of other addons you can try.
Anyone else get trakt errors and timeout warnings all the time?
FEN does not work either
Hi Joanie, I just checked. It is working. You may want to try it with a VPN.