
This guide shows how to pair the FireStick remote with your TV. The instructions are compatible with all Fire TV devices, including FireStick Lite, FireStick HD, FireStick 4K, FireStick 4K Max, and Fire TV Cube.
The latest Amazon FireStick remotes come equipped with TV control features. The remote syncs with your TV, allowing you to adjust the volume, mute the sound, or turn the TV on or off.
Furthermore, you can switch HDMI ports using an Alexa voice command.
To sync your FireStick remote to your TV, you need the following devices:
- A TV equipped with CEC
- An Alexa Voice Remote that includes Power & Volume control buttons.
Once configured, this setup lets you control your TV’s power, volume, and input selection without needing multiple remotes.
For FireStick Users
ISPs, hackers, and other third-party entities worldwide may monitor your online activities. For security, privacy, and smooth streaming, it is recommended to use a reliable VPN for FireStick. Your IP address is visible to sites you visit.
I recommend ExpressVPN, a fast and secure VPN. It is very easy to install on any device, including an Amazon Fire TV Stick. Also, it comes with a 30-day money-back guarantee. If you don't like their service, you can always ask for a refund. ExpressVPN also has a special deal where you can get 4 months free and save 81% on the 2-year plan.
Read: How to Install and Use the Best VPN for FireStick
How to Connect a New FireStick Remote to a TV
When you connect your FireStick to your TV via the HDMI port and set it up for the first time, the FireStick remote connects automatically.
However, if you have been using FireStick for a while and changed or reset the remote, you may need to resync the TV controls.
To manually pair a Fire TV remote with a TV, follow these steps:
- Press the home button (house icon) on your FireStick remote for around 10 seconds.
- The LED light on the button will start blinking. This means that the remote is searching for a TV.
- The remote will flash three blue lights once it has found a TV and connected to it. This means that your remote is paired with the TV.
If these steps do not work for you or you are pairing an additional remote, please follow our detailed guide.
How to Control the TV using the FireStick Remote
FireStick and its remote can communicate with your TV via Consumer Electronics Control (CEC, a feature found in most modern televisions. As a result, you can:
- Power on/off the TV
- Increase/decrease volume
- Switch display source
Different TV manufacturers market the CEC feature with different names. I have compiled a list of the most popular TV brands and their respective CEC branding:
- Samsung: Anynet+
- Sony: BRAVIA Sync
- LG: SimpLink
- Panasonic: HDAVI Control, EZ-Sync, or VIERA Link
- Toshiba: CE-Link and Regza Link
In the following section, we will explore how to enable CEC on your FireStick and TV.
Part 1: Preparing your FireStick and TV
Please follow these steps:
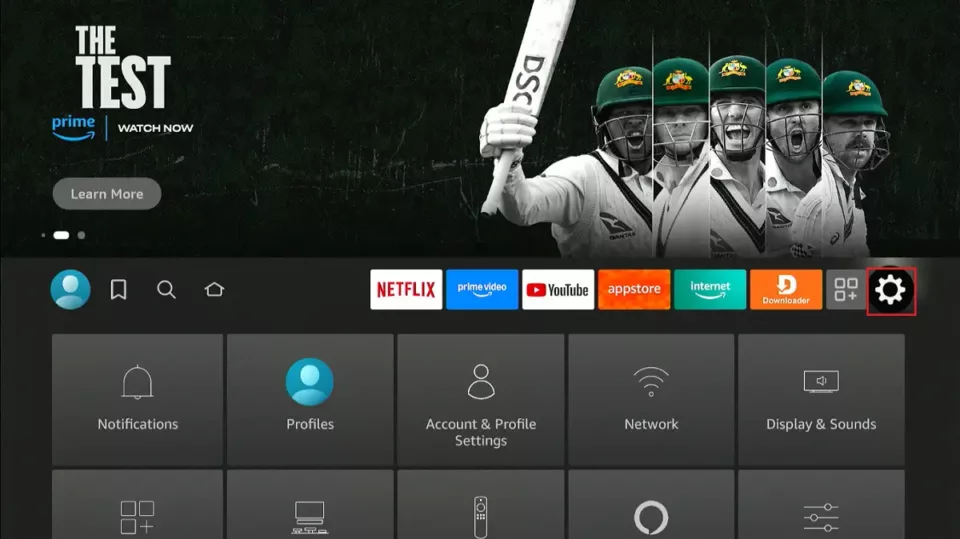
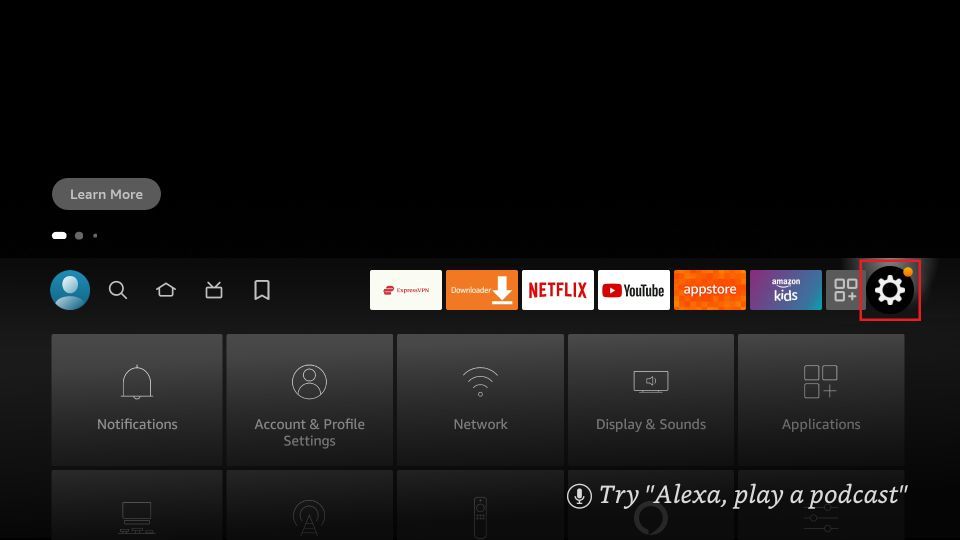
1. Go to your FireStick home screen and click on settings (the gear icon).
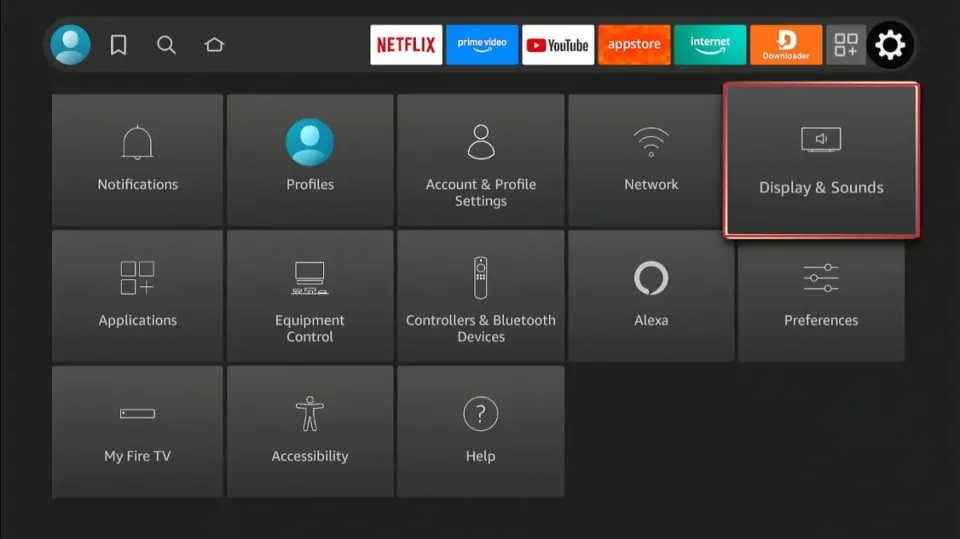
2. Select Display & Audio. For some Fire TV versions, this section is called Display & Sounds.
3. Scroll down to HDMI CEC Device Control.
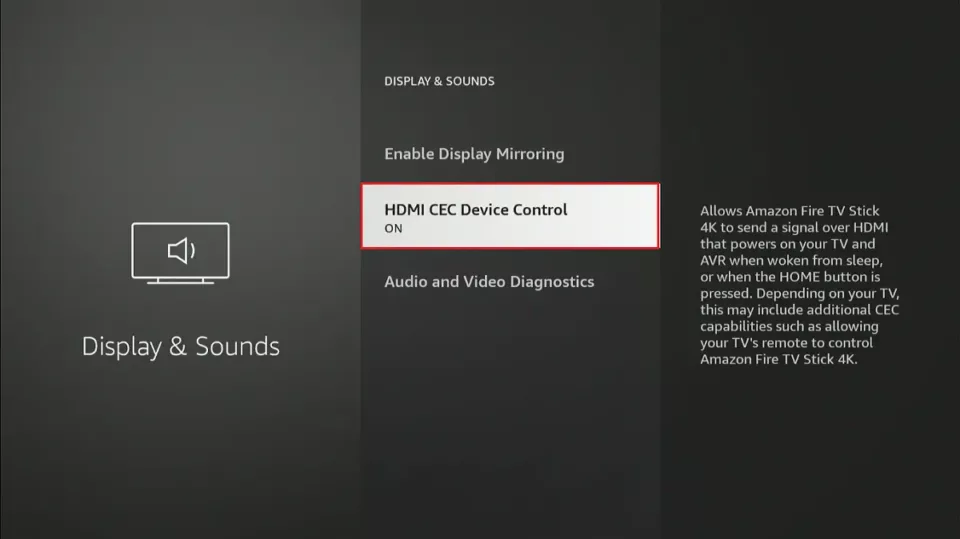
4. If this setting is OFF, click it to turn it ON.
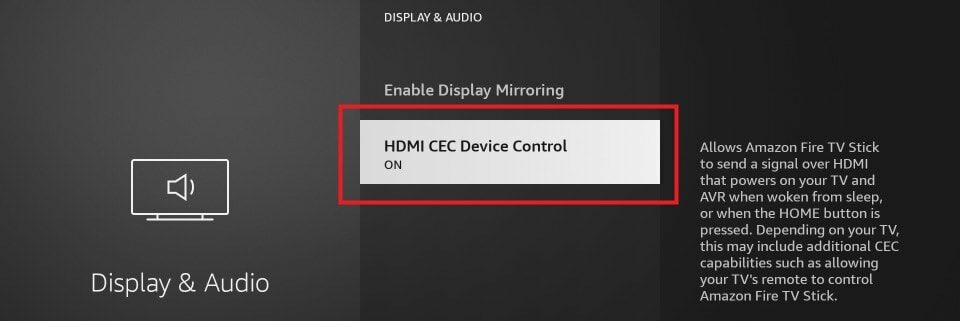
Your FireStick is now ready. Now, let’s enable CEC on your TV.
Note: I will explain this process on a Toshiba TV. The User Interface and controls vary by brand, but the general process should be similar.
- Press the menu button on the TV remote.
- The settings window should pop up. Go to System.
- Locate the option named HDMI CEC Control.
- Enable HDMI CEC control. If prompted, select Always On.
We can now set up the FireStick remote to control the TV because CEC is enabled on both devices.
Part 2: Connecting the FireStick Remote to TV
⚡ DON'T MISS THIS LIMITED-TIME 🕒 DEAL
![]()
Protect your privacy with ExpressVPN
DEAL OF THE DAY
73% DISCOUNT ON ExpressVPN + 4 EXTRA MONTHS
Risk-free with a 30-day money-back guarantee
🔒 GET ExpressVPN↗️
Here are the steps:
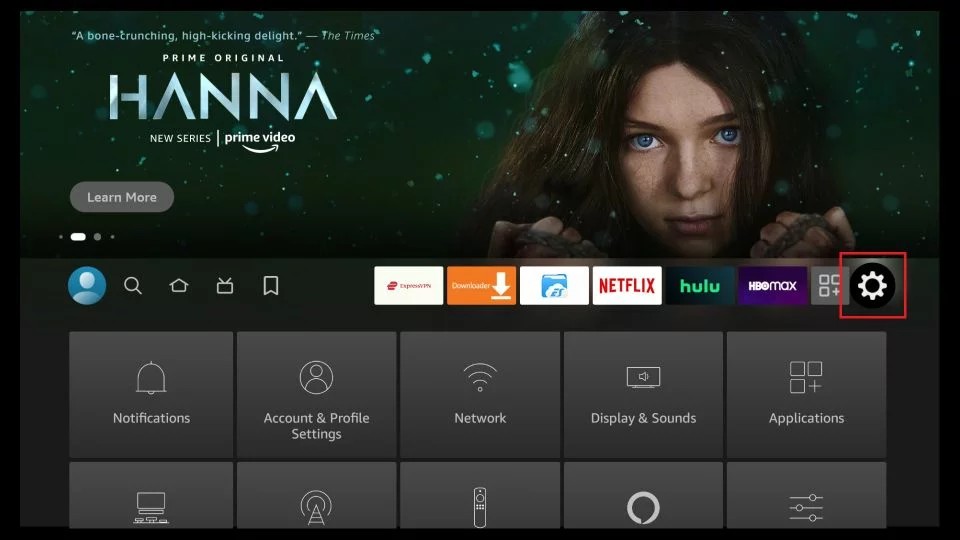
1. From your FireStick home screen, click Settings. It’s the cog (gear) icon in the top-right.
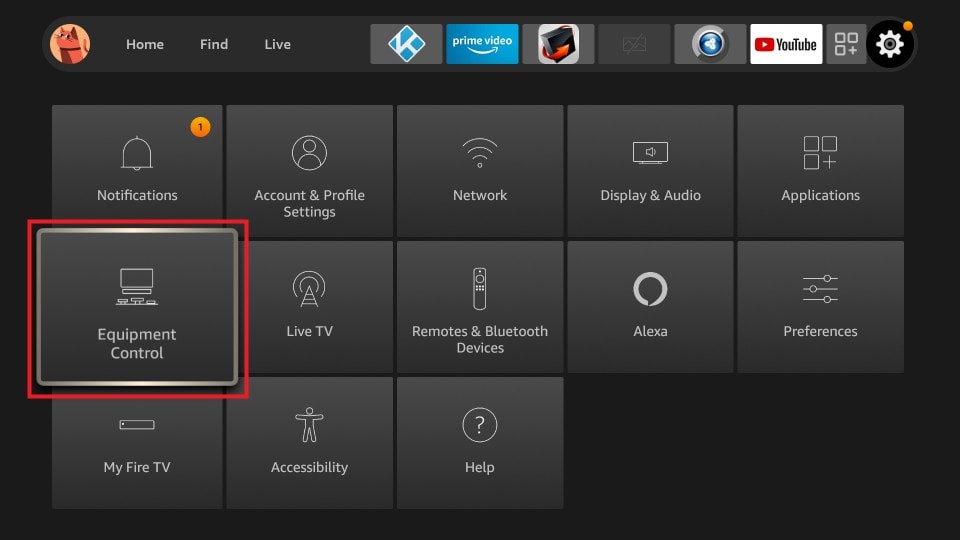
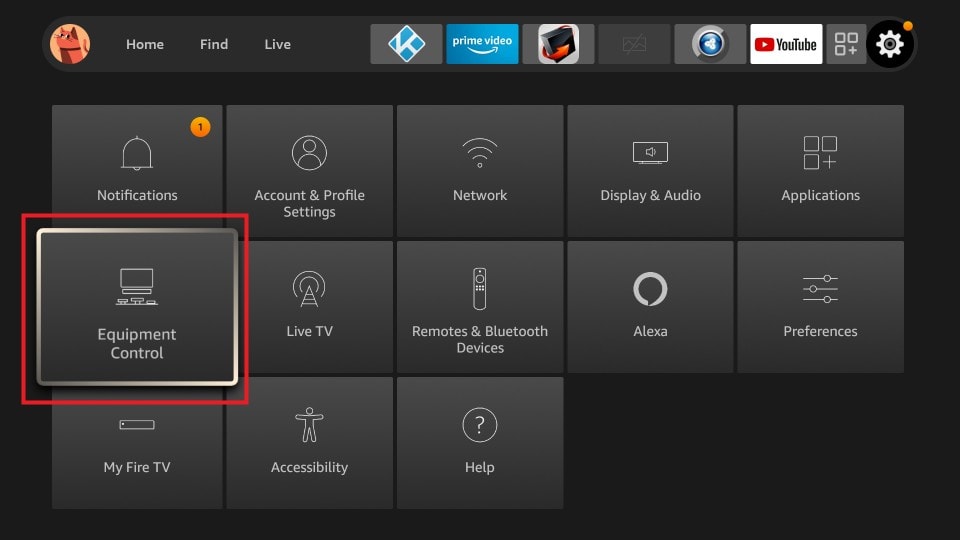
2. Navigate to Equipment Control.
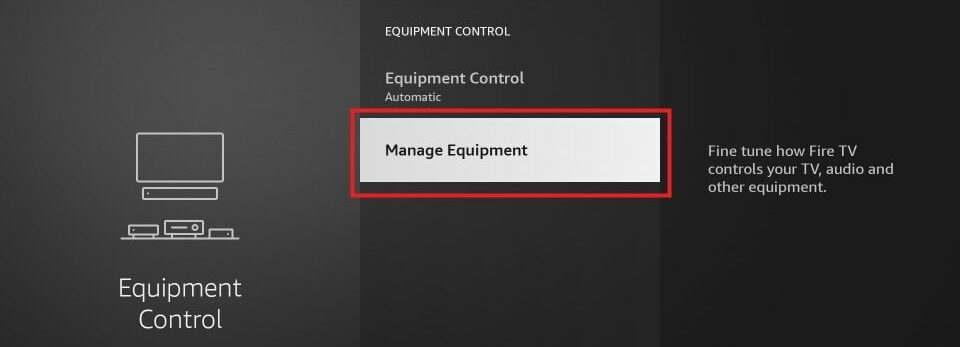
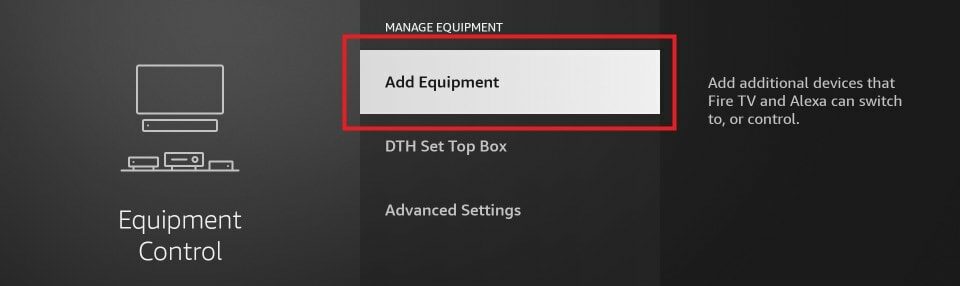
3. Select Manage Equipment.
4. Click Add Equipment.
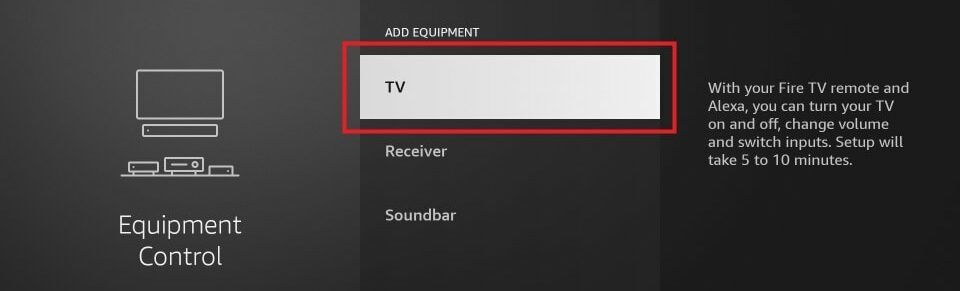
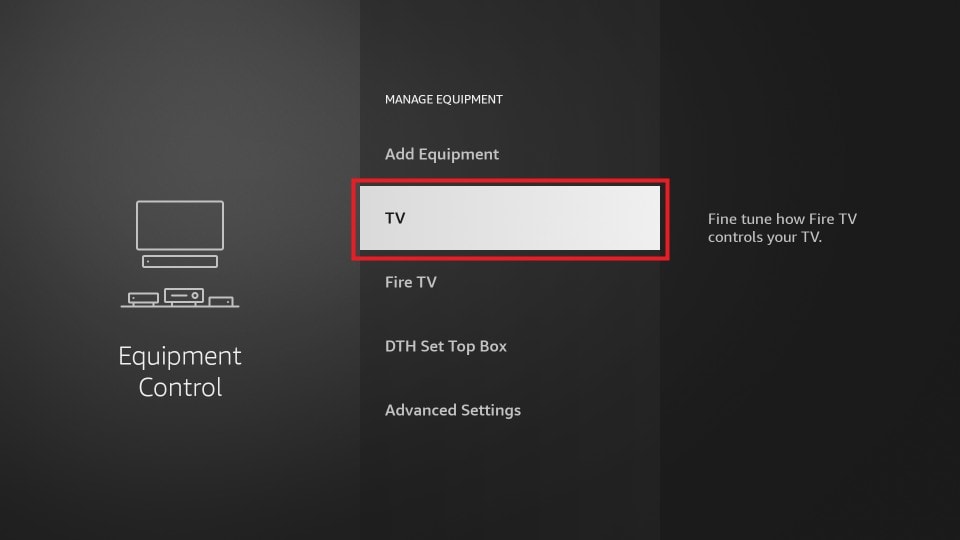
5. Choose TV.
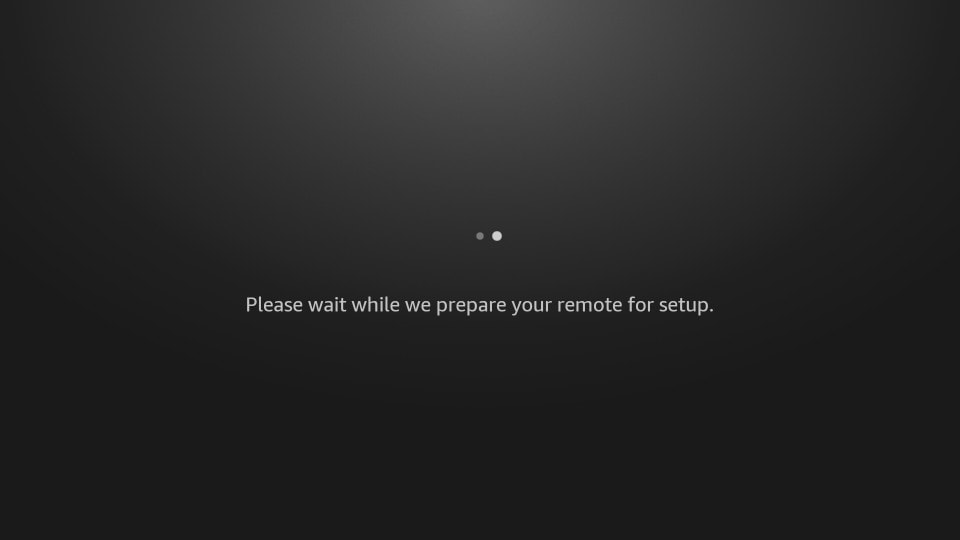
6. Wait while the FireStick prepares your remote for setup.
7. If the system correctly identifies your TV, select Yes and skip to step 10. Otherwise, continue with step 8 below.
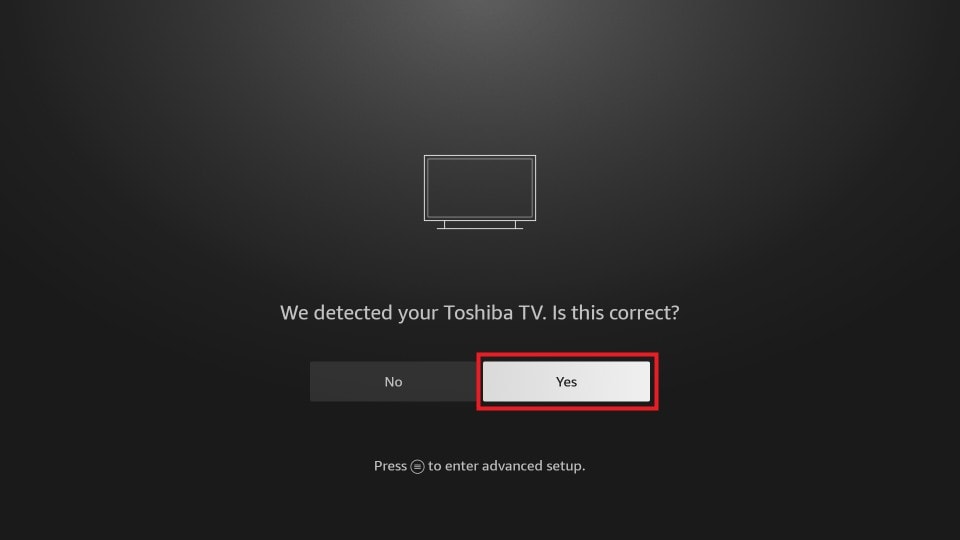
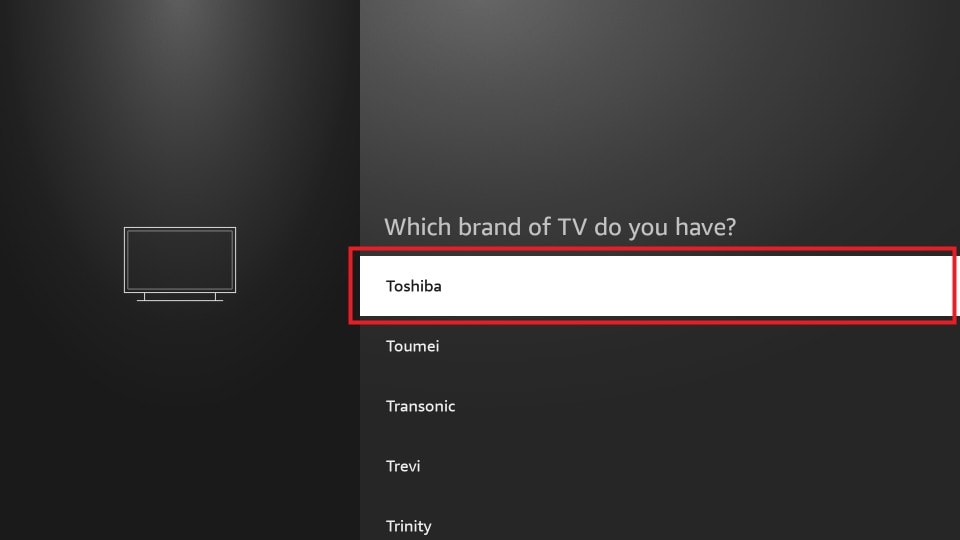
8. If the identified TV is incorrect, click on No.

9. Select the brand of your TV from the provided list. I am using a Toshiba TV for this guide, so I’ll select Toshiba.
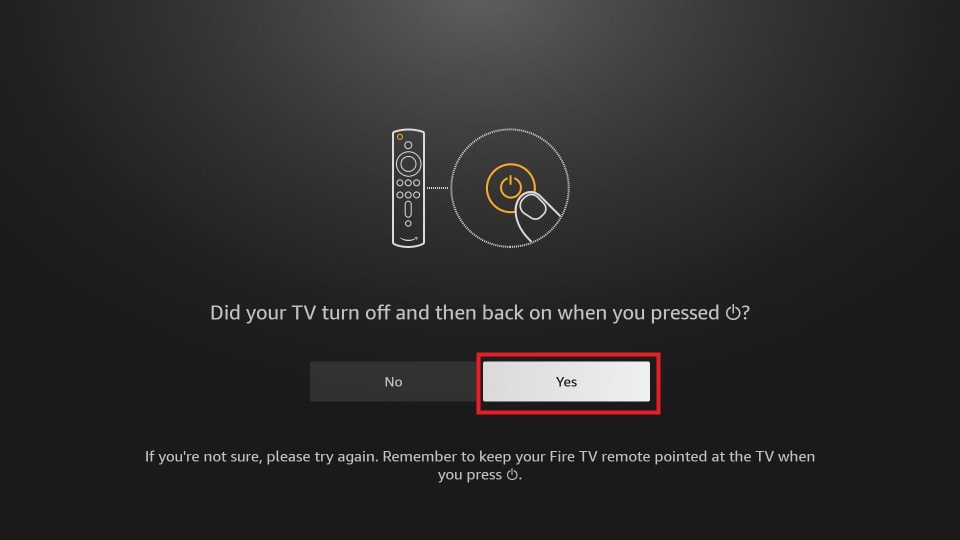
10. Follow the on-screen instructions: Press the power button on your FireStick remote, wait 10 seconds, and press the power button again.

11. If your FireStick remote turns your TV off and back on, select Yes and skip to step 15. Otherwise, go to step 12 below.
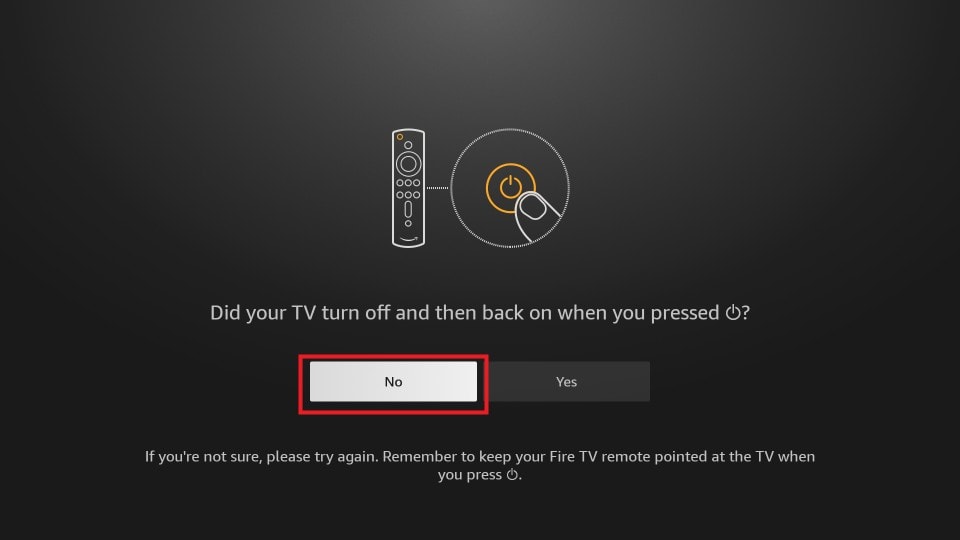
12. Select No if your TV didn’t respond to the FireStick remote’s power button.
13. The system will now ask you to go through several attempts. This is a trial-and-error method. Keep trying until it works. The number of attempts for each user may vary.
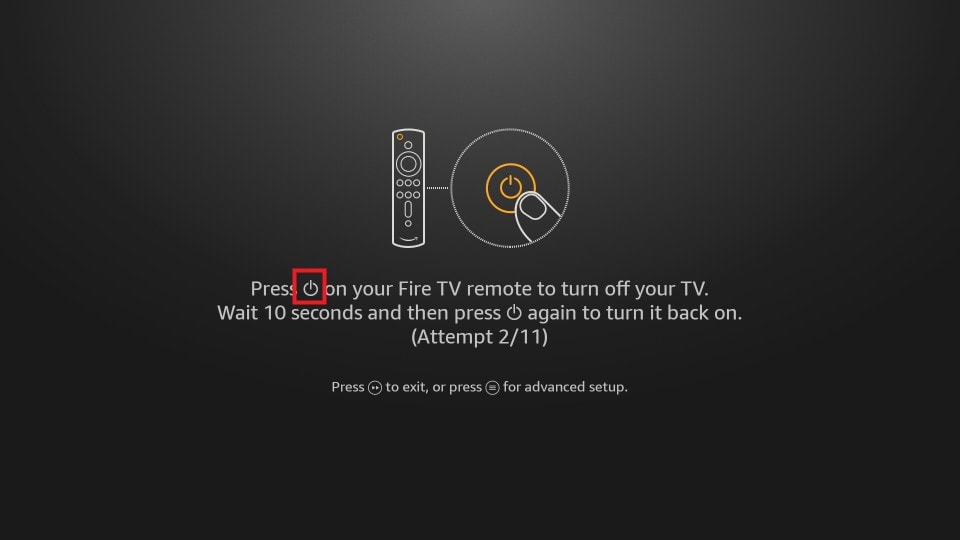
14. Click on Yes for the attempt that successfully turned the TV off and on.

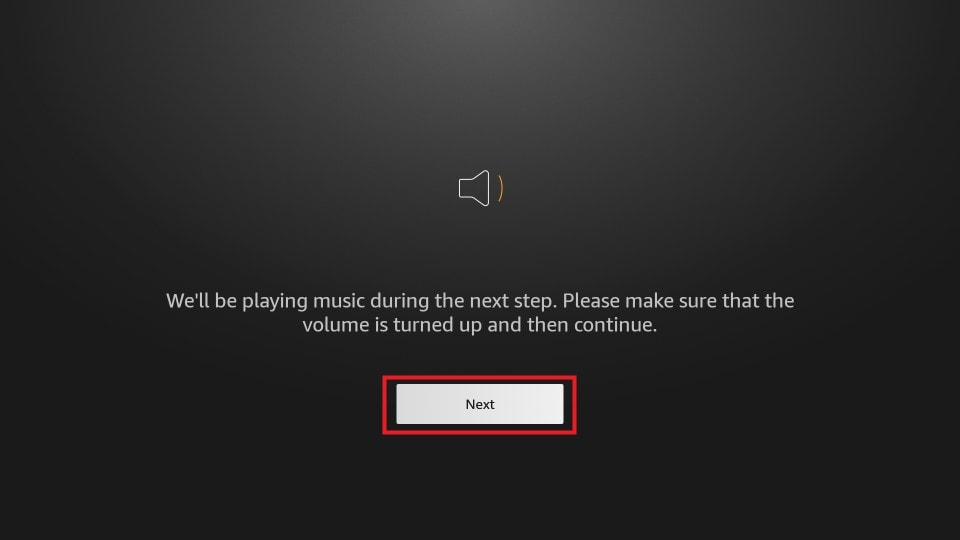
15. The system will now perform a volume test. If the TV is muted, increase the volume using the traditional remote. When you’re ready for the volume test, click Next.
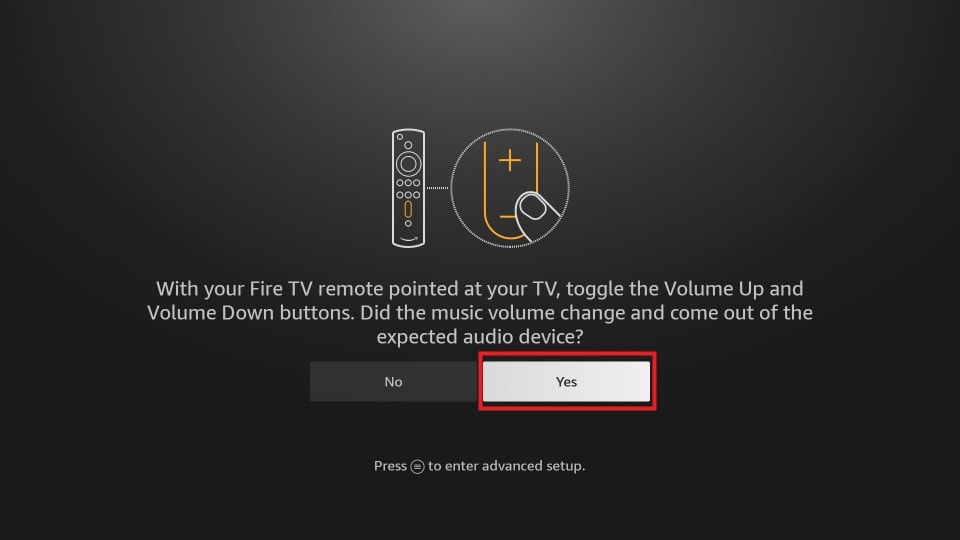
16. Use your FireStick remote to change the volume levels. If you can control the volume using your FireStick remote, click Yes and skip to step 19. Otherwise, follow step 17 below.
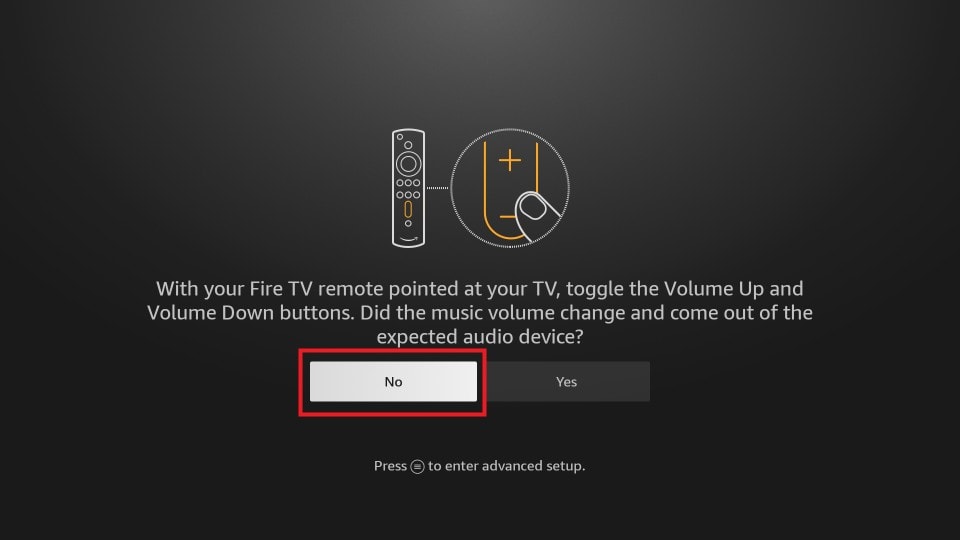
17. Click No if the volume didn’t change in response to your FireStick remote.
18. Select the option that best suits your setup. If you do not use external audio equipment, select I use just my TV.
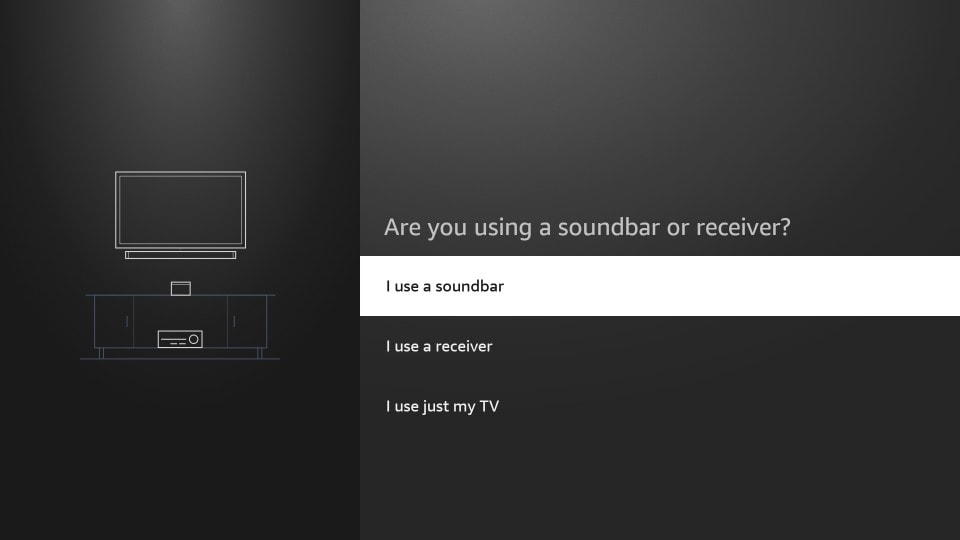
Repeat from step 13. Keep repeating this cycle until you find a setup that works for you. Once you’ve found the one that works, you can proceed to step 20.
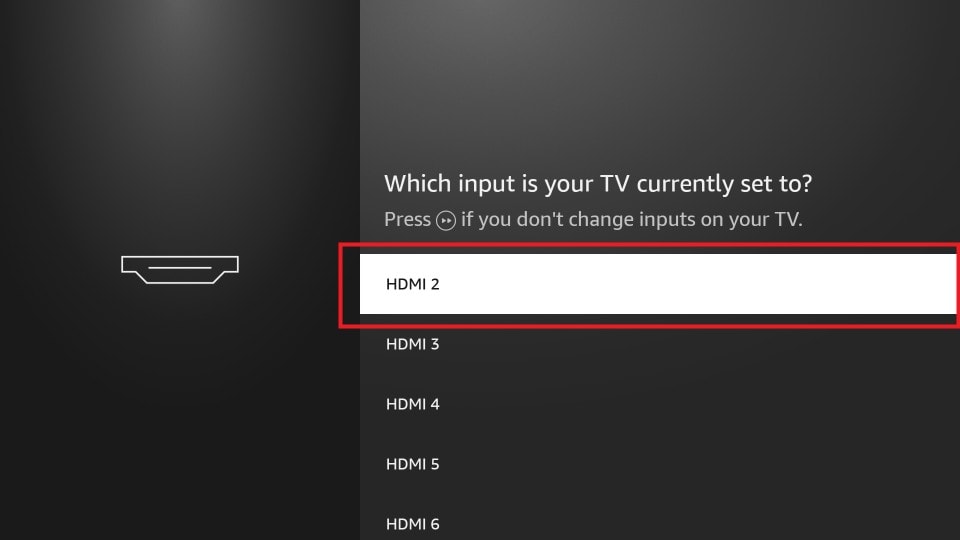
19. This step helps when multiple media devices (like consoles and DTH boxes) are connected to your TV and must constantly switch between the HDMI channels.
This step will create a shortcut for your FireStick’s HDMI channel. From the list, select the HDMI port your FireStick is connected to. In my case, it’s HDMI 2.
Note: If your TV has only a single HDMI input (FireStick), you can skip this process by pressing the forward button (two forward arrows) on your FireStick remote. Then, skip to step 23.
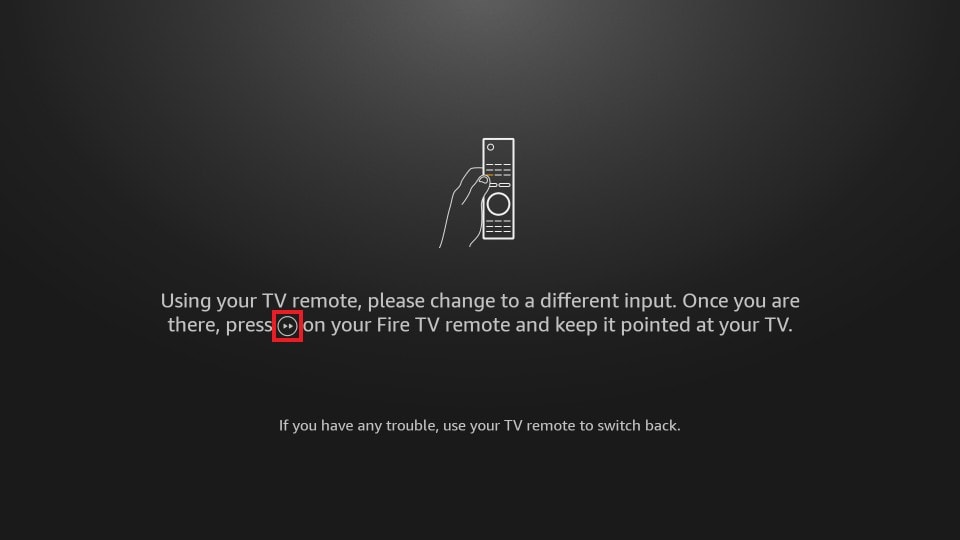
20. Use your traditional TV remote to switch to an alternate HDMI input source. Press the forward button (two forward arrows) on your FireStick remote.
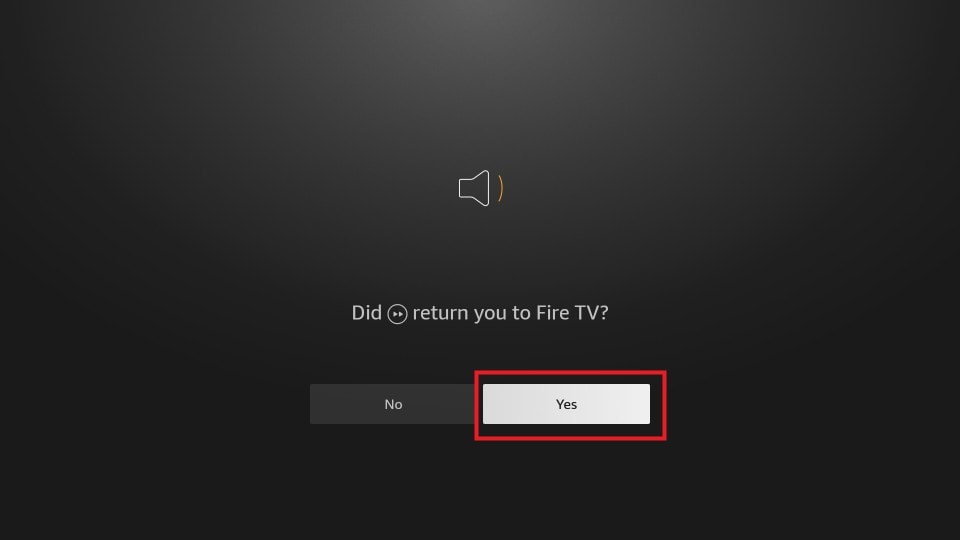
21. The TV should switch to the FireStick HDMI channel. If it did, select Yes. You have now created a shortcut to switch back to your Fire TV from any HDMI source using the forward button on your FireStick remote.
22. Click OK to sync your FireStick remote to your TV.
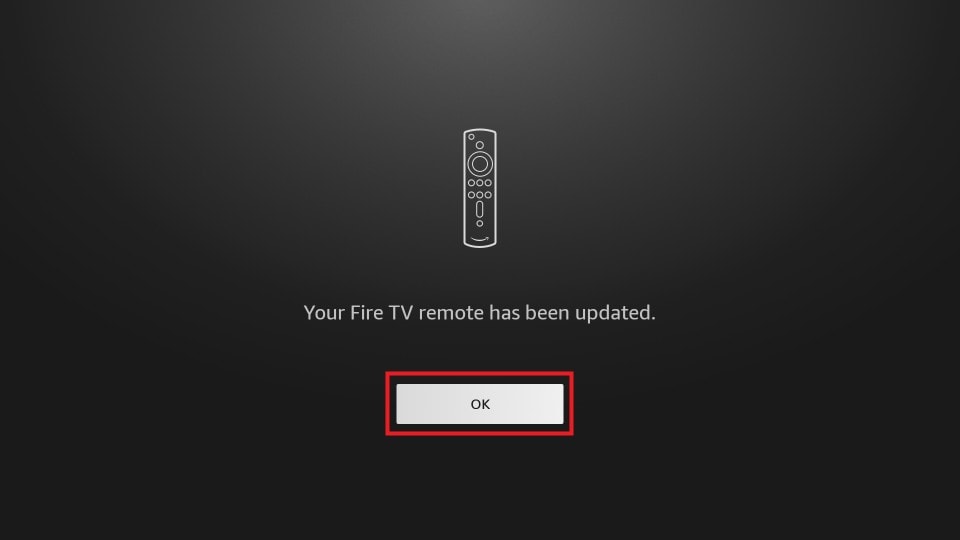
That’s all. You have successfully synced your FireStick remote to the TV and can now navigate your FireStick and TV using a single remote. Enjoy a hassle-free experience on your FireStick and TV.
How to Change the Paired TV
Do you have a new TV and want to sync the FireStick remote to it? Follow the steps below to pair your new TV with your Fire TV remote:
1. Click Settings (the gear icon) on your Fire TV home screen.
2. The Settings page window will appear. Select Equipment Control.
3. On the following screen, select Manage Equipment.

4. Choose TV.
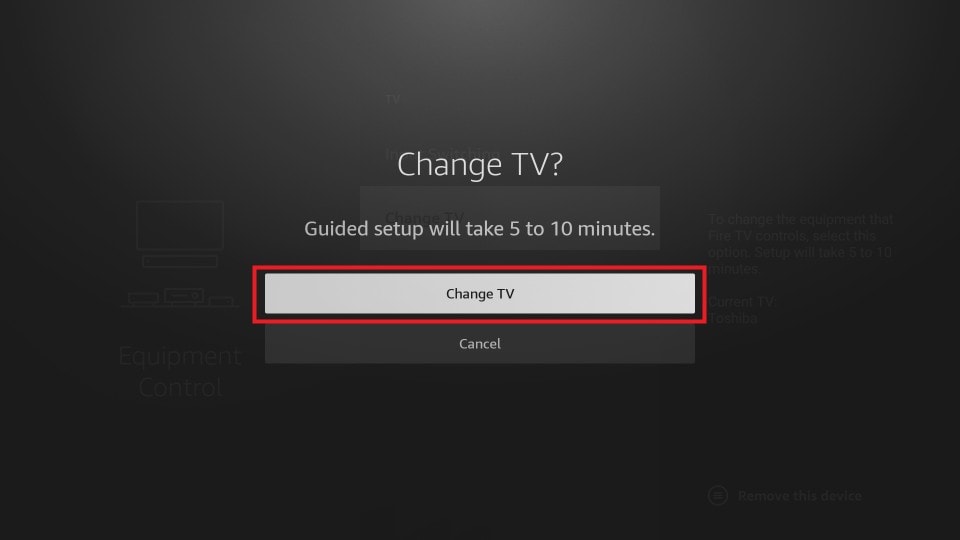
5. From the TV menu screen, select Change TV.

6. Click Change TV to confirm the action. Repeat steps 6-23 as outlined in the Connecting the FireStick Remote to TV section above.
That’s it. The FireStick remote is connected to the new television. You can now use it to control and navigate the Fire TV.
How to Add a New Remote to FireStick
You can also sync two remotes with FireStick. Even if the primary one gets lost or broken, the device is easily accessible. Here are the steps to add a new Fire TV remote:
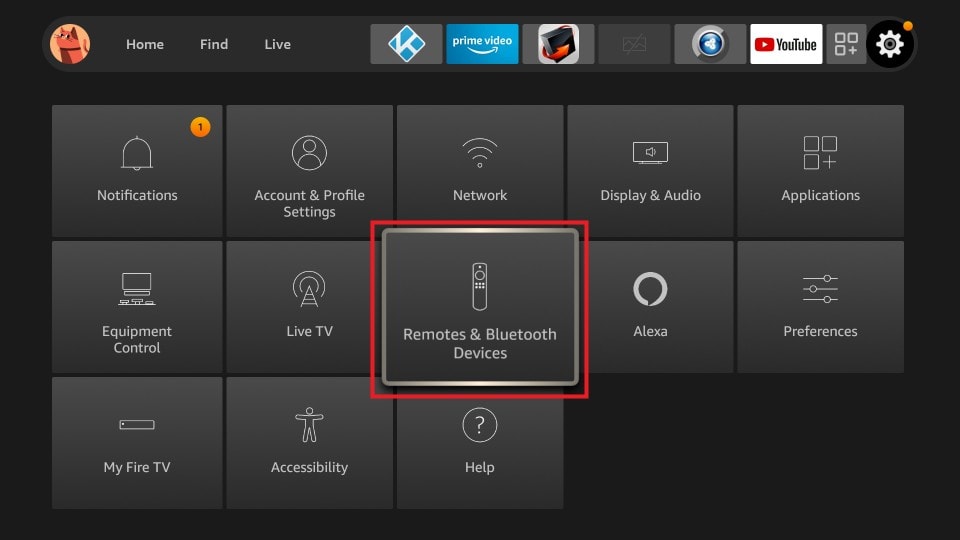
1. On FireStick home screen, select Settings Gear.
2. Open the Remotes & Bluetooth Devices sub-menu.
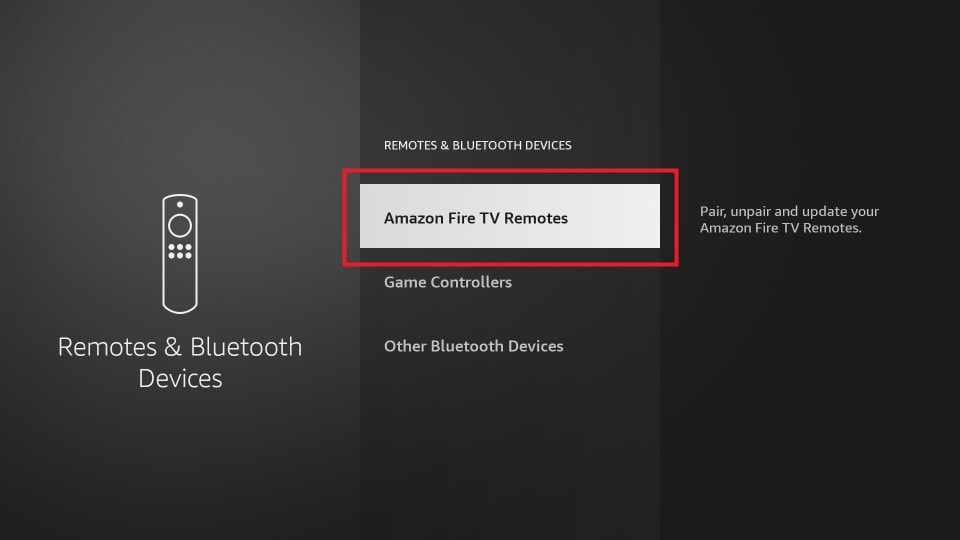
3. Select Amazon Fire TV Remotes.
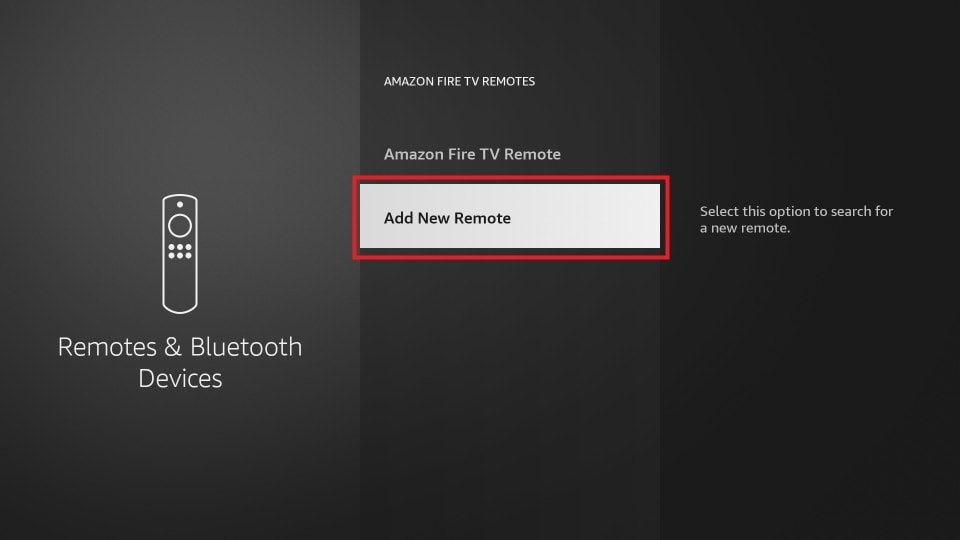
4. Open Add New Remote.
5. FireStick will start searching for a new remote nearby. On your new remote, press & hold the Home button for 10 seconds.
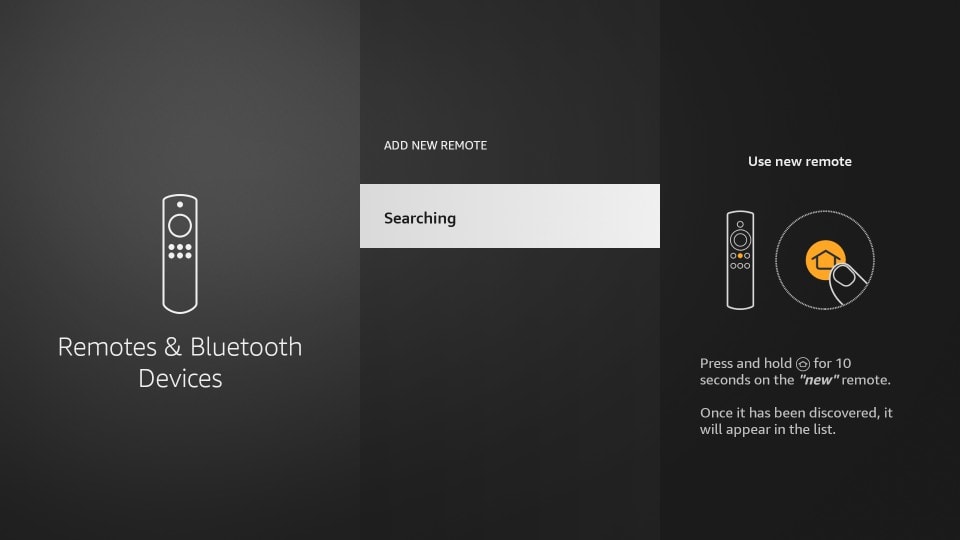
And you’re done. The new remote will be paired with the TV and appear next to the older remote.
Frequently Asked Questions
Go to Settings > Equipment Control > Manage Equipment > TV, then follow the prompts to set up your remote.
It could be due to low batteries, a lost connection, or TV compatibility issues. Make sure HDMI-CEC is enabled on your TV and re-pair the remote if needed.
No, a FireStick remote can only be synced with one TV at a time, as it's paired to a specific FireStick device connected to that TV.
Press and hold the Back, Menu (☰), and Left buttons together for 10 seconds, then wait 60 seconds. Remove the remote’s batteries, unplug the FireStick for a minute, then reconnect everything and re-pair the remote.
Ensure your TV supports HDMI-CEC and it's enabled. Reconfigure the remote under Settings > Equipment Control > TV. Also, check for software updates and replace the remote batteries if needed.
Winding Up
This guide outlined different ways to sync your FireStick remote with your TV. Once paired, you can use a single remote to control both your TV and Fire TV, avoiding the need to switch between two remotes. Have you successfully paired your FireStick remote with your TV? Feel free to share your experience in the comments.

Suberboost Your FireStick with My Free Guide
Stay Ahead: Weekly Insights on the Latest in Free Streaming!
No spam, ever. Unsubscribe anytime.

Leave a Reply