
This guide explains how to watch IPTV on Kodi.
What Is IPTV?
IPTV stands for Internet Protocol television. It’s a technology that enables digital television services to be transmitted over the Internet. Unlike traditional cable or satellite services, IPTV relies on your internet connection to stream content directly to your device.
IPTV offers significantly more flexibility than traditional cable or satellite TV. It doesn’t require a dedicated cable line or satellite set-top box. Instead, you can access IPTV by entering a URL or launching an app on an internet-connected smart device. It also supports two-way interactivity, offering a more personalized viewing experience.
Like traditional cable television, IPTV offers a diverse range of channels. An IPTV service typically includes every channel type, from music to sports to entertainment. However, the channel lineup can vary depending on the service provider.
For Kodi Users! ISPs, hackers, and other third-party entities worldwide may monitor your online activities. For security, privacy, and smooth streaming, it is recommended to use a reliable VPN for Kodi. Your IP address is visible to sites you visit. I recommend ExpressVPN, a fast and secure VPN. It is very easy to install on any device, including Amazon Fire TV Stick, PC, Mac, and Smartphones. Also, it comes with a 30-day money-back guarantee. If you're not satisfied with their service, you can request a refund. ExpressVPN also has a special deal where you can get 4 months free and save 81% on the 2-year plan.
Is Watching IPTV on Kodi Legal?
Who wouldn’t want to stream live TV channels without worrying about cable or an antenna? But is watching IPTV on Kodi legal? Well, it depends on the method you use.
If you are using official apps and addons to watch IPTV, it is 100% legal. However, using unverified and third-party IPTV services may violate copyright laws and result in legal issues.
FireStickTricks.com does not endorse piracy; we recommend using only legal services. For this reason, this guide does not include any unverified apps, addons, or playlists.
We will discuss two methods to watch IPTV on Kodi:
How to Watch IPTV on Kodi with PVR IPTV Simple Client
As mentioned above, we’ll use Kodi’s official PVR IPTV Simple Client to stream IPTV. We’ll start by installing the PVR addon.
After that, we’ll configure it and learn how to stream live TV channels. Lastly, I’ll list some excellent sources for M3U playlists. Let’s get started.
Part 1: Install the PVR IPTV Simple Client
PVR IPTV Simple Client is available on the official Kodi repository, which only hosts legal addons. Here are the steps to install it:
1. Launch your Kodi application. Click on the Settings Gear in the top-left corner, just below the Kodi logo.
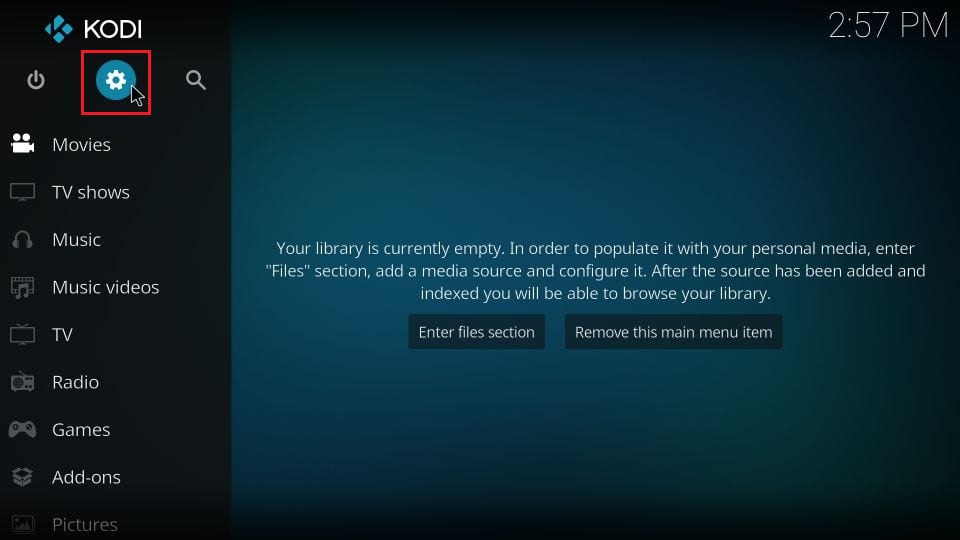
2. On the next page, select the Add-ons option.

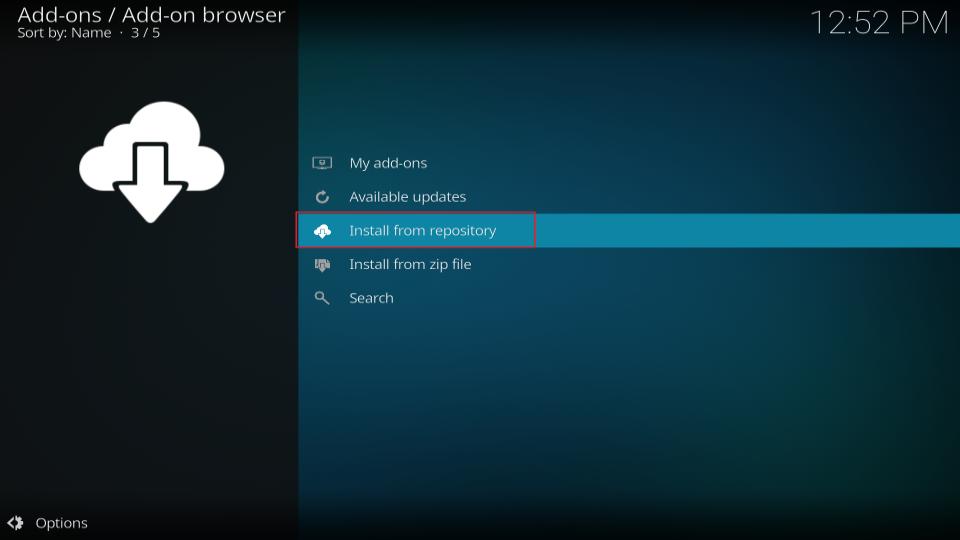
3. Then, click Install from repository.
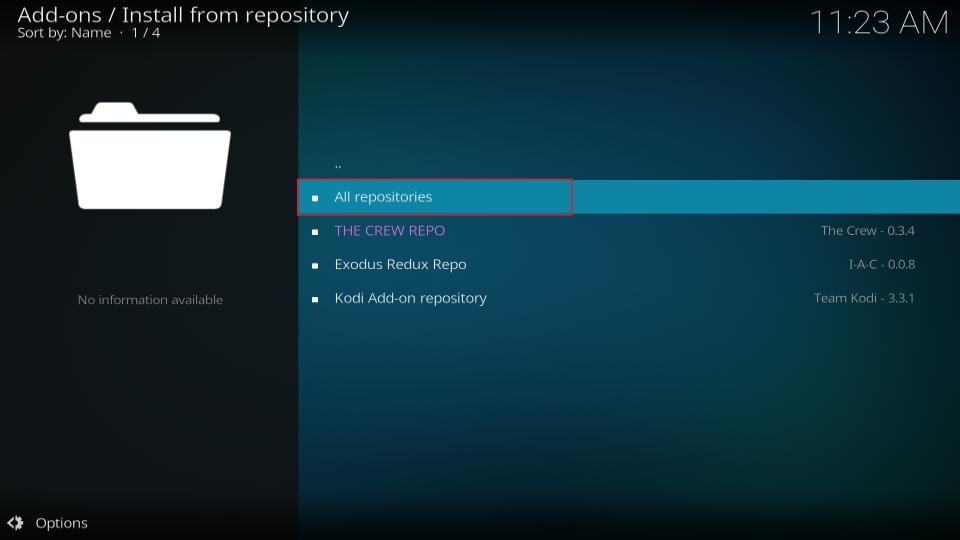
4. Select All repositories.
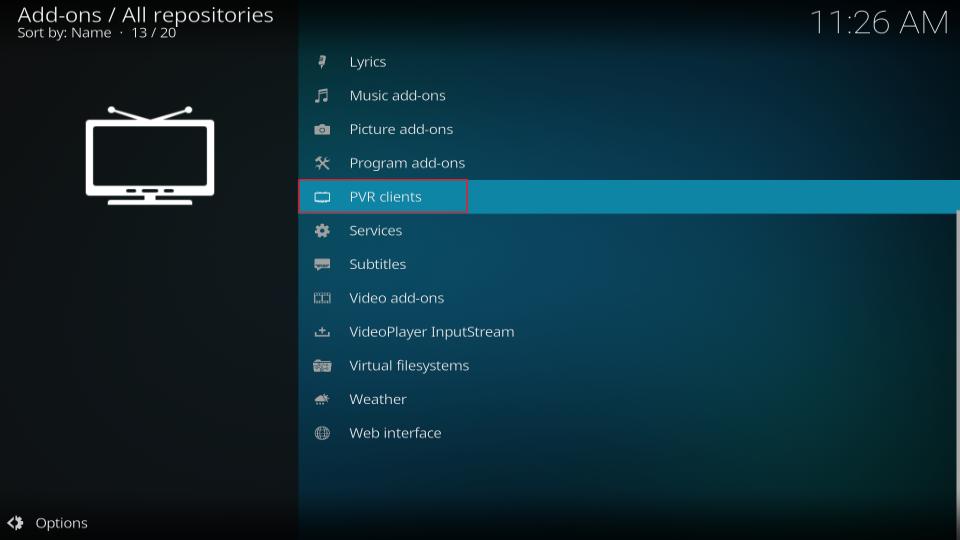
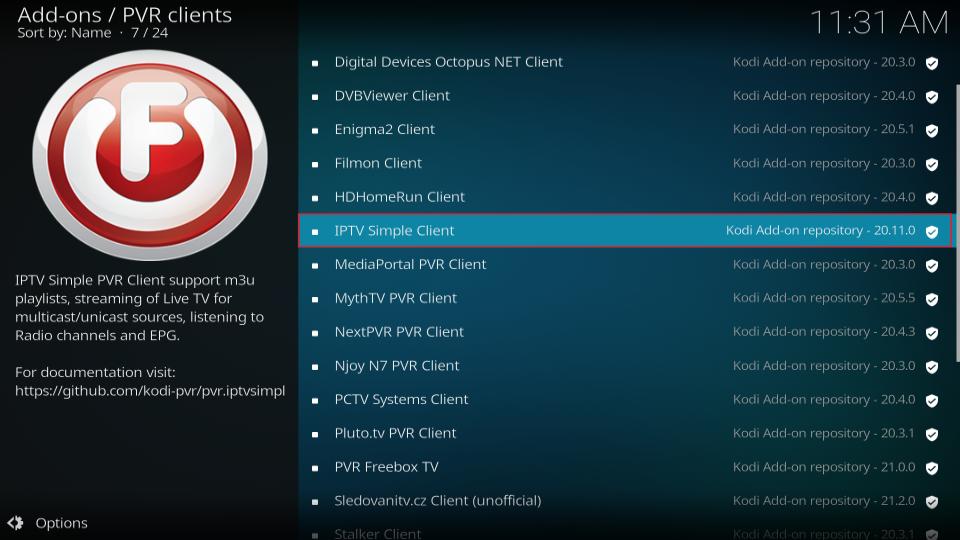
5. On the next screen, scroll down and select PVR clients.
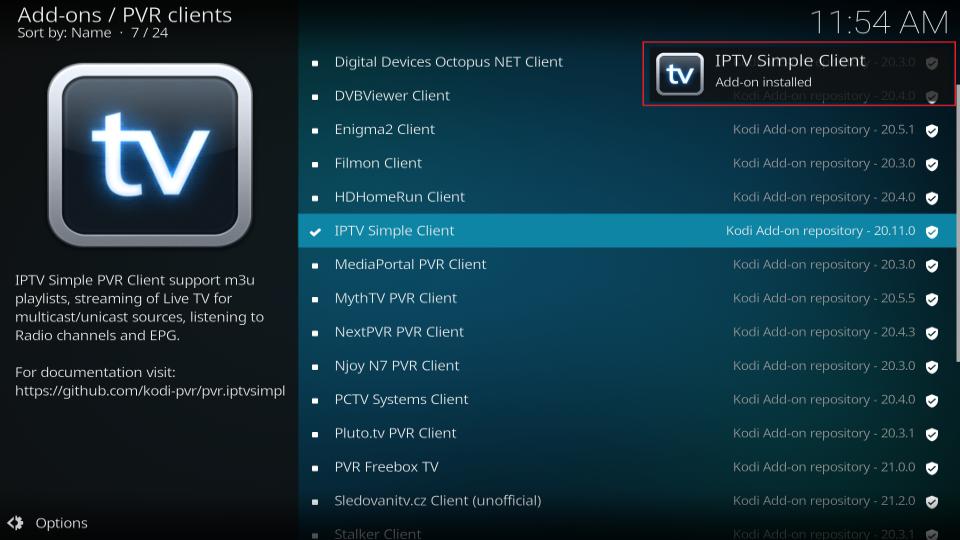
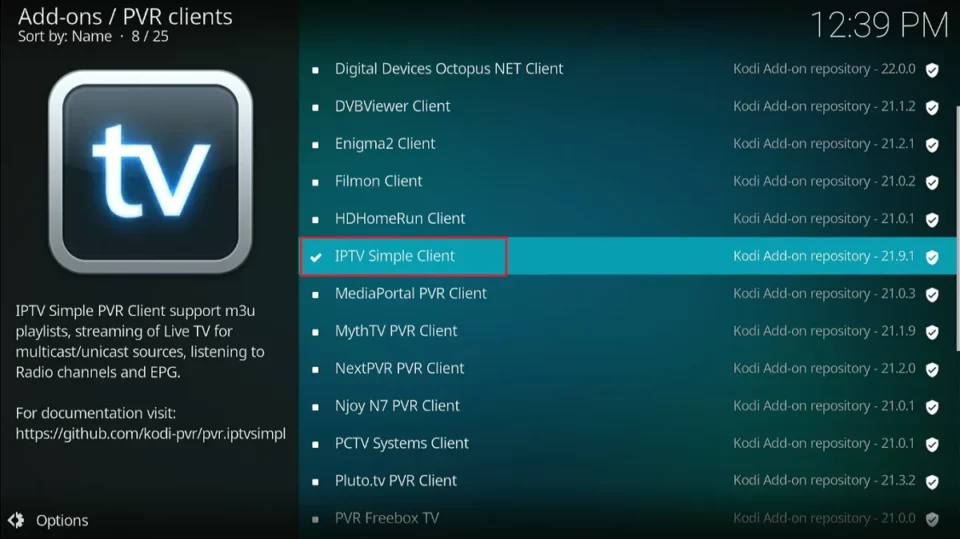
6. Then, scroll down and select PVR IPTV Simple Client.
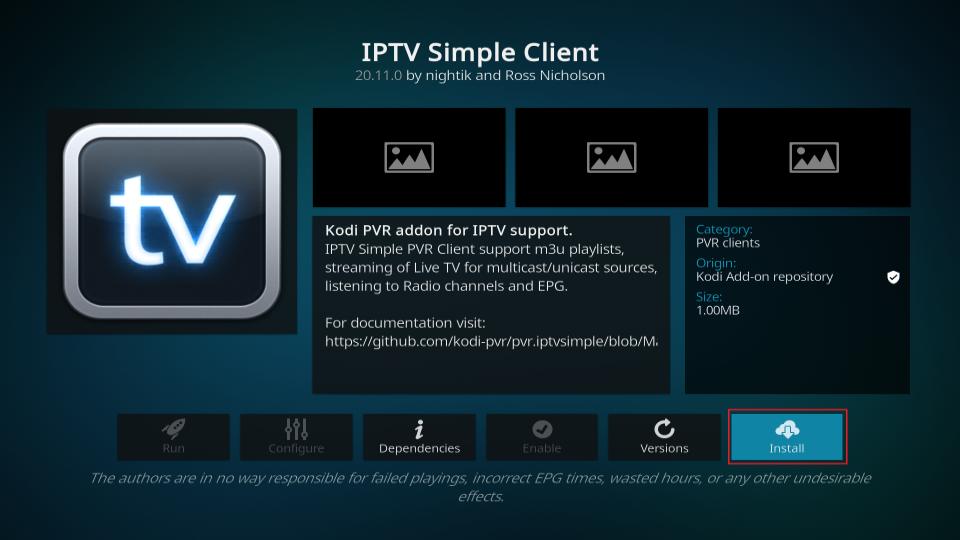
7. The addon’s dashboard will open. Select Install.
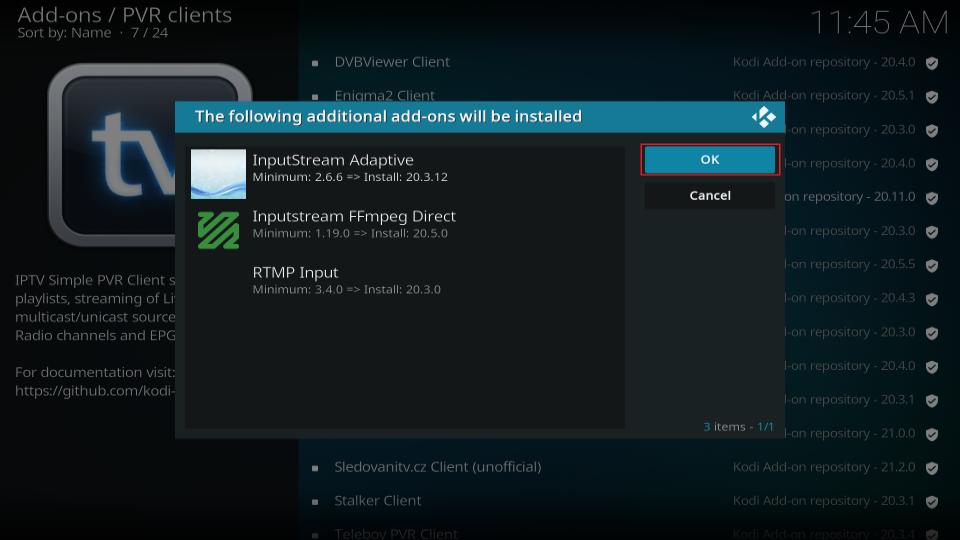
8. Click OK to install the necessary supporting addons.
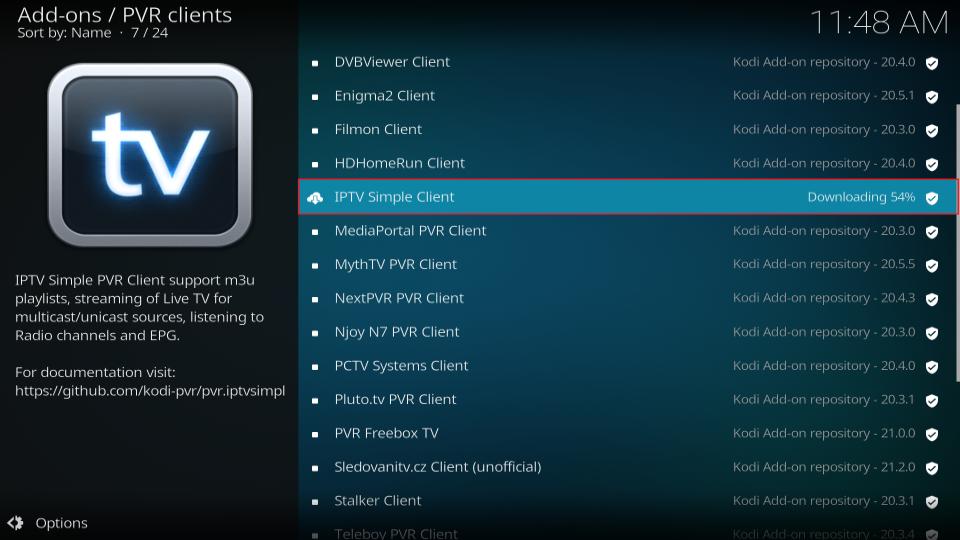
9. PVR IPTV Simple Client will start downloading on your Kodi app.
10. Lastly, you’ll see an Add-on installed notification in the top-right corner of your screen.
Part 2: Add an M3U Playlist to PVR IPTV Simple Client
That’s it! You have successfully installed the PVR IPTV Simple Client on your Kodi app. However, it’s of no use if you haven’t configured it correctly.
Follow the steps below to add a playlist to the addon for streaming IPTV:
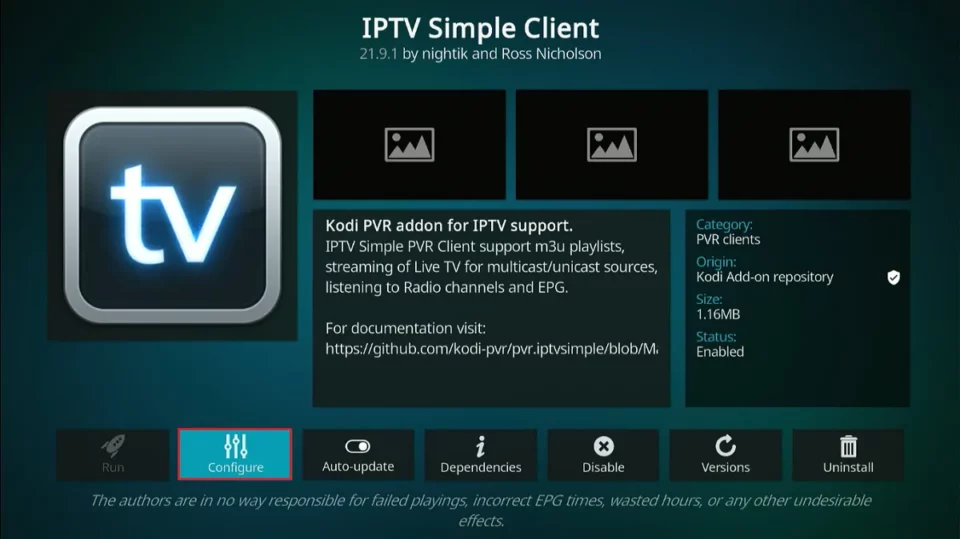
1. On the same screen, select PVR IPTV Simple Client.
2. On the Addon Dashboard, select Configure.
3. Select Add Addon Configuration.
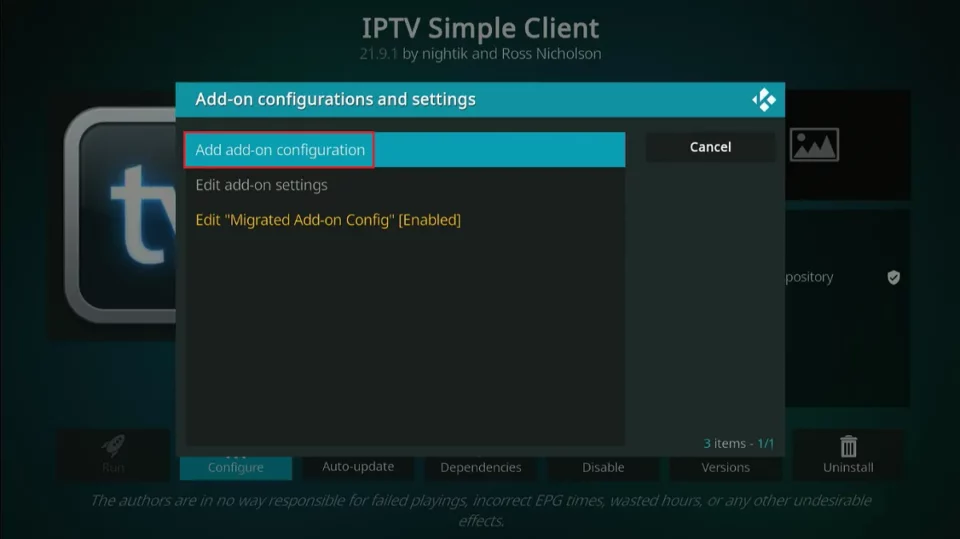
4. Then, go to the General tab.
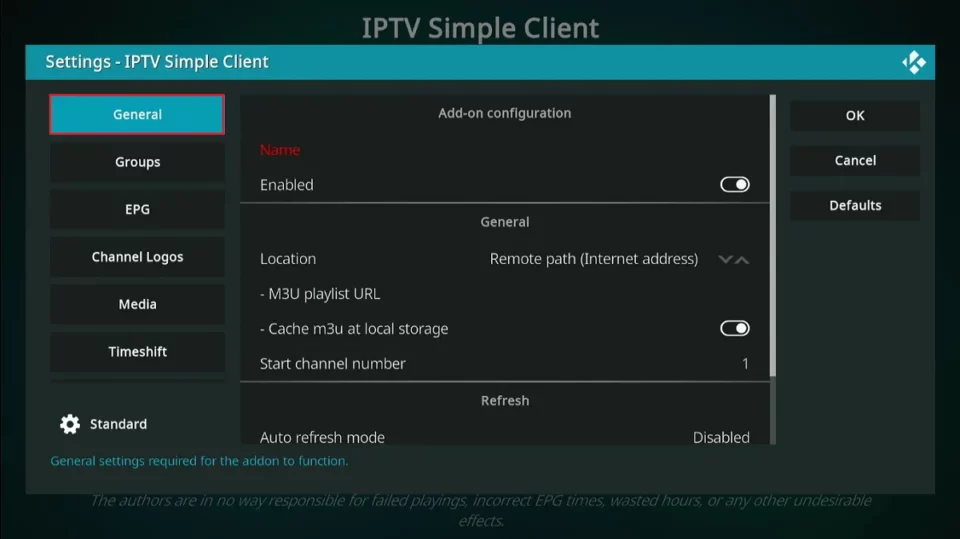
5. Within the General tab, scroll down and select M3U playlist URL.
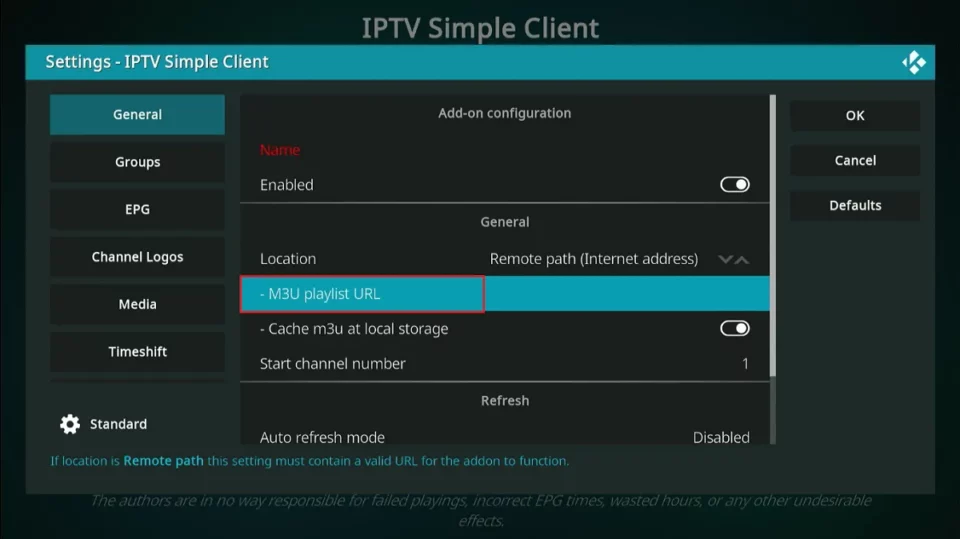
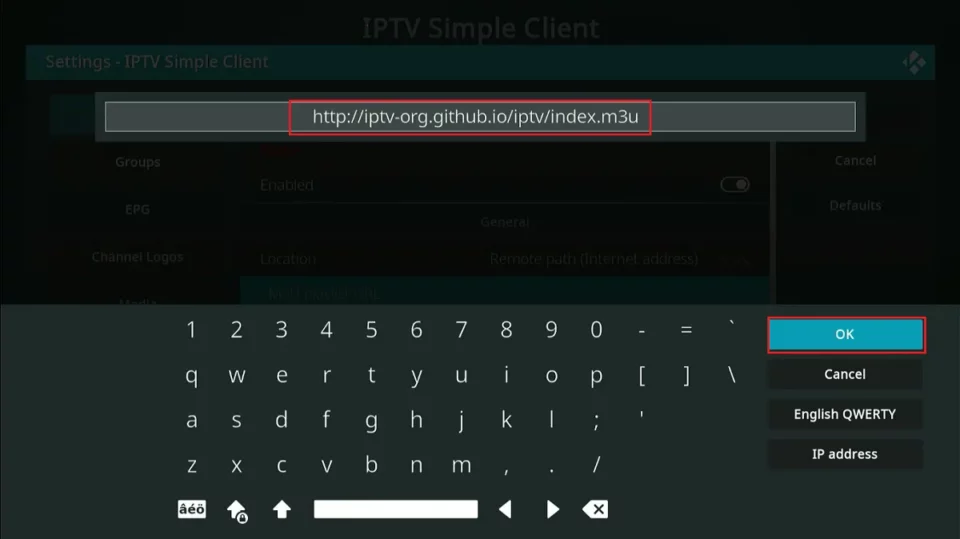
6. A window with a keyboard will pop up. If you have an M3U playlist of your own or one provided by your cable provider, you may enter it now to add it. Otherwise, enter https://iptv-org.github.io/iptv/index.m3u and click OK.
Note: FireStickTricks.com doesn’t host or distribute this M3U playlist. It’s a renowned open-source collection of over 8,000 free channels.
7. Click on the OK button.
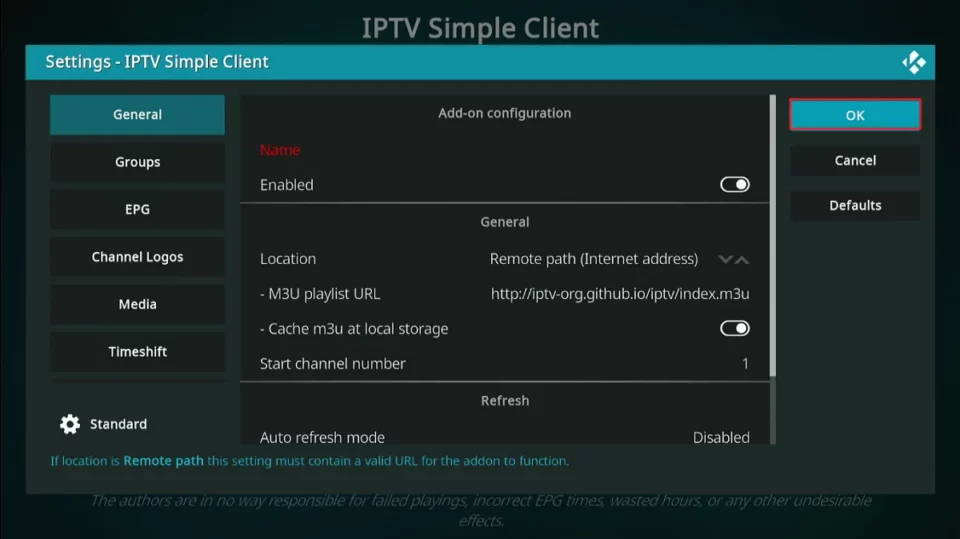
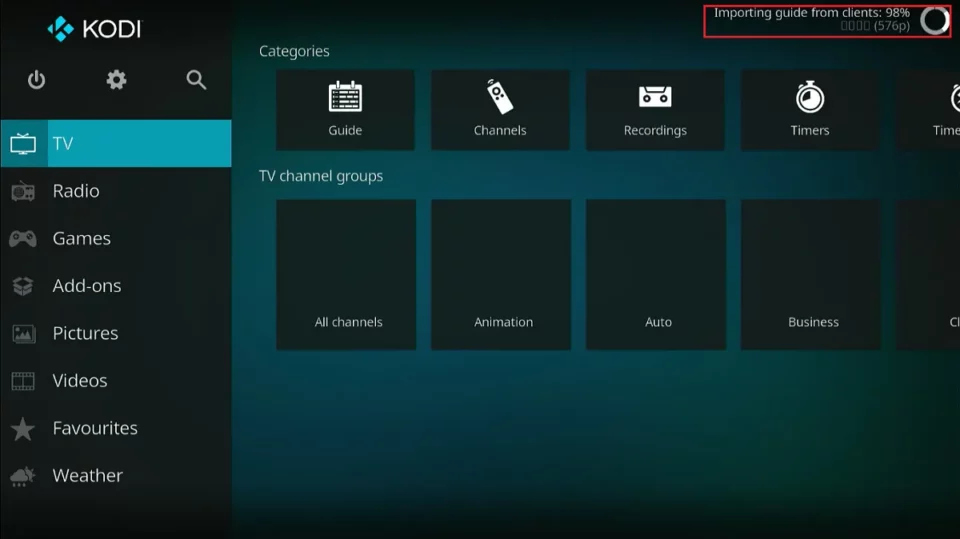
8. Exit and then restart your Kodi application. After restarting, the PVR IPTV Simple Client will launch automatically. The PVR addon will start loading the channels from the M3U playlist you entered. Wait for the addon to finish importing the channels.
How to Watch IPTV with the PVR IPTV Simple Client
Follow these steps to start watching IPTV on Kodi using the PVR IPTV Simple Client:
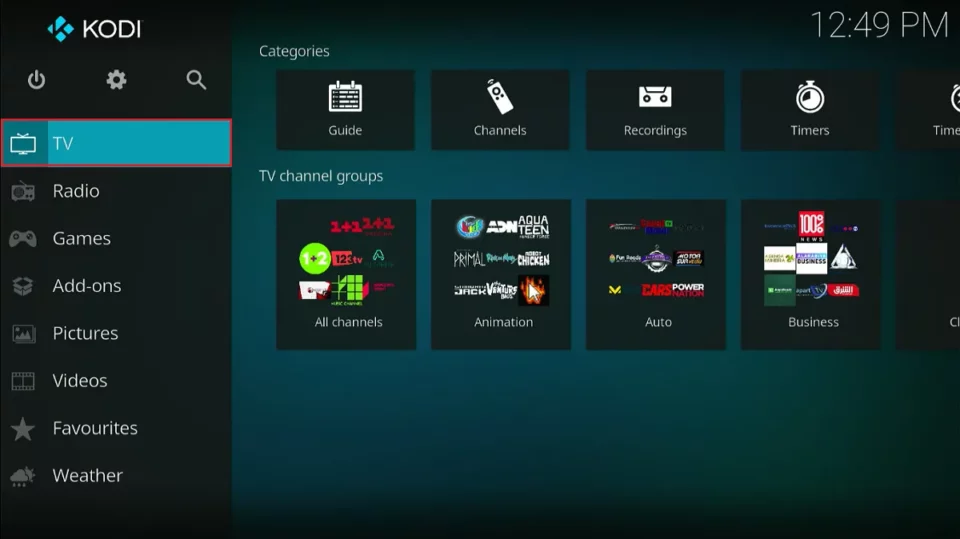
1. When the channels have been added, select the TV tab on the Kodi home screen.
2. Scroll to the right and click on the Channels option.
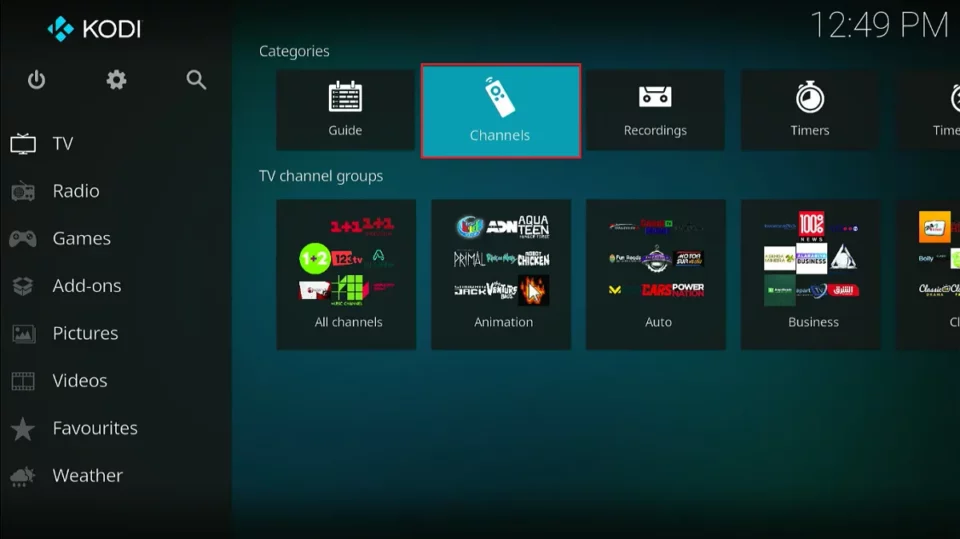
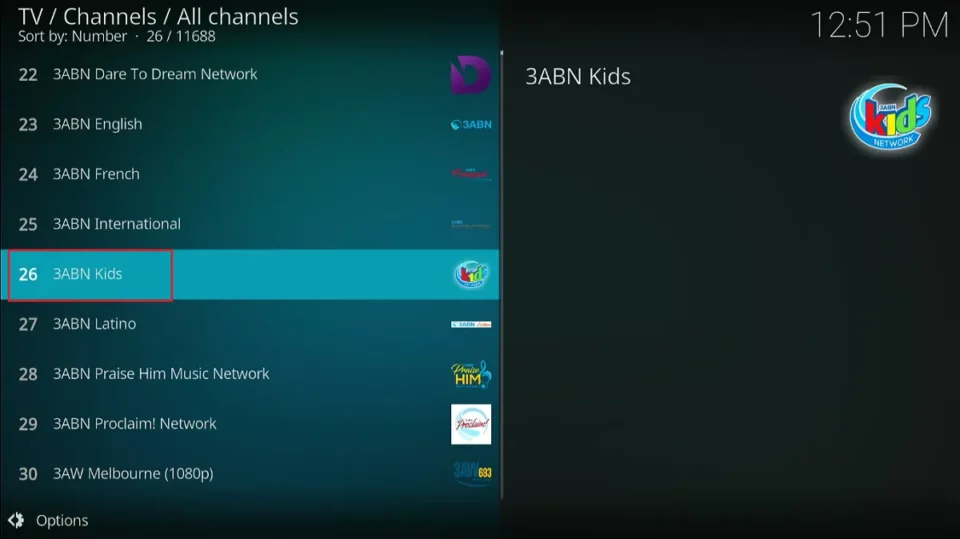
3. You’ll see the list of all channels from the M3U playlist(s) you’ve added.
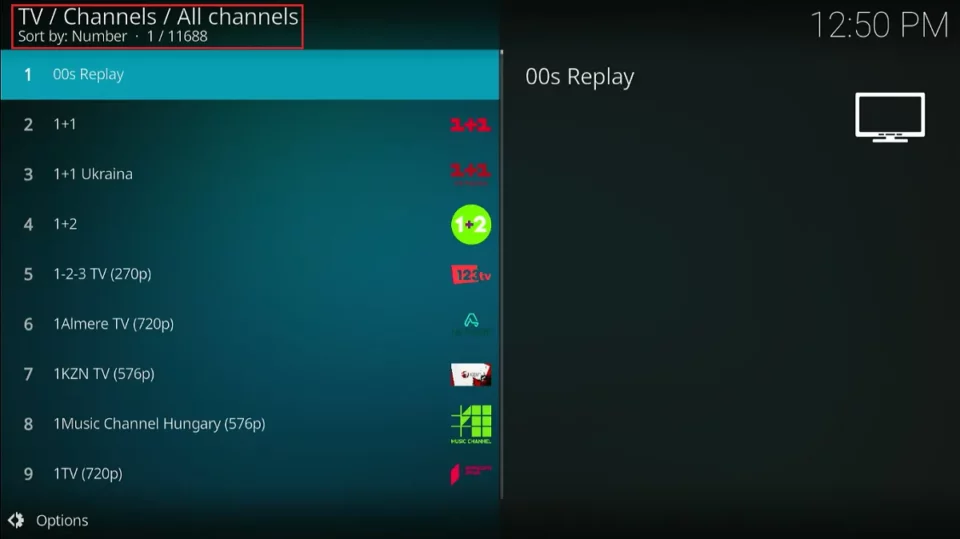
4. Select any channel.
5. After loading for a few moments, the content will start streaming.

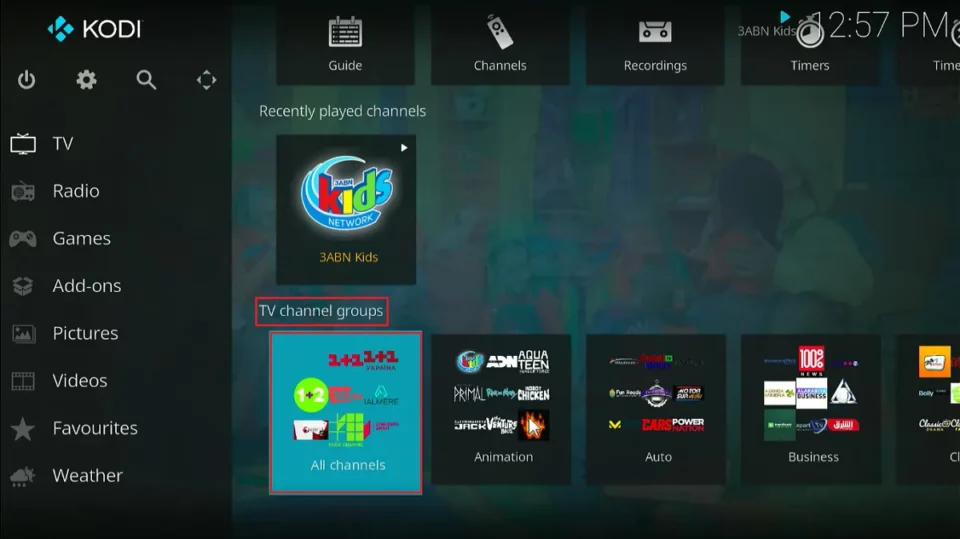
6. Return to the row labeled ‘TV channel groups’. Here, you can access channel categories. The All channels tile is another way to access the list of all available channels.
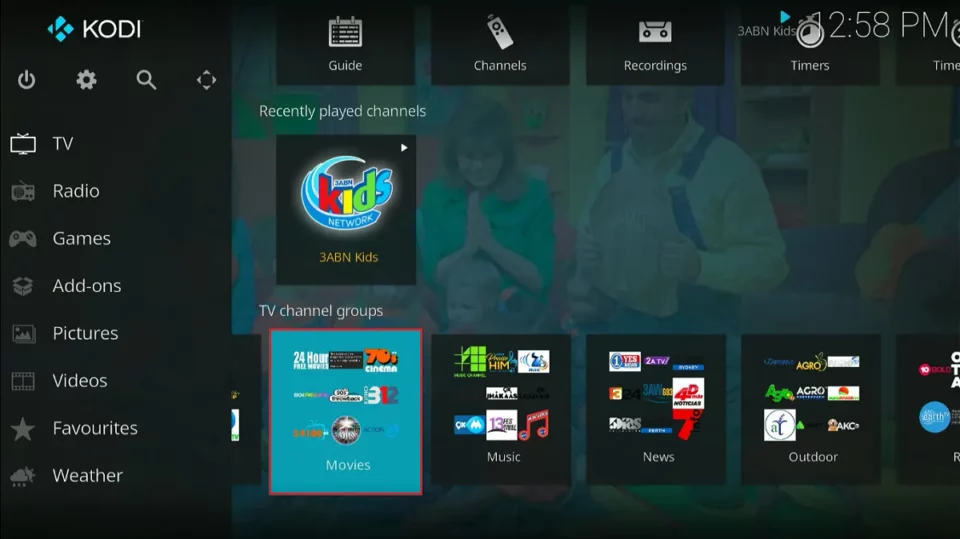
7. The Movies tile lists the movie-related channels.
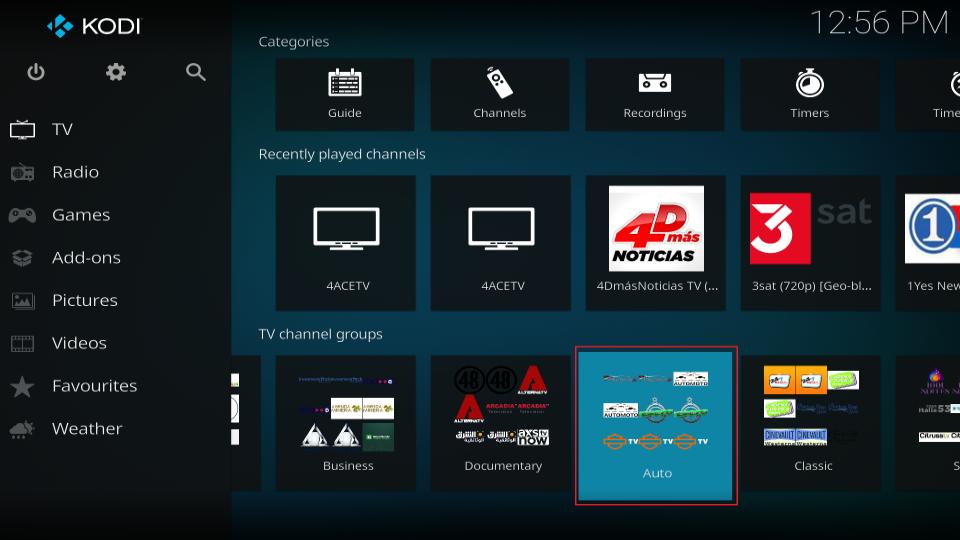
8. The Auto tab lists all the channels related to auto sports.
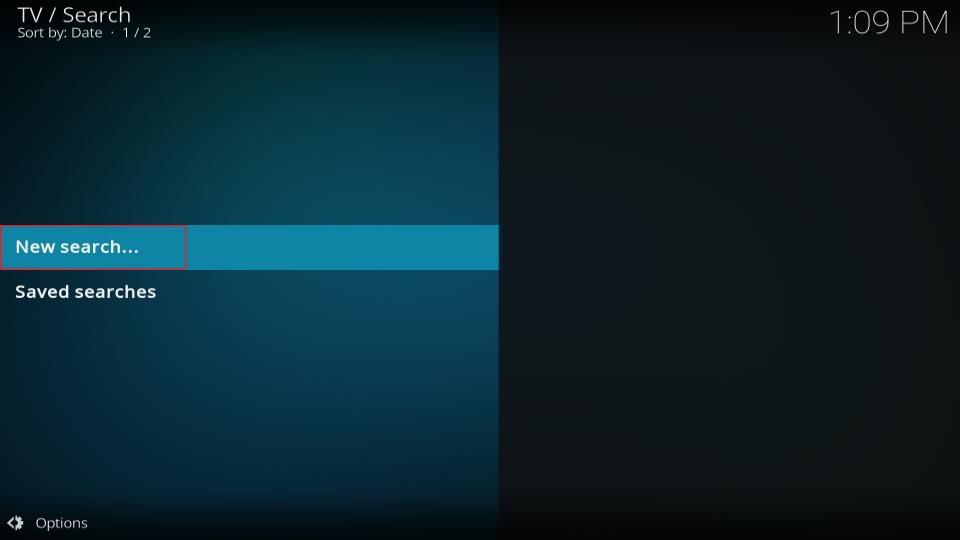
9. To search for specific channels, scroll up within the right portion of the screen and select the Search option at the far right of the top row.

10. Click on Search…
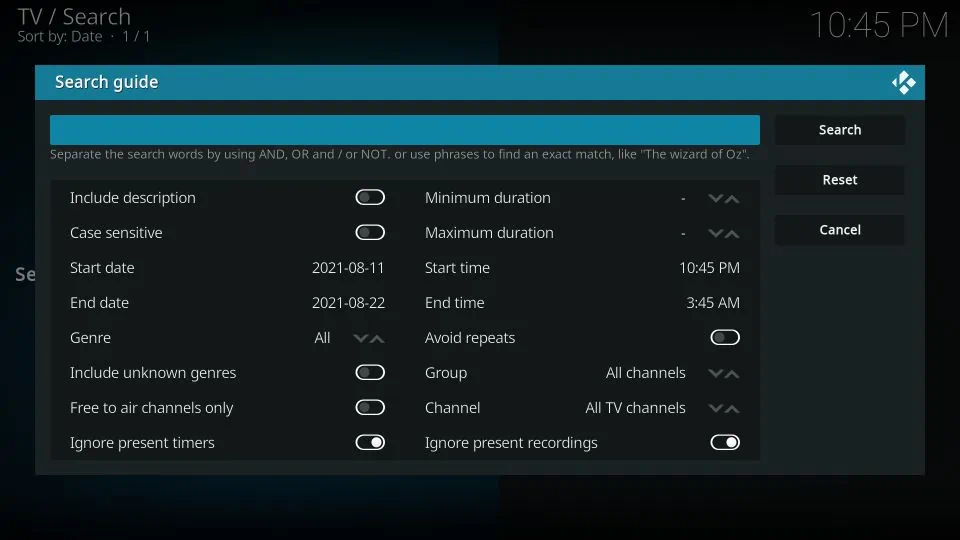
11. Type in the information you want to look up and click the Search button. Read the instructions and check the search settings to maximize the tool’s potential.
Great Sources for M3U Playlists
IPTV typically relies on M3U playlists to access live channels online. If you have a cable or satellite subscription, your provider may supply an M3U playlist for configuring apps like the PVR IPTV Simple Client. However, not everyone has access to such services. Fortunately, there are also free online sources that provide M3U playlists.
Firstly, there is a collection of publicly available IPTV channels from all around the world. This is the M3U we used in the instructions above. It’s hosted on GitHub and is known as iptv-org. You can use this source to watch thousands of channels for free.
One of the most notable features of this M3U playlist is that it allows you to group content by country, category, and language. In case you didn’t add this M3U while following the instructions, here it is again:
- https://iptv-org.github.io/iptv/index.m3u
Next up, there’s another collection on GitHub known as Free TV. This M3U list doesn’t include any paid channels, so you won’t run into any legal issues watching them for free. This list has fewer channels than the previous one, prioritizing quality over quantity. Here’s the M3U to add all channels in the Free TV playlist:
- https://raw.githubusercontent.com/Free-TV/IPTV/master/playlist.m3u8
Also Read: Best Free Public M3U Playlists
How to Watch IPTV on Kodi with Addons
Legal Disclaimer: This tutorial is purely educational. FireStickTricks.com doesn’t own, host, operate, resell, or distribute any streaming apps, addons, websites, IPTV or services. The page contains some unverified services, and we are not certain whether they hold legal licenses to distribute the content. FireStickTricks.com does not verify the legality of each app/service in all regions. Do your due diligence if you use any of the unverified apps/services, and stream only content that is available in the public domain. The end-user shall be solely responsible for the media accessed.
You don’t have to use the PVR IPTV Simple Client to watch IPTV through Kodi. Instead, you can use Kodi addons.
Unlike the first method, you don’t have to add a link to an M3U playlist to stream channels on third-party IPTV addons. Once you install these addons, you can start streaming channels immediately.
Our list only includes legal addons.
Samsung TV Plus

Samsung TV Plus is a free streaming service from Samsung. It allows you to watch over 400 free live TV channels online. The Samsung TV Plus Kodi addon pulls streaming links from this site. It is supported on Kodi 19, Kodi 20, and Kodi 21.
While it is an official Kodi add-on, you won’t find it in the official Kodi repository. It is hosted on a third-party repo, SlyGuy.
- Repo Name: SlyGuy Repository
- Repo URL: https://k.slyguy.xyz
How to install Samsung TV Plus Kodi Addon
Plex Live

Plex Live is a third-party Kodi addon that lets you stream hundreds of TV channels for free. This addon pulls its streams from The Plex website, a streaming platform for free live TV and on-demand content.
This addon offers over 1,000 TV channels for free, including channels from the US, Canada, Spain, Mexico, and Australia. It is compatible with Kodi 210 and Kodi 21.
- Repo: SlyGuy Repository
- Repo URL: https://k.slyguy.xyz
How to install any addon using the Repo URL
Stirr

Are you a fan of older TV shows and programs? You can access these and more on Kodi via the Stirr addon. It is an official addon that legally sources content from the Stirr streaming platform.
Popular live TV networks on the Stirr addon include Always Funny, Just for Laughs, Encore+, and Law and Crime.
- Repo: SlyGuy Repository
- Repo URL: https://k.slyguy.xyz
How to Install Stirr Kodi Addon
Pluto TV

Pluto TV is a popular free streaming platform that offers a wide range of free movies, TV shows, and live channels. The Pluto TV addon lets you stream hundreds of live channels on Kodi, including entertainment, news, kids, travel, and sports networks.
- Repo Name: SlyGuy Repository
- Repo URL: https://k.slyguy.xyz
You’re now all set. A quick reminder: your internet provider and many websites/apps can see your IP address and some details about your connection. Using a VPN encrypts your traffic and masks your IP address, which helps protect your online privacy.
I recommend ExpressVPN. It’s a reputable VPN with strong encryption and fast connections, and it’s straightforward to install on Fire TV/FireStick and other devices.
Next, I’ll show you how to set up and use ExpressVPN.
Step 1: Get the ExpressVPN subscription HERE. It comes with a 30-day money-back guarantee. Meaning you can use it for free for the first 30 days, and if you are not satisfied with the performance (which is highly unlikely), you can request a full refund.
Step 2: Click HERE to download and install the ExpressVPN app on your streaming device. If you are using a FireStick, I have given the exact steps starting with Step 4 below.
Step 3: Click the Power icon to connect to a VPN server. That's all. Your connection is now secure with the fastest and best VPN for Kodi.

The following steps will help you install Kodi VPN on your Fire TV devices. If you have other streaming devices, follow Step 1-3 above.
Step 4: Subscribe to ExpressVPN HERE (if you are not already subscribed).
Step 5: Go to the Fire TV Stick home screen. Click Find, then select the Search option (see image below).

Step 6: Type Expressvpn in the search bar and select it when it shows up.

Step 7: Click Download.

Step 8: Open the ExpressVPN app and Sign in using the email ID and password that you created while buying the ExpressVPN subscription.

Step 9: Click the Power icon to connect to a VPN server. That’s all. Your FireStick is now secured with the fastest VPN.

Frequently Asked Questions
IPTV on Kodi refers to watching live TV channels through the internet rather than traditional satellite or cable. Kodi serves as a media center where you can load IPTV playlists to access live content directly from your device.
Yes, you need an addon like the PVR IPTV Simple Client. It allows Kodi to read M3U playlist files and stream live TV channels, acting as a bridge between Kodi and IPTV services.
IPTV itself is legal, but it depends on the content source. If you’re streaming copyrighted content without permission, it may be illegal. Always use verified and legal IPTV providers.
To install the PVR IPTV Simple Client, Go to Kodi Settings > Add-ons > My Add-ons > PVR Clients > PVR IPTV Simple Client. Select it, then click "Install" to add the plugin to your Kodi system.
Yes, Kodi supports live TV through various other addons as well. However, IPTV is the most customizable and widely used method for watching global live content on Kodi.
Wrapping Up
IPTV lets you watch live TV without a cable connection or satellite antenna. You can also stream IPTV through Kodi. This guide explains how to watch IPTV on Kodi using two methods: the PVR IPTV Simple Client and third-party add-ons. Which method do you prefer? Let us know in the comments section below.

Suberboost Your FireStick with My Free Guide
Stay Ahead: Weekly Insights on the Latest in Free Streaming!
No spam, ever. Unsubscribe anytime.

Leave a Reply