This tutorial provides step-by-step instructions for installing the Smokin build on Kodi. The images used in the guide are from Windows 11; however, the steps apply to any Kodi-compatible device, including Fire OS (FireStick 4K, 4K Max, Lite, and Fire TV Cube), Android TVs, Windows 10, macOS, Linux, Android & iOS, and more.
Smokin is a Kodi 19 Matrix build. While you can install it on Kodi 20 Nexus, there’s a chance it may not work properly. Follow our collection of best builds for Kodi for Kodi 20 compatible builds.

What is Smokin Build for Kodi?
As the name suggests, Smokin is a build for Kodi. Like any other build, it installs a new skin and changes the interface of Kodi.
The Smokin build also comes bundled with plenty of streaming addons, such as Twisted, Homelander, Rising Tides, The Crew, Scrubs V2, Switchify, Fetch, Ghost, Mad Titan Sports, The Loop, and more.
Smokin is lightweight and features a user-friendly interface. Even if you are new to Kodi builds, you will quickly get the hang of it. Smokin build is part of the third-party repository called Doomzday.
Attention Kodi Users!
Governments and ISPs worldwide monitor your online activities. If you use third-party Kodi addons, you should always use a reliable Kodi VPN to hide your identity and prevent issues with your streaming experience. Currently, your IP is visible to everyone.
I use ExpressVPN, the fastest and most secure VPN in the industry. It is very easy to install on any device, including Amazon Fire TV Stick, PC, Mac, and Smartphones. It also includes a 30-day money-back guarantee. If you're not satisfied with their service, you can request a refund. ExpressVPN is offering a special NEW YEAR deal: get 4 months free and save 78% on the 2-year plan.
Install and Use Best Kodi VPN | Why you must use a VPN at all times
Is Smokin Safe & Legal?
On the safety front, the build seems fine to me. I have two reasons to believe that. First, I use this build on my computer, which has an antivirus. My computer hasn’t shown any alerts or flags.
Second, I scanned the Doomzday Repo with Virus Total. The following result shows there are no security flags:
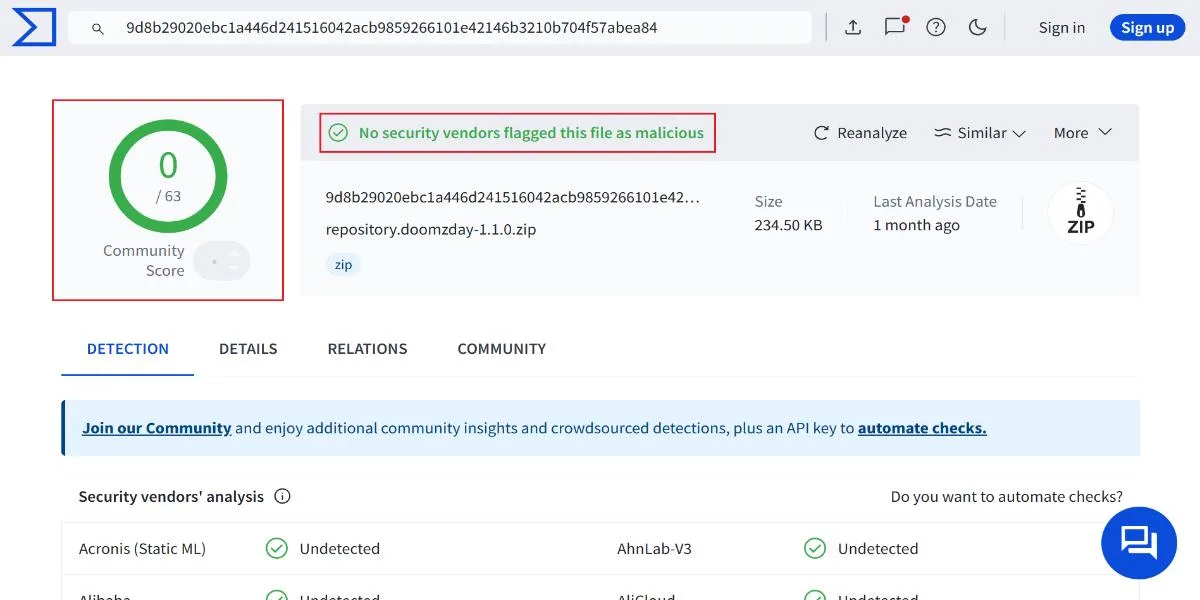
Please note that I am not claiming the Smokin build is safe. I am only assuming it is safe based on the results from the antivirus tools.
Regarding legality, it is impossible to verify whether the build is legal. The build bundles some of the most popular, unofficial Kodi addons. These addons fetch the streaming links from numerous unverified sources. FireStickTricks.com does not have the resources to check each source and verify its legality independently.
It’s very likely the providers of the videos do not have the licenses to distribute the content.
I do not encourage piracy or copyright violations. However, you have the right to privacy. Therefore, I always recommend using ExpressVPN to hide your online presence and avoid legal problems.
How to Install Smokin Build on Kodi
Smokin is a third-party Kodi build. Meaning it is not listed on the official repository of Kodi. Instead, you will download and install this build from an unofficial repository called Doomzday.
Installing a build from a third-party source is not as straightforward as installing it from the official source. However, don’t worry. I have outlined the steps so that they will be easier to follow. You will have the Smokin built on your device within minutes. Let’s get going now.
Legal Disclaimer: This guide is for informational purposes only. FireStickTricks.com does not own, host, operate, resell, or distribute any apps, services, or content mentioned.
Part 1: Changing a Kodi Setting to Allow Third-Party Builds
You can install any third-party build or addon. However, you will bypass a security restriction placed by Kodi to prevent unauthorized installations. Here are the steps:
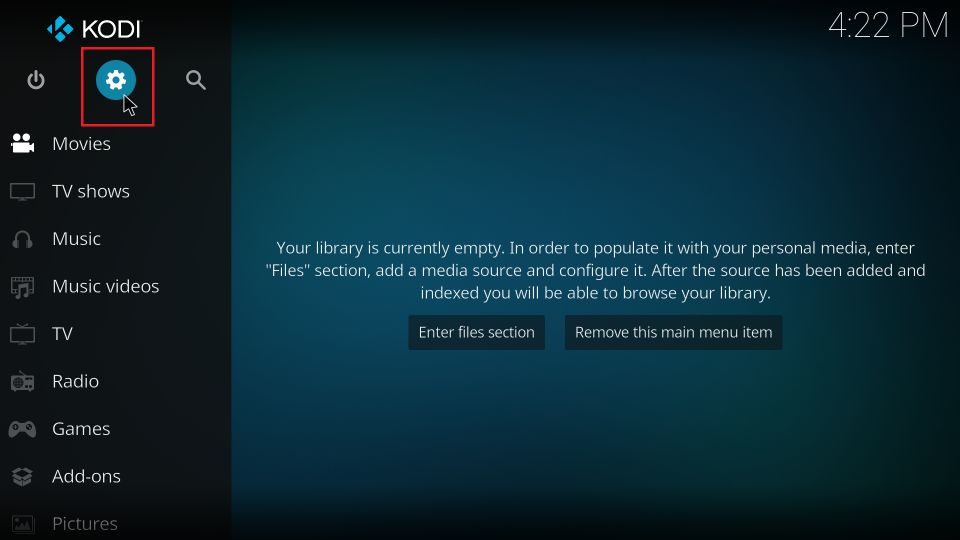
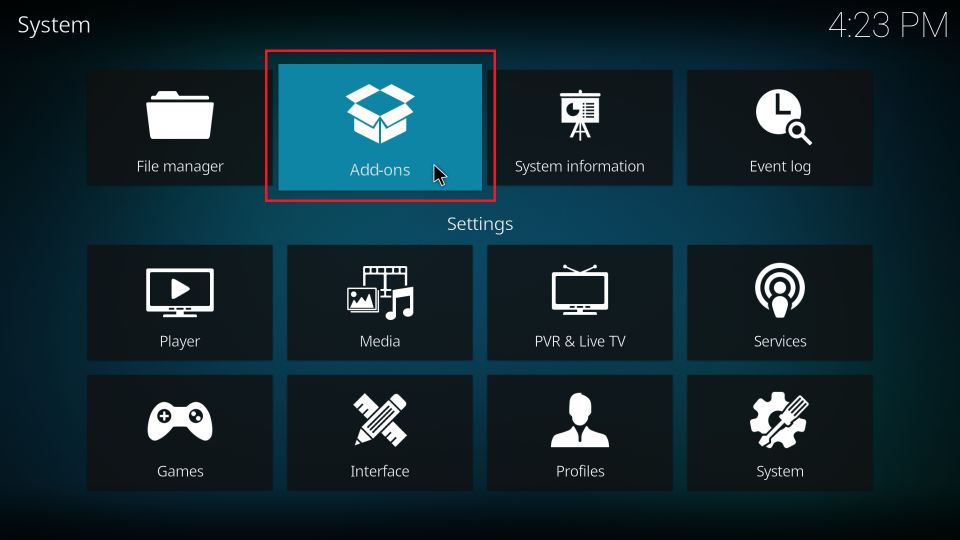
1. Navigate to the top-left section of the Kodi home screen and click the cogwheel. It will open the Settings panel.
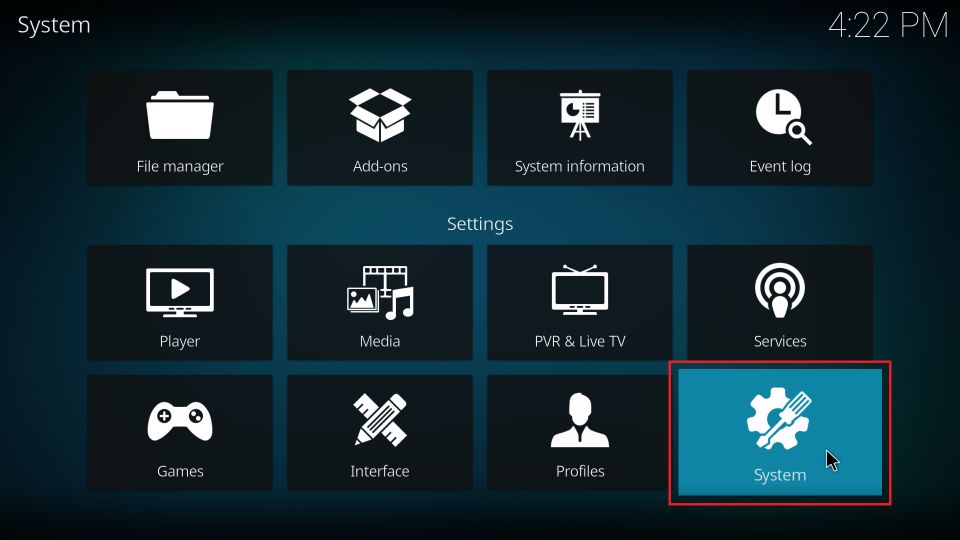
2. Within the Settings window, click the System icon.
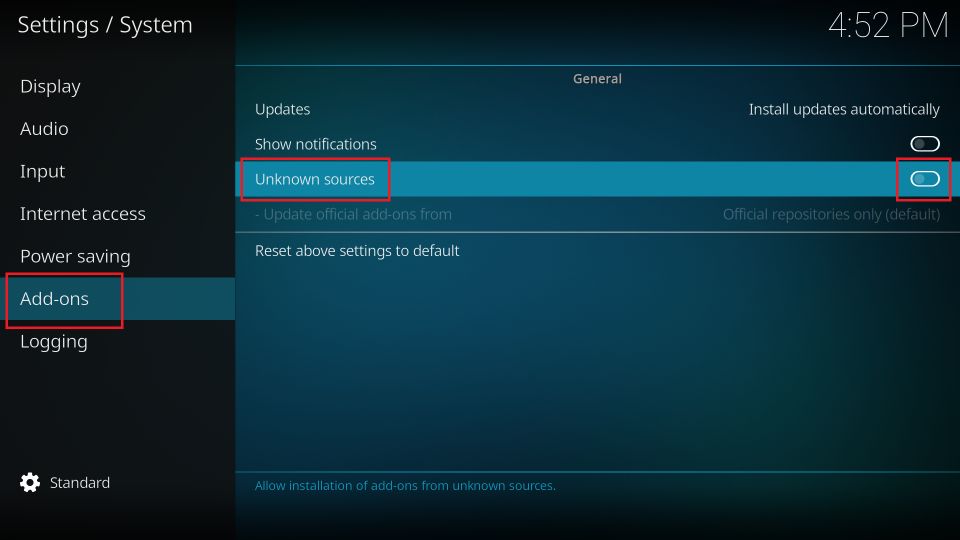
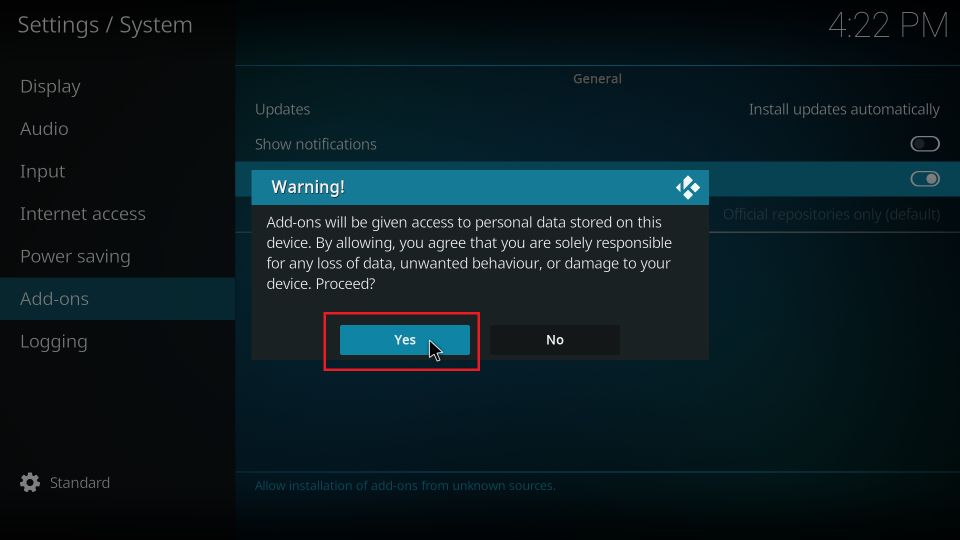
3. Now, navigate to Add-ons > Unknown Sources. You will notice that the switch is off. Click the switch and turn it ON.
4. You should see a popup dialog box with a warning. Let’s ignore this for now and save the changes by clicking OK.
You have successfully changed the Kodi setting to allow third-party builds. Let’s move to the next part.
Part 2: Install Doomzday Repository
You will now add the source URL from where Kodi will fetch the Doomzday repository. Then, you will install the repository from the URL. Finally, you will install the Doomzday Wizard (the addon that hosts the Smokin build). Follow my lead:
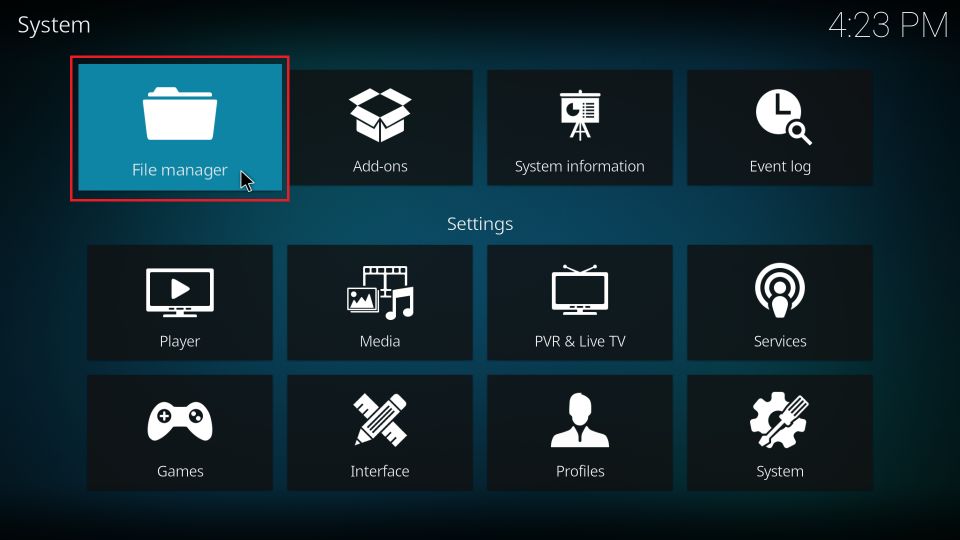
1. Go back to the Settings panel from the home screen of the Kodi app again and click the folder File manager.
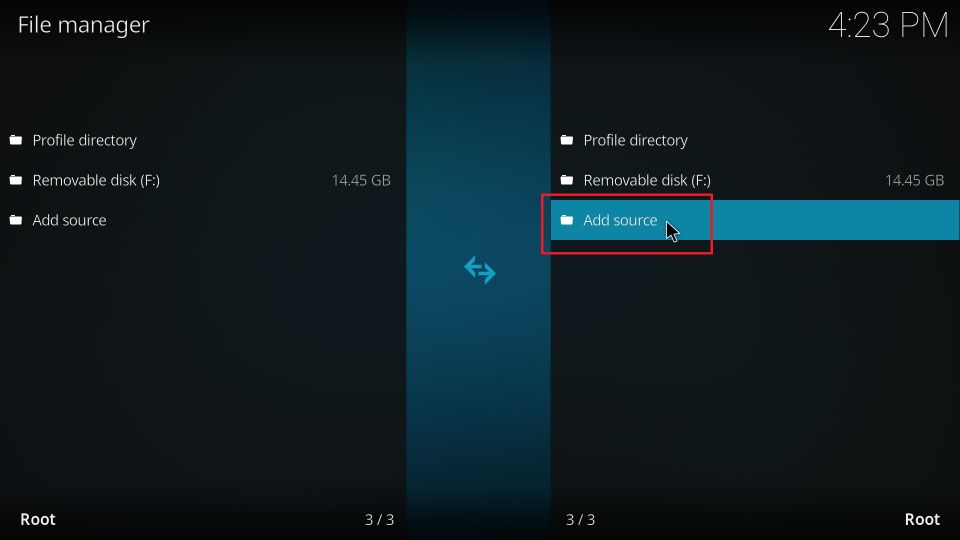
2. If you use Kodi on a remote or touch device, click Add source once. If you are on a computer, click it twice.
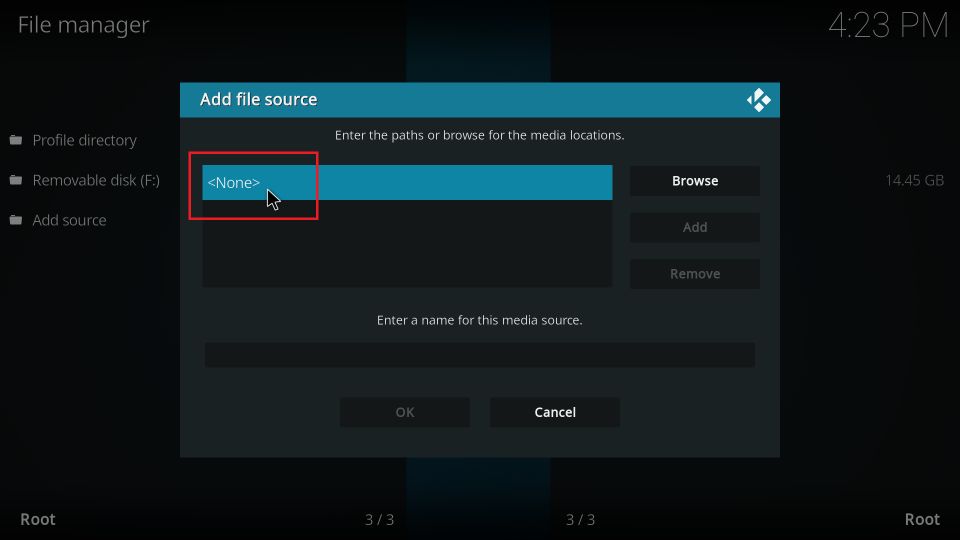
3. The Kodi screen shows a popup. Click the <None> option here.
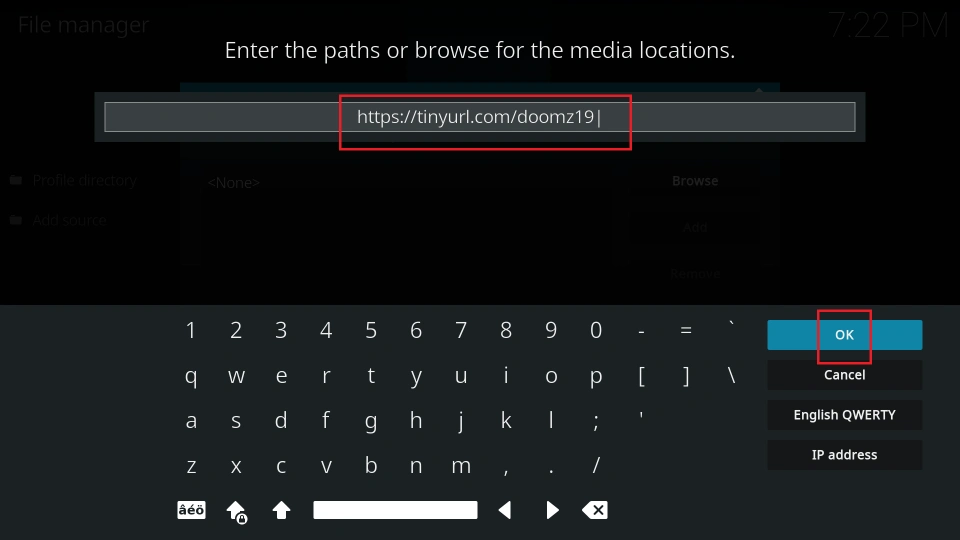
4. On this window, you enter the source URL, which is https://tinyurl.com/doomz19
Type the link carefully and check for typos. You don’t want any trouble during installation. Then, click OK to save the URL.
Note: The URL above redirects you to https://doomzdayteam.github.io/doomzday. I have shortened the URL to make it easier to type. FireStickTricks.com does not own the URL. We are not associated with the repository’s owners or the developers of the Smokin build.
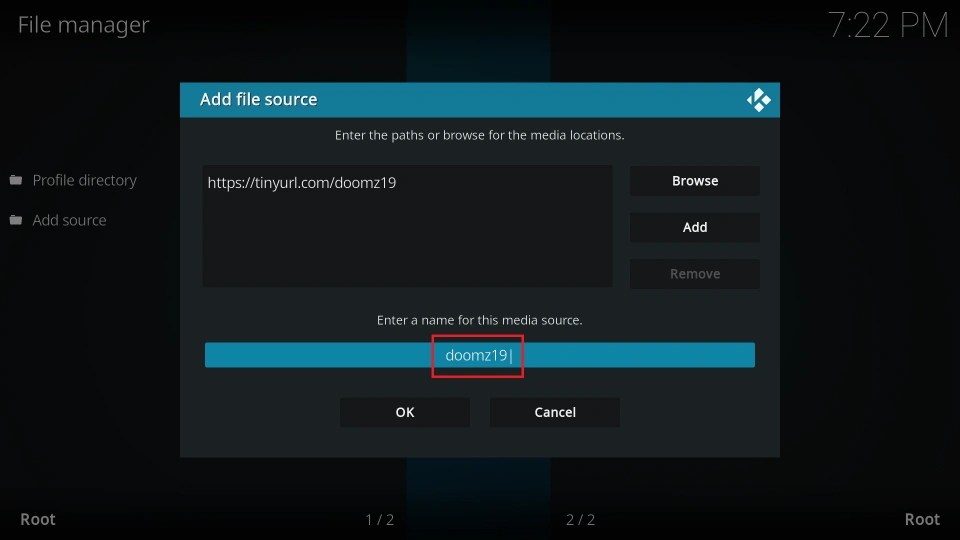
5. the text box for the media source name picks the name doomz19 from the URL. If you want to change it, click the text box. However, I am proceeding with doomz19. Save the source by clicking OK.
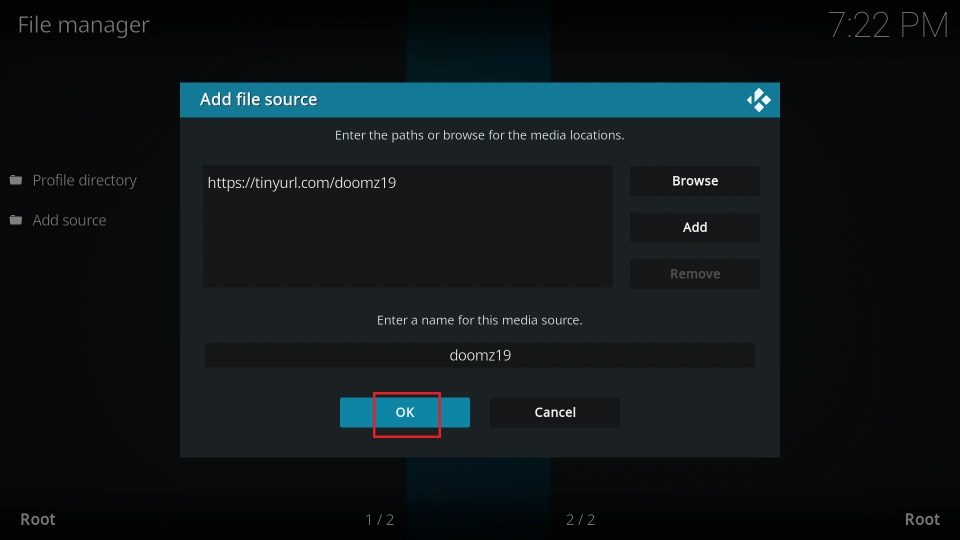
6. Click OK.
7. The following window displays the source doomz19. Press the back button to return to the Settings panel.
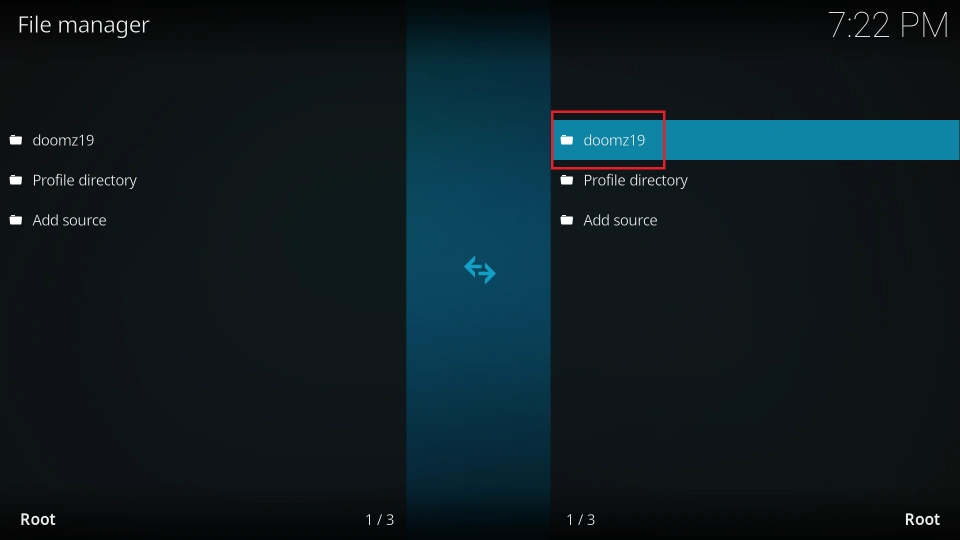
You have added the repository’s source. In the following steps, you will install the Doomzday repository.
8. Click Add-ons when you are here. If you do not see this window, return to the home screen and reopen Settings.
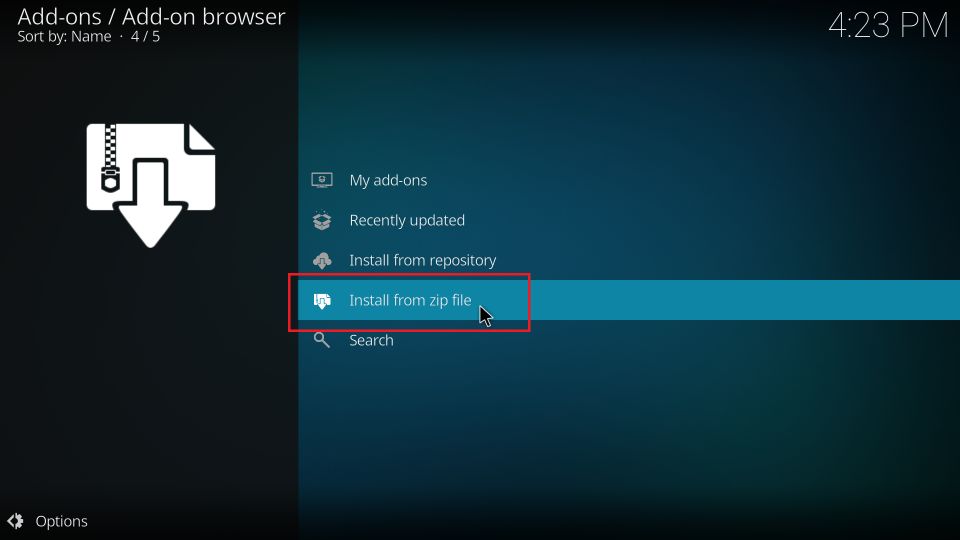
9. Open the option Install from zip file.
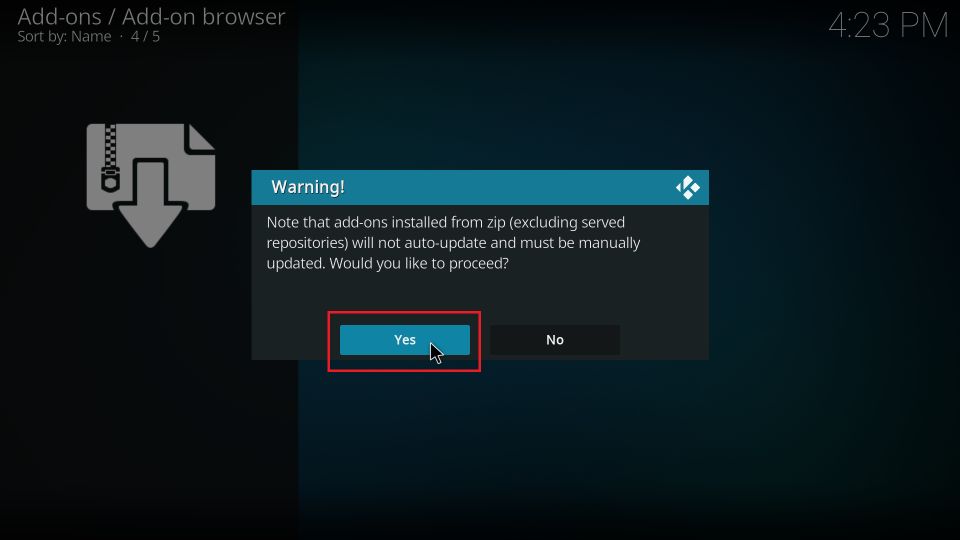
10. There will be a prompt. Click Yes. This prompt does not appear on Kodi 20.
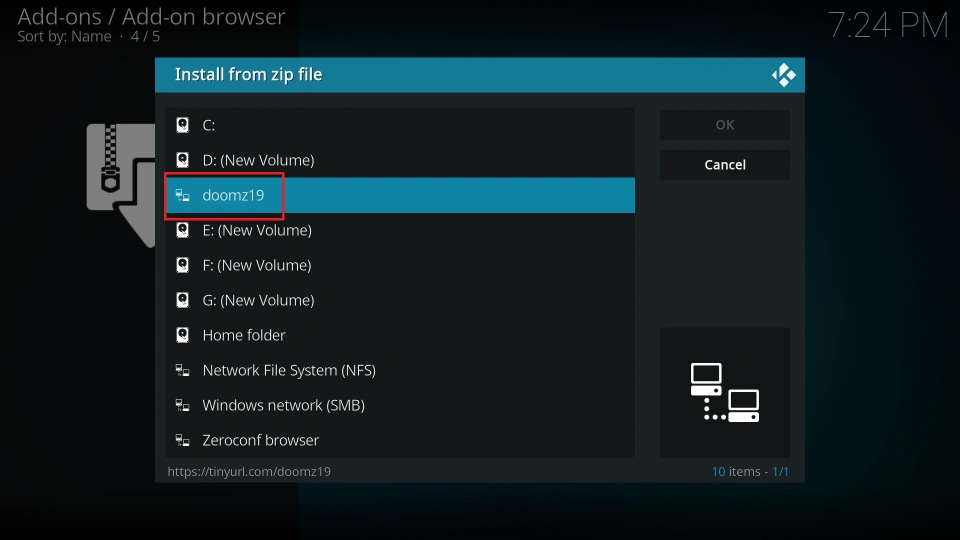
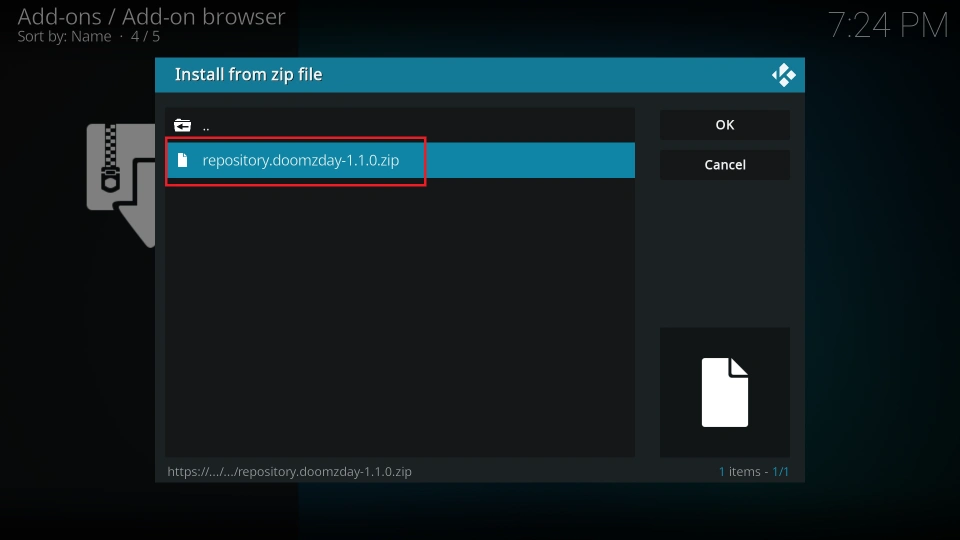
11. You should now have a popup window on your Kodi screen. Locate and click doomz19 or whatever other source name you typed.
12. You now see a zip file for the repository. Click this file (as marked in the image below).
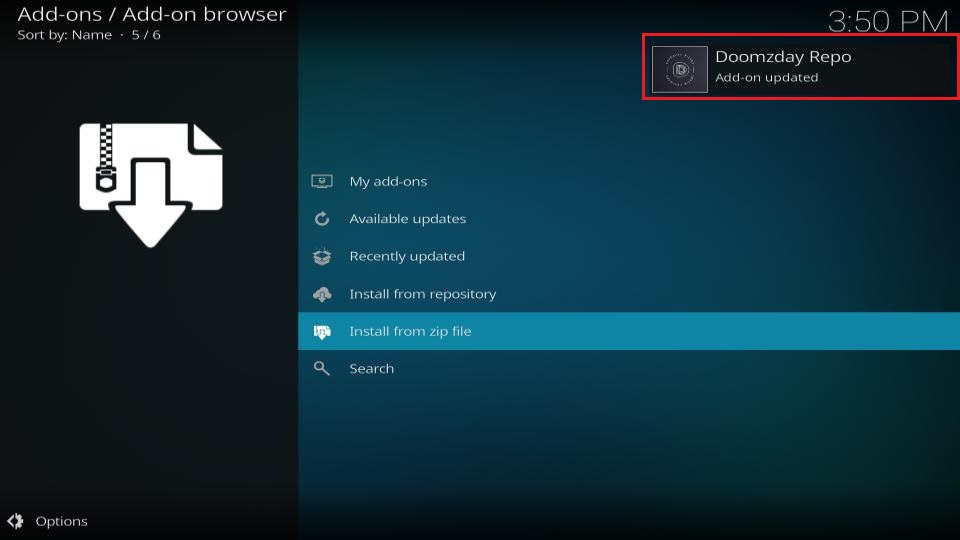
13. Installing the Doomzday Repo takes only a few moments. A notification is displayed on your screen when the installation is finished. You have installed the Doomzday Repo. Next, you install the Doomzday Wizard.
14. Click Install from repository on the same window.
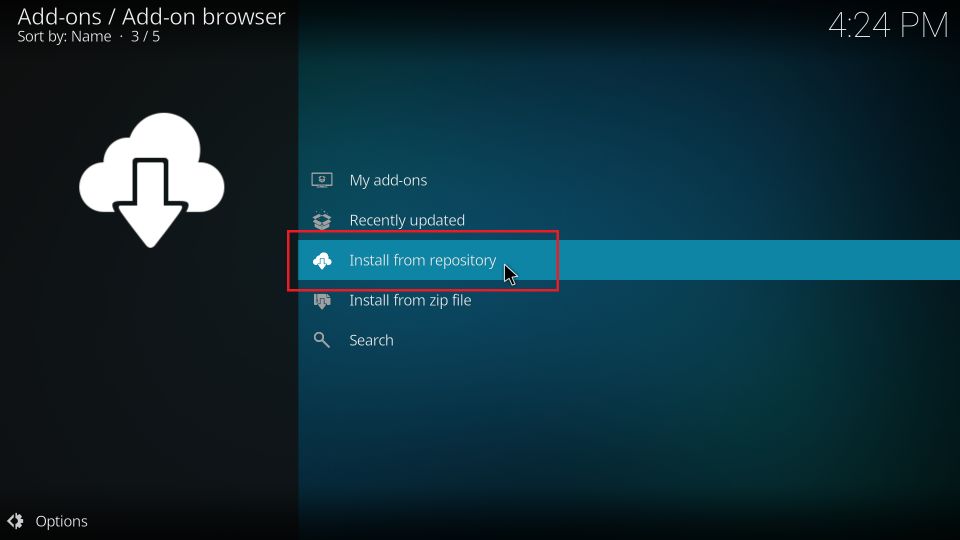
15. Choose the Doomzday Repo you installed moments ago.

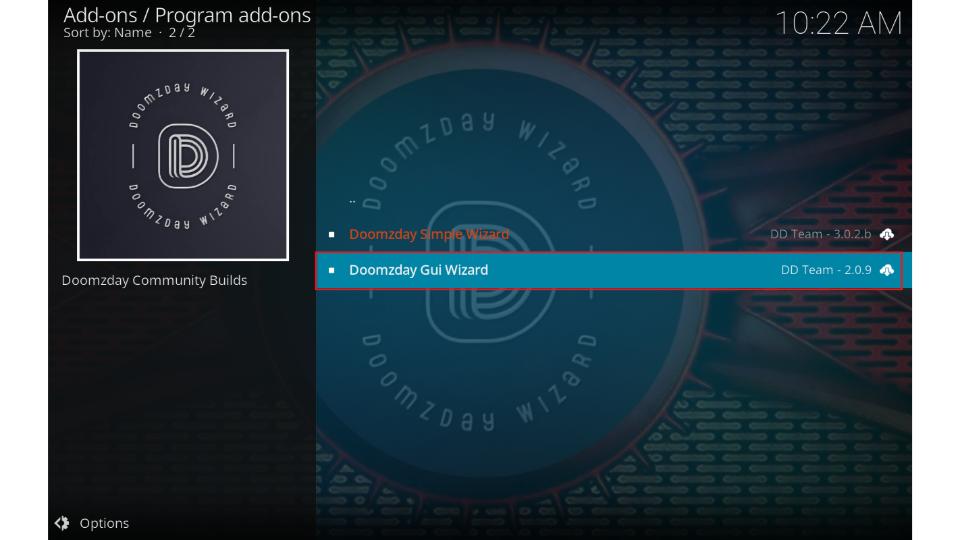
16. Pick the folder titled Program add-ons.
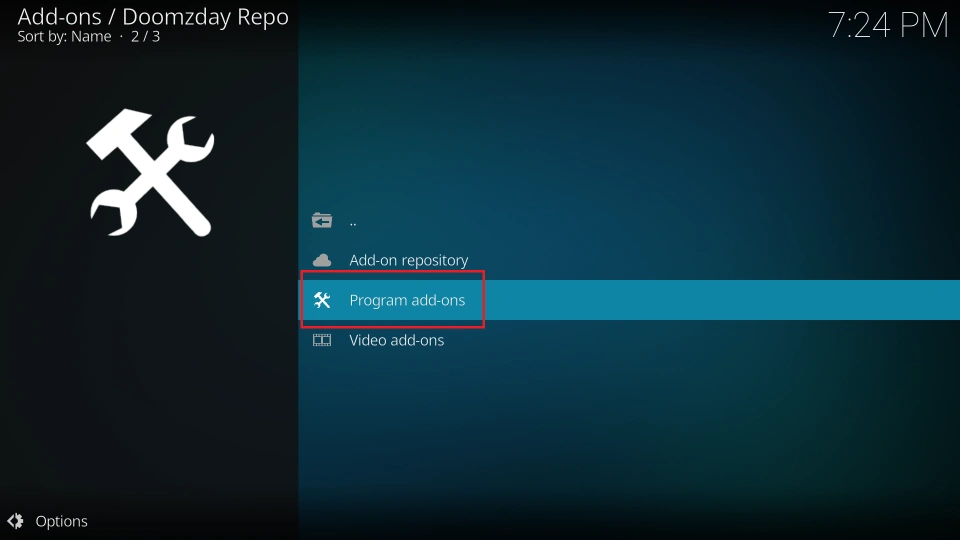
17. Click the Doomzday Gui Wizard option on the next screen.
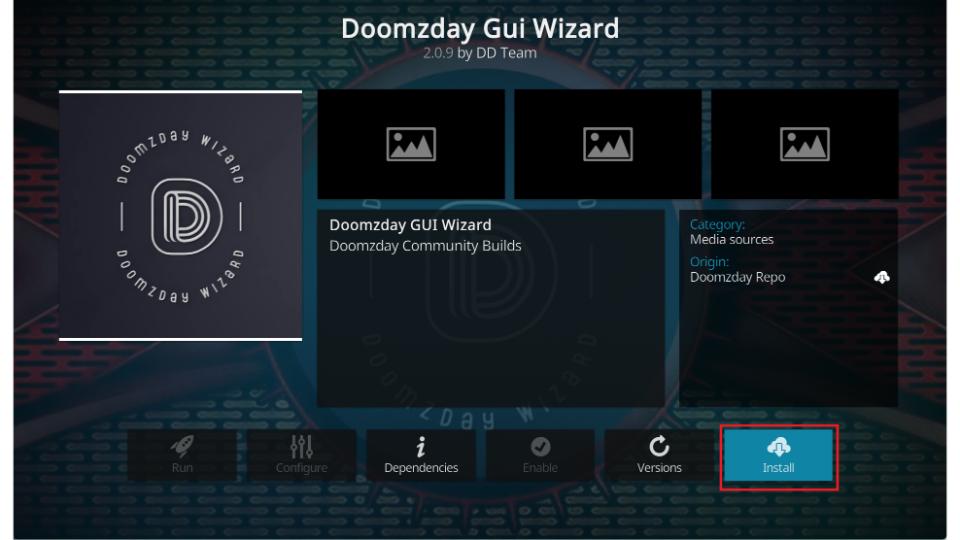
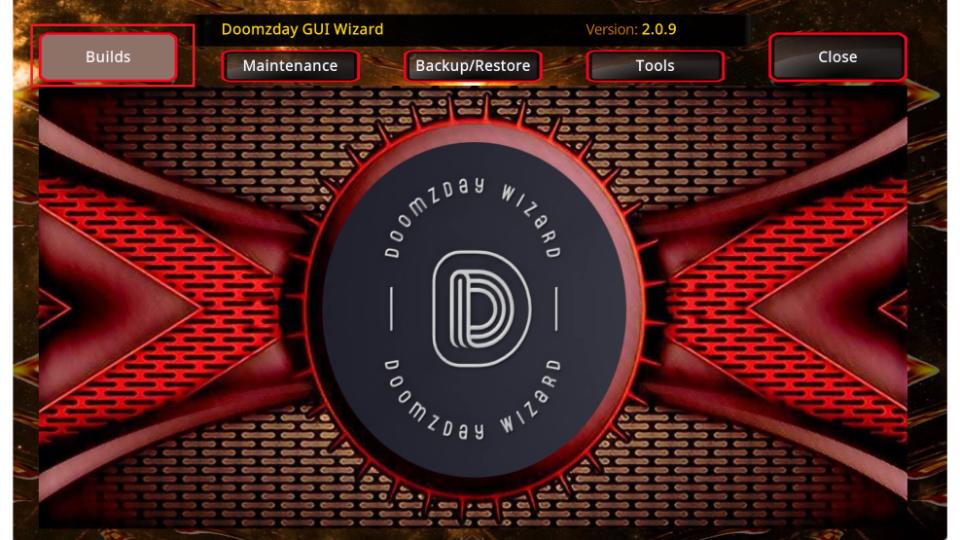
18. The following window displays a dashboard. Locate and click the button Install.
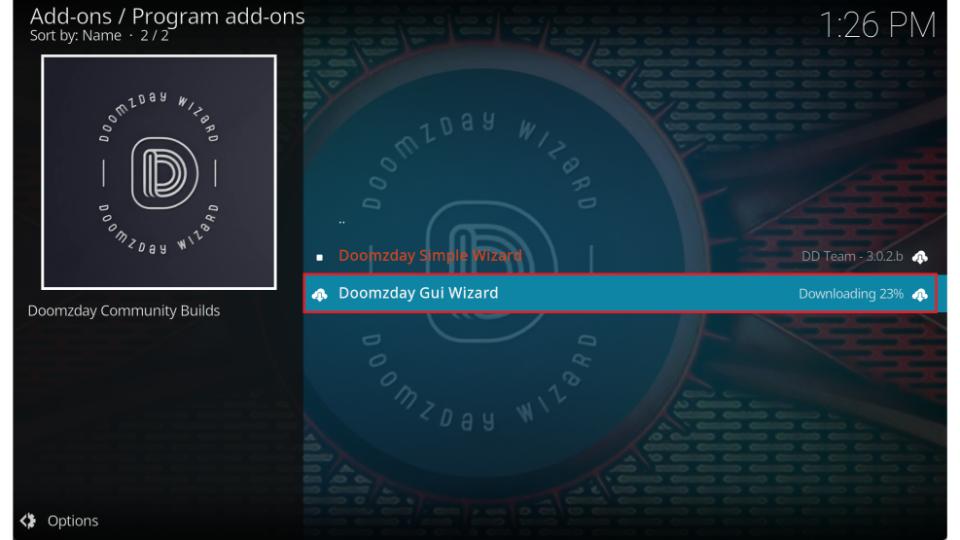
19. The Doomzday Wizard installation update is visible on your screen.
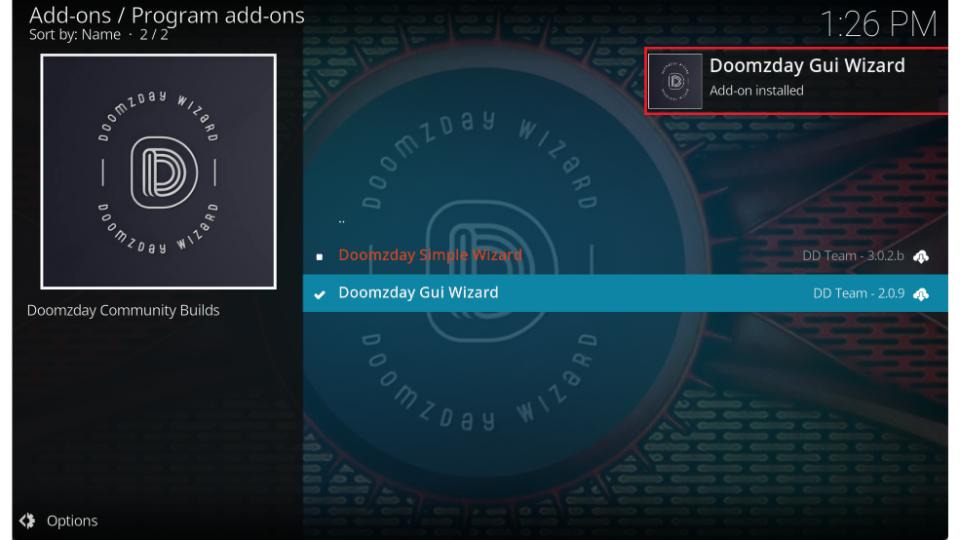
20. When the installation is complete, a notification at the top confirms the same.
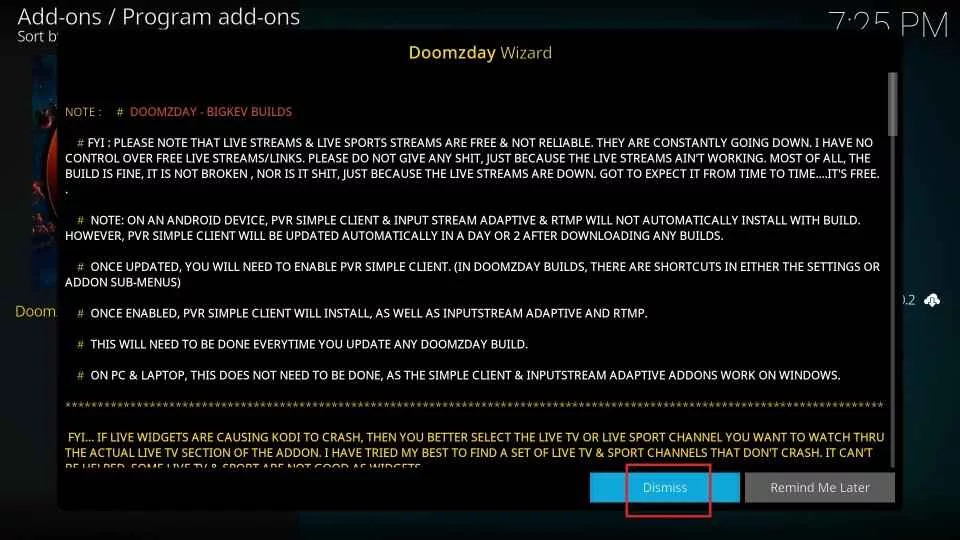
21. One last popup is displayed. Choose Dismiss.
You are all set to install the Smokin build on Kodi.
Part 3: Steps to Install Smokin Build on Kodi
Follow the steps below and install the Smokin build:
1. Head back to the Kodi home screen. Click Add-ons.
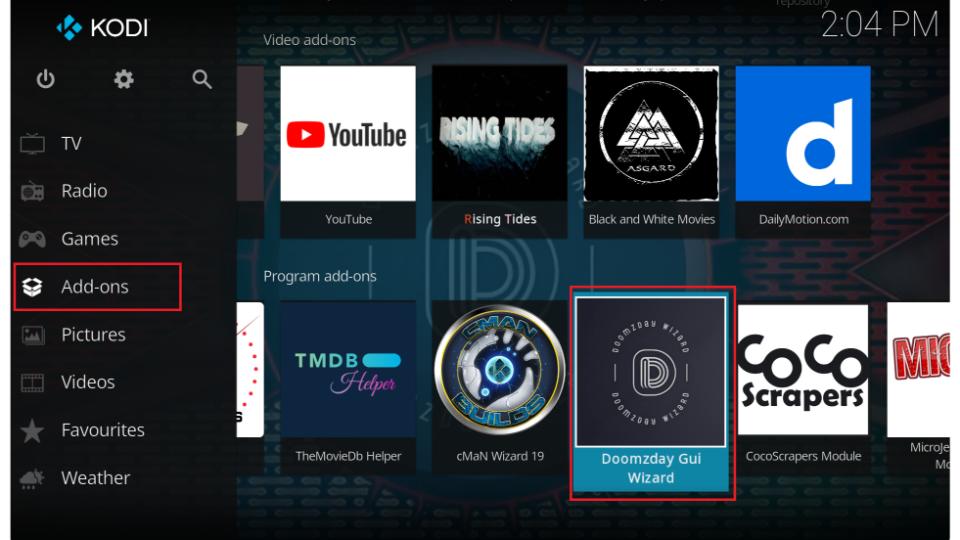
2. Click Builds on the following window.
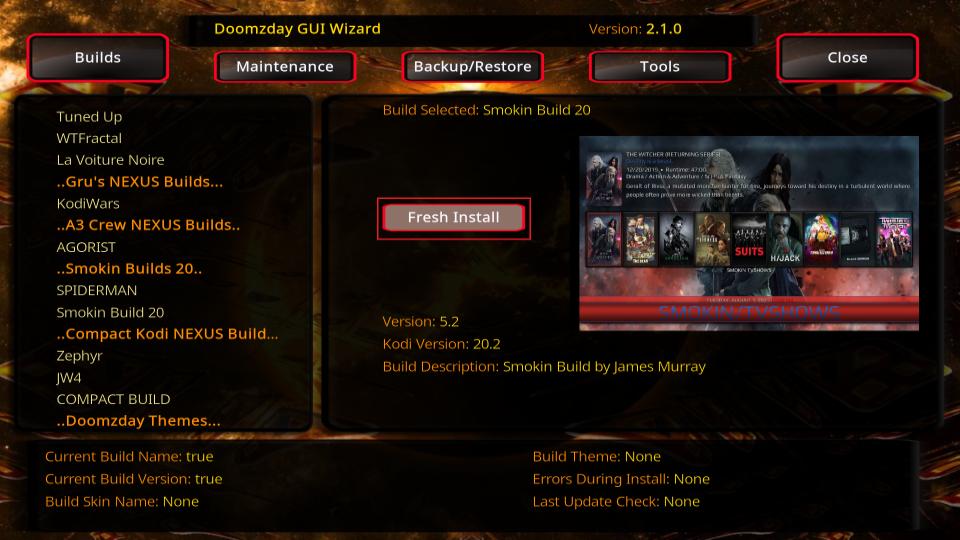
3. Scroll down to the Smokin Builds section and click Smokin Build.
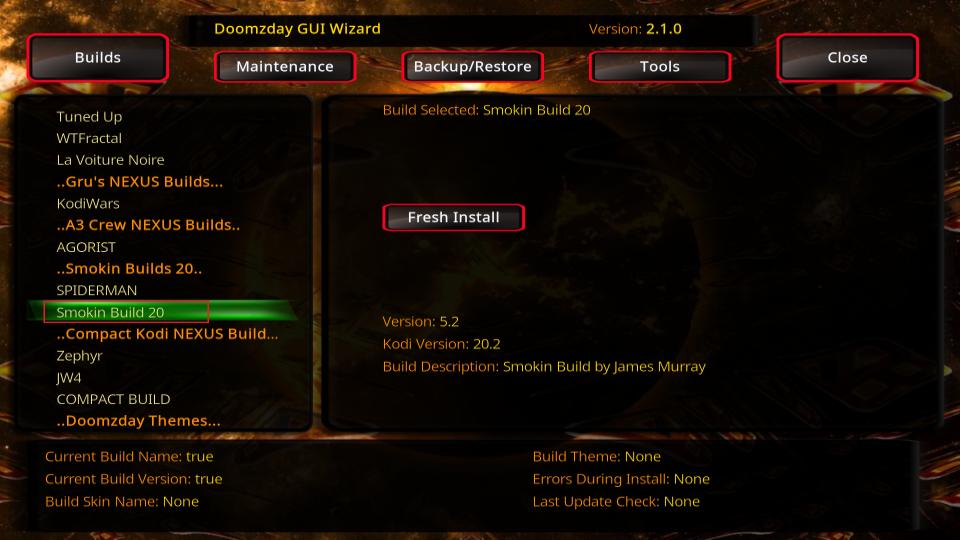
4. Click Fresh Install on the next window.
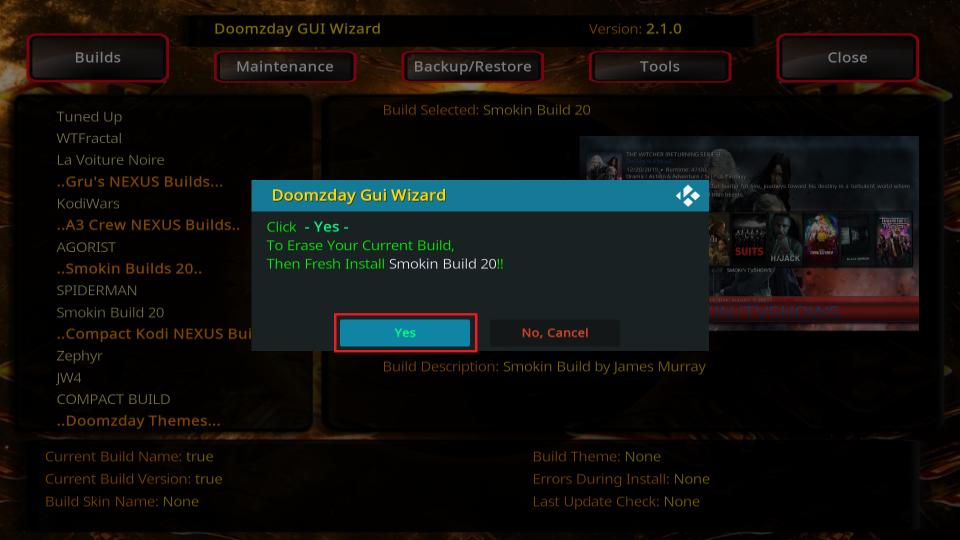
5. When this prompt is displayed, click Yes and confirm.
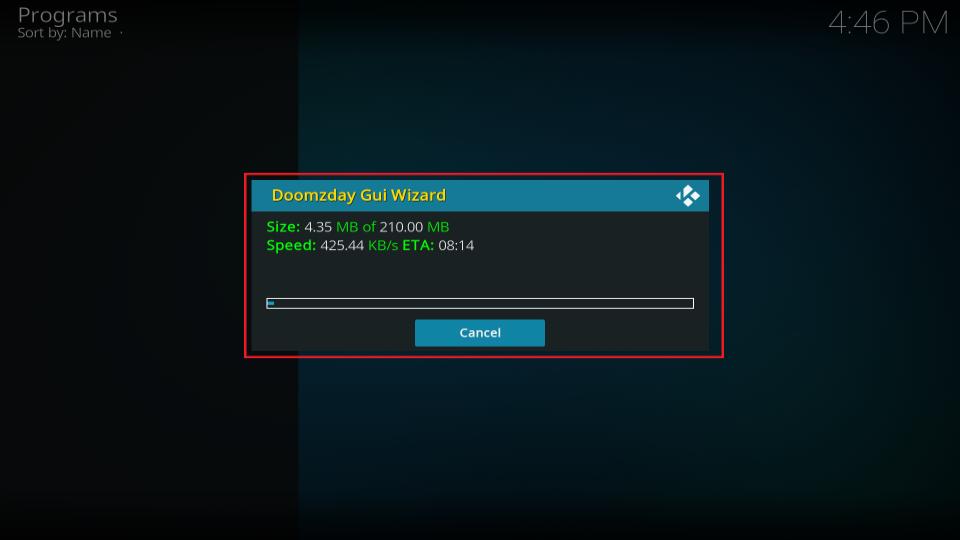
6. Kodi has started downloading the Smokin build. Typically, it only takes less than 30 seconds. However, if your connection is slow or there is an extra load on the Smokin build server, it may take longer.
7. Kodi must be force-closed to save the changes made during installation. Click OK.
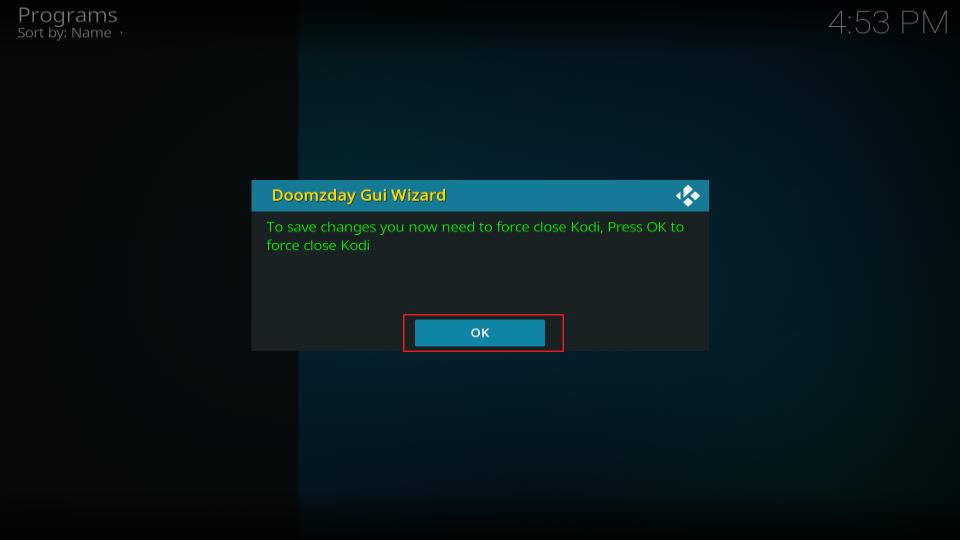
That’s it! The installation of the Smokin Kodi build is complete.
Before you start streaming with Kodi Addons or Builds, I would like to warn you that everything you stream on Kodi is visible to your ISP and Government. This means, streaming copyrighted content (free movies, TV shows, live TV, and Sports) might get you into legal trouble.
Thankfully, there is a foolproof way to keep all your streaming activities hidden from your ISP and the Government. All you need is a good VPN for Kodi. A VPN will mask your original IP which is and will help you bypass Online Surveillance, ISP throttling, and content geo-restrictions.
I personally use and recommend ExpressVPN, which is the fastest and most secure VPN. It is compatible with all kinds of streaming apps and devices.
NOTE: We do not encourage the violation of copyright laws. But, what if you end up streaming content from an illegitimate source unintentionally? It is not always easy to tell the difference between a legit and illegal source.
So, before you start streaming on Kodi, here's how to get VPN protection in 3 simple steps.
Step 1: Get the ExpressVPN subscription HERE. It comes with a 30-day money-back guarantee. Meaning, you can use it free for the first 30-days and if you are not satisfied with the performance (which is highly unlikely), you can ask for a full refund.
Step 2: Click HERE to download and install the ExpressVPN app on your streaming device. If you are using a FireStick, I have given the exact steps starting with Step 4 below.
Step 3: Click the Power icon to connect to a VPN server. That's all. Your connection is now secure with the fastest and best VPN for Kodi.

The following are the steps to install Kodi VPN on your Fire TV devices. If you have other streaming devices, follow Step 1-3 above.
Step 4: Subscribe to ExpressVPN HERE (if not subscribed already).
Step 5: Go to Fire TV Stick home screen. Click Find followed by Search option (see image below).

Step 6: Type Expressvpn in the search bar and select when it shows up.

Step 7: Click Download.

Step 8: Open the ExpressVPN app and Sign in using the email ID and password that you created while buying the ExpressVPN subscription.

Step 9: Click the Power icon to connect to a VPN server. That’s all. Your FireStick is now secured with the fastest VPN.

How to Use Smokin Build on Kodi
After installing the Smokin build, you can run it by reopening the Kodi app. When I start the build the first time, I ensure I give it a bit to prepare itself.
On the first run, you see several prompts at the top. The build takes time to load. You can start interacting with the Smokin build when the updates are complete. The following image shows Smokin’s home screen.
The prominent main menu bar close to the bottom is probably the first thing you notice about the build. However, a less noticeable submenu strip is also underneath the main menu.
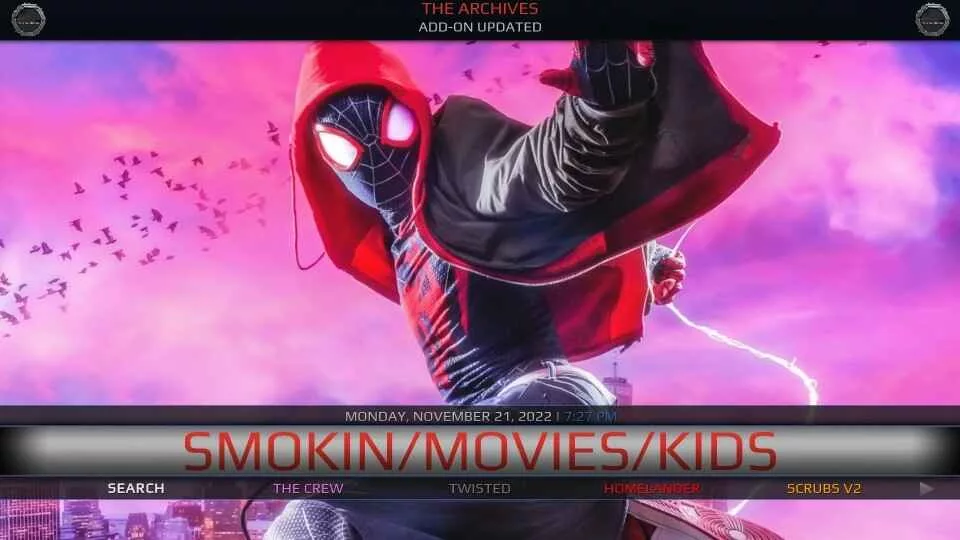
You can cycle through various options in the menu bar, including Movies, Shows, Music, Sports, and more. The submenu changes as you change the option in the main menu.
The submenu will display the associated addons if you highlight a streaming option (such as Movies) in the main menu. These addons are bundled with the Smokin build.
Homelander, Scrubs V2, Rising Tides, and The Crew are some pre-bundled addons with the build. You can explore the complete list by going to Apps in the main menu and selecting Video Add-ons in the submenu.
The image below shows some of the preinstalled addons with the build. You may scroll down to view the rest of them.
The build does not show trending or recommended videos by default. However, you can press the up key/button to display them. For example, I pressed the up navigation key in the image below after highlighting the Movies menu.
Smokin build seems straightforward. You will get around it quickly. Please use the comments section below if you have questions, feedback, or need help with the Smokin Build.
How to Sign In to Real Debrid
If you are new to Real Debrid, you may want to learn more about it. To get a new Real Debrid subscription, visit the service’s official website.
To use Real Debrid with the Smokin Kodi Build, here are the steps:
1. Highlight System/Settings in the main menu on the Smokin Build home screen. Then, click Settings in the submenu. Click the option System on the following screen.
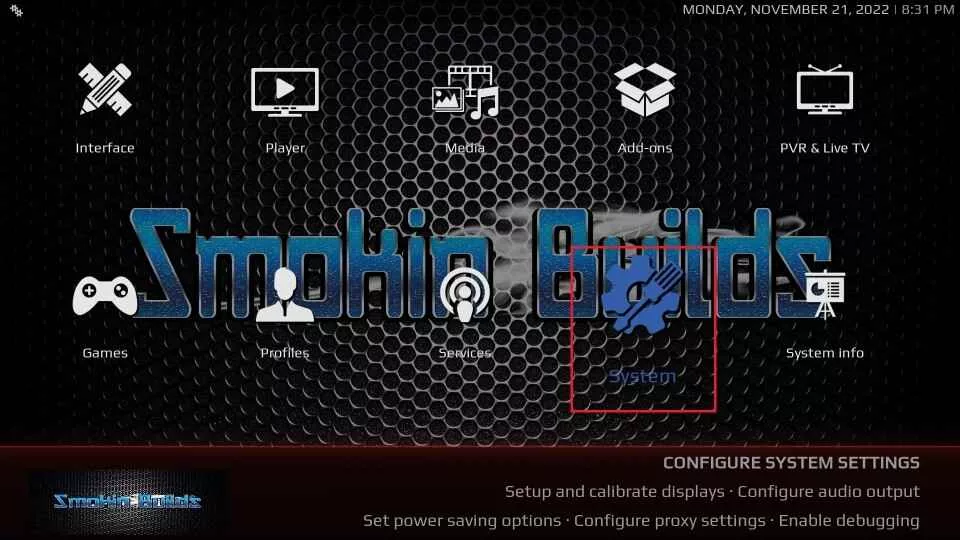
2. Choose Add-ons followed by Manage Dependencies.
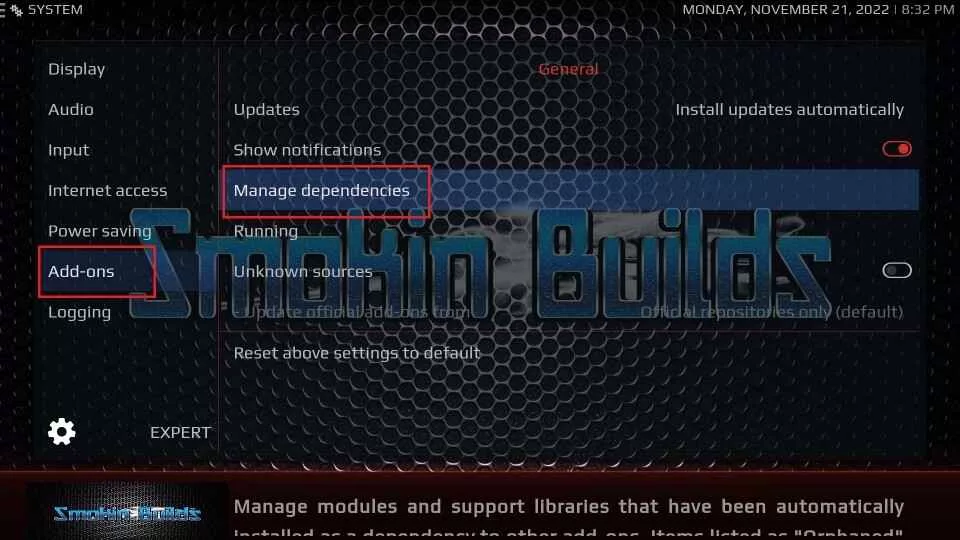
3. Scroll down a bit and then click Resolve URL.
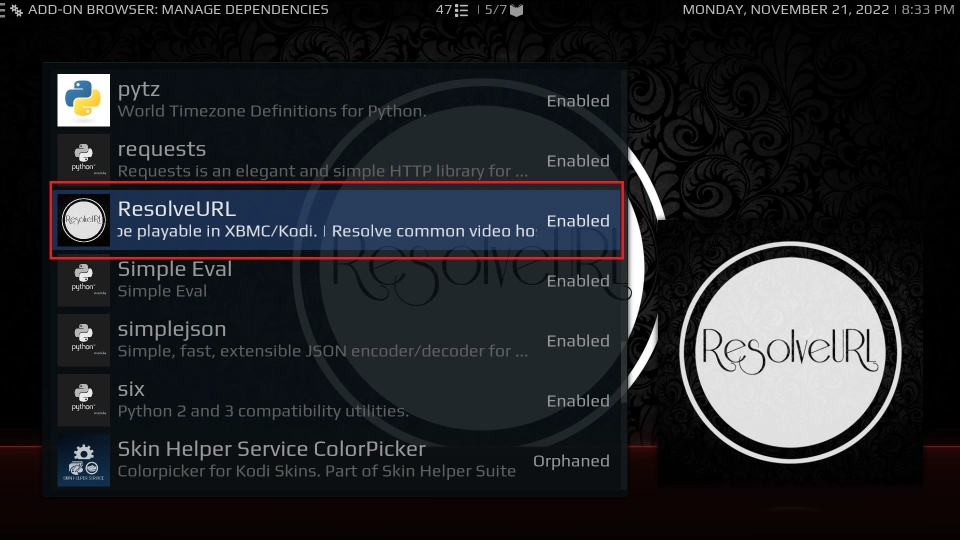
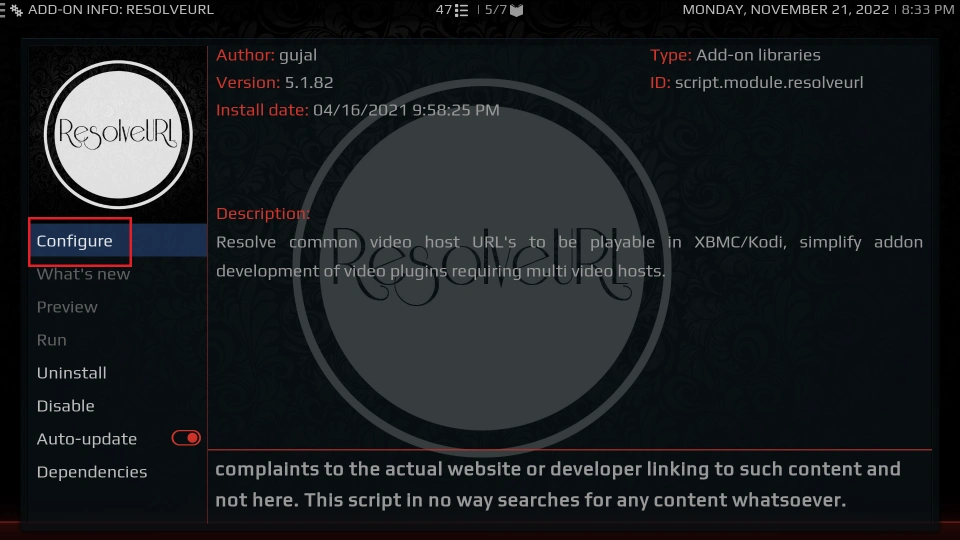
4. On this dashboard, click Configure.
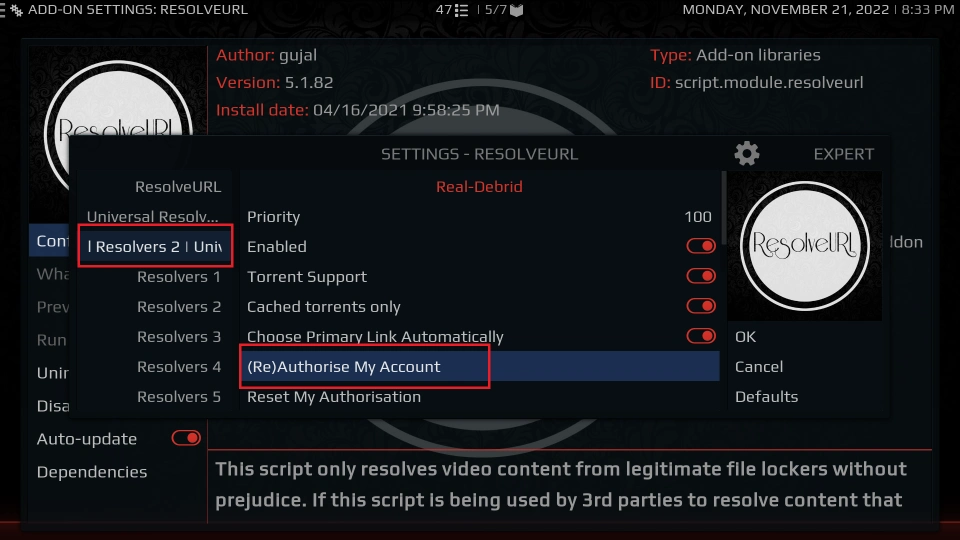
5. Choose Universal Resolvers 2 and then click ReAuthorize My Account.
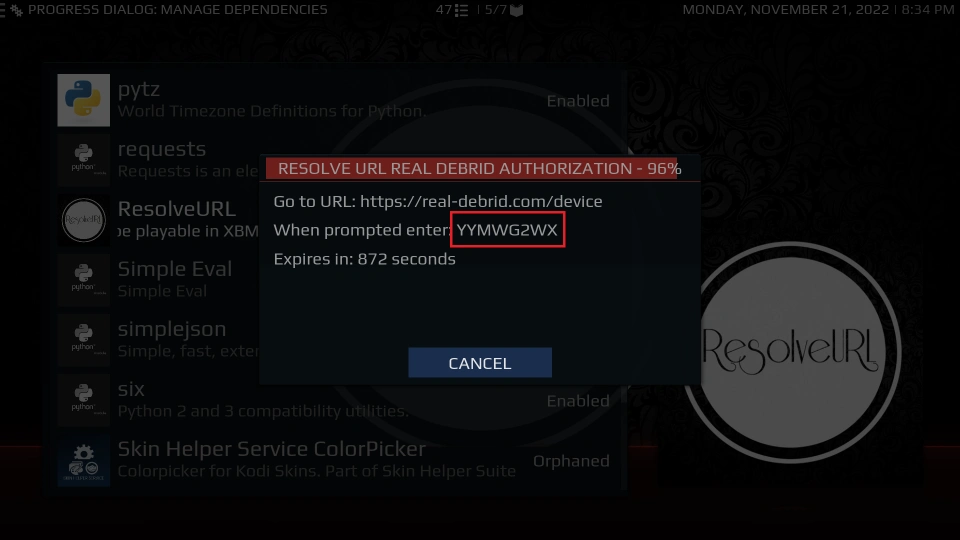
6. Your Kodi window displays a popup. This popup has a code. You will authorize Smokin Build with the code at https://real-debrid.com/device.
Wrapping Up
You learned how to install Smokin Build on Kodi in this guide. Kodi now has a more user-friendly interface. You also have pre-bundled Kodi addons to start streaming right away.
Related:
- How to Install Diggz Chef Wizard Kodi Builds
- How to Install Crew Wizard Kodi Builds
- How to Install Plutonium Kodi Build
- How to Install Misfit Mods Lite Kodi Build

Suberboost Your FireStick with My Free Guide
Stay Ahead: Weekly Insights on the Latest in Free Streaming!
No spam, ever. Unsubscribe anytime.

Leave a Reply