This post provides the list of the best Kodi live TV addons. The addons listed here work on all the Kodi devices, including FireStick, PC, Android TV, Android mobiles, tablets, and more.

I enjoy tuning in to my favorite cable TV channel whenever possible. However, the traditional way of watching TV through a cable connection is becoming more expensive, which makes me consider other options.
Watching TV on internet-connected devices has become even more convenient thanks to the live TV Kodi addons.
Kodi is a versatile media player that can play content from local storage, on-demand content on the Internet, and live TV.
If you are new to Kodi, check out my ultimate beginner’s guide.
You only need to find a suitable addon to watch live TV on Kodi. But how do you find the best live TV addons for Kodi?
There are hundreds of Kodi addons available. Hence, I have created this list of Kodi’s best live TV addons.
Attention Kodi Users!
Governments and ISPs worldwide monitor your online activities. If you use third-party Kodi addons, you should always use a reliable Kodi VPN to hide your identity and prevent issues with your streaming experience. Currently, your IP is visible to everyone.
I use ExpressVPN, the fastest and most secure VPN in the industry. It is very easy to install on any device, including Amazon Fire TV Stick, PC, Mac, and Smartphones. It also includes a 30-day money-back guarantee. If you're not satisfied with their service, you can request a refund. ExpressVPN is offering a special NEW YEAR deal: get 4 months free and save 78% on the 2-year plan.
Install and Use Best Kodi VPN | Why you must use a VPN at all times
Best Live TV Kodi Addons
We have handpicked some of the best live TV addons for Kodi that work. This article will show you how to watch live TV on Kodi. Keep reading!
Legal Disclaimer: This guide is for informational purposes only. FireStickTricks.com does not own, host, operate, resell, or distribute any apps, services, or content mentioned.
1. The Crew

The addon gets the channels’ streaming links from multiple sources. Therefore, if one source is offline, you can always try another.
You can watch global, national, and even local TV channels. The addon includes various genres: News, Entertainment, Weather, Music, Lifestyle, Drama, and more.
In addition to live TV, you can also explore the massive collection of on-demand films and episodes.
- Repo: The Crew
- Source: https://team-crew.github.io/
How to Install The Crew Addon on Kodi
2. Fetch

You can stream channels across categories, including Comedy, Lifestyle, Entertainment, Sports, Travel, News, Auto, Business, and more.
The Fetch addon is from the Doomzday Repo, which is more popularly known for the Doomzday Kodi builds.
The Fetch addon lets you add channels to favorites, displays recently played channels, and allows you to search for channels by keywords.
- Repo: Doomzday
- Source: https://doomzdayteam.github.io/doomzday
How to Install The Fetch Addon on Kodi
3. Stirr

However, the Stirr addon is not available in the official Kodi repository. Therefore, you sideload it on Kodi from the third-party repo called Sly Guy.
Stirr addon lets you stream several free-to-air channels from the Sinclair TV network, as well as many other streaming services. You may also find some on-demand content in the addon.
- Repo: The Sly Guy
- Source: https://slyguy.uk
How to Install Stirr Addon on Kodi
4. UK Turks Playlists

The app and addon have similar interfaces and streaming categories. While UK Turks dedicates most of its categories to on-demand content, it has a decent collection of live TV channels. This is why we have added UK Turks to this line-up of the best Live TV addons for Kodi.
The addon features channels from many countries, including the USA, the UK, Canada, etc.
- Repo: UK Turks Addon Repository
- Source: https://addapp.club/ukturk
How to Install UK Turks Addon on Kodi
5. iPlayer WWW (Official)

You are required to sign up for a free BBC account on the official website.
Furthermore, BBC iPlayer is available only within the UK. If you want to use iPlayer WWW outside the UK, you will need a VPN. I recommend using ExpressVPN and connecting to a UK server to watch iPlayer WWW from the US or any other country.
iPlayer WWW offers you access to BBC One, BBC Two, BBC Three, BBC Four, BBC News Channel, CBeebies, and more. The addon is easy to install, set up, and use.
- Repo: Kodi Add-on Repository
How to Install BBC iPlayer Kodi Addon
6. Catch Up TV & More (Official)

This addon is available on the official repository of Kodi 19 Matrix only, called the Kodi Add-ons Repository.
Catch Up TV & More only gives you access to the free channels available for legal streaming. The US section has CBS News, ABC News, PBS Kids, etc. The channels may get removed or added occasionally, depending upon availability.
- Repo: Kodi Add-ons Repository
How to Install Catch Up TV & More Kodi Addon
7. Pluto TV (official)

You can watch Pluto TV without registration. However, Pluto TV is available on multiple platforms, including FireStick, Android Mobiles, iOS, and more.
If you intend to use it on multiple devices, it is best that you sign up for an account and log in to the addon. This way, you can sync your streaming activities across devices. Also, some options may not work if you are not signed in.
Pluto TV is ad-supported and lets you watch popular channels like CNN, Sky News, MTV, NBC News, NFL, and more.
- Repo: Kodi Add-on Repository
How to Install Pluto TV Kodi Addon
8. NewsOn (official)

NewsOn is a free and ad-supported news addon. You can watch local news from almost all the states and regions. There are currently more than 175 local stations from 114 regions/markets.
In addition to the live feed, NewsOn lets you catch up with the news broadcast for up to 48 hours.
NewsOn is an official service, and you can download it from the official Kodi Add-ons Repository. The service also offers a free app for FireStick.
- Repo: Kodi Add-on Repository
How to Install NewsOn Kodi Addon
9. Fluxux IPTV

The platform provides M3U playlists, which can be used to access over 4000 channels and VOD content via the internet.
The addon offers channels in various categories, including music, news, sports, and international channels. Moreover, the free addon is available to all, so you don’t need to register.
Fluxux IPTV is an ad-supported addon for all Kodi-compatible devices. Its simple and easy-to-understand interface makes it a popular addon for watching free IPTV.
- Repo: cMaN’s Wizard Repository
- Source: http://cmanbuilds.com/repo
10. Daddy Live

Daddy Live has a simple, clean, and clutter-free interface. When you launch the addon, you’ll see the main menus: Live Sports and Live TV.
The sections are further divided into various subsections. For reference, the Live Sports section includes sports genres such as WWE, Table Tennis, Baseball, Cycling, and more.
It also includes a TV Shows section with both old and new shows. Daddy Live is a great Kodi addon that offers high-quality live TV and sports streaming.
- Repo: THE CREW REPO
- Source: https://team-crew.github.io
11. The TV App

The addon lets you watch high-quality sports, news, entertainment, cooking shows, music, kids, and more.
It’s primarily a sports-focused addon offering numerous sporting events and matches. The TV App boasts a simple-to-navigate interface.
The Home menu is divided into Live TV, NBA, MLB, NHL, and NFL. All sections are subdivided into relevant categories to make browsing easier and more enjoyable.
- Repo: G-Live Repository
- Source: https://mrgsi.github.io/glive
12. Plex Live

Moreover, the channels are available in various genres like sports, news, entertainment, lifestyle, gaming, etc. Plex Live is an entirely free Kodi addon from the SlyGuy repository.
Moreover, you aren’t required to subscribe/ register to use the addon. Plex Live features a simple, minimalist design. The 4 main menus on the Home page include Live TV, Search, Bookmarks, and Settings.
The Live TV menu offers channels from regions like Australia, Brazil, Hong Kong, India, Mexico, Spain, the USA, Germany, Great Britain, and more.
- Repo: SlyGuy Repository
- Source: https://slyguy.uk
13. Mega IPTV

The top perk of the addon is it offers channels from over 180 countries around the globe. Moreover, the thousands of live TV channels are a treat for the viewers.
The Mega IPTV Home menu categories are IPTV-Org Channels by Country, Flexus Channels English, Samsung TV, Search, Recently Played, Settings, and more.
So, whether you’re a fan of Anime, Comedy, Game shows, kids’ content, news, etc., Mega IPTV has something for everyone. Also, you can easily install the addon on all Kodi-compatible gadgets.
- Repo: G-Live Repository
- Source: https://mrgsi.github.io/glive
14. Samsung TV Plus

Samsung TV Plus doesn’t require any registration, login, or sign-up. You will receive a free IPTV service with a selection of popular channels.
The content genres available on the addon include films, documentaries, crime, news, and more. Moreover, you can utilize the search function to look for particular channels.
The Samsung TV Plus Home menu has four sections: Live TV, My Channels, Search, and Settings. You can tap on each section to browse the available content.
- Repo: SlyGuy Repository
- Source: https://slyguy.uk
How to Install Samsung TV Plus Kodi Addon
15. PBS Live

PBS Live offers more than 1,000 live TV channels without any subscription fee. It lets you stream all the PBS Live content on your smart devices.
The extensive range of available channels makes PBS a perfect alternative to cable TV. You can access a wide range of channels for sports, news, entertainment, arts, and more.
Moreover, the search function makes finding particular networks and channels easy.
- Repo: SlyGuy Repository
- Source: https://slyguy.uk
16. Homelander

Homelander is an all-in-one addon offering content like Live TV, Movies, TV Shows, and more. The addons Home menu boasts a helpful yet straightforward interface.
The available sections include Movies, TV Shows, Live TV, My Movies, My TV Shows, New Movies, New Episodes, People, Tools, and Search.
You can stream all the latest and new movies and view live TV channels. To access the live TV section, tap the Live TV button in the main menu. You can then select the preferred networks and start streaming.
- Repo: THE CREW REPO
- Source: https://team-crew.github.io
How to Install Homelander Kodi Addon
17. Ghost

The addon is mainly known for its simplistic, easy-to-navigate interface and helpful Home page.
The sections in the Ghost Home menu include Movies, TV Shows, Replays, Live TV, Trackt, Search, and Settings. Tap the Live TV tab to view available IPTV providers for live streaming.
Ghost lets you connect your Real Debrid account for an enhanced streaming experience. Additionally, you can link Trakt to Ghost to keep your content library synced and up to date.
These fantastic features make Ghost a reputable and famous Kodi addon.
- Repo: THE CREW REPO
- Source: https://team-crew.github.io
How to Install Ghost Kodi Addon
18. Asgard

Asgard is often regarded as an all-encompassing addon for entertainment lovers.
The interface is simple yet appalling and offers all the essential menus. The main sections in the Asgard Home menu include TV Scrapers, OneClick Section, Non-Debrid, and more.
It also provides dedicated categories for Live TV, Anime, Movies, Kids, etc. Asgard lets you connect your Real Debrid and Trakt accounts for an improved streaming experience.
However, one major downside of the addon is its legality and safety. Asgard is a third-party addon; therefore, its safety status is ambiguous.
Other than that, it’s a fantastic addon that quickly fetches free streaming links and offers a buffer-free viewing experience.
- Repo: Narcacist’s Wizard Repository
- Source: https://mylostsoulspace.co.uk/repo
How to Install Asgard Kodi Addon
19. Json IPTV

The addon provides live streaming across multiple genres, including entertainment, sports, and international channels. The Home menu of Json IPTV has a minimal and user-friendly design.
The available sections include Some IPTV Channels, Some IPTV providers, and Some Rdio Providers.
Json IPTV offers an extensive list of live channels and streaming options. Therefore, you can easily stream for hours without getting bored.
The best part? The addon is available on multiple devices, including FireSticks, Fire TVs, and more.
- Repo: G-Live Repository
- Source: https://mrgsi.github.io/glive
20. tvOne

The tvOne Kodi addon features a simple and traditional design. It’s easy to navigate, and all the sections are well-marked.
The categories in the Home menu include Sports, Pakistani, Indian, Turkish, Sout Indian, Kids, Religious, Science and more. Therefore, streaming on the addon is very simple.
All you have to do is tap your preferred category/ region and select the particular channel to start watching. It’s easily one of the least complicated and user-friendly addons.
- Repo: Narcacist Wizard Repository
- Source: https://mylostsoulspace.co.uk/repo
How to Install TVOne Kodi Addon
21. IPTV AU

Moreover, when you tap your preferred channel, IPTV AU will ask you to manually select the streaming quality.
The streams are mainly available in 240p to 1080p, and selecting your preferred choice will ensure minimal buffering while streaming. IPTV AU is a straightforward addon for the Australian audience. However, you may incur geo-restrictions outside the region.
- Repo: SlyGuy Repository
- Source: https://slyguy.uk
22. IPTV NZ

However, the content is geo-restricted, and you can only access IPTV NZ in New Zealand. Therefore, we’d advise you to use a VPN to access IPTV NZ outside the region.
The addon is available for Android devices, including NVIDIA Shield, Fire TV, and Android.
- Repo: SlyGuy Repository
- Source: https://slyguy.uk
23. Halcyon

The Home menu features sections for Movies, TV Shows, 4 K Movies, Comedy Shows, Documentaries, Jukebox Videos, Live Webcams, and more.
It has a Search facility to make browsing easy. Moreover, you can link your premium accounts, such as Real Debrid and Trakt, with Halcyon to stream high-quality videos and access additional features.
- Repo: cMaN’s Wizard Repository
- Source: http://cmanbuilds.com/repo
24. Fork-Q

It’s the perfect addon for streaming your favorite live TV channels from the two regions. Fork-Q is a simple and user-friendly addon. It does what it claims and is open to all.
Moreover, you can install it for free on various Kodi-compatible devices like FireSticks, Android, and more.
However, like other unofficial addons, Fork-Q is not entirely safe and legal. Therefore, you must be cautious when using the addon.
- Repo: cMaN’s Wizard Repository
- Source: http://cmanbuilds.com/repo
Before you start streaming with Kodi Addons or Builds, I would like to warn you that everything you stream on Kodi is visible to your ISP and Government. This means, streaming copyrighted content (free movies, TV shows, live TV, and Sports) might get you into legal trouble.
Thankfully, there is a foolproof way to keep all your streaming activities hidden from your ISP and the Government. All you need is a good VPN for Kodi. A VPN will mask your original IP which is and will help you bypass Online Surveillance, ISP throttling, and content geo-restrictions.
I personally use and recommend ExpressVPN, which is the fastest and most secure VPN. It is compatible with all kinds of streaming apps and devices.
NOTE: We do not encourage the violation of copyright laws. But, what if you end up streaming content from an illegitimate source unintentionally? It is not always easy to tell the difference between a legit and illegal source.
So, before you start streaming on Kodi, here's how to get VPN protection in 3 simple steps.
Step 1: Get the ExpressVPN subscription HERE. It comes with a 30-day money-back guarantee. Meaning, you can use it free for the first 30-days and if you are not satisfied with the performance (which is highly unlikely), you can ask for a full refund.
Step 2: Click HERE to download and install the ExpressVPN app on your streaming device. If you are using a FireStick, I have given the exact steps starting with Step 4 below.
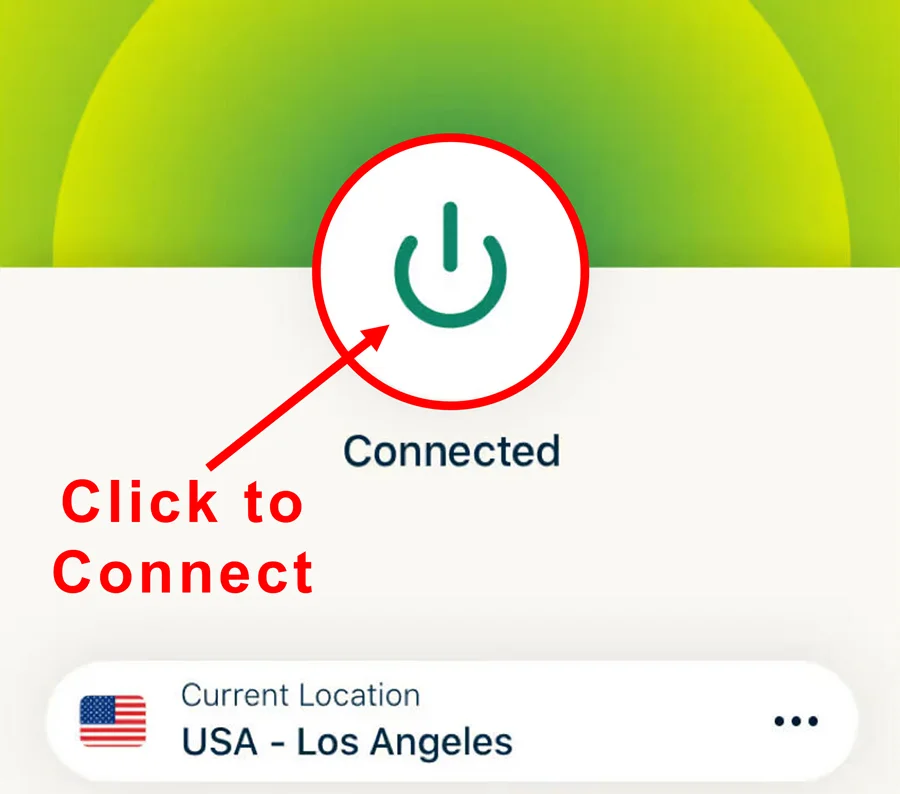
Step 3: Click the Power icon to connect to a VPN server. That's all. Your connection is now secure with the fastest and best VPN for Kodi.
The following are the steps to install Kodi VPN on your Fire TV devices. If you have other streaming devices, follow Step 1-3 above.
Step 4: Subscribe to ExpressVPN HERE (if not subscribed already).
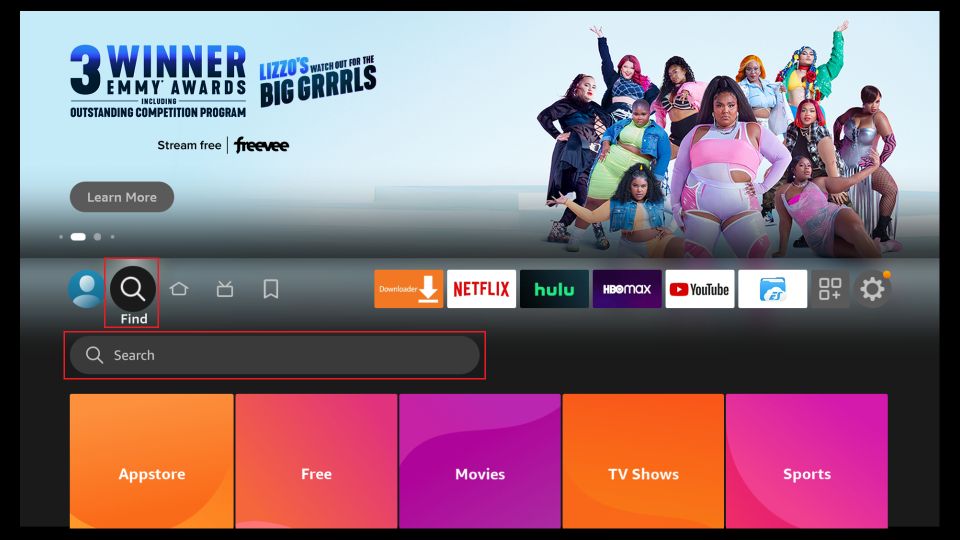
Step 5: Go to Fire TV Stick home screen. Click Find followed by Search option (see image below).
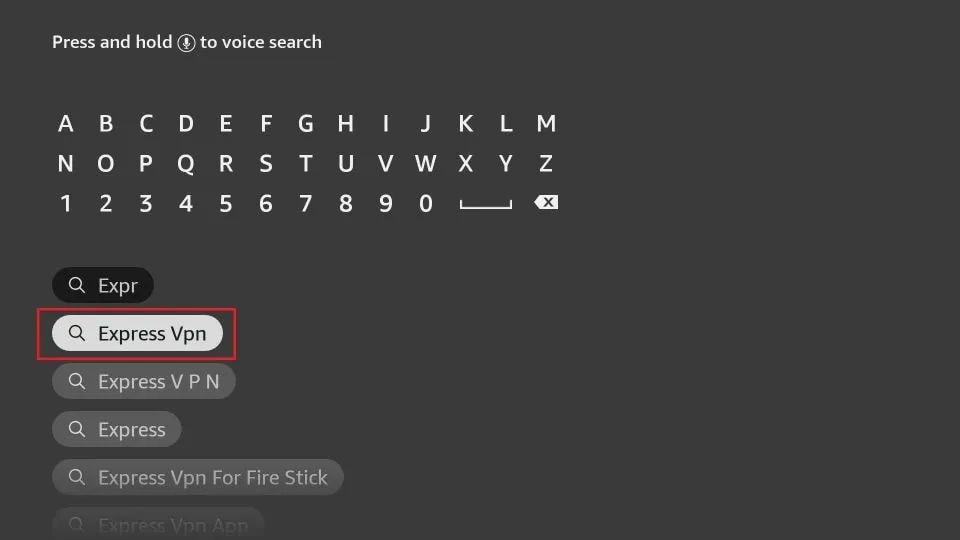
Step 6: Type Expressvpn in the search bar and select when it shows up.
Step 7: Click Download.
Step 8: Open the ExpressVPN app and Sign in using the email ID and password that you created while buying the ExpressVPN subscription.
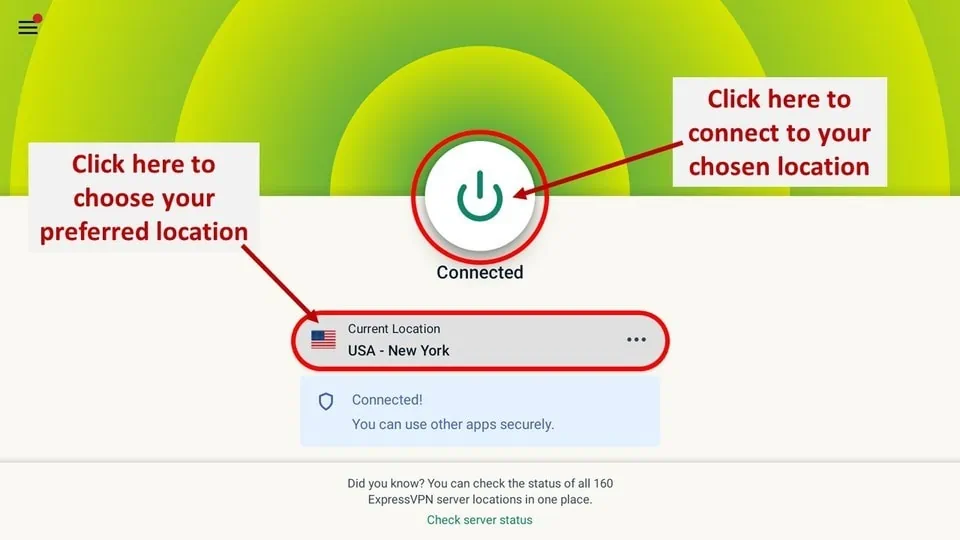
Step 9: Click the Power icon to connect to a VPN server. That’s all. Your FireStick is now secured with the fastest VPN.
Wrapping Up
So, here is our list of the best Kodi live TV addons for 2025. The addons I have listed above have working links. If you discover any addons, please share them with us in the comments section below. Thank you for reading!
Related:
- Best Kodi Builds
- How to Update Kodi on Fire TV Stick
- How to Fix Buffering on Kodi
- Best Stremio Addons

Suberboost Your FireStick with My Free Guide
Stay Ahead: Weekly Insights on the Latest in Free Streaming!
No spam, ever. Unsubscribe anytime.


thank you
Limitless and ccloud doesn’t not work it doesn’t install
Hi Suzanne, yes, they aren’t working. I just checked. However, you may try other addons on the list. Also, here is another list of addons you may be interested in: https://www.firesticktricks.com/best-kodi-addons.html
Nothing is showing up when I go to install files for the first 2 sources
Hi Jasmine, it seems like a temporary issue. Have you tried other addons on the list?
Can I get my local channels on live tv
Hi Stacy, you may try LiveStream addon for local channels. It is available from the official Kodi repository. Here are the steps:
– Go to Kodi Settings from the home screen
– Click Add-ons
– Click Install from repository
– Click Video Add-ons
– Click LiveStream and click Install
I am not aware of any working third-party addons that offer local channel streaming
indian tv iptv link plz????